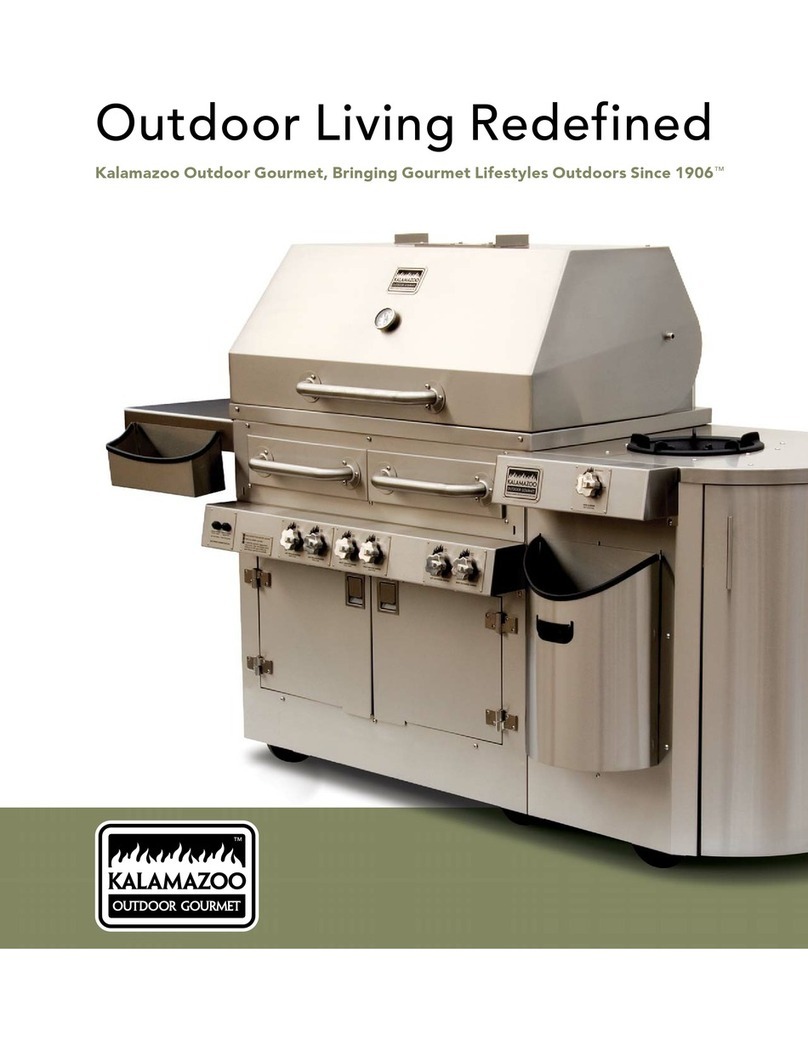
Kalamazoo K42DB-1-NA User manual

Kalamazoo Gas GrillsKalamazoo Gas Grills
USE AND CARE GUIDEUSE AND CARE GUIDE


Important Safety Warnings
This appliance is FOR OUTDOOR USE ONLY. It is not to be used inside a garage, other building or
any type of enclosed area.
WARNING: Failure to follow the information in this Use and Care Guide exactly may result in re
or explosion, causing property damage, personal injury or death. Read and follow all warnings and
instructions before assembling and using the appliance.
WARNING: This appliance is not intended to be installed in or on a boat or recreational vehicle.
IMPORTANT: Damage caused by a failure to heed the warnings or follow the
safety instructions and practices described in this Use and Care Guide is not
covered by the warranty.
DANGER: IF YOU SMELL GAS:
1. Shut-off gas to the appliance.
2. Extinguish any open ame.
3. Open grill lid.
4. If odor continues, keep away from the appliance and immediately call your gas
supplier or re department.
Failure to follow these instructions could result in re or explosion which could cause
property damage, personal injury or death.
WARNING: FOR YOUR SAFETY:
1. Do not store or use gasoline or other ammable liquids or vapors in the vicinity of
this or any other appliance.
2. An LP cylinder not connected for use shall not be stored in the vicinity of this or any
other appliance.

Thank you for choosing Kalamazoo Outdoor
Gourmet cooking equipment.
Because of the high performance nature
of Kalamazoo Grills, we recommend
familiarizing yourself with this book before
using your grill for the rst time. Your Use
and Care Guide contains important safety
information as well as helpful guidance for
successful cooking experiences and care.
Following the guidance of this book will
help ensure many years of outdoor cooking
enjoyment.
Should you ever have any questions about cooking
with or caring for your Kalamazoo Grill, we are here
to help. Contact Kalamazoo Outdoor Gourmet
Customer Service at:
+1.800.868.1699
or
Please have your model number and serial number
ready or include it in your email.
Model Number
FK42DB-1-NA
FK42DT-1-NA
Fuel Type
FNatural Gas
Serial Number
FK54DB-1-NA
FK54DT-1-NA
FLiquid
Propane
Cylinder
FBulk Liquid
Propane
This Use and Care Guide contains
important information necessary
for the proper assembly and safe
use of the grill.
Read and follow all warnings and
instructions before assembling and
using the grill.
Follow all warnings and
instructions when using the grill.
Keep the Use and Care Guide for
future reference.
Version 03.01.2022

+1.800.868.1699 1
Table of Contents
Safe Operation 4
Liquid Propane Tank Safety 6
Gas Requirements 8
Leak Testing 13
Locating the Grill 14
Required Clearances 14
Ventilation Hood Information 15
Grill Dimensions 17
Initial Assembly 28
Get to Know Your Grill 32
Grill Controls 36
Lighting Your Grill 39
Ignition System Power Supply 41
Burner Adjustments 43
Valve Adjustments 43
Cooking with Your Grill 49
Caring for Your Grill 57
Troubleshooting 61
Electrical Diagrams 63
Installation Checklist 67

KalamazooGourmet.com2

+1.800.868.1699 3
Important Safety Information

KalamazooGourmet.com4
Safe Operation
WARNING: When in use, portions of your grill get hot enough to cause severe burns.
Children and pets should never be left alone or unattended in the area where the grill is
being used. Never allow children to sit, stand or play on or around the grill.
IMPORTANT: Improper use or installation is dangerous. Because this grill produces intense
heat, the risk of accidents or potential injuries is increased. Extreme care must be taken.
Carefully follow all instructions, including the following:
To reduce the risk of re, burns or other injury, read this Use and Care Guide thoroughly. Begin by
ensuring proper installation and servicing. Do not repair or replace any part of the grill yourself unless it is
specically recommended in this Use and Care Guide. All other service must be carried out by a qualied
gas technician.
Never allow children to operate the grill. Do not store items of interest to children in or around the grill.
Do not heat unopened food containers in the grill. The build up of pressure resulting from the heat may
cause the container to burst.
Never lean on any part of the grill. When lighting the grill, always pay close attention to what you are
doing. Make sure you are aware of which burner you are lighting and can see whether or not it is lit. Make
sure you have ready access to the burner valves when you are lighting the burner. Make sure you are
pushing in the burner valve to activate the ignition when you attempt to light the burner.
When the burners are on or the grill is hot, do not touch the grilling surface, warming rack, any part of the
grill’s interior or any surface of areas surrounding the grilling surface. These areas become extremely hot and
may cause severe burns. Likewise, do not touch any part of the grill lid other than the handle. Do not touch
any surface of the cleanout trays or open the cleanout when the grill is hot.
Do not use any cleaner, including water, on a hot grill.
Be sure all control knobs are in the OFF position and the grill is cool before using any aerosol cleaner on it
or near it. The chemical used for aerosol propellant could ignite in the presence of heat.
Always use dry pot holders or gloves on hot surfaces or cooking tools: moist or damp pot holders or
gloves may cause steam burns. Never use a towel or bulky cloth in place of pot holders. Do not let pot
holders touch hot portions of the grill or allow them to get near the open ame.
Do not operate the grill under an unprotected combustible construction. Use only in a well-ventilated area.
The grill is for outdoor use only.
Do not obstruct any of the openings on the grill or otherwise obstruct the ow of combustion and
ventilation air. Do not build the grill into any combustible structure that is closer than 6 inches from the
sides and back.
Do not use the grill when there is a strong wind blowing from behind the grill. For installations with
a prevailing wind that blows against the rear side of the grill, a wind break may be required for safe
operation.
Keep all gas hoses away from the hot surfaces of the grill, including all external surfaces of the unit.
Keep all electrical supply cords away from the hot surfaces of the grill, including all external surfaces of the unit.

+1.800.868.1699 5
Ensure proper installation and servicing by following all instructions in this Use and Care Guide and any
other instructions or markings provided with this product. Have your grill installed by a qualied technician.
Have the installer show you were the gas supply shut-off valve is located and instruct you in its operation
so that you can shut-off the gas to the grill.
If you smell gas, there is likely a problem with the installation. If the connections are not perfectly sealed,
you can have a small leak resulting in the faint smell of gas — even if the grill appears to be working
properly. Close the gas supply shut-off valve and call a qualied technician to locate and resolve the leak.
SPIDER ALERT: Spiders and other insects are prone to nesting inside burners in
outdoor cooking equipment. This can create a very dangerous condition where
the gas ow is redirected and can create a re behind the control panel. This
will damage the grill and make it unusable. Frequent inspections and care are
recommended. See the care section beginning on page 57.
California Proposition 65 Warning:
The burning of gas cooking fuel generates some by-products that are on the list of substances which are
known by the State of California to cause cancer or reproductive harm. California law requires businesses to
warn customers of potential exposure to such substances. To minimize exposure to these substances, always
operate the grill according to this Use and Care Guide and ensure you provide good ventilation when cooking.
State of Massachusetts:
Massachusetts requires all gas appliances be installed by a plumber or gas tter carrying the appropriate
Massachusetts license.
All permanently-installed natural gas or propane installations require a “T” handle type manual gas valve be
installed in the gas supply line to this appliance.
This does not apply to portable propane installations using a 20 pound cylinder.

KalamazooGourmet.com6
Important LP Tank Safety Information
A liquid propane cylinder should never be overlled beyond the cylinder lling capacity. Overlling
may create a dangerous condition.
Overlled tanks can build up excess pressure. The standard safety device on tanks is the safety relief
valve. This valve vents propane gas vapors to relieve excess pressure. These vapors are combustible
and can be ignited.
To avoid risk of re or explosion, take the following safety precautions:
DANGER:
Do not route the gas supply hose or locate
a propane cylinder in a way that may create
a tripping hazard. Tripping over, or getting
caught on, a gas supply hose may tip the grill
over or damage the hose, creating serious
risk of injury and re.
Never replace the liquid propane regulator
or hose with a different type than the model
supplied.
Never use a dented or rusty LP tank.
Never connect the grill to anything other than the
fuel source indicated on the serial plate. Factory
conversion kits are available for switching fuel
sources. Contact Kalamazoo Outdoor Gourmet
or an authorized dealer for details. Conversion
kit installation must be done by a qualied
technician.
The LP-gas cylinder must include a collar to
protect the cylinder valve from damage.
Ensure proper ventilation of the cylinder. The
cylinder supply system must be arranged for
vapor withdrawal.
The LP-gas supply cylinder to be used must be
constructed and marked in accordance with
the specications for LP-gas cylinders, U.S.
Department of Transportation (DOT) or the
standard for Cylinders, Spheres and Tubes for
the Transportation of Dangerous Goods, CAN/
CSA-B339.
When the grill is not in use, the gas must be
turned off at the supply cylinder.
The grill may be stored indoors, but only if the
cylinder is disconnected and removed from the
grill. An LP cylinder MUST NEVER BE STORED
INDOORS.
Cylinders must be stored outdoors out of the
reach of children and must not be stored in a
building, garage or any other enclosed area.
The pressure regulator and hose assembly
supplied with the grill must be used. Replacement
pressure regulators and hose assemblies must
be the type specied by Kalamazoo Outdoor
Gourmet. For replacement parts, contact
Kalamazoo Outdoor Gourmet customer service at
+1.800.868.1699.
FIGURE 1

+1.800.868.1699 7
DANGER:
A. Do not store a spare LP-gas cylinder under or near this appliance;
B. Never ll the cylinder beyond 80 percent full; and
C. If instructions A and B are not followed exactly, a re causing death or
serious injury may occur.
Required ventilation for built-in LP-gas cylinder structures:
An enclosure for an LP-gas cylinder shall be ventilated by openings at both the upper and lower levels of the
enclosure (See Figure 2). The effectiveness of the opening(s) for purposes of ventilation shall be determined
with the LP-gas supply cylinder in place. This shall be accompanied by one of the following:
Kalamazoo Outdoor
Gourmet offers an LP
tank mounting bracket to
meet the cylinder install
requirements
FIGURE 2
1. One side of the enclosure shall be completely
open; or
2. For an enclosure having four sides, a top and a
bottom:
a. At least two ventilation openings shall be
provided in the side walls of the enclosure,
located within 5 in (217 mm) of the top of the
enclosure, equally sized, spaced at a minimum
of 90 degrees (1.57 rad), and unobstructed. See
Figure 2. The opening(s) shall have a total free
area of not less than 1 in2/lb (14.2 cm2/kg) of
stored fuel capacity.
b.Ventilation opening(s) shall be provided at oor
level of the enclosure and shall have a total free
area of not less than 1/2 in2/lb (7.1 cm2/kg) of
stored fuel capacity. If ventilation openings at
oor level are in a side wall, there shall be at
least two openings. (See Figure 2) The bottom
of the openings shall be 1 in (25.4 mm) or less
from the oor level and the upper edge no
more than 5 in (127 mm) above the oor level.
The openings shall be equally sized, spaced at
a minimum of 90 degrees and unobstructed.
c. Every opening shall be a minimum of a 1/8 in
(3.2 mm) diameter.
d.Ventilation openings in side walls shall not
communicate directly with other enclosures of
the outdoor cooking gas appliance.
e. A door on the enclosure to gain access to the
cylinder is acceptable, provided it is non locking
and can be opened without the use of tools.
3. Some means of retention (chain, bracketry, cut-
out) must be used to hold cylinder in place inside
enclosure.
4. There shall be a minimum clearance of 2 in (50.8
mm) between the oor of the LP-gas cylinder
enclosure and the ground.

KalamazooGourmet.com8
Liquid Propane Gas Requirements
(20-Pound Cylinder)
Verify the type of gas your grill has been congured for by the factory by checking the serial
tag inside the cleanout tray of the grill. Grills congured for liquid propane (LP) gas are oriced
differently than grills congured for natural gas (NG). Grills congured for use with 20-pound LP
cylinders (Type 1) are shipped with a dual-stage LP regulator hose assembly (see Figure 3).
Connection: LP regulator hose assembly (included) connects to the grill via 0.5" NPT male with a
0.375" flare adapter (included).
Input Pressure via LP regulator hose assembly: 11" W.C.
Manifold Pressure: 10.5" W.C.
To connect the LP regulator hose assembly to the LP tank, first make sure the main valve on the tank
is completely closed. Make sure also that all control valves on the front of the grill are OFF.
Thread the regulator inlet over the tank valve. Use care to ensure proper
alignment of the threaded coupler and avoid cross-threading or
damaging the coupler. Turn the coupler clockwise until tightened
up, but do not over-tighten.
FIGURE 3 (Freestanding Model)
20-POUND LP CYLINDER
DUAL-STAGE REGULATOR
11" W.C. PRESSURE
THREADED COUPLER
MAIN TANK VALVE
STRAPS TO SECURE CYLINDER

+1.800.868.1699 9
IMPORTANT: Always close the main valve on the tank
before disconnecting or transporting the tank.
IMPORTANT: After connecting a fresh LP tank,
you may need to purge air from the system. Before
lighting, open the main valve on the tank. Turn the
control valves on the grill to the HIGH position for
about 15 seconds to purge air from the system. Turn
the control valves on the grill OFF and wait 5 minutes
for any gas to clear. Finally, continue with the normal
lighting procedure.
The installation must conform with local codes. In the
absence of local codes, the installation must conform
with the National Fuel Gas Code, ANSI Z223.1/NFPA
54; Storage and Handling of Liquefied Petroleum
Gases, ANSI/NFPA 58; Natural Gas and Propane
Installation Code, CSA B149.1; or Propane Storage and
Handling, CSA B149.2.
MAIN TANK VALVE
FIGURE 4 (Built-in Model shown
with K-42DBC-LVP Base Cabinet
designed for proper
safety venting)
SECONDARY 10" W.C.
PRESSURE REGULATOR
CONNECTS TO GRILL.
DUAL-STAGE 11" W.C.
PRESSURE REGULATOR
HOSE CONNECTS
TO SECONDARY
REGULATOR

KalamazooGourmet.com10
Bulk Gas Plumbing Information
IMPORTANT: An installer-supplied safety shut-off valve MUST be installed at the gas supply
line connection point for the grill. The valve should be easily accessed and located between 3
and 20 feet away from the grill.
All gas connections should be made by a qualified technician. The installation and all installer-
supplied parts must conform to local codes. In the absence of local codes, the installation and all
parts should conform to the National Fuel Gas Code, ANSI Z223.1/NFPA 54 or Natural Gas and
Propane Installation Code, CSA B149.1. Cooktops to be connected to a xed fuel piping system
must use rigid pipe, semi-rigid tubing, and/or a connector that complies with the Standard for
Connectors for Outdoor Gas Appliances and Manufactured Homes, ANSI Z21.75/CSA 6.27.
IMPORTANT: Always close gas supply shut-off valve before disconnecting the grill gas supply hose.
All pipe sealants must be an approved type.
IMPORTANT: Diameter and length of the gas supply pipe may limit the pressure and BTU delivery
of gas to the grill. The installer must ensure proper delivery to the grill or it will not operate properly.
The appliance must be disconnected from the gas supply piping system during any pressure testing
of that system at pressures in excess of 1/2 psi (3.5 kPa).
During any pressure testing of the gas supply piping system at test pressures equal to or less than
1/2 psi (3.5 kPa), the appliance must be isolated from the system by closing the supply shut-off valve.

+1.800.868.1699 11
Bulk Supply Liquid Propane Gas Requirements
Verify the type of gas your grill has been congured for by the factory by checking the serial
tag inside the cleanout tray of the grill. Grills congured for liquid propane (LP) gas are oriced
differently than grills congured for natural gas (NG). Grills congured for use with a bulk LP supply
are shipped with a gray hose with a quick-connect tting.
Connection: 1/2" NPT male. Quick-connect hose assembly (included) connects to the grill via
0.625" flare fitting.
Input Pressure: 11.0" W.C. (27.4 mbar)
Manifold Pressure: 10" W.C. (26.1 mbar)
All pipe sealants must be an approved type and safe for use with LP gas.
INCLUDED 10' FLEXIBLE
GAS HOSE CONNECTS TO
GRILL WITH FLARE FITTING
(NO PIPE SEALANT
NEEDED HERE)
FITTING ON GRILL CAN BE
ROTATED 90°STRAIGHT
DOWN IF PREFERRED
INSTALLER-SUPPLIED SHUT-
OFF VALVE WITH 1/2” MALE
NPT CONNECTION FOR GRILL
INCLUDED QUICK-CONNECT
FITTING AND 10' FLEXIBLE
GAS HOSE
11" W.C. BULK LIQUID
PROPANE GAS SUPPLY
INCLUDED 10" W.C. REGULATOR
INCLUDED BRASS FITTING CONNECTS
INCLUDED REGULATOR TO INCLUDED
QUICK-CONNECT FITTING
GRILL END
SUPPLY END
FIGURE 5

KalamazooGourmet.com12
INCLUDED 10' FLEXIBLE
GAS HOSE CONNECTS TO
GRILL WITH FLARE FITTING
(NO PIPE SEALANT
NEEDED HERE)
FITTING ON GRILL CAN BE
ROTATED 90°STRAIGHT
DOWN IF PREFERRED
Natural Gas Requirements
Verify the type of gas your grill has been congured for by the factory by checking the serial tag
inside the door of the grill cabinet. Grills congured for natural gas (NG) are oriced differently than
grills congured for liquid propane (LP) gas. Grills congured for use with natural gas are shipped
with a gray hose with a quick-connect tting.
Connection: 1/2" NPT male. Quick-connect hose assembly (included) connects to the grill via a
0.625" flare fitting.
Input Pressure: 7.0" W.C. (17.4 mbar)
Manifold Pressure: 4.0" W.C. (10 mbar)
INSTALLER-SUPPLIED SHUT-
OFF VALVE WITH 1/2” MALE
NPT CONNECTION FOR GRILL
INCLUDED QUICK-CONNECT
FITTING AND 10' FLEXIBLE
GAS HOSE
7" W.C. NATURAL
GAS SUPPLY
INCLUDED 4" W.C. REGULATOR
INCLUDED BRASS FITTING CONNECTS
INCLUDED REGULATOR TO INCLUDED
QUICK-CONNECT FITTING
GRILL END
SUPPLY END
FIGURE 6

+1.800.868.1699 13
High Altitudes
For all gas types, the stated BTU ratings of this appliance apply to installation at sea level.
With increased altitude, there is decreased atmospheric pressure. The National Fuel Gas Code
recommends down-rating burner BTUs by 4% for every 1,000 feet (305 meters) of altitude above
2,000 ft (610 meters) to ensure complete combustion while operating at higher altitudes. Please call
Kalamazoo Customer Service at +1.800.868.1699 for a high altitude kit for your appliance.
Leak Testing
Although gas connections on the grill are leak tested at the factory prior to shipment, a complete
test must be performed after installation due to possible mishandling during shipping or installation.
Periodic checks are also recommended. Immediately check for leaks if you smell gas.
Never use an open ame to look for leaks.
Before Testing: Extinguish all open ames. Do not smoke.
You will need a spray bottle, a brush or a rag. For LP units using a 20-pound cylinder, a full cylinder
should be used.
IMPORTANT: Homeowners should only check for leaks on the gas connections that are external
to the grill. If the valves or other internal connections need to be checked, please call a qualified
technician or Kalamazoo Outdoor Gourmet customer service at +1.800.868.1699.
To Conduct the Test: Make a soap solution of one part liquid dish soap and one part water.
Make sure all grill control valves are in the OFF position. Turn the gas supply ON. Use a spray bottle,
brush or rag to apply the mild soap solution to all connections from the supply line or LP cylinder to
the connection on the grill. Check all connections. Soap bubbles will appear at any connections with
a leak. Turn OFF the gas supply and tighten any leaky connections. Recheck, applying more mild
soap solution.
Electrical Connection
The grill requires AC power for ignition, the control panel lighting, and rotisserie motor functionality.
It must be connected with an outdoor-rated, grounded electric extension cord.
The grill, when installed, must be electrically grounded in accordance with local codes or, in the absence of
local codes, with the National Electrical Code, ANSI/NFPA 70, or the Canadian Electrical Code, CSA C22.1.
See additional electrical precautions on page 41.
IMPORTANT: Do not use the grill until all connections have been
checked and do not leak.

KalamazooGourmet.com14
Grill Location
The Kalamazoo Grill is designed for easy placement on an outdoor patio or deck. It
is recommended that the grill be placed on a non-combustible surface. Important
considerations for grill placement include exposure to wind, proximity to foot trafc and
areas where people congregate and access to the gas supply.
Do not place the grill in a location where the rear lid openings
are likely to be exposed to strong wind. Wind from behind may
prevent the heat of the grill from venting properly, causing the
front of the grill, including the control panel and control knobs to
become dangerously hot. A wind break wall is recommended for
installations where the prevailing wind may be a problem.
Do not place the grill where it is likely to be bumped into or inadvertently touched by passers by. It is
recommended that the counter top or other surface extend 9 inches beyond the sides and back of the grill
as a safety clearance to protect people from injury.
Do not place the grill on a surface that is unable to safely support the weight of the grill or may cause it to
be unstable.
Never place the grill where the gas hose creates a safety hazard (see Figure 1). Tripping over an exposed gas
hose may create a gas leak or create other serious safety hazards.
Never locate the grill in a building, breezeway, shed or other such enclosed areas.
The grill is not intended to be installed in or on a boat or recreational vehicle.
For ease of use and safe operation, it is recommended the grill be placed on a level surface.
REQUIRED CLEARANCES
IMPORTANT: Do not build the grill into a combustible enclosure. Maintain at
least 6 inches of clearance between the sides and back of the grill and any
combustible surface, or use an insulating surround provided by Kalamazoo
Outdoor Gourmet. NEVER place the grill underneath an unprotected
overhead combustible structure or surface.
WIND

+1.800.868.1699 15
Installing a Vent Hood
A properly-installed hood can sometimes be used to address the safety restrictions regarding
overhead combustible structures. Please check your local building codes to conrm if this is
an option for your installation.
Important information:
Outdoor ventilation hoods will not “suck” smoke into the hood. The smoke must collect naturally within
the capture area of the hood, where the fan can then exhaust the smoke.
Breezes, together with the lack of any sealed system or controlled recovery air, make it unlikely in many
situations that all of the smoke will be collected.
A standard residential ventilation hood does not make it okay to use an outdoor grill in a building,
breezeway, shed or other such enclosed area.
The bottom of the vent hood must be located no more than 36 inches above the grill grates. The closer
the hood is positioned to the grill grates, the more effectively it will capture smoke.
The front of the vent hood must be positioned at least 4 inches beyond the front of the grill. If the hood
is positioned too far back relative to the grill, the smoke will be more likely to roll out in front of the hood.
36"
std.
counter
height
31" countertop depth
with BKFP installed
35"
36" max.
29" min.
from surface
37 1/2" max.
30 1/2" min.
from counter
4" min.
distance from
grill front
37 1/2" max.
30 1/2" min.
from counter
36" max.
29" min.
from surface
36"
std.
counter
height
31" countertop depth
with BKFP installed
4" min.
distance from
grill front
39"
FIGURE 7
RUSS CAN UPDATE

KalamazooGourmet.com16
This manual suits for next models
3
Table of contents
Other Kalamazoo Grill manuals

Kalamazoo
Kalamazoo 450 Series K450GB User manual

Kalamazoo
Kalamazoo K500HB-2-NA User manual

Kalamazoo
Kalamazoo Smoker Pellet Grill User manual

Kalamazoo
Kalamazoo Shokunin Kamado KSHOK430 User manual

Kalamazoo
Kalamazoo K750GB-2-NA User manual

Kalamazoo
Kalamazoo Shokunin Kamado User manual

Kalamazoo
Kalamazoo Outdoor Gourmet K500HB User manual

Kalamazoo
Kalamazoo 450 Series K450GB User manual

Kalamazoo
Kalamazoo K750GS User manual

Kalamazoo
Kalamazoo Sculpture User manual