manuals.online logo
Brands
  1. Home
  2. •
  3. Brands
  4. •
  5. KAM
  6. •
  7. Dj Equipment
  8. •
  9. KAM LED Quadtrix User manual

KAM LED Quadtrix User manual

Other KAM Dj Equipment manuals

KAM LED Quadbar 1 DMX User manual

KAM

KAM LED Quadbar 1 DMX User manual

KAM LASERSCAN 1000 3D User manual

KAM

KAM LASERSCAN 1000 3D User manual

KAM Powercan70W User manual

KAM

KAM Powercan70W User manual

KAM InfinityBeam User manual

KAM

KAM InfinityBeam User manual

KAM DMX Laser 40 User manual

KAM

KAM DMX Laser 40 User manual

KAM Energy SD300 User manual

KAM

KAM Energy SD300 User manual

KAM dmx3 User manual

KAM

KAM dmx3 User manual

KAM iLINK RVP User manual

KAM

KAM iLINK RVP User manual

KAM KML305 User manual

KAM

KAM KML305 User manual

KAM LED White192 Panel User manual

KAM

KAM LED White192 Panel User manual

KAM Laserscan Hyper 3D User manual

KAM

KAM Laserscan Hyper 3D User manual

KAM Powercan15W User manual

KAM

KAM Powercan15W User manual

KAM KSM Vegas LED User manual

KAM

KAM KSM Vegas LED User manual

KAM HEXATRIX GLOW User manual

KAM

KAM HEXATRIX GLOW User manual

KAM KMH SERIES User manual

KAM

KAM KMH SERIES User manual

KAM LED PARTYBAR User manual

KAM

KAM LED PARTYBAR User manual

KAM DMX Star Cluster 3D User manual

KAM

KAM DMX Star Cluster 3D User manual

KAM KSD2 User manual

KAM

KAM KSD2 User manual

KAM DMX Laser80 FScan User manual

KAM

KAM DMX Laser80 FScan User manual

KAM Par Kit WFS User manual

KAM

KAM Par Kit WFS User manual

KAM Derby FX-Bar User manual

KAM

KAM Derby FX-Bar User manual

KAM LED Superflower 1 DMX User manual

KAM

KAM LED Superflower 1 DMX User manual

KAM Liteobar 126 User manual

KAM

KAM Liteobar 126 User manual

KAM VECTOR6 User manual

KAM

KAM VECTOR6 User manual

Popular Dj Equipment manuals by other brands

MAGMATIC Prisma Wash 25 user manual

MAGMATIC

MAGMATIC Prisma Wash 25 user manual

HERA PROCOLOR 60 RGBW SERIES User manual & installation guide

HERA

HERA PROCOLOR 60 RGBW SERIES User manual & installation guide

EuroLite LED TSL-600 SCAN COB user manual

EuroLite

EuroLite LED TSL-600 SCAN COB user manual

Ledj Slimline 12HEX12 user manual

Ledj

Ledj Slimline 12HEX12 user manual

Laserworld Garden GS-50RG Xmas manual

Laserworld

Laserworld Garden GS-50RG Xmas manual

Chauvet OVATION E-930VW Quick reference guide

Chauvet

Chauvet OVATION E-930VW Quick reference guide

Snow Masters Zig Oscillator user manual

Snow Masters

Snow Masters Zig Oscillator user manual

EuroLite 50530554 user manual

EuroLite

EuroLite 50530554 user manual

Beamz BUV243 user manual

Beamz

Beamz BUV243 user manual

Eagletone 6 Eyes Flower user manual

Eagletone

Eagletone 6 Eyes Flower user manual

EuroLite FLD-1508 user manual

EuroLite

EuroLite FLD-1508 user manual

Technical Pro LG8xSEA user manual

Technical Pro

Technical Pro LG8xSEA user manual

JB Systems Lounge Laser DMX Operation manual

JB Systems

JB Systems Lounge Laser DMX Operation manual

Elation FUZE WASH Z350 user manual

Elation

Elation FUZE WASH Z350 user manual

Maverick MK3 WASH Quick reference guide

Maverick

Maverick MK3 WASH Quick reference guide

Infinity TF-260C7 Fresnel manual

Infinity

Infinity TF-260C7 Fresnel manual

Chauvet EVE E-50Z Quick reference guide

Chauvet

Chauvet EVE E-50Z Quick reference guide

Eliminator Lighting E 138 manual

Eliminator Lighting

Eliminator Lighting E 138 manual

manuals.online logo
manuals.online logoBrands
  • About & Mission
  • Contact us
  • Privacy Policy
  • Terms and Conditions

Copyright 2025 Manuals.Online. All Rights Reserved.

LED Quadtrix
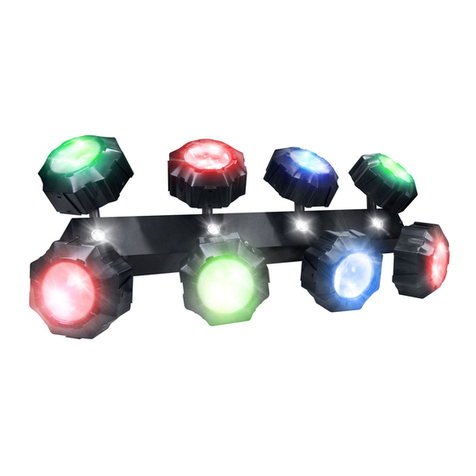
4 lens multi-beam scanning LED lighting effect
256 ultra bright LEDs
96 x red / 96 x green / 64 x blue LEDs
Auto, Sound-to-Light, DMX512 & Master/Slave modes
10 channel DMX512 operation
XLR DMX in and out
Pre-programmed moving patterns in Auto mode
Attractive moulded design
Low power consumption
Adjustable hanging bracket
M A N U A L V E R S I O N 4 .0
For the latest instruction manual updates and information on the entire Kam range visit:
www.kam.co.uk
Kam products are manufactured by: Lamba plc, Unit 1, Southfields Road, Dunstable, Bedfordshire, United Kingdom LU6 3EJ
Telephone: (+44) (0)1582 690600 • Fax: (+44) (0)1582 690400 • Email: [email protected] • Web: www.lambaplc.com
If this product is ever no longer functional please take it to a recycling plant for environmentally friendly disposal.
Due to continuous product development, specifications and appearance are subject to change.
© COPYRIGHT LAMBA plc 2009. E&O E.
Thank you for purchasing this product, we hope that it serves you for many years to come.
To optimise the performance of this product, please read these operating instructions carefully to
familiarise yourself with the basic operations of this unit.
This unit has been tested at the factory before being shipped to you.
To prevent or reduce the risk of electrical shock or fire, do not expose this unit to high temperature and
rain or moisture.
Unpacking
Please unpack your new product carefully, your new product should reach you in perfect condition. Please
check that no damage has occurred during transit. If any damage is found, do not operate your unit.
Please contact the retailer you purchased it from immediately.
Safety
This unit operates on 240V AC. This appliance must be earthed.
This product is for indoor use only, do not expose to rain or moisture. Always store unit in a dry place.
If there is any damage to the mains cable do not use the device.
Always disconnect the unit from the mains supply when carrying out any servicing or cleaning of the unit.
The unit must not be connected to dimming-packs.
Never look directly into any light source as this may damage eyes.
There are no user serviceable parts in this unit, please consult your retailer for any repair work.
Operation
To prolong the life of your unit it is recommended that the unit is not for constant us. Leaving a break
between long periods of use will increase the life span of your unit.
When choosing the installation position, please make sure that the device is not exposed to extreme
temperature, moisture, and that no air ways are blocked, keep a good distance from materials etc.
When using smoke machines/foggers, make sure that the device is never exposed to the direct smoke jet
and is installed at distance of 0.5 meters away from other surfaces. Always fix the fixture with an
appropriate safety-chain. The maximum ambient temperature Ta = 45°C must never be exceeded.
Installation / Overhead rigging
Caution: any units installed in an overhead position may cause severe injuries if not installed correctly or
safely. Please ensure the mounting structure is secure and stable, and is capable of holding 10 times the
weight of the unit to be installed. Always use suitable hanging/mounting brackets or clamps. Always fit a
suitable safety chain. If in any doubt about installation please contact a qualified technician.
Rear panel
1. Fused mains inlet
2. DMX input
3. DMX output
4. Microphone
5. DMX address switches
Dip switch functions
1 = ON / 0 = OFF / X = Function
Auto Mode
In order to select Auto mode, set DIP switch 0 to 12 to OFF.
Sound Control
In order to select Sound Controlled Mode, set DIP switch 12 to ON and DIP switch 1 to 10 to OFF.
Master/Slave no controller
MASTER select Sound Controlled Mode, set dips switch 12 to the on position and all other dipswitches
off. Or if a preset program is requires set the dipswitches on the master for the program you require
SLAVE set dip switch 1 to the on position only, all other dipswitches to off. The slave will act as the master
unit.
DMX settings
DMX controller
Each unit uses 10 DMX channels
Each unit will need a dmx start address, using dipswitches 1-10 set the desired DMX start address
If all units are to be controlled at the same time with the same effect, set all units with the same DMX start
address
If individual control of each unit is required then all units will need to be assigned their own unique DMX
start address, make sure all units are set at least 12 channels apart, and that no DMX channels overlap
Example set unit 1 to DMX start address1 set unit 2 to DMX start address 13. Add 12 channels each time
DMX Channels
Channel
Value
Function
CH1
0-14
Black out
15-19
Red
20-24
Green
25-29
Blue
30-34
Red/Green/Blue
35-39
Red/blue
40-44
Green/Blue
45-49
Red/Green/Blue
50-99
DMX control
100-255
Select the automatic program
To use CH 2-10 set the DMX value of CH1 to between 50-99
CH2
0-255
Select the automatic program
CH3
0-255
Speed from fast to slow
CH4
0-255
Up to down,slow to fast
CH5
0-255
Left to right,slow to fast
CH6
0-255
Inside to outside,slow to fast
CH7
0-255
Up to down, left to right, inside to outside,slow to fast
CH8
0-255
Strobe from Slow to fast
CH9
0-14
All bright
15-255
Dimmer
CH10
0-63
4 LED lenses illuminated
64-127
3 LED lenses illuminated
128-190
2 LED lenses illuminated
191-255
1 LED lenS illuminated
CH11
0-255
No function
CH12
0-255
Sound activation
Technical specifications
Sound control: via built-in microphone
DMX-512-connection: 3-pin XLR
Maximum ambient temperature T: 45
Maximum housing temperature T: 50
Fuse: F 2A, 250V
DMX channels: 10
Number of LEDs: 256