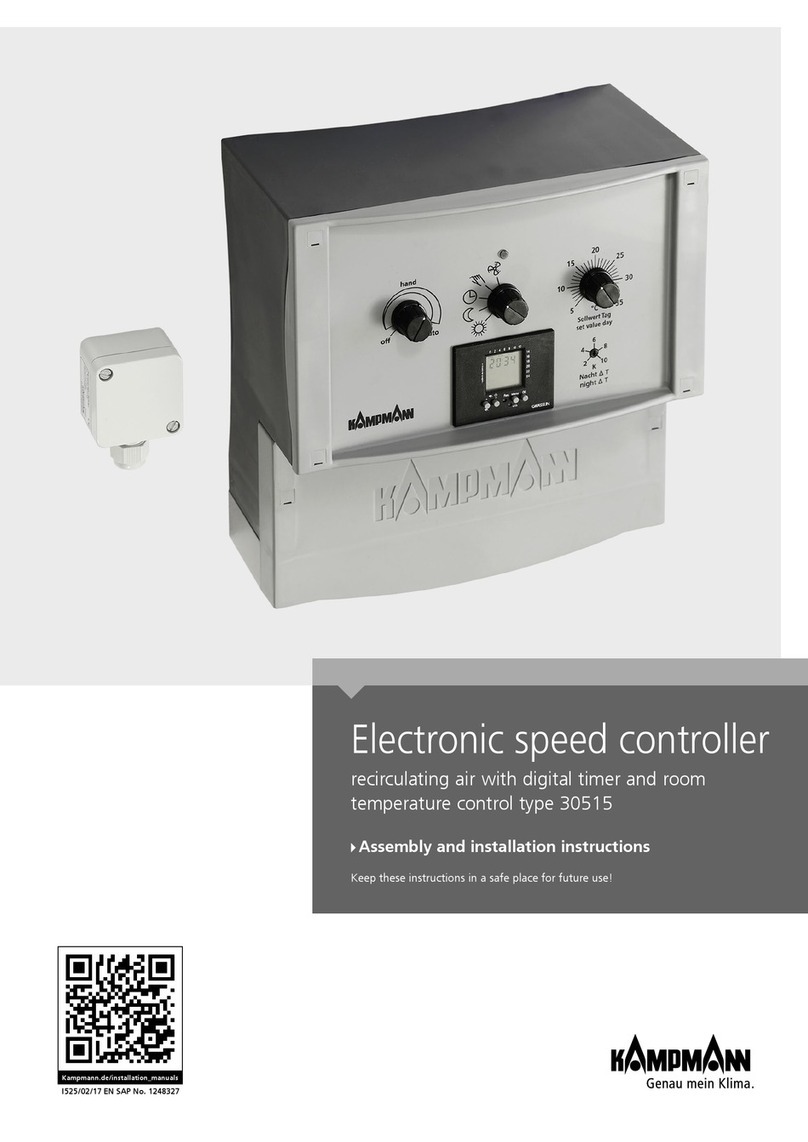
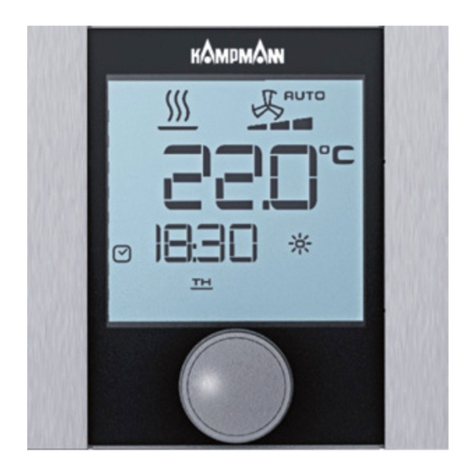
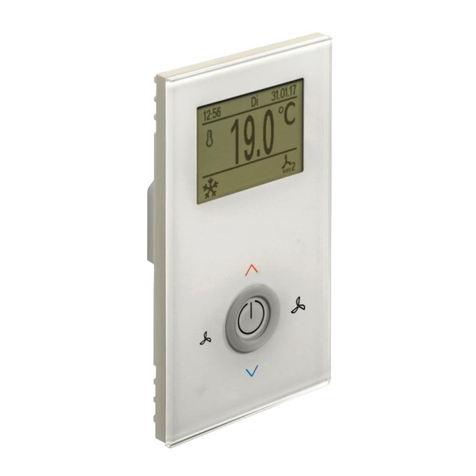
Kampmann KaControl User manual


KaControl for Door Air CurtainsI STALLATIO A D OPERATI G I STRUCTIO S
I STALLATIO A D OPERATI G I STRUCTIO S
1.96
2
Door air curtains
1 Intended Use....................................................................................... 4
2 Important Information / Safety Information............................... 5
3 Operation of the KaController........................................................ 6
3.1 Function Keys, Display Elements.................................................. 7
3.2 Operation...................................................................................... 9
3.2.1 Switching the Controller Off and On .................................... 10
3.2.2 Fan Setting............................................................................. 11
3.2.3 Time Setting........................................................................... 12
3.2.4 Timer Programs...................................................................... 13
3.2.5 Operating Modes (Mode key)............................................... 15
3.2.6 Operating Modes (Summer mode / Winter mode).............. 16
4 Alarm Messages .......................................................................... 17
4.1 Door air curtains........................................................................... 17
4.2 KaController Control Electronics ................................................. 17
5 Frost Protection Function, Motor Protection ............................... 18
5.1 Motor Protection.......................................................................... 18
6 Cabling ................................................................................................. 18
6.1 General Information..................................................................... 18
6.2 Single-circuit Controls of up to 6 Units ...................................... 19
6.3 KaController ................................................................................. 20
6.4 Inputs for Processing External Contacts (e.g. external
thermostat, ON/OFF etc.).............................................................. 21
7 Installation, Electrics, Door Air Curtains, KaController.............. 22
7.1 Door air curtains........................................................................... 22
7.2 KaController ................................................................................. 22
8 Addressing........................................................................................... 24
8.1 Single-circuit Controls of up to 6 Units ....................................... 24
8.1.1 Maximum 6 Door Air Curtains in One Control Zone............ 24
9 Setting the Unit Configuration by means of DIP Switches....... 25
10 Operation and Systems .................................................................. 28
10.1 System 1/Factory Setting ............................................................ 28
10.2 System 2 ...................................................................................... 29
10.3 System 3 ...................................................................................... 30
10.4 System 4 ...................................................................................... 31
10.5 System 5 ...................................................................................... 32
11 Parameter Settings.......................................................................... 33
11.1 General........................................................................................ 33
11.2 Calling up the Service Menu...................................................... 33
11.3 Parameter Settings ..................................................................... 34
11.3.1 Display
Key to symbols:
Caution! Danger!
Non-compliance with this
information can lead to
serious personal injuries or
damage to property.
Danger from
electrocution
Non-compliance with this
information can lead to
serious personal injuries or
damage to property by
electrocution.
Carefully read this manual
in full prior to any
assembly and installation
work!
Anyone involved with the
installation, commissioning
and use of this product is
obliged to pass these
instructions on to trades
people who are involved
at the same time or
subsequently, as well as to
end users or operators.
Retain this manual until
final decommissioning!
Content or design-related
changes may be made
without any prior notice!
Printed on environmentally-friendly
non-chlorine-bleached paper; all
rights reserved; our prior permission
is required for any reprints even
excerpts; we reserve the right to
make changes.

KaControl for Door Air Curtains
I STALLATIO A D OPERATI G I STRUCTIO S
3
Door air curtains 1.96
Target Temperature/Room Temperature .......................... 34
11.3.2 Locking Operating Functions............................................. 34
11.3.3 Fan Actuation ..................................................................... 35
11.3.3.1 Maximum Fan Speed using Parameter P50 ............... 35
11.3.3.2 Maximum Fan Speed using a Potentiometer ............ 35
11.3.3.3 Minimum Fan Speed ................................................... 36
11.3.3.4 Locking Fan Stages...................................................... 36
11.3.4 Sensor Calibration .............................................................. 36
11.3.5 Function of Multifunctional Inputs AI1, AI2 and AI3 ....... 37
11.3.5.1 Function of AI1............................................................ 37
11.3.5.2 Function of AI2............................................................ 38
11.3.5.3 Function of AI2............................................................ 38
11.3.6 Function of Digital Inputs DI1 and DI2.............................. 39
11.3.6.1 Function of DI1............................................................ 39
11.3.6.2 Function of DI2............................................................ 39
11.3.7 Locking Operating Options or Functions, Parameter 38.. 40
11.4 Programming Key....................................................................... 41
12 Parameter List for Control PCB ..................................................... 42
13 Functional Testing of Connected Assemblies ............................ 46
14 KaController Parameters................................................................ 47
14.1 General........................................................................................ 47
14.2 Calling up the KaController Parameter Menu.......................... 47
14.3 KaController Parameter List....................................................... 48

KaControl for Door Air CurtainsI STALLATIO A D OPERATI G I STRUCTIO S
I STALLATIO A D OPERATI G I STRUCTIO S
1.96
4
Door air curtains
1. Intended Use
Kampmann KaControllers and door air curtains are built in line with
the state of the art and recognised safety regulations. Nevertheless,
their use can result in danger to people or damage to the units
or other materials assets if they are not appropriately installed and
operated or correctly and properly used.
Applications
The KaController should only be used as a room unit in conjunction
with Kampmann systems.
KaControllers should only be used
- indoors (for instance in residential properties and offices,
showrooms etc.)
KaControllers should not be used
- Outdoors,
- In humid areas, such as swimming pools, in wet rooms,
- In areas where there is a risk of explosion,
- In areas with a high dust content,
- In areas with an aggressive atmosphere.
Door air curtains are solely intended for use indoors (e.g. residential
and commercial properties, showrooms etc.). They are not suitable for
use in humid environments, such as swimming pools or outdoors.
The products should be protected from any moisture during
installation. Check the application with the manufacturer in case of
any doubt. Any use other than the use specified above is deemed not
to be correct and proper.
The operator of the unit is solely responsible for any damage arising
as a result of this. Correct and proper use is deemed to include
observing the installation instructions described in these instructions.
Specialist knowledge
The installation of this product requires specialist knowledge of
heating, cooling, ventilation and electrical engineering. This
knowledge, generally learned in vocational training in one of the
fields mentioned above, is not described separately. Damage caused
by improper installation is the responsibility of the operator.
The installer of these units should have adequate knowledge of the
following gained from specialist vocational training
- Safety and accident prevention regulations
- Guidelines and recognised technical regulations, i.e. Association of
German Electricians (VDE) regulations, DIN and EN standards.
Purpose and scope of these instructions
This manual contains information on the operation of the KaController.
The information contained in these instructions can be changed
without prior notification.

KaControl for Door Air Curtains
I STALLATIO A D OPERATI G I STRUCTIO S
5
Door air curtains 1.96
2. Important Information / Safety Information
Installation, assembly and maintenance work on electrical units
should only be performed by a qualified electrician in compliance with
the VDE guidelines.
Wiring should comply with the applicable VDE regulations and
provisions laid down by the regional electricity providers.
Non-compliance with these regulations and operating instructions can
result in the units malfunctioning with consequential damage and
danger to persons and property. The units can be incorrectly wired by
the wires being swapped – danger of fatal injury! Disconnect all parts
of the system from the mains power supply and prevent them from
being reconnected before starting any connection and maintenance
work!
Please read these instructions in full to ensure correct and proper
installation and the correct operation of the KaController.
Please note the following safety-relevant information:
• Disconnect all parts of the system that are being worked on.
• Ensure that the system cannot be accidentally re-connected!
• efore commencing the installation/maintenance work, wait until
the fan has stopped when the unit is switched off.
• Caution! Pipes, casings and fittings can become very hot or very cold
depending on the operating mode!
• Qualified personnel must have undergone training to provide them
with adequate knowledge of the following:
•Safety and accident prevention regulations
•Guidelines and recognised technical regulations, i.e. Association
of German Electricians (VDE) regulations
•DIN and EN standards.
•Accident prevention regulations V G, V G4, V G9a
•DDIN VDE 0100, DIN VDE 0105
•EN 60730 (Part 1)
•Technical wiring regulations (TA s) issued by the regional
electricity providers
The products should be protected from any moisture during installation.
Check the application with the manufacturer in case of any doubt. Any
use other than the use specified above is deemed not to be correct and
proper. The operator of the unit is solely responsible for any damage
arising as a result of this. Correct and proper use is deemed to include
adhering to the installation instructions described in these instructions.
Modifications to the unit
Do not undertake any modifications or upgrades on the KaController or
door air curtain unit without discussing these with the manufacturer as
these can impair the safety and operation of the unit.
Do not undertake any work on the unit that is not described in this
manual. On-site systems and cabling must be suitable for connection to
the intended system!

KaControl for Door Air CurtainsI STALLATIO A D OPERATI G I STRUCTIO S
I STALLATIO A D OPERATI G I STRUCTIO S
1.96
6
Door air curtains
3. Operation of the KaController
The KaController is capable of controlling the wide range of
Kampmann systems. KaControllers are equipped with state of the
art technology and offer users the option of adapting the air
conditioning of buildings to individual needs.
Users can configure up to two switching on and off times for every day
of the week so that demand-led temperature control can be set by the
user.
Product features:
• Integral temperature sensor
• Large LCD multifunctional display
• Automatic LED background lighting
• Large seven-segment display for visualisation of target room
temperature
• Real-time clock with integral timer programs
• 2 Switch-on and switch-off times per day
• Alarm display
• Individually adjustable basic display
• Press/Turn button with endless turn/rest function
• Single-button operation of all functions
• Connection of Kampmann system components via bus connection
• Password-protected service level
• Language-independent display, ideal for international use

KaControl for Door Air Curtains
I STALLATIO A D OPERATI G I STRUCTIO S
7
Door air curtains 1.96
3.1 Function Keys, Display Elements
1. Display with LED background lighting
2. ON/OFF key (depending on setting)
- ON / OFF (factory setting)
- Eco mode / Day mode
3. TIMER key
- Setting the time
- Set timer program
4. ESC key
- ack to default view
5. Navigator dial
- Changing settings
- Call up menus
6. MODE key
- Setting operating modes
(disabled with 2-pipe applications)
7. FAN key
- Setting fan control
All menus can be selected and set using the navigator.
The LED background lighting is automatically switched off 5 seconds
after the last operation on the KaController.
The LED background lighting can be permanently disabled by
adjusting the parameters.
KaController with
operating keys
type 3210002
KaController without
operating keys
(single-button operation)
type 3210001

KaControl for Door Air CurtainsI STALLATIO A D OPERATI G I STRUCTIO S
I STALLATIO A D OPERATI G I STRUCTIO S
1.96
8
Door air curtains
1 Display of setpoint room temperature
2 Current time
3 Timer program enabled
4 Weekday
5 Alarm
6 Selected function is locked
7 Eco mode
8 Setpoint setting enabled
9 Fan control setting Auto-1-2-3-4-5
10 Ventilation mode
11 Operating mode - summer mode
12 Operating mode - winter mode
The symbols on the display depend on the application (2-pipe,
4-pipe etc.) and the parameters set.
LCD display symbols

KaControl for Door Air Curtains
I STALLATIO A D OPERATI G I STRUCTIO S
9
Door air curtains 1.96
3.2 Operation
The KaController is operated by the navigator dial and the function
keys. The functions that can be called up and set using the navigator
are identical on both versions (with and without function keys on the
side). An illustration of the KaController with the function keys at the
side is used throughout these instructions for ease of understanding.
The navigator dial or side function keys are also used to select the
various selection menus.
f no action is carried out using the navigator or the function keys
for longer than 3 seconds, the last change made is saved and the
default view is called up.
Menu selection using the navigator
Menu selection using function keys

KaControl for Door Air CurtainsI STALLATIO A D OPERATI G I STRUCTIO S
I STALLATIO A D OPERATI G I STRUCTIO S
1.96
10
Door air curtains
3.2.1 Switching the Controller Off and On
When the control is switched on, the display shows the standard view
with the current room temperature target figure and the fan stage
set.
Following initial commissioning of the KaController, the time is no
longer shown in the standard view (see "Time setting" selection
menu).
Switching off the control:
There are 3 options for switching off the control:
1. Press the ON/OFF key
2. Turn the navigator to the left until OFF appears
3. Press and hold down the navigator until OFF appears
Switching on the control:
There are 2 options for switching on the control:
1. Press the ON/OFF key
2. Press the navigator
Default view
Default view
Control OFF display

KaControl for Door Air Curtains
I STALLATIO A D OPERATI G I STRUCTIO S
11
Door air curtains 1.96
3.2.2 Fan Setting
Press the FAN key (quick access) or use the navigator dial to call up
the "Fan setting" selection menu.
Calling up the "Fan setting" menu using the navigator:
The room temperature is initially controlled with natural convection
in Automatic mode and then by continually adjusting the fan speed.
Users also have the option of setting the fan stages Auto-0-1-2-3-4-5
as required.
Pressing the navigator dial in standard view switches the display to
the "Fan setting" menu.
You can select the required fan stage Auto-0-1-2-3-4-5- by turning
the navigator.
Pressing the navigator activates the selected fan stage.
f no action is carried out using the navigator for longer than
3 seconds, the last change made is saved and the standard view is
called up.
Fan stage 3

KaControl for Door Air CurtainsI STALLATIO A D OPERATI G I STRUCTIO S
I STALLATIO A D OPERATI G I STRUCTIO S
1.96
12
Door air curtains
3.2.3 Time Setting
Press the TIMER key (quick access) or use the navigator dial to call up
the "Time setting" selection menu.
Calling up the "Time setting" menu using the navigator:
Setting the time
Use the navigator to set the following:
1. Current hour
2. Current minute
3. Current day
The "Timer programs" selection menu is automatically called up
once the current day has been confirmed by pressing the navigator
dial.
f no action is carried out using the navigator or the function keys
for longer than 7 seconds, the last change made is saved and the
default view is called up.
Following initial commissioning of the KaController, the time is no
longer shown in the standard view.
Only when the time has been set, is the current time shown in the
standard view.
f "- -: - -" is entered for hours and minutes, the real-time clock is
disabled and the time is hidden in the default view.
Time setting view
Setting to hide the time in
the default view

KaControl for Door Air Curtains
I STALLATIO A D OPERATI G I STRUCTIO S
Door air curtains 1.96
ON1 OFF1 ON2 OFF2
MO 6 : 00 18 : 00 - - : - - - - : - -
TU 6 : 00 18 : 00 - - : - - - - : - -
WE 6 : 00 18 : 00 - - : - - - - : - -
TH 6 : 00 18 : 00 - - : - - - - : - -
FR 6 : 00 18 : 00 - - : - - - - : - -
SA 8 : 00 14 : 00 - - : - - - - : - -
SU - - : - - - - : - - - - : - - - - : - -
Timer matrix
Example of a weekly
switching program
Display elements in the Timer
Programs selection menu
3.2.4 Timer Programs
The KaController provides the option of programming switching on
and off times using a timer program if rooms are only to be air
conditioned during certain times of the day. Unlike with conventional
thermostatic controllers where only one switching on and off time can
be selected, two switching on and off times can be set for each day.
Set the time in the "Time setting" selection menu before
parameterizing the switching on and off times.
The KaController can manage 2 switching on and 2 switching off times
per day. The switching on and off times can be entered as a block or
individually for each day.
The timer program switches the controller on and off in accordance
with the timer entries. After switching off the controller using the
timer program, the user then has the option of switching the
controller on using the ON/OFF key or the navigator.
1ON = SWITCH ON timer program
OFF = SWITCH OFF timer program
21 = Timer program no. 1
2 = Timer program no. 2
3 Switching on/switching off time
4 Weekday
5If no switching on or off time is entered in the timer program matrix,
the "Clock" symbol is hidden in the standard view.
f no switching on or off time is entered in the timer program
matrix, the "Clock" symbol is hidden in the standard view.
The diagram below shows the sequence for setting the timer
program. Steps 1-4 are described in more detail in the next section.
To exit the "Timer programs" selection menu, press and hold down
the navigator for 3 seconds in the timer program start screen or do
not use the KaController for 15 seconds.
13

KaControl for Door Air CurtainsI STALLATIO A D OPERATI G I STRUCTIO S
I STALLATIO A D OPERATI G I STRUCTIO S
1.96
14
Door air curtains
Press the TIMER key twice (quick access) or use the navigator dial to
call up the "Time switching program" selection menu.
Calling up the "Timer programs" menu using the navigator:
Step 1:
Turn the navigator to select a day for which you would like to
program a switching-on or off time.
You have the option of selecting the days of the week as a block
(MO-FR, SA-SU, MO-SU) or individually.
The figure is applied by pressing the navigator and
(For example: MO−FR) and the next input screen is called up.
Step 2:
Select the number of the timer program (no. 1 or no. 2) by turning the
navigator.
The figure is applied by pressing the navigator (for instance: Timer
program no. 1) and the next input screen is called up.
Step 3:
It is possible to set the switching on time you require by turning the
navigator.
Once the minutes have been set, the set switching on time is carried
over by pressing the navigator and the input screen for the switching
off time of the selected program no. is called up.
Timer start screen
Input screen for timer
program no.
Input screen for switching
on time

KaControl for Door Air Curtains
I STALLATIO A D OPERATI G I STRUCTIO S
15
Door air curtains 1.96
Step 4:
You can set the switching off time you require by turning the
navigator dial.
Once the minutes have been set, the set switching off time is carried
over and the timer program start screen is called up by pressing the
navigator dial (-> Step 1).
The respective day and associated timer program no. must be called
up (Step 1 + Step 2) to delete the switching-on and off times
entered.
The switching on or off time entered should be replaced by " - -:- -"
(Step 3 +Step 4).
mportant note: t is not possible to delete timer entries as a block!
Timer entries can be overwritten at any time and can be overwritten
either as a block or for each day.
Switching-on and off times should only be requested singly for each
day. t is not possible to request switching on and off times as a
block where there are differing time entries for the respective days
of the week and the time is then shown by "--:--".
To exit the "Timer programs" selection menu, press and hold down
the navigator for 3 seconds in the timer program start screen or do
not use the KaController for 15 seconds.
3.2.5 Operating Modes (Mode key)
The MODE key is locked with door air curtain applications, as only
Heating mode can be active.
The KaController cannot enter the mode setting (see Section
11.3.11.2)!
Input screen for switching
off time

KaControl for Door Air CurtainsI STALLATIO A D OPERATI G I STRUCTIO S
I STALLATIO A D OPERATI G I STRUCTIO S
1.96
16
Door air curtains
3.2.6 Operating Modes (Summer Mode / Winter Mode)
Press the MODE key (quick access) or use the navigator dial to call up
the "Operating modes" selection menu.
Calling up the "Operating modes" menu using the navigator:
The operating mode can be set using the navigator depending on the
parameter setting.
Operating mode - summer mode: The controller operates only in
summer mode (Fan ON, Heating OFF).
Operating mode - winter mode: The controller operates only in
cooling mode (Fan ON, Heating ON).
The operating mode required can be selected by turning the
navigator dial in the 'Operating mode' selection menu.
Pressing the navigator activates the selected operating mode.
f the summer mode / winter mode changeover is actuated by an
external thermostat, the KaController cannot perform the summer
mode / winter mode changeover.
f no action is carried out using the navigator for longer than
3 seconds, the last change made is saved and the standard view is
called up.
Operating mode - winter
mode setting

KaControl for Door Air Curtains
I STALLATIO A D OPERATI G I STRUCTIO S
17
Door air curtains 1.96
View of "Motor fault" alarm
4. Alarm Messages
The KaController displays faults by means of the alarm messageslisted
in the table below. The alarm messages are displayed according to
their priority.
In the event of an alarm, note down the alarm message and contact
the responsible member of staff (System Administrator or
Installer/Service Technician) to fix the fault quickly.
4.1 Door air curtains
Door air curtain - Alarm table
4.2 KaController Control Electronics
KaController control electronics alarm table
Should more than one fault occur simultaneously in the KaController
control electronics, the alarm messages are displayed alternately in
the display.
Code Alarm Priority
A11 Faulty control sensor 1
A12 Motor fault 2
A13 Room frost protection 3
A14 Condensation alarm 4
A15 General alarm 5
A16 Faulty AI1, AI2 or AI3 sensor 6
A18 Faulty EEPROM 8
A19 Offline slave in the CAN bus network 9
Code Alarm
tAL1 Temperature sensor in KaController defective
tAL3 Realtime clock in KaController defective
tAL4 EEPROM in KaController defective
Cn Communication fault with the external PC

KaControl for Door Air CurtainsI STALLATIO A D OPERATI G I STRUCTIO S
I STALLATIO A D OPERATI G I STRUCTIO S
1.96
18
Door air curtains
6 Cabling
6.1 General Information
• Lay all low voltage cables along the shortest route.
• Ensure that low voltage and high voltage cables are laid
separately, for instance using metal planking on cable trays
• Use only shielded cables as low voltage and bus cables.
• Lay all US cables in a linear pattern. Star-shaped wiring is not
permitted (Figure on left).
• The KaController is connected to the door air curtain by a bus line
and should be connected to the door air curtain's PC .
Shielded, paired cables should be used as US cables, for
instance CAT5 (AWG23), but at least of the same value.
When laying bus cables, avoid the formation of star points,
for instance in junction boxes. Pass the cables through the
units (door air curtains)!
5. Frost Protection Function, Motor Protection
5.1 Motor Protection
Any motor fault with a door air curtain is shown on the KaController
by the display "A12". The door air curtain with the motor fault shuts
down automatically.
When a motor fault has occurred, check whether the fan is blocked.
To eliminate the fault, disconnect the door air curtain and remedy the
cause of the fault.
The door air curtain should then restart after the power supply has
been reconnected and a fan stage has been selected.
Contact a Service Technician should the motor fault continue to be
shown on the display.
A fault in the motor of a slave unit is not shown on the KaController.
Only a motor fault in a master unit is shown on the KaController
!

KaControl for Door Air Curtains
I STALLATIO A D OPERATI G I STRUCTIO S
19
Door air curtains 1.96
Door air curtain with KaController
Maximum 6 door air curtains
6.2 Single-circuit Controls of up to 6 Units
Maximum permissible cable lengths
Total length of bus cables between door air curtains max. 30m
Total length of bus cable between room control unit and master unit max. 30m
Total length between door air curtain and external potential-free contacts max. 30m
e.g. external thermostat, ext. contact ON/OFF etc.
Optional: - External thermostat for summer
mode / winter mode changeover
- external contact ON/OFF
KaController
ype 3210001
ype 3210002
KaController #1 #2 #3 #4 #5 #6
GND
Rx+/ x+
Rx-/ x-
GND
GND
GND
V+
x
x
GND
V+
x
x
GND
V+
x
x
GND
V+
x
x
GND
V+
x
x
24 V
GND
GND
GND
GND
GND
V+
x
x
GND
he number of connecting wires required incl.
fuses is given on the individual control units.
* Lay shielded cables (e.g. Y(S )Y, 0.8 mm), separately
from high-voltage cables.
** Lay shielded, paired cables, e.g. CA 5 (AWG23) of
at least the same value, separately from high-voltage
cables.
Master unit
#1
KaControl
C1
KaControl
C1
KaControl
C1
KaControl
C1
KaControl
C1
KaControl
C1
Slave unit
#2
Slave unit
#3
Slave unit
#5
Slave unit
#4
Slave unit
#6
Mains
230 V/50 Hz
Max. length of
bus line = 30 m Max. length of bus line = 30 m
Max. length of bus line = 30 mMax. length of bus line = 30 m
Diagram of bus cabling
Mains
230 V/50 Hz
Mains
230 V/50 Hz
Mains
230 V/50 Hz
Mains
230 V/50 Hz
Mains
230 V/50 Hz
2** 2** 2** 2** 2**
2**
3
3**
3 3 3 3 3

KaControl for Door Air CurtainsI STALLATIO A D OPERATI G I STRUCTIO S
I STALLATIO A D OPERATI G I STRUCTIO S
1.96
20
Door air curtains
6.3 KaController
• A flush-mounted back box is needed for the KaController.
• Connect the KaController to the nearest door air curtain as per the
wiring diagram.
The maximum bus length between the KaController and door air
curtain is 30 m.
• y connecting a KaController, the respective door air curtain
automatically becomes the master unit in the control circuit.
Flush-mounted back box
Master unit
#1
2**
2**
33
Mains
230 V/50 Hz
Mains
230 V/50 Hz
Slave unit
#2
Max. cable
length = 30 m
** Use shielded, paired cables, e.g.
CAT5 (AWG23) of at least the
same value
2**
KaControl
C1
KaControl
C1
Other manuals for KaControl
1
Table of contents
Other Kampmann Controllers manuals
Popular Controllers manuals by other brands

COLORKINETICS
COLORKINETICS Gen6 installation instructions

Black Box
Black Box MEDIACENTO VSW-MC-CTRL user manual

red lion
red lion PXU100B0 instructions

alphainnoTec
alphainnoTec Luxtronik 2.0 operating instructions

Oriental motor
Oriental motor TM Series operating manual

Elmo
Elmo VILLEGGIO NG-TRX Series user manual