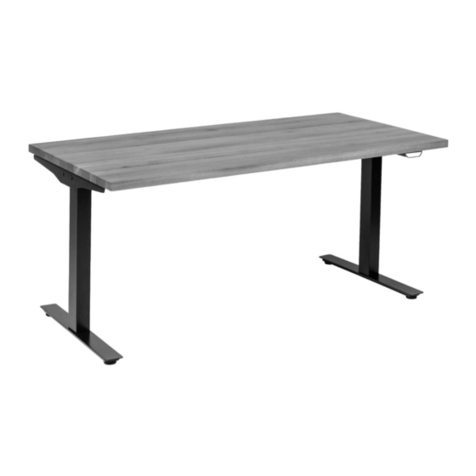
KARE design F-SP-GF470 User manual

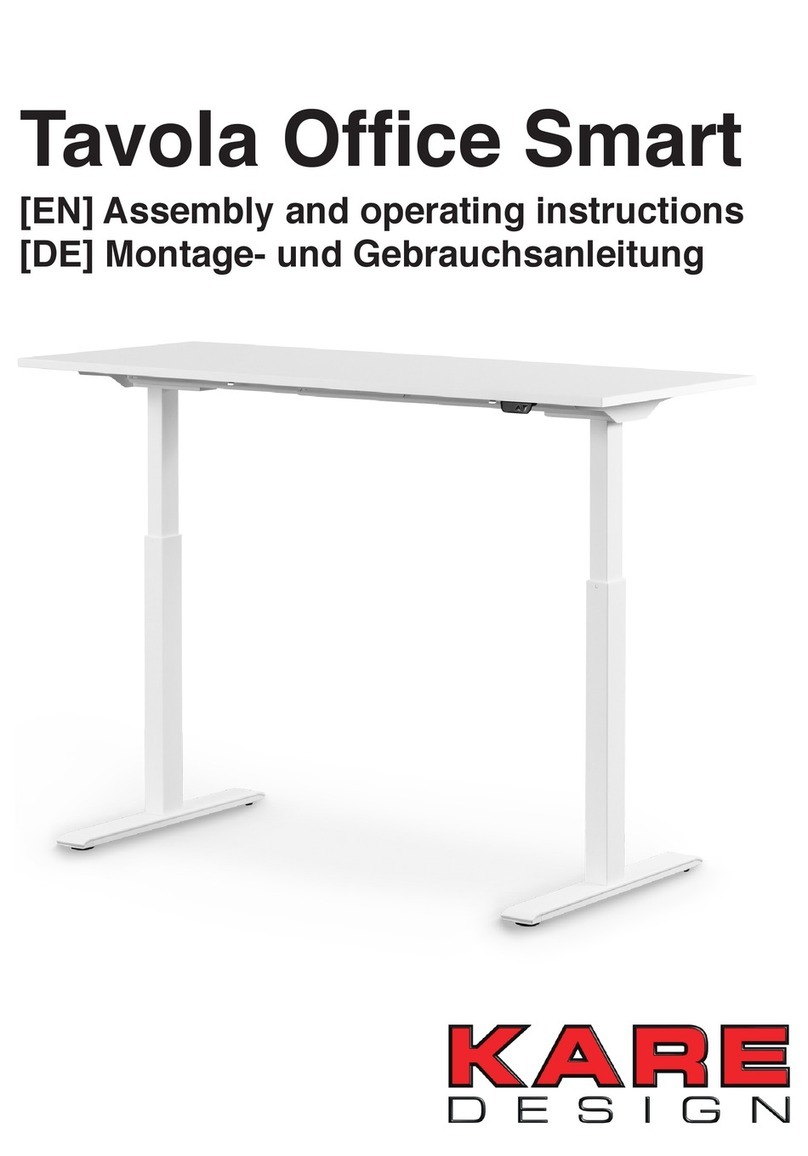
Tavola Oce Smart
[EN] Assembly and operating instructions
[DE] Montage- und Gebrauchsanleitung
[FR] Instructions de montage et de fonctionnement
[RU] Инструкция по сборке и эксплуатации

2

[EN] Dear customer,
Thank you very much for your purchase and the trust you have placed in us.
With Tavola we have developed and manufactured a European quality product.
We attach great importance to sustainability and ecological compatibility.
Today you will receive your desk of the next generation.
Tavola will help you be healthier and more productive at your desk.
Have fun with your product!
Your KARE-Team
[DE] Lieber Kunde,
vielen Dank für Deinen Kauf und Dein uns entgegengebrachtes Vertrauen.
Mit Tavola Ofce Smart haben wir ein europäisches Qualitätsprodukt entwickelt und hergestellt.
Wir legen großen Wert auf Nachhaltigkeit und ökologische Verträglichkeit.
Heute erhältst du Deinen Schreibtisch der nächsten Generation.
Tavola Ofce Smart wird Dir helfen, gesünder und produktiver am Schreibtisch zu sein.
Viel Freude mit Deinem Produkt!
Dein KARE-TEAM
[FR] Cher client,
Merci beaucoup pour votre achat et de la conance que vous nous accordez. Avec Tavola, nous avons conçu
et fabriqué un produit répondant aux normes de qualité européennes. Nous attachons beaucoup d’importance
à la durabilité et à la compatibilité écologique.
Vous recevez aujourd’hui votre bureau nouvelle génération.
Tavola vous aidera à être plus productif mais aussi à mieux prendre de soin de votre santé à votre bureau.
Amusez-vous bien avec votre produit !
Votre équipe KARE
[RU] Уважаемый покупатель,
Большое спасибо за вашу покупку и оказанное нам доверие. С Tavola мы разработали и произвели
продукт европейского качества. Мы придаем большое значение экологичности и бережному
отношению к окружающей среде.
Сегодня Вы получите письменный стол нового поколения.
Tavola поможет Вам оставаться здоровыми и более продуктивно работать за письменным столом.
Используйте новый стол с удовольствием!
Ваша команда фирмы KARE
3
[EN] Parts List Package 1 [DE] Teileliste Paket 1
[FR] Nomenclature paquet 1 [RU] Список деталей Пакет 1
[EN] Parts List Package 2 [DE] Teileliste Paket 2
[FR] Nomenclature paquet 2 [RU] Список деталей Пакет 2
[EN] Desktop
[DE] Tischplatte
[FR] Bureau
[RU] Столешница
1x
[EN] 2x side parts
1x screw box
1x control box
1x power cable
1x control switch
2x table legs incl. connecting cable
2x table feet
4x crossbars
[DE] 2x Seitenteile
1x Schraubenbox
1x Kontrollbox
1x Stromkabel
1x Bedienschalter
2x Tischbeine inkl. Verbindungskabel
2x Tischfüße
4x Quertraversen
[FR] 2x parties latérales
1x boîte à vis
1x boîtier de commande
1x câble d’alimentation
1x interrupteur de commande
2x pieds de table avec câbles de raccordement
2x pieds de table
4x traverses
[RU] 2x боковые части
1x коробка с винтами
1x блок управления
1x кабель питания
1x контрольный переключатель
2x ножки стола вкл. соединительный кабель
2x подставки для ножек стола
4x перекладины
4

[EN] Parts List Screwbox
[DE] Teileliste Schraubenbox
4x 10x 2x 18x 2x 2x 4x
[EN] Before assembly
Please check the completeness of all parts. We recommend mounting on a material that is gentle on the
surface. For the assembly of the Tavola table we recommend a cordless screwdriver.
[DE] Vor der Montage
Bitte prüfe die Vollständigkeit aller Teile. Wir empfehlen die Montage auf einen Material schonenden
Untergrund durchzuführen. Für die Montage des Tavola-Tisches empfehlen wir einen Akkuschrauber.
In case of damage or defects to your Tavola table, please contact your Dealer or our customer
service: tavola-of[email protected]. Please document your request with pictures and/or a short
description.
Bitte wende Dich bei Schäden oder Mängeln an Deinem Tavola-Tisch an Deinen Händler oder
schriftlich an unseren Kundenservice: tavola-of[email protected]. Bitte dokumentiere Dein Anliegen
mittels Bildern und/oder einer kurzen Beschreibung.
If you have any questions, please contact our customer service:
Hotline: +49 5542 600 666
Mail: tavola-of[email protected]
Bei Fragen steht Dir unser Kundenservice zur Verfügung:
Hotline: +49 5542 600 666
Mail: tavola-of[email protected]
5

[FR] Nomenclature paquet 2
[RU] Список деталей Коробка с винтами
4x 10x 2x 18x 2x 2x 4x
[FE] Avant le montage
Veuillez contrôler que toutes les pièces sont bien présentes. Nous vous recommandons de procéder au
montage sur un matériau qui n’endommagera pas le support. Nous vous recommandons d’utiliser une
visseuse sans l dans le cadre du montage de la table Tavola.
[RU] Перед сборкой
Пожалуйста, проверьте полную комплектацию всех деталей. Мы рекомендуем собирать стол на
мягкой подложке. Для сборки стола Tavola мы рекомендуем аккумуляторный шуруповерт.
En cas de défaut constaté ou de dégât subi par votre table Tavola, veuillez contacter votre
revendeur ou notre service client : tavola-of[email protected]. Veuillez joindre des photos et/ou une
brève description à votre demande.
В случае повреждения или дефекта Вашего стола Tavola, пожалуйста, свяжитесь с
торговым представителем или нашей службой поддержки клиентов:
tavola-of[email protected]. Пожалуйста, приложите к запросу фотографии и/или краткое
описание.
En cas de question, veuillez contacter notre service client :
Hotline : +49 5542 600 666
e-mail : tavola-of[email protected]
Если у Вас возникли вопросы, пожалуйста, свяжитесь с нашей службой поддержки
клиентов: Горячая линия: +49 5542 600 666
Mail: tavola-of[email protected]
6

[EN] 1. Please arrange the individual components as shown. When mounting a 100cm
table top you need two of the crossbars instead of the four shown crossbars. (See page 11)
2. Please x the traverses to the table legs with a total of 8 screws.
Pay attention to a right-angled alignment.
[DE] 1. Ordne die einzelnen Bauteile wie abgebildet an. Bei der Montage einer 100cm
Tischplatte benötigst Du zwei der Quertraversen anstelle der abgebildeten vier
Quertraversen. (Siehe Seite 11)
2. Fixiere die Traversen mit insgesamt 8 Schrauben an den Tischbeinen.
Achte auf eine rechtwinklige Ausrichtung.
[FR] 1. Veuillez agencer les différents composants comme sur l’image. Si vous montez un dessus
plateau de table de 100 cm, vous aurez besoin de deux traverses plutôt que quatre.
(cf. page 11)
2. Veuillez xer les traverses aux pieds de table à l’aide des huit vis fournies au total.
Attention à les aligner selon le bon angle.
[RU] 1. Пожалуйста, расположите отдельные компоненты, как показано на рисунке. При
установке 100-сантиметровой столешницы необходимы две перекладины вместо
четырех показанных на рисунке. (См. стр. 11)
2. Пожалуйста, прикрепите траверсы к ножкам стола с помощью 8 винтов. Обратите
внимание на выравнивание под прямым углом.
8x
1
7

[EN] 1. Place the table top carefully on the surface. The sticker on it marks the side on which the
table frame is mounted.
2. Carefully lift the table frame onto the table top and center it.
[DE] 1. Lege die Tischplatte vorsichtig auf den Untergrund. Der darauf bendliche Aufkleber
markiert die Seite, an der das Tischgestell montiert wird.
2. Hebe vorsichtig das Tischgestell auf die Tischplatte und richte es mittig aus.
[FR] 1. Veuillez placer le plateau de table sur la surface avec précaution. L’autocollant indique
dans quel sens se monte la structure de la table.
2. Levez soigneusement le plateau de la table pour le placer sur le dessus de table et veillez
à bien le centrer.
[RU] 1. Осторожно установите столешницу на поверхность. Наклейка на ней отмечает
сторону, на которой установлена рама стола.
2. Аккуратно поднимите раму стола на столешницу и установите ее по центру.
2
8

je 2x
[EN] Crossbars adjustment for table top 160 cm
Use for the assembly of a table top of length 160 cm the second perforation from the inside of the
respective crossbar.
[DE] Quertraversen-Einstellung für Tischplatte 160 cm
Nutze für die Montage einer Tischplatte der Länge 160 cm die zweite Lochung von innen der
jeweiligen Quertraverse.
[FR] Réglage des traverses pour un plateau de table de 160 cm
Pour monter un dessus de table d’une longueur de 160 cm, utilisez la deuxième perforation sur la
face interne de la traverse.
[RU] Регулировка перекладин для столешницы 160 см
Для сборки столешницы длиной 160 см используйте второе отверстие изнутри
соответствующей перекладины.
3
9

[EN] Crossbars adjustment for table top 140 cm
Use for the assembly of a table top of length 140 cm the third perforation from the inside of the
respective crossbar.
[DE] Quertraversen-Einstellung für Tischplatte 140 cm
Nutze für die Montage einer Tischplatte der Länge 140 cm die dritte Lochung von innen der
jeweiligen Quertraverse.
[FR] Réglage des traverses pour un plateau de table de 140 cm
Pour monter un dessus de table d’une longueur de 140 cm, utilisez la troisième perforation sur la
face interne de la traverse du dessus de table.
[RU] Регулировка перекладин для столешницы 140 см
Для сборки столешницы длиной 140 см используйте третье отверстие изнутри
соответствующей перекладины.
3
je 2x
10

[EN] Crossbars adjustment for table top 120 cm
Use for the assembly of a table top of length 120 cm the fourth perforation from the inside of the
respective crossbar.
[DE] Quertraversen-Einstellung für Tischplatte 120 cm
Nutze für die Montage einer Tischplatte der Länge 120 cm die vierte Lochung von innen der
jeweiligen Quertraverse.
[FR] Réglage des traverses pour un plateau de table de 120 cm
Pour monter un plateau de table d’une longueur de 120 cm, utilisez la quatrième perforation sur la
face interne de la traverse du dessus de table.
[RU] Регулировка перекладин для столешницы 120 см
Для сборки столешницы длиной 120 см используйте четвертое отверстие изнутри
соответствующей перекладины.
3
je 2x
11

[EN] Crossbars adjustment for table top 100 cm
Use only two of the four crossbars supplied for mounting a table top of length 100.
[DE] Quertraversen-Einstellung für Tischplatte 100 cm
Nutze für die Montage einer Tischplatte der Länge 100 ausschliesslich zwei der vier mitgelieferten
Quertraversen.
[FR] Réglage des traverses pour un plateau de table de 100 cm
Veuillez utiliser uniquement deux des quatre traverses fournies pour monter un plateau de table
d’une longueur de 100 cm.
[RU] Регулировка перекладин для столешницы 100 см
Для монтажа столешницы длиной 100 используйте только две из четырех прилагаемых
перекладин.
3
12

[EN] Mount the table feet and screw the oor glides together.
[DE] Montiere die Tischfüße und verschraube die Bodengleiter.
[FR] Montez les pieds de table et vissez les patins.
[RU] Установите подставки для ножек стола и ввинтите защитные
наконечники.
4
4x 4x
13

[EN] Fasten the table frame to the table top using the screws supplied.
[DE] Befestige das Tischgestell an der Tischplatte mittels der mitgelieferten
Schrauben.
[FR] Fixez la structure de la table au plateau de table à l’aide des vis fournies.
[RU] Прикрепите раму стола к столешнице с помощью входящих в
комплект винтов.
5
18x
14

[DE] 1. Position the control box centrally between the two crossbars and fasten it to the table top
using the two screws supplied.
2. Position the control switch on the table top according to your wishes and fasten it with the
two screws provided.
3. Connect the two cables of the table legs, the control switch and the power cable to the
control box.
[DE] 1. Positioniere die Kontrollbox mittig zwischen die beiden Traversen und befestige
diese mit Hilfe der beiden mitgelieferten Schrauben an der Tischplatte.
2. Positioniere den Bedienschalter ganz nach Deinen Wünschen an der Tischplatte
und befestige diesen mit Hilfe der beiden mitgelieferten Schrauben.
3. Verbinde die beiden Kabel der Tischbeine, den Bedienschalter und das Stromkabel
mit der Kontrollbox. Tipp: Fädele die Kabel durch die Kabelhaken in der Quertraverse.
6
2x 2x
1x
1. 2.
1x
3.
1x
15

[FR] 1. Placez le boîtier de commande au centre entre les deux traverses et xez-le à la structure
de table à l’aide des deux vis fournies.
2. Placez l’interrupteur de commande sur la structure de la à l’endroit de votre choix et
xez-le à l’aide des deux vis fournies.
3. Reliez les deux câbles des pieds de table, l’interrupteur de commande et le câble
d’alimentation au boîtier de commande.
[RU] 1. Расположите блок управления по центру между двумя перекладинами и закрепите
его на столешнице при помощи двух входящих в комплект винтов.
2. Расположите контрольный переключатель на столешнице в соответствии с Вашими
пожеланиями и закрепите его двумя входящими в комплект винтами.
3. Подключите два кабеля ножек стола, контрольный переключатель и кабель
питания к блоку управления.
6
2x 2x
1x
1. 2.
1x
3.
1x
16

[EN] After the rst manual reset your Tavola Oce Smart is now ready for use.
Please refer to our Quick Start Guide on page 20 and the ofcial instructions for use and care on
the following pages.
[DE] Nach einem manuellen Reset ist Dein Tavola Oce Smart jetzt einsatzbereit.
Bitte beachte bei der Inbetriebnahme unsere Schnellanleitung auf Seite 23 und die ofzielle
Gebrauchsanleitung und Pegehinweise auf den nachfolgenden Seiten.
[FR] Après la première mise en service votre Tavola Oce Smart est maintenant
prêt à l’emploi.
Veuillez consulter la page 26 de notre guide de démarrage rapide ainsi que les instructions
ofcielles d’utilisation et d’entretien dans les pages suivantes.
[RU] Ваш стол Tavola Oce Smart готов к использованию.
Пожалуйста, ознакомьтесь с нашим Кратким руководством по использованию на странице
29 и официальными инструкциями по эксплуатации и уходу на следующих страницах.
17

18

[EN] Instruction manual English
Tavola is an electromechanically height-adjustable sitting/standing table with control switch for height
adjustment up and down.
This device can be used by children aged 8 and over. Persons with limited physical, sensory or mental abilities
or lack of experience and knowledge should be supervised or instructed on the safe use of the device and
should understand the dangers involved. Children should not play with the device. Cleaning and maintenance
of the appliance must not be carried out by children without supervision.
Recommendations and parameters for Tavola:
Sound level:
< 50 dB(A)
Interval for height adjustment:
68-115 cm or 26.8-45.3 inches
Maximum load:
83 kg
Temperature interval in use:
50-104°F or 10-40°C.
Storage temperature interval:
0 to 158°F or -18 to 70°C.
Humidity:
20-90% at 104°F or 40°C
Electrical power:
100-240 V AC, 50-60 Hz, 3.2-1.5 A
Model:
F-SP-GF470
This table may only be used with the
supplied control switch or Tavola-certied
accessories.
It is the sole responsibility of anyone installing,
using, repairing or servicing this desk to read this
manual carefully.
Keep this manual close to your Tavola table.
installation instructions
• The table is assembled according to the above
assembly instructions.
• Connect the power cord to a wall outlet before
use.
NOTE! The electrical cable must be completely
movable.
• The desk is now ready for use.
• The motors stop automatically when the desk
reaches its lowest or highest position.
Using the Table
The table may only be used as a continuously
adjustable work table between sitting and standing
position.
The desk is intended exclusively for use indoors and
in dry rooms (ofce environment, etc.). The desk
must not be overloaded - the maximum load is 83
kg. The system can be operated continuously for a
maximum of 1 minute. The motors must stand still
for approx. 9 minutes before they can be switched
on again.
19

.
++ +
[EN] QUICK GUIDE
Manual reset / rst start-up
Perform a reset by simultaneously holding the up and down buttons pressed for at least
8 seconds. Press and hold the buttons as the desk slowly moves to its lowest level. The
reset is complete when the desk has stopped at the lowest point.
Follow these instructions when adjusting the table height:
1. Ensure that there are no objects in the table height adjustment area.
2. To move the desk up or down, press up or down.
For full stroke, release the down button at the lowest safe point and then press it again for 5 seconds.
The desk will then move to the lowest mechanical height to achieve full stroke.
Saving of preferred standing and sitting position / end positions
Press both buttons three times (with an interval of 0.5-1 second between them). Then press „up“ or „down“
to adjust the position (0.5-1 second). The same applies to your second stored setting. To delete the memory
positions, perform a reset.
Press the Up key until the desired table height is reached.
Press the Down key until the desired table height is reached.
Memory
standing height
Memory
seating height
About storage position
Press for >5 seconds
20
Table of contents
Other KARE design Indoor Furnishing manuals

KARE design
KARE design Tavola Office Planning guide

KARE design
KARE design Edward 83370 User manual

KARE design
KARE design Tavola Office Smart User manual

KARE design
KARE design Console Industrial Ring 79103 User manual

KARE design
KARE design JUNGLE NATURE 87205 User manual

KARE design
KARE design 80880 User manual
Popular Indoor Furnishing manuals by other brands

Lifetime Kidsrooms
Lifetime Kidsrooms 155 Assembly instructions

SCREENLINE
SCREENLINE ARENA manual

Kvik
Kvik Tinta Assembly guidelines

Kogan
Kogan COD-C5-3D-WD-AB Assembly instructions

cozee home
cozee home Cozee Stool 520863 Assembly & use instructions

Sunnydaze Decor
Sunnydaze Decor MID-CENTURY MODERN TV STAND manual