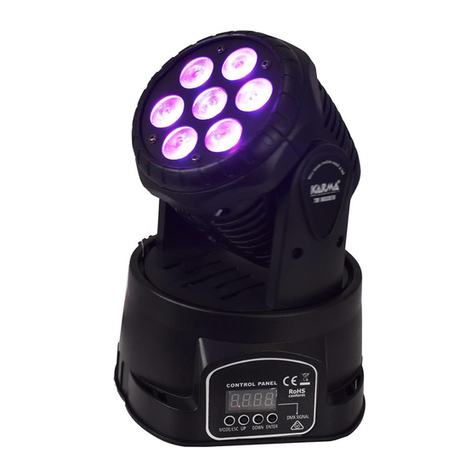
Karma LED BAR72 User manual

www.karmaitaliana.it
Manuale di istruzioni
Instruction manual
IE
LED BAR72
Barra a led 24 x 3W
24 x 3W led bar

32
Grazie per aver scelto il
marchio KARMA
Il prodotto KARMA da Lei acquistato è frutto di
un’accurata progettazione da parte di ingegneri
specializzati. Per la sua fabbricazione sono stati
impiegati materiali di ottima qualità per garantirne
il funzionamento nel tempo. Il prodotto è realizzato
in conformità alle normative imposte dall’Unione
Europea, garanzia di adabilità e sicurezza. Vi
consigliamo di leggere attentamente questo manuale
prima di iniziare ad utilizzare l’apparecchio, al ne di
sfruttarne appieno le potenzialità. Augurandoci che
rimarrete soddisfatti del vostro acquisto, Vi ringraziamo
nuovamente per la ducia riposta nel nostro
marchio e vi invitamo a visitare il nostro sito internet
www.karmaitaliana.it
dove troverete l’intera gamma dei prodotti KARMA,
insieme ad informazioni ed aggiornamenti utili.
Thank you for choosing
KARMA brand
The KARMA product you have purchased is the
result of careful planning by specialized engineers.
High quality materials were used for its construction,
to ensure its functioning over time. The product is
manufactured in compliance with the strict regulations
imposed by the European Union, a guarantee of
reliability and safety. We suggest to read this manual
carefully before starting to use the device in order to
take advantage of its full potential. Hoping that you
will be satised of your purchase, we thank you again
for your trust in our brand and we invite you to visit
our website
www.karmaitaliana.it
where you will nd the whole range of KARMA
products, along with useful information and updates.
Precauzioni ed
avvertenze
• Leggete con attenzione le istruzioni riportate su
questo manuale e seguitele scrupolosamente.
• Conservate il manuale per future consultazioni e
allegatelo se cedete l’apparecchio ad altri.
• Il dispositivo funziona con pericolosa tensione di
rete 230V. Non apritelo, non smontatelo e non
cercate di intervenire al suo interno. In caso di
utilizzo improprio esiste il pericolo di una scarica
elettrica.
• Per l’installazione rivolgetevi a un tecnico
qualicato.
• Quando collegate l’apparecchio controllate
sempre che la tensione del prodotto corrisponda a
quella della fonte di alimentazione.
• Evitate di utilizzare l’unità:
- in luoghi con temperatura superiore ai 40°C
- in luoghi soggetti a vibrazione e/o possibili urti
- in luoghi esposti alla pioggia o con troppa
umidità.
• Questo prodotto è destinato ad uso interno.
• Evitate che nel prodotto entrino liquido
inammabile, acqua o oggetti.
• Installate il prodotto in posizione areata, lontano
da fonti di calore e non ostruite le prese d’aria.
• Non toccate il prodotto con le mani bagnate.
• Non posizionate recipienti pieni di liquido, come
ad esempio vasi, sull’apparecchio o in prossimità
Cautions and
warnings
• Read carefully the instructions given in this
manual and follow them strictly.
• Keep this manual for future reference and
include it if you give the product to another
user.
• This device works with dangerous 230V mains
power. Do not open, do not disassemble and
don’t try to operate inside. In case of wrong use
an electric shock may occur.
• Contact a specialized technician for the
installation.
• When you connect the device always check
that the voltage set on the unit corresponds to
the power outlet voltage.
• Avoid using the unit:
- in places with temperatures above 40° C
- in places subject to vibrations and / or
possible impacts
- in places exposed to rain or humidity.
• This product is designed for indoor use only.
• Do not allow ammable liquid, water or objects
to enter the product.
• Install the product in a ventilated position, far
from heat sources and don’t obstruct the air
vents.

32
Spedizione
e reclami
Al momento dell’acquisto o della ricezione del
prodotto aprite la scatola e controllate attentamente
il contenuto per accertarvi che tutte le parti
siano presenti e in buone condizioni. Segnalate
immediatamente al venditore eventuali danni da
trasporto subiti dall’apparecchio.
In caso di invio in assistenza è importante che
il prodotto sia completo dell’imballo originale: vi
suggeriamo quindi di conservarlo, assieme allo
scontrino o fattura d’acquisto.
Shipment
and complaints
When purchasing or receiving the product, open
the box and carefully check the content, to make
sure that all parts are present and in good condition.
Report any transport damage suered by the device
to the seller immediately.
If you send the product for repair, it must be shipped
with complete original packaging: we therefore
recommend to keep it, along with the invoice or the
purchase receipt.
di esso.
• In caso di problemi di funzionamento
interrompete l’uso immediatamente.
Non tentate di riparare l’apparecchio per
conto vostro, ma rivolgetevi all’assistenza
autorizzata. Riparazioni eettuate da personale
non competente potrebbero creare gravi danni
sia all’apparecchio che alle persone.
• Scollegate l’unità dall’alimentazione quando
non è in uso.
• Lasciate rareddare il prodotto prima di
eettuare pulizia o manutenzione.
• Se il prodotto non si accende controllate il
fusibile e se necessario sostituitelo con uno
dello stesso tipo e amperaggio, dopo aver
scollegato l’apparecchio dall’alimentazione.
• Non staccate il cavo di alimentazione tirandolo
dal lo.
• Non tagliate, piegate, danneggiate o modicate
il cavo di alimentazione e controllate sempre
che sia in buone condizioni.
• Evitate di guardare direttamente il fascio di
luce a distanza ravvicinata.
• Per la pulizia del prodotto usate
esclusivamente uno straccio umido, evitando
solventi o detersivi di qualsiasi genere
• Tenete lontano dalla portata dei bambini.
• Don’t touch the product with wet hands.
• Do not place any recipients lled with liquids,
such as vases, on top of or directly next to the
appliance.
• In the event of a serious operating problem,
stop using the product immediately. Never
try to repair it by yourself, but contact the
authorized technical service center. Repairs
carried out by unskilled persons could lead
to serious damages both to the xture and to
people.
• Disconnect the unit from power when it is not
used.
• Wait for the product to cool before cleaning or
maintenance.
• If the product doesn’t turn on, check the fuse
and if necessary replace it with one of the
same type and rating, after disconnecting the
xture from power.
• Never disconnect the product from the power
source by pulling on the cord.
• Do not cut, kink, otherwise damage nor modify
the power supply cord and periodically check
that it is in good condition.
• Avoid looking directly at the light beam from a
short distance.
• To clean the product, use only a damp cloth,
avoiding solvents or detergents of any kind.
• Keep away from children’s reach

54
1. Posizionate la barra a piacimento utilizzando
la doppia staa per ssarla a traliccio o
semplicemente appoggiarla su qualsiasi
supercie. I pomelli di serraggio assicureranno
che rimanga in posizione.
Assicuratevi di non installarla in ambienti umidi
o troppo caldi, lasciando libere le prese d’aria.
2. Se intendete utilizzarlo collegato ad un impianto
DMX, collegate i cavi in entrata ed uscita alle
prese DMX IN / DMX OUT(4-3).
3. Collegate il cavo (2) di alimentazione ad una
presa elettrica 230V.
4. Tramite la presa( 10) potrete alimentare a
cascata un altro faro LED BAR72
Una volta completati questi passaggi siete pronti per
utlizzare l’apparecchio.
Questo apparecchio può essere utilizzato in diverse
modalità:
- Funzionamento in manuale
- Modalità Automatico
- Modalità attivazione sonora
- Modalità DMX (2/3/4/6/7/12/24 CH)
FUNZIONAMENTO/ OPERATION
Prima di eettuare i collegamenti, assicuratevi
che l’unità sia scollegata dalla corrente. Tutti i
collegamenti devono avvenire ad apparecchio
spento.
Before making any connection, check that the
unit is unplugged from the electrical outlet. All
connections must be made with the appliance
turned o.
1. Position the bar at will using the double bracket
to mount it on stand or simply place it on at
surface. The locking knobs will ensure it stays
in place.
Make sure you do not install it in humid or too
hot environments, leaving the air vents free.
2. If you mean to use it in a DMX system, connect
the incoming and outgoing cables to the DMX
IN / DMX OUT sockets (4-3).
3. Connect the power cable (2) to a 230V electric
socket.
4. Using the plug (10) you can power in cascade
connection another unit of LED BAR72.
Once these steps have been completed, you are
ready to use the device.
This xture can be used in dierent ways:
- Manual operation
- Auto mode
- Sound activation mode
- DMX mode (2/3/4/6/7/12/24 CH)
LED BAR72
23 - MADE IN CHINA
ATTENZIONE
RISCHIO DI SCOSSA
ELETTRICA, NON APRIRE
AVVERTENZA: PER RIDURRE IL RISCHIO DI SCOSSA
ELETTRICA, NON TOGLIETE IL COPERCHIO, NON CONTIENE
PARTI UTILI PER L'UTENTE. PER L'ASSISTENZA FATE
RIFERIMENTO A PERSONALE QUALIFICATO POWER OUT
26:26
LED BAR72
23 - MADE IN CHINA
ATTENZIONE
RISCHIO DI SCOSSA
ELETTRICA, NON APRIRE
AVVERTENZA: PER RIDURRE IL RISCHIO DI SCOSSA
ELETTRICA, NON TOGLIETE IL COPERCHIO, NON CONTIENE
PARTI UTILI PER L'UTENTE. PER L'ASSISTENZA FATE
RIFERIMENTO A PERSONALE QUALIFICATO POWER OUT
26:26
9876
4 3 2 1
5

54
LED BAR72
23 - MADE IN CHINA
ATTENZIONE
RISCHIO DI SCOSSA
ELETTRICA, NON APRIRE
AVVERTENZA: PER RIDURRE IL RISCHIO DI SCOSSA
ELETTRICA, NON TOGLIETE IL COPERCHIO, NON CONTIENE
PARTI UTILI PER L'UTENTE. PER L'ASSISTENZA FATE
RIFERIMENTO A PERSONALE QUALIFICATO POWER OUT
26:26
10
MANUAL OPERATION
Referring to the chart on the next page, you can use
the buttons 6-9 to choose the desired functions and
change the intensity (as in the case of colours) or
speed (as for strobe function).
AUTO MODE
Select from the display one of the modes from
“1Uxx” to “9Uxx”, or a function from “1dxx” to “6dxx”.
Each of them is related to a dierent auto mode.
Using UP and DOWN keys it is possible to change
the operating settings.
SOUND ACTIVATION MODE
By selecting the “SUxx” function on the display, you
set the sound activation mode and the bar will light
up following the rhythm of music.
DMX MODE
This xture can be connected to a professional DMX
system to be managed in all its functions by means
of an optional controller. Connect it to the system
using the sockets (3 and 4), then set on the display
the desired operating mode, choosing the number of
channels that will control the led bar. To do this refer
to the charts on the next pages.
DISPLAY
Press repeatedly the “Menu” buttons (8 or 9) to
select the desired function. Use the Down (6) and
Up (7) keys to scroll through the values. The display
will help you choose the desired function and set its
parameters correctly.
In the next pages there are the various functions
shown on the display and the related submenus.
FUNZIONAMENTO IN MANUALE
Riferendovi alla tabella riportata nella pagina
successiva, potrete agire sui tasti 6-9 per scegliere
la funzione desiderata e variarne l’intensità (come
nel caso di un colore) o la velocità (come nello
strobo).
MODALITA’ AUTO
Selezionate dal display una delle modalità da
“1Uxx” a “9Uxx”, piuttosto che una funzione
da “1dxx” a “6dxx”. Ognuna è ralativa ad una
funzione automatica dierente. I tasti UP e
DOWN permettono di variarne i parametri di
funzionamento.
MODALITA’ ATTIVAZIONE SONORA
Selezionando la funzione “SUxx” sul display, viene
impostata la modalità attivazione sonora e la barra
si accenderà a tempo di musica.
MODALITA’ DMX
Questo apparecchio è in grado di collegarsi ad un
impianto professionale DMX per essere controllato
in tutte le sue funzioni da una centralina opzionale.
Collegatelo all’impianto sfruttando le prese (3
e 4), quindi impostate sul display la modalità di
funzionamento desiderata, scegliendo il numero
di canali che gestiranno la barra a led. Per fare ciò
riferitevi alle tabelle nelle pagine seguenti.
DISPLAY
Premete ripetutamente i tasti “Menu”(8 o 9) per
selezionare la funzione desiderata. Utilizzate i tasti
Down (6) e Up (7) per scorrere i valori. Il display
vi aiuterà a scegliere la funzione desiderata e a
settarne i parametri correttamente.
A seguito sono riportate le varie funzioni mostrate
dal display ed i relativi sottomenu.
Table of contents
Other Karma Dj Equipment manuals

Karma
Karma LED PAR27 User manual

Karma
Karma DJ 368MP3 User manual

Karma
Karma TM WASH70 User manual

Karma
Karma TM SPOT30 User manual

Karma
Karma LED PAR120Q User manual

Karma
Karma BM 661USB User manual

Karma
Karma MOT 4 User manual

Karma
Karma LED PAR27 User manual

Karma
Karma LED PAR120 User manual

Karma
Karma BUBBLE PRO3 User manual