manuals.online logo
Brands
  1. Home
  2. •
  3. Brands
  4. •
  5. Karol
  6. •
  7. Indoor Furnishing
  8. •
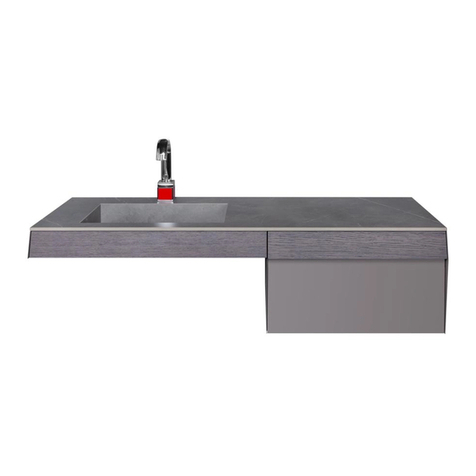
  9. Karol URBAN CHIC Assembly instructions

Karol URBAN CHIC Assembly instructions

URBAN CHIC
Instructions of assembly
We recommend to stick always to these simple rules. Karol disclaims all responsibility in case of breakages due to improper handling and assembling.
Handling of glass and stone tops
1) Glass and stone tops must be always leant perpendicular
to the floor and carried in their wooden crate to the instal-
lation site.
Sharp movements or strokes may easily cause cracks.
2) Place the wooden crate on the narrow side just in front
of the installation site, open it cautiously and take the
glass/stone top out.
3) Glass/stone tops must be carried and lifted to wished
height taking care of keeping them always perpendicular
to the floor.
An improper lifting or an incorrect transport may cause
cracks of glass/stone tops.
4) Carry the top in the proper mounting position.
1)
2)
3)
4)
1
We disclaim all responsibility if the assembling is not carried out as advised.
Assembling instructions for hanging vanity units and wall
cabinets “Urban chic”
Assembling
1) Fix the “E” bracket to the wall at wished height (height
depends on use of under or over top built-in basins).
PLEASE NOTE:
IT IS VERY IMPORTANT TO MOUNT THE BRACKET
LEVELLED
2) Open the drawers and the large pull-out drawers “A”
completely, push them up and take them out.
3) Place the cabinet on the bracket “E”, mark holes, drill and
insert screw anchors.
4) Place the cabinet on the bracket “E” again, insert screws
and screw.
5) Extract the metallic slides totally and place the drawers
or the pull-out drawers there on. Then push them to
closing. If the drawers do not perfectly suit, open
them totally and close them again.
6) Act on the arm “D” to line up the fronts; if the wall is not
perfectly levelled, act on the screws “C”.
We disclaim all responsibility if the assembling is not carried out as advised.
2
Assembling
1) Fix the bracket “A” in line with the wall, mark holes, drill,
insert screw anchors and screw.
2) Hang the cabinet on the bracket “A” by adjusting the screw
“B” from inside to level it.
3) Fix the cabinet by screws “C”.
4) If front doors are not perfectly levelled, that is due to
irregular wall. So, level them by adjusting screws “B” and
“C”.
Assembling instructions for wall cupboards “Urban chic”
3
We disclaim all responsibility if the assembling is not carried out as advised.
3
Drawers fronts “Urban chic”
Adjustment
1) Remove the side plate.
2) Vertical adjustment.
3) Horizontal adjustment.
1 mm to the right
1 mm to the left
2 mm
+
---
We disclaim all responsibility if the assembling is not carried out as advised.
4
Assembling instructions for undertop basin “Urban chic”
Assembling
1) Place the basin “A” on the cabinet “B”.
2) Put silicone on the basin’s edge”A”.
3) Put silicone on the edge of top “D” side against
wall/walls.
4) Place the top on the cabinet and act on “C” screws
pushing up the basin as long as there is a perfect adhesion
between top and basin.
PLEASE NOTE:
On the top use only the supplied silicone.
We disclaim all responsibility if the assembling is not carried out as advised.
5
Assembling
1) Fix the “E” bracket to the wall at wished height.
PLEASE NOTE:
IT IS VERY IMPORTANT TO MOUNT THE BRACKET LEVELLED
PL
EASE
2) Open the drawers and the large pull-out drawers “B”
completely, push them up and take them out.
3) Place the cabinet on the bracket “E”, mark holes, drill and
insert screw anchors.
4) Place the cabinet on the bracket “E” again, insert screws
and screw.
5) Place the basin “A” on cabinet and fix it by screws “D”
from the inside of cabinet.
6) Extract the metallic slides totally and place the drawers or
the pull-out drawers there on. Then push them to closing.
If the drawers do not perfectly suit, open them totally and
close them again.
7) Act on screws “C” to line up the fronts.
Assembling instructions for “Urban chic” standing basin K9504
We disclaim all responsibility if the assembling is not carried out as advised.
6
Electrical connecting/maintenance for “Urban chic” internal
lighting kit
Assembling
1) Unscrew the screws “A” and remove the white panel.
2) Insert the electric cable in the hole “B” and connect it to
the terminal board “C”.
3) Close the unit with the white panel by fixing it with screws
“A”.
We disclaim all responsibility if the assembling is not carried out as advised.
7
Assembling
1) Place the screws “C” on the prearranged cuts on the
door.
2) Screw the screws “C” leaving the space to insert the fitting
“A”; insert the fitting “A” and tighten the screws.
Assembling instructions for internal fittings “Urban chic”
We disclaim all responsibility if the assembling is not carried out as advised.
8
Assembling instructions for towel holder “Urban chic”
Assembling
1) Place the screws “C” on the prearranged cuts “E” as per
drawing “D”.
2) Place the supplied cylinders between the towerl holder
“A” and the door “B” and screw.
We disclaim all responsibility if the assembling is not carried out as advised.
9
Mirror stirrup
Wall hook
Screw + plug
Screw + plug
Assembling instructions for mirrors “Urban chic”
Assembling
1) Fasten the two hooks “G” to the wall by acting on “E”
screws.
2) Place the mirror acting on hook “G”.
3) Unhook the mirror and fasten “F” screws.
PLEASE NOTE:
For the mirror’s cleaning we recommend to use only denatured
alcohol.
The Company is not responsible for damages caused by the
use of different products.
Mirror stirrup
Wall hook

Other Karol Indoor Furnishing manuals

Karol SIGNATURE User manual

Karol

Karol SIGNATURE User manual

Karol K08 Assembly instructions

Karol

Karol K08 Assembly instructions

Karol Alpha 1 Installation guide

Karol

Karol Alpha 1 Installation guide

Karol KUT User manual

Karol

Karol KUT User manual

Popular Indoor Furnishing manuals by other brands

Regency LWMS3015 Assembly instructions

Regency

Regency LWMS3015 Assembly instructions

Furniture of America CM7751C Assembly instructions

Furniture of America

Furniture of America CM7751C Assembly instructions

Safavieh Furniture Estella CNS5731 manual

Safavieh Furniture

Safavieh Furniture Estella CNS5731 manual

PLACES OF STYLE Ovalfuss Assembly instruction

PLACES OF STYLE

PLACES OF STYLE Ovalfuss Assembly instruction

Trasman 1138 Bo1 Assembly manual

Trasman

Trasman 1138 Bo1 Assembly manual

Costway JV10856 manual

Costway

Costway JV10856 manual

moss DESIGN Caisson Credenza Assembly instructions

moss DESIGN

moss DESIGN Caisson Credenza Assembly instructions

Aquaglide FULL DECK 15.0 owner's manual

Aquaglide

Aquaglide FULL DECK 15.0 owner's manual

AREBOS AR-HE-SW30 user manual

AREBOS

AREBOS AR-HE-SW30 user manual

Till-Hilft Fulda 87005.330 Assembly instructions

Till-Hilft

Till-Hilft Fulda 87005.330 Assembly instructions

Twoey Outside 2010 quick start guide

Twoey Outside

Twoey Outside 2010 quick start guide

Hettich Easys 200 operating instructions

Hettich

Hettich Easys 200 operating instructions

The bedboss RELAX 404 Series owner's manual

The bedboss

The bedboss RELAX 404 Series owner's manual

Oeseder Möbelindustrie Bern 991 720 Assembly instructions

Oeseder Möbelindustrie

Oeseder Möbelindustrie Bern 991 720 Assembly instructions

Costway HW68469 user manual

Costway

Costway HW68469 user manual

Next ALIX A27743 Assembly instructions

Next

Next ALIX A27743 Assembly instructions

BROSA Hans Assembly guide

BROSA

BROSA Hans Assembly guide

Prodigg MINIKA PBA015T-FUR installation manual

Prodigg

Prodigg MINIKA PBA015T-FUR installation manual

manuals.online logo
manuals.online logoBrands
  • About & Mission
  • Contact us
  • Privacy Policy
  • Terms and Conditions

Copyright 2025 Manuals.Online. All Rights Reserved.