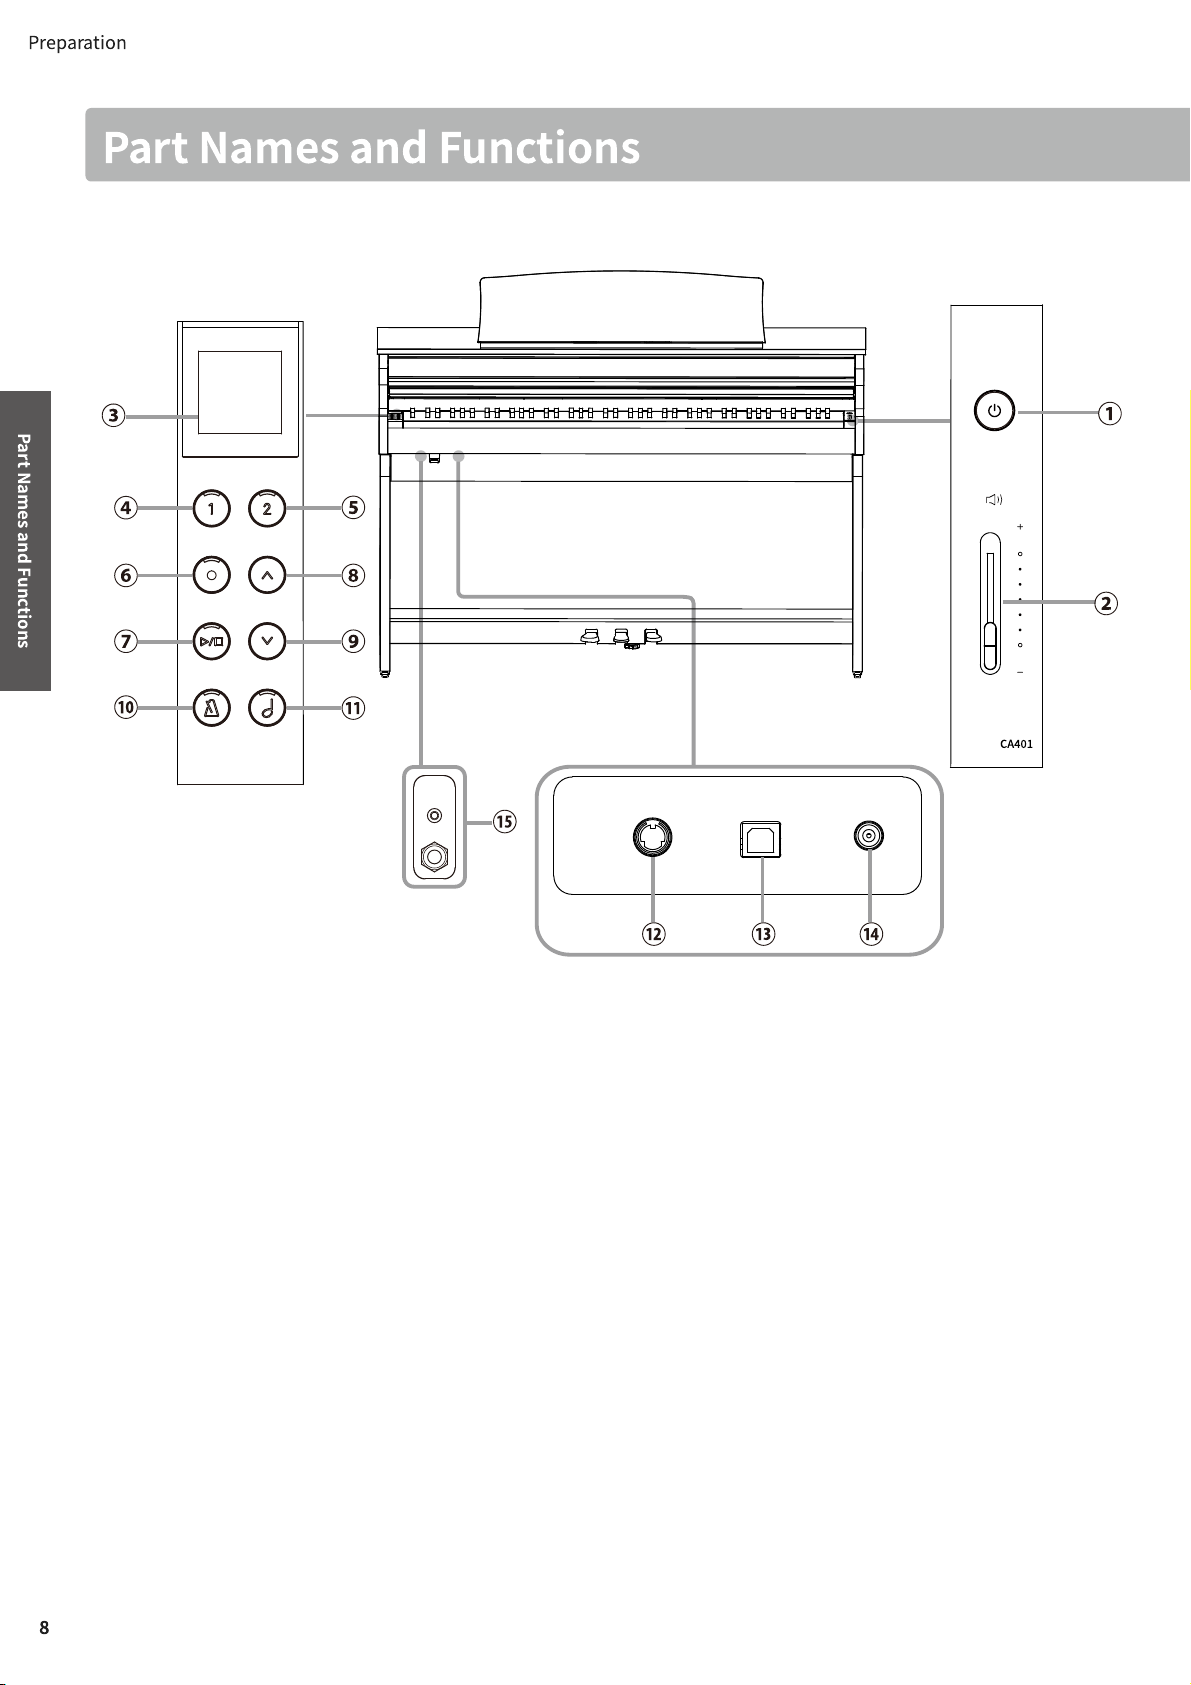
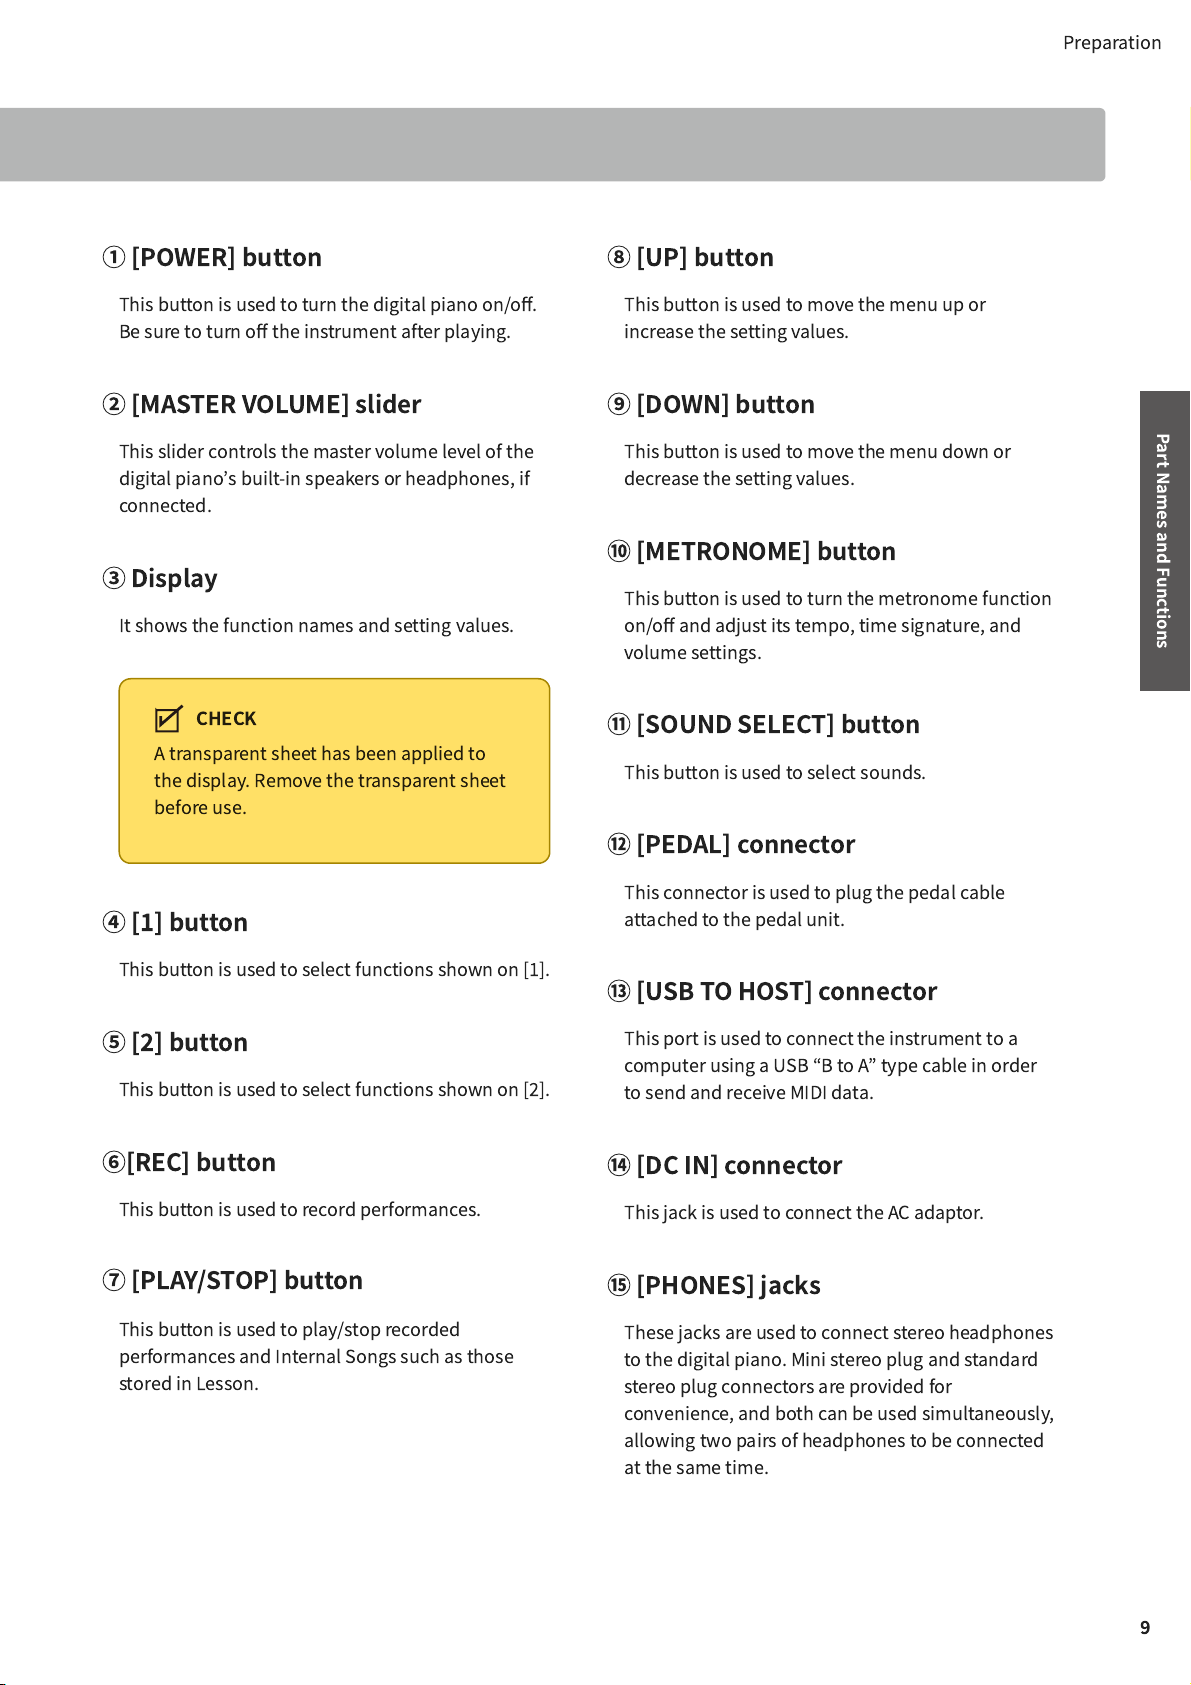
Kawai CA401 User manual
Other Kawai Musical Instrument manuals

Kawai
Kawai ES100 User manual

Kawai
Kawai E-520 User manual

Kawai
Kawai Digital Piano model 2000 2000 User manual

Kawai
Kawai MP6 User manual

Kawai
Kawai ES4 User manual

Kawai
Kawai SR5 User manual

Kawai
Kawai Friendly Digital Piano Forte PV35 User manual

Kawai
Kawai KDP80 User manual

Kawai
Kawai ES4/es1P User manual

Kawai
Kawai ES110 User manual

Kawai
Kawai Stage Piano MP8 User manual

Kawai
Kawai CN25 User manual

Kawai
Kawai MR270 User manual

Kawai
Kawai ES520 Manual

Kawai
Kawai AnytimeX User manual

Kawai
Kawai KDP70 User manual

Kawai
Kawai CL36 User manual

Kawai
Kawai PN Series User manual

Kawai
Kawai Digital Piano CA91 User manual

Kawai
Kawai Digital Piano CA750 User manual