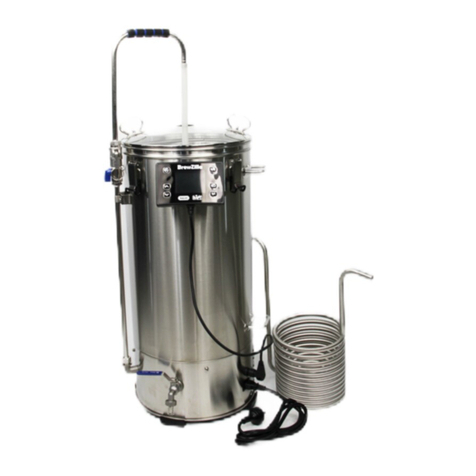
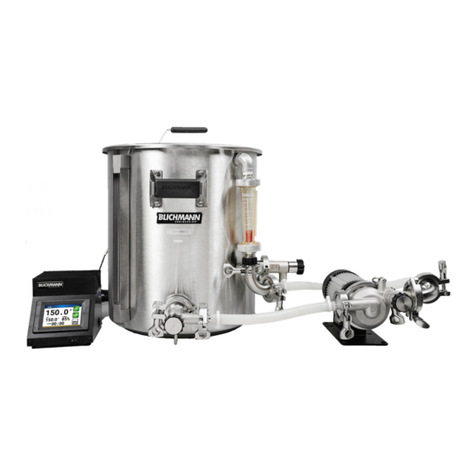
KegLand BrewZilla 35L User manual

Page 1of 29 http://www.KegLand.com.au Last Updated 12/01/2021 09:01 AM
Instruction Sheet
WELCOME TO THE CLUB
BrewZilla 35L
All-in-one Brewery with integrated
Pump
Generation 3.1.1

Page 2of 29 http://www.KegLand.com.au Last Updated 12/01/2021 09:01 AM
WARNING IMPORTANT INFORMATION!
1. Please read this ENTIRE instruction sheet before using the BrewZilla unit. If
you are unsure about any part of using this brewery please refer to the
YouTube videos that we have made or contact your local distributor.
2. If the BrewZilla is damaged in any way do not use it. Contact your local
distributor.
3. NEVER turn on the pump without attaching the recirculation arm shown in
step 4 of the instructions. If you do not fit this arm you could be at risk of
spraying hot wort into the air causing injury.
4. NEVER turn on the pump without first attaching the recirculation arm first.
Also do not run the pump dry for extended periods. This can damage the
pump.
5. NEVER lift the BrewZilla when it is completely full, we strongly urge you to
use a hose to fill your unit. Use the pump or ball valve to transfer your wort.
Lifting a heavy / hot BrewZilla may result in serious injury. The new
secondary handle is for cleaning purposes only.
6. If at any stage the recirculation arm is not fitted and/or needs to be removed
always ensure the ball valve is turned off (see instructions under the
heading
7. NEVER clear a blocked pump by spraying water down the recirculation arm
or directly into the pump inlet.
8. Do not boil dry. Do not turn on the elements if there is less than 4 liters of
liquid in the boiler. This is the minimum fill level.
9. Use only the recommended cleaners and sanitiser products listed in the
recommended accessories section (p.20-22). Using chemicals not tested or
recommended on the BrewZilla can result in permanent damage and void
warranty.
If you require further assistance with chemical compatibility
please contact

Page 3of 29 http://www.KegLand.com.au Last Updated 12/01/2021 09:01 AM
Parts Checklist
Main BrewZilla Gen3.1.1 Unit With Pump
½” Ball Lock Assembly with 13mm Barbed Hose Fitting
Glass Lid with Recirculation Hole
2 x Black Lid Knobs
Immersion Chiller
Male Camlock Recirculation Arm Extension
White Camlock Silicone Washer for Female Camlock
0.5m Silicone Hose for recirculation arm
BrewZilla Boiler Perforated False Bottom
Hoop Ring Assembly: 2 x Nut 2 x Washer
Malt Pipe Assembly:
Malt Pipe Body
Malt Pipe Handle
Malt Pipe Threaded Lower Tube with stop lock (3/8” thread)
Malt Pipe Upper Tube with pinch compression spring
Malt Pipe Overflow Funnel for Upper Tube
Malt Pipe Reinforced Bottom Screen - 3/8 female thread
(No Seal Required)
Malt Pipe Reinforced Cover Screen (No Seal Required)
Malt Tube Black Silicone Plug

Page 4of 29 http://www.KegLand.com.au Last Updated 12/01/2021 09:01 AM
Before We Start
Your BrewZilla will enable you to have the freedom in
crafting your own craft beer.
In this instruction manual we’ll teach you the basics
to get you on your way to making your very
own all-grain craft beer.
The BrewZilla was created to help introduce the
public into All Grain Brewing without the headaches
of drilling holes in pots and wiring up boxes. Here we
strive to help you on your journey into the homebrew
world. With a world class customer support base
behind us and a growing community of friendly and
helpful brewers of all
skill levels, we all strive to get each other’s beer to be the best beer you can make.
Firstly, there are some things we need to discuss in terms of safety.
As we will be dealing with electricity, hot liquids, pumps etc. There are some
inherent dangers that need to be considered prior to operating. Always use a sturdy
bench where the BrewZilla cannot fall over. Do not brew in an area with poor
ventilation, high foot traffic area or any area where children can reach the BrewZilla
unit.
Before you start using the brewery check that you have all
the components in these instructions. Please also check
that before you fill the BrewZilla unit that this ball valve on
the side of the unit is turned off and is in the horizontal
position (shown in the picture to the right).
The bottom of the BrewZilla has been lifted and vent holes
multiplied. For this reason you can brew directly on a flat
surface without fear of parts overheating with extended
boils.

Page 5of 29 http://www.KegLand.com.au Last Updated 12/01/2021 09:01 AM
Boiler Perforated False Bottom Assembly This
model of BrewZilla has been designed with a
perforated false bottom (legged false bottom) for
the boiler. This false bottom HAS NOT been
designed so you can place grain directly onto this
screen. This false bottom is designed to protect
your pump from solids and drawing in things
such as hop pellets, flowers, spices, grain, etc.
This false bottom adds significantly to the reliable
operation of the BrewZilla units and it’s
recommended that this screen is always in place
if the pump is going to be used.
The false bottom has legs that suspend the false
bottom about 20mm above the base of the boiler
so all liquid that exits into the pump our out via
the ball valve will be filtered using this screen.
A fully stainless hoop ring with a thread and nut
will need to be manually attached to aid in lifting
out the false bottom. These parts will be in your
BrewZilla kit.
Once the screen is in place, fill the boiler with the
desired amount of water for mashing in. Set the
temperature on the display and wait for the water
to heat up.

Page 6of 29 http://www.KegLand.com.au Last Updated 12/01/2021 09:01 AM
2. Tap Assembly
Currently the tap is not fitted to the BrewZilla unit for risk of damage in transport. The
tap for the BrewZilla is fairly straight forward to fit. Make sure the silicone seal is on the
tap body prior to installation. (see image below).
The lock nut can be tightened onto the thread from the inside of the BrewZilla boiler.

Page 7of 29 http://www.KegLand.com.au Last Updated 12/01/2021 09:01 AM
bottom screen.
3.
Malt Pipe Assembly
The malt pipe is the pie that sits inside the boiler and contains
your grain. The malt pipe is made up of a top screen and a
The top screen is optional, the system can be used without it if
you prefer to gently stir the mash.
As you can
see from the right
,
the bottom screen looks slightly
different and it has no silicone seal, it does however have a
stainless threaded fitting for the lower malt pipe. Screw this
threaded rod onto the bottom screen as shown.
Once the rod is screwed onto t
he bottom screen
,
place the bottom
screen inside the malt pipe so it’s at the bottom of the malt pipe.
Now slide the stainless extension
tube
over the lower half
that you
just attached to the bottom screen
.
There is no need to push this
extension tube all
the way to the bottom. Squeeze the two wires
together to loosen the tension. It will click into place at the
m
aximum height.
After you have attached the extension pipe you can then use the
small black silicone plug and put this over the hole at the top o
f
the extension pipe. This plug will prevent grain for pouring into
the middle of the pi
pe and ending up in the boiler.
If you lose this
piece,
you can
simply place foil over the top.

Page 8of 29 http://www.KegLand.com.au Last Updated 12/01/2021 09:01 AM
4. Fitting the Malt Pipe Handle
We recommend installing the malt pipe
handle before you add your grain and
malt pipe into your BrewZilla
To fit the handle feed one end of the
handle through one hole in the malt pipe.
Push the handle in on one side far
enough so you have enough clearance
on the other side to feed the handle into
the opposing hole.
Once the handle has been fitted you can
lift/maneuver the malt pipe easily.

Page 9of 29 http://www.KegLand.com.au Last Updated 12/01/2021 09:01 AM
5. Mashing
We recommend lifting up the malt pipe empty to insert the
malt pipe handle before you add your grain.
Once the malt pipe has been assembled and you have the
grain stopper in place you can pour your grain into the malt
pipe. The malt pipe is designed to take up to about 9kg of
grain but in the majority of recipes you will probably only
probably use 4-5kg.
Once the grains have been poured into the malt pipe it’s
important to stir in the grains and remove all dough balls (dry
spots). Thoroughly stirring the grain will take you about 2-5
minutes.
Once you have stirred in the grain fit the top screen (show to
right)
The top screen should be placed so that it lightly touches the
top of the grain
NOTE: Once you have fitted the top screen use the stainless
overflow cone and place this over the extension tube with the
cone side facing up.
Push down on the cone until the extension tube and cone is
sitting gently against the top screen. (shown to the left)
Please note: Only use 500w element to increase temperature
when Malt Pipe is inserted.
Using the powerful 1900w element with malt pipe inserted may scorch the bottom
of your BrewZilla and result in some pretty nasty sweet flavours.
NOTE: The wattage buttons on 110-120v BrewZilla units is less.

Page 10 of 29 http://www.KegLand.com.au Last Updated 12/01/2021 09:01 AM
6. Fitting the Camlocks together
Recirculation is something that can be done easily using the
pump that is built into this model of BrewZilla.
It is recommended to purchase some extra silicon tubing with
the BrewZilla as this will help with transferring the wort from the
BrewZilla unit to your fermenter using the pump or the ball
valve.
If you are recirculating during mashing it is recommend that you
only use the 500watt element. This will normally be fast enough
on its own to gently heat the mash.
The recirculation speed can be controlled using the ball valve at
the base of the recirculation arm.
NOTE: Due to the power constraint on 110v AC systems the
wattage of the 110v BrewZilla units in countries such as
America will be less than what is shown in the photos to the
right.
WARNING: The recirculation arm must be fitted whenever the
pump is in use. Follow these instructions to fit the recirculation
arm.
Before attaching your recirculation arm, please check to see if
the silicone washer is still in the female camlock. If that has
rattled loose or fallen off it will not make an entire seal and will
leak when the pump is in use.
We must stress not to rotate the rotating racking arm while it is engaged in the lock
down position. If you need to rotate the racking arm to fill your fermenter, please
switch off the pump and readjust the camlock to the position you need then
reengage the camlock.

Page 11 of 29 http://www.KegLand.com.au Last Updated 12/01/2021 09:01 AM
7. Temperature
The temperature on the display reads the
temperature at the bottom of the boiler near where
the element is mounted. It is important to
understand that this is not the core temperature of
the mash. If you recirculate for long enough the
mash temp will eventually be close to the display
temp. With that said if you want to increase the
temperature of the mash it is normally fastest and
easiest to overshoot the desired mash temperature
by a few degrees while using a secondary thermometer in the mash to keep an
eye on the core temperature of the mash.
The photo to the right shows the placement of the probe. The probe placement
has been designed like this as it prevents the element from overheating and
scorching wort by taking the temperature of the wort closest to the element. This is
why your strike temperature needs to accurate!
7.1 - Ultra Low Watt Density Elements -
ULWD
Meaning brighter beer can be brewed without the fear of
scorching and burnt off-flavours; From 9.4w+ per/cm² to
just 6w per/cm²

Page 12 of 29 http://www.KegLand.com.au Last Updated 12/01/2021 09:01 AM
8. Sparging
Once you have mashed your grain for 60-90
minutes it’s then time to sparge the grain.
Using the malt pipe handle lift the malt pipe out of
the boiler and rotate 90 degrees until you see the
feet of the malt pipe locate near the wire supports.
(see picture to the right)
Once the feet have been located place the malt
pipe down and ensure its securely in place.
Pour warm water (approximately 75-80C) on top of
the grain inside the malt pipe and this will rinse the
grain of the majority of remaining sugars. This
process will probably require 5-15 liters of water
depending on your recipe and desired gravity that
you are trying to achieve.
We highly recommend a secondary vessel to hold
hot/warm water for this process. If not hot water directly from your faucet will do.
9. Boiling
Boiling is one of the final steps to making beer in the BrewZilla. Simply set the
display to HH and turn on both elements, this will result in the elements remaining
on continuously. Once the BrewZilla has started to boil normally the single 1900
watt element is sufficient to maintain a constant rolling boil. Then make your hop
additions as per your recipe.

Page 13 of 29 http://www.KegLand.com.au Last Updated 12/01/2021 09:01 AM
10. Cooling
The BrewZilla includes an immersion cooling coil.
Optional counter flow chiller can be purchase separately but
these are complicated to use and it is sold as an optional
extra.
The immersion chiller is easy to use and clean. Simply
connect your garden hose to each end and run cold water
through this while it’s immersed in the wort inside the boiler.
If you were looking to save water you can also connect the immersion chiller to
your pump on your Brewzilla and then immerse your immersion
chiller in a bucket of ice water.
Compression fittings for the immersion chiller can be purchase
separately if you want to use threaded connections for camlocks or
garden hose fittings. (see picture below - part number KL02004).
This will enable any ½” BSP threaded fitting to be attached.
10.1 Hot Cubing
Another great method of cooling wort that saves time is
hot- cubing. If you fill an HDPE Cube or HDPE Bladder
(picture to the right) with hot wort then quickly fit the lid
this will keep your wort in a sanitary environment. If you
use this method make sure to purge air out of the cube /
bladder and then simply leave it at ambient temperature
for 24hrs to cool down. (Preferably out of direct sunlight)

Page 14 of 29 http://www.KegLand.com.au Last Updated 12/01/2021 09:01 AM
10.2 Ice Bath
Although the immersion cooling coil was intended to be used with cold water
running through it there is also another method that is worth mentioning. That is to
run the hot wort through the coil then to immerse the coil into an ice bath.
If you prefer to use this method then connect some silicone tubing to the
recirculation arm and then the other end to the immersion cooling coil. Recirculate
boiling wort through the coil and back into the boiler for at least 5 minutes to make
sure the coil is hot and any potential bacteria in the coil is exposed to boiling wort.
Then place the cooling coil into a bucket of ice water. Use the ball valve on the
recirculation arm to adjust the flow rate. Adjusting the flow rate on the recirculation
arm will affect the temperature on the output of the coil. So use this adjustment to
achieve your desired wort temperature so the wort is at a suitable temperature to
put into your fermenter.

Page 15 of 29 http://www.KegLand.com.au Last Updated 12/01/2021 09:01 AM
Digital Controller and Temperature
Settings
Display
Actual Temp –This displays the current temperature. Please be aware that this is
the temperature that is taken at the bottom of the BrewZilla close the element. As
a result this temperature will often not be the same as the core temperature inside
the grain in the malt pipe. Typically if you want to increase the core temperature of
the grain in the malt pipe you will have to set the target temperature several
degrees warmer than your desired mash core temperature.
Target Temp –This is the target temperature at which the elements will continue
to operate. Once the target temperature is reached the elements will turn off.
When set to a boil the symbols HH will be shown indicating that the elements are
always on.
Time Elapsed –This is the amount of time that has elapsed. This will only be
displayed in auto mode.
Target Time –This is the amount of time allocated to a particular stage. This will
only be displayed in auto mode. The once the time elapsed has reached the target
time the unit will cycle to the next stage.
Stages 1-6 –This model has 6 different stages at which you can preset a time and
temperature. Once the time has cycled out from one stage it will jump to the next
stage. Once all the stages are complete the alarm will sound. If you set 00:00 in
the time for a particular stage that stage will be skipped.

Page 16 of 29 http://www.KegLand.com.au Last Updated 12/01/2021 09:01 AM
Buttons
1. On/Off –This button is to turn off on or off the power.
2. Temp –Pressing this button will allow you to change the temperature.
Press this button once quickly and the target temperature setting will start
flashing. Then use the +/- buttons to adjust the temperature. The BrewZilla
can cycle between Celsius and Fahrenheit by simply pressing and holding
down the temp button for more than a few seconds.
3. Time –Pressing this button will allow you to change the target time.
4. Auto/Man –This button switches between automatic/stages and manual
mode.
5. +/-- The plus and minus buttons are to increment and decrease the time
and temperature settings.
6. S1-S6 –This button is to cycle between the different stages. This button will
only work in automatic mode not manual.
7. Play/Pause –This button will play or pause the brewing process. When the
pause button is pressed the elements are turned off and the timer will stop.

Page 17 of 29 http://www.KegLand.com.au Last Updated 12/01/2021 09:01 AM
Factory Reset
To reset all the settings on the BrewZilla and clear all the stages the fastest way to
do this is by quickly pressing the “+” and “-“ buttons at the same time quickly. Both
buttons must be pressed at exactly the same time in order for this to work. NOTE:
This reset will also reset the calibration figure.
Calibration
This model of BrewZilla has a temperature calibration feature. If you find that the
actual temperature on the display is not correct this can be calibrated. This
procedure is not normally required and if you are unsure of what you are doing it’s
best if you leave the calibration 0. To adjust the calibration settings follow the
instructions below:
1. Power up the BrewZilla and press the pause button.
2. Press and hold down the time button until the calibration number is
displayed.
3. Adjust the calibration number between -10 and +10. A positive figure will
increase the displayed temperature and a negative figure will decrease the
displayed temperature. For instance if your BrewZilla is reading 200C on the
display but it should be reading 250C then use a calibration figure of positive
5.
4. Press the time button again to return to the home screen.
Note: The calibration figure must be set in Celsius but it will affect the displayed
temperature in both Celsius and Fahrenheit.

Page 18 of 29 http://www.KegLand.com.au Last Updated 12/01/2021 09:01 AM
Manual Mode
The BrewZilla is easiest to operate in the manual mode. When in manual mode
there are only 4 buttons that you need to use. Temp, positive, negative, and
play/pause button. To adjust the temperature, you must pause the operation then
simply press the temp button and use the positive and negative buttons to adjust
the desired target temperature.
Auto Mode
There are two automatic modes which can be switched between. The first
automatic mode will start the timer before reaching the step temperature. The
second automatic mode will wait until the temperature of the step has been
reached before starting the timer for the step. To switch between automatic modes
hold the S1-S6 button for 5 seconds. If one beep is heard then it is in the second
mode whereas, if two beeps are heard then it is in the first mode.
In the automatic mode there are 6 different stages that can be set into the
BrewZilla. These stages can be used to program a stepped mash or alternatively it
can be used to set a timer to pre-heat water so your mash in water is already pre-
heated when you wake up on your brew day.
Once the play button has been pressed the stages will cycle through from S1 to S6.
If any of the stages are set with time being 00:00 then this stage will be skipped.
To setup the stages use the following instructions:
1. Press the pause button and put the BrewZilla into Auto mode using the
auto/man button.
2. Press the S1-S6 button to select the stage that you want to adjust.
3. Use the temp, time and positive and negative buttons to set the desired
temperature and time for that stage.
4. Press the S1-S6 button to move to the next stage and repeat step 3 until all
the desired stages are setup.
5. You do not need to use all stages if you do not want to. If you set a stage to
00:00 time this stage will be ignored.

Page 19 of 29 http://www.KegLand.com.au Last Updated 12/01/2021 09:01 AM
6. Once you finish setting up all the stages use the S1-S6 button to select the
stage that you want to start from (normally S1) then push the play button
and the stages will begin in sequence.
7. It is possible to jump forward and backward to different stages if desired. To
do this just hit the pause button then use the S1-S6 key to select the stage
you want to start then hit the play button and this stage will begin.
8. When a particular stage is being played the icon for that particular stage will
flash on the display.
9. When all stages are complete the BrewZilla will sound an alarm and it will
hold the last set temperature in the stage settings.

Page 20 of 29 http://www.KegLand.com.au Last Updated 12/01/2021 09:01 AM
Recommended Accessories
Heavy Duty Silicone Tubing
Silicone tubing is great for transferring the wort from the BrewZilla
unit to your fermenter or into a hot cube/bladder. We recommend
heavy duty silicone tubing with 12.5mm ID and 18.5mm OD. This
Silicone tubing is plasticiser free so there is no BPA. It’s also
suitable for temperatures up to 200C so it’s suitable for the transfer
of hot wort. Unfortunately, silicone tubing is more expensive than
vinyl (PVC) tubing however it’s better suited for this application.
(Part No. KL06873)
StellarClean
(Powerful Brewery Wash - PBW) is a buffered alkaline detergent
that has been proven to be more than an effective substitute for
caustic soda cleaners. Because of its unique formulation of
buffers and mild alkalis, it is safe on skin as well as soft metals
such as stainless steel, aluminum, and on plastics. StellarClean
uses active oxygen to penetrate carbon or protein soils and is
not affected by hard water. Works best in warm to hot water. It
will require to be rinsed with the same temperature water after
cleaning is finished. StellarOxy can also be used, but
StellarClean is recommended due to the increased potential of
hop oil residue left in the boiler.
(Part No. KL05494)
StellarSan
Phosphoric Acid Blend Sanitiser can be used to passivate
the internals of the BrewZilla back to their original shiny
finish. We recommend applying some undiluted to a rag,
rubbing the internals. Leave for 30 minutes and rinse with
cold water thoroughly until the foam subsides. You do not
need to sterilize your BrewZilla prior to use, as the boiling
action of the vessel will kill any harmful bacteria. But can be
done to ensure the upkeep of the stainless steel is as
protected as possible.
It is also a great brewery sanitizer for any of your equipment
that comes into contact with fermented beer. E.G mash
paddle if you’re adding gelatin / dextrose for clarifying /
priming and stirring the vessel.
(Part No. KL05494)
Table of contents
Other KegLand Brewing System manuals

KegLand
KegLand KL14649 User manual

KegLand
KegLand KL20671 User manual

KegLand
KegLand Fermzilla User manual
KegLand
KegLand Robobrew User manual

KegLand
KegLand KL20671 User manual

KegLand
KegLand KL25164 User manual

KegLand
KegLand Cannular Instruction manual

KegLand
KegLand Fermzilla User manual
KegLand
KegLand Fermzilla User manual

KegLand
KegLand Fermzilla User manual
Popular Brewing System manuals by other brands
BRAVILOR BONAMAT
BRAVILOR BONAMAT Aurora GTBSH-001 user manual

Curtis
Curtis G4 TPX Series user guide

Speidel
Speidel Braumeister PLUS 10 litres Original instruction manual

Newco
Newco BISTRO TOUCH LARGE CAPACITY manual

Tone
Tone TOUCH 01 Installation and user instructions

Klarstein
Klarstein Mundschenk 3XL manual