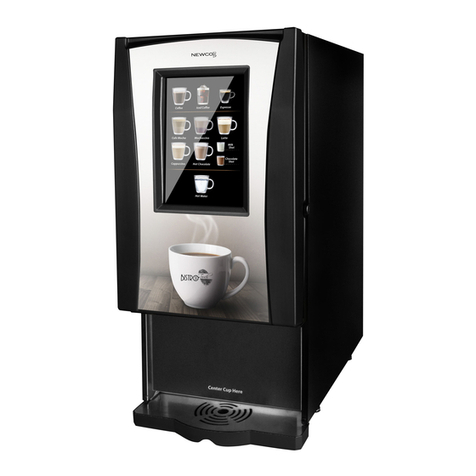
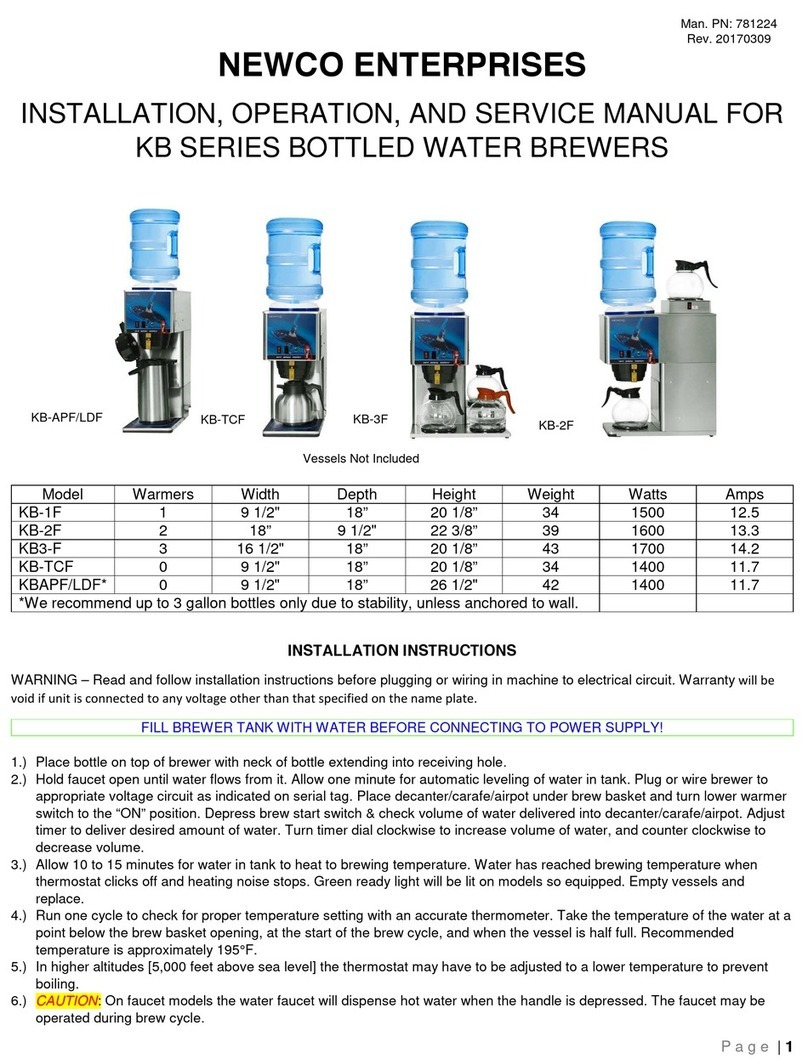
Newco BISTRO TOUCH LARGE CAPACITY User manual

Technical Service: 1-800-556-3926
MANUAL PN 128308 20230717MMF
BISTRO TOUCH MANUAL
LARGE CAPACITY
NEWCO ENTERPRISES INC,
3650 NEW TOWN BLVD SAINT CHARLES, MO 63301
1-800-325-7867
For brewer PN 128280
Shown with side car accessory, 128269-BPC
To order Brewer and Side Car together, order PN 128 02

B STRO TOUCH LARGE CAPAC TY PN 128308 20230717
Technical Service: 1-800-556-3926
2
NEWCO CONTACT INFORMATION
ADDRESS
NEWCO ENTERPR SES NC,
3650 NEW TOWN BLVD
SA NT CHARLES, MO 63301
CUSTOMER SERVICE PHONE
1-800-325-7867
TECHNICAL SERVICE PHONE
1-800-556-3926
FAX
1-636-925-0029
WEBSITE
newcocoffee.com
CUSTOMER SERVICE AND SALES EMAIL
sales@newcocoffee.com
MAINTENANCE INFORMATION
Machine Model ___________________________________________________________
Company nformation and Phone Number
___________________________________________________________________________
___________________________________________________________________________
___________________________________________________________________________
___________________________________________________________________________

B STRO TOUCH LARGE CAPAC TY PN 128308 20230717
Technical Service: 1-800-556-3926
3
TABLE OF CONTENTS
Warranty -------------------------------------------------------------------------------------------------- 4
Specifications ------------------------------------------------------------------------------------------- 6
Machine Set Up ---------------------------------------------------------------------------------------- 8
Plumbing ----------------------------------------------------------------------------------------------- 8
Electrical ----------------------------------------------------------------------------------------------- 8
nitial Set Up ------------------------------------------------------------------------------------------- 9
Machine Operation -------------------------------------------------------------------------------- 11
Drink Selection Menu ---------------------------------------------------------------------------- 11
Cleaning --------------------------------------------------------------------------------------------- 12
Machine Programming --------------------------------------------------------------------------- 13
Maintenance--------------------------------------------------------------------------------------- 14
Statistics ---------------------------------------------------------------------------------------------- 14
Setup -------------------------------------------------------------------------------------------------- 15
Calibration ------------------------------------------------------------------------------------------ 17
Recipe Entry ---------------------------------------------------------------------------------------- 18
Local Setup ----------------------------------------------------------------------------------------- 18
Servicing The Machine ---------------------------------------------------------------------------- 19
Access Points --------------------------------------------------------------------------------------- 19
Draining The Hot Water Tank ----------------------------------------------------------------- 19
Error Messages ------------------------------------------------------------------------------------- 20
Wiring Diagram ------------------------------------------------------------------------------------ 22

B STRO TOUCH LARGE CAPAC TY PN 128308 20230717
Technical Service: 1-800-556-3926
4
WARRANTY
This warranty supersedes all other previous warranties that are currently in manuals.
Newco warrants equipment manufactured by it for 1-year parts and labor. Accessories,
Dispensers, and Display Tablets - 1 Year parts only. Electronic Circuit and Control Boards-
years parts, 1 year labor. Equipment manufactured by others and distributed by Newco-
please see original equipment manufacturers warranty, Newco will follow.
These warranty periods run from the date of sale Newco warrants that the equipment
manufactured by it will be commercially free of defects in material and workmanship existing at the
time of manufacture and appearing within the applicable warranty period. This warranty does not
apply to any equipment, component or part that was not manufactured by Newco or that, in
Newco’s judgment, has been affected by misuse, neglect, alteration, improper installation or
operation, relocation or reinstallation, improper maintenance or repair, incorrect voltage applied to
the unit at any time, damage or casualty. This warranty does not apply to any equipment failures
related to poor water quality, excessive lime and chlorine and non-periodic cleaning and descaling.
Warranty is null and void if muriatic or any other form of hydrochloric acid is used for cleaning or
deliming. n addition, this warranty does not apply to replacement of items subject to normal use
including but not limited to user replaceable parts such as faucet seat cups, sight gauge tubes,
washers, o-rings, tubing, seals and gaskets.
This warranty is conditioned on the Buyer 1) giving Newco prompt notice of any claim to be
made under this warranty by telephone at (800) 556-3926 or by writing to 3650 New Town B vd, Saint
Char es, MO 63301; 2) if requested by Newco, shipping the defective equipment prepaid to an
authorized Newco service location; and 3) receiving prior authorization from Newco that the
defective equipment is under warranty.
THE FOREGO NG WARRANTY S EXCLUS VE AND S N L EU OF ANY OTHER WARRANTY, WR TTEN
OR ORAL, EXPRESS OR MPL ED, NCLUD NG, BUT NOT L M TED TO, ANY MPL ED WARRANTY OF E THER
MERCHANTAB L TY OR F TNESS FOR A PART CULAR PURPOSE. The agents, dealers or employees of
Newco are not authorized to make modifications to this warranty or to make additional warranties
that are binding on Newco. Accordingly, statements by such individuals, whether oral or written, do
not constitute warranties and should not be relied upon.
f Newco determines in its sole discretion that the equipment does not conform to the
warranty, Newco, at its exclusive option while the equipment is under warranty, shall either 1) provide
at no charge replacement parts and/or labor (during the applicable parts and labor warranty
periods specified above) to repair the defective components, provided that this repair is done by a
Newco Authorized Service Representative; or 2) shall replace the equipment or refund the purchase
price for the equipment.
THE BUYER’S REMEDY AGA NST NEWCO FOR THE BREACH OF ANY OBL GAT ON AR S NG OUT OF
THE SALE OF TH S EQU PMENT, WHETHER DER VED FROM WARRANTY OR OTHERW SE, SHALL BE L M TED,
AT NEWCO’S SOLE OPT ON AS SPEC F ED HERE N, TO REPA R, REPLACEMENT OR REFUND.
n no event shall Newco be liable for any other damage or loss, including, but not limited to,
lost profits, lost sales, loss of use of equipment, claims of Buyer’s customers, cost of capital, cost of
down time, cost of substitute equipment, facilities or services, or any other special, incidental or
consequential damages.
WARNING
: Read and follow installation instructions before plugging or wiring in machine to
electrical circuit. Warranty will be void if machine is connected to any voltage other than
that specified on the serial tag. Machine must be plugged into a grounded outlet.
B STRO TOUCH LARGE CAPAC TY PN 128308 20230717
Technical Service: 1-800-556-3926
5
WARNING LABELS
PN 100821 PN 100817
PN 101012 PN 101025
PN 123062

B STRO TOUCH LARGE CAPAC TY PN 128308 20230717
Technical Service: 1-800-556-3926
6
SPECIFICATIONS
TEMPERATURE RANGE
140-205F
CUP SIZE
6-20oz
SHIPPING WT
Bistro Touch only: 38 lbs.
Side Car accessory only: 12 lbs.
Bistro Touch with Side Car accessory: 50 lbs.

B STRO TOUCH LARGE CAPAC TY PN 128308 20230717
Technical Service: 1-800-556-3926
7
Side Car Accessory
Brewer with
side car
accessory

B STRO TOUCH LARGE CAPAC TY PN 128308 20230717
Technical Service: 1-800-556-3926
8
MACHINE SET UP
PLUMBING
Always flush at least 1/2 gallon of water through the waterline to remove any debris.
This machine must be connected to a cold-water system with operating pressure between
20 and 90 psi (138 and 620 kPa) from a ¹⁄₂” or larger supply line. A shut-off valve should be
installed in the line before the machine. nstall a regulator in the line when pressure is greater
than 60 psi (620 kPa) to reduce it to 50 psi (345 kPa). The water inlet fitting is ¹⁄₄" male flare.
A loose coil of copper tubing in the water line will allow movement of the machine to easily
clean the countertop underneath.
Note: Water pressure should be at least 20 lbs. For less than a 25 ft run, use ¹⁄
₄
" copper tubing
and connect to ¹⁄
₂
" or larger water line. For longer runs, use ³⁄
₈
" copper tubing & connect to
¹⁄
₂
" or larger water line and provide an adapter fitting for connection to the brewer. Newco
does not recommend the use of a saddle valve to install the brewer. The size and shape of
the hole made in the supply line by this type of device may restrict water flow.
This equipment must be installed to comply with the Basic Plumbing Code of the Building
Officials and Code Administrators nternational, nc. (BOCA) and the Food Service Sanitation
Manual of the Food and Drug Administration (FDA). For models installed outside the U.S.A.,
comply with the applicable Plumbing/ Sanitation Code.
WARNING: Read and follow installation instructions before plugging or wiring in machine to
electrical circuit. Warranty will be void if machine is connected to any voltage other than
that specified on the serial tag. Machine must be plugged into a grounded outlet.
ELECTRICAL
WARNING: The brewer must be disconnected from the power source until specified in
Installation Instructions.
Determine the available on-site electrical requirements.
Refer to Data Plate on the brewer, and local/national electrical codes, to determine circuit
requirements.
CAUTION – Improper electrical installation will damage electronic components.

B STRO TOUCH LARGE CAPAC TY PN 128308 20230717
Technical Service: 1-800-556-3926
9
INITIAL SET UP
WARNING: Read and follow installation instructions before plugging or wiring machine into
electrical circuit. Warranty will be void if machine is connected to any voltage other than
that specified on the serial tag. Machine must be plugged into a grounded outlet. Machine
must be installed on a flat level surface.
SETTING UP THE SIDE CAR ACCESSORY
Newco recommends installing the anti-tip bracket with every brewer.
Once it is decided which side of the brewer the side car will be placed on,
locate and remove the top two screws from the brewer side of the side car.
See image for installing the sidecar on the right of the brewer- mirrored from
installing the side car on the left of the brewer.
Use the screws from the side car to attach the anti-tip bracket to the brewer.
Place the brewer in its desired location, do not plug in or turn on power to
the brewer.
Set side car near brewer, on preferred side, angled for ease of
access to the pump hose connections.
nsert the ends of the provided pump hoses to the connections
on the back of the brewer and the back of the side car.
Ensure the pump hoses have not crossed, and that pump 1 on
the side car is connected to pump 1 on the brewer.
Move the side car in place parallel to the brewer, with about 1” between the
brewer and the side car. There must be enough room between the brewer
and the side car to access the knurled screws located on the side car door in
order to change product.
Reaching around the back of the side car, insert knurled screws (PN 100425)
into the slots on the anti-tip bracket.
Tighten knurled screws to finish attaching the side car to the brewer.

B STRO TOUCH LARGE CAPAC TY PN 128308 20230717
Technical Service: 1-800-556-3926
10
INSTALLING THE BIBS TO THE SIDE CAR ACCESSORY AND FILLING THE HOPPERS
nside the side car, there are two shelves for Bag-in-Box (B B) products. When placing
products into the side car, note which product is on each shelf. Product name will be
displayed on the drink submenu, see page 16 to input product names. See page 11 for an
example of product indications on drink submenu screen. Ensure product B Bs are placed
into the side car nozzle up for optimal performance.
When installing the hoppers, slight manual rotation of the auger gear may be necessary.
Always remove hoppers from machine and ensure that hopper nozzles are turned up when
filling with product.
STARTING THE BREWER
Once setup is complete, plug the brewer into the power source and turn machine power
on. The touch screen will display a series of screens showing that the brewer is filling, then
heating, the hot water tank. nitial fill and heating cycle may take 15 minutes to complete.
Once the drink selection screen is displayed, open the brewer door. Place a cup under the
dispense nozzle, then press and hold the rinse button until the dispensed water runs clear.

B STRO TOUCH LARGE CAPAC TY PN 128308 20230717
Technical Service: 1-800-556-3926
11
MACHINE OPERATION
DRINK SELECTION MENU
DRINK SUBMENU
Ensure cup is placed below dispense nozzle before pressing brew. Brew cycles can be
canceled at any time from the brewing screen.
On brewer On smart device
Roast 1 / Pump 1
See page 16 for
settings.
Roast 2 / Pump 2
See page 16 for
settings.
Cup Size Drink Strength
Return to Drink
Selection Screen
Begin brew cycle

B STRO TOUCH LARGE CAPAC TY PN 128308 20230717
Technical Service: 1-800-556-3926
12
CLEANING
CLEANING THE WHIPPER BOWL
Daily
1. With the brewer door open, place a container capable of holding at least 12 ounces
on the drip try, under the dispense nozzle.
2. Press and hold the rinse button until only clear water is dispensed.
3. Discard the contents of the container.
4. Disconnect the dispense tube from the bottom of the whipper bowl, and rotate it
away from the brewer.
5. Rotate the base of the whipper bowl counterclockwise, until the tab is in the 5
o’clock position.
6. Remove the whipper bowl from its base, then thoroughly wash all parts with warm
soapy water.
7. Allow parts to dry completely before reassembling.
CLEANING THE PUMPS
1. Access the Cleaning and Priming page of the Maintenance Settings found in the
Programming menu. See page 13 for instructions on accessing the Programming
Menu.
2. Remove product B B from upper shelf of sidecar, disconnecting the pump tube.
nsert cleaner B B and connect to pump tube.
3. Place a container capable of holding at least 12 ounces on the drip tray under the
dispense nozzles.
4. On the screen, select Clean Pump 1 or Clean Pump 2 based on which tube the
cleaning B B is connected to.
5. Once the cleaning cycle ends, discard contents of the container and replace under
dispense nozzles.
6. Disconnect cleaner B B from current tubing and set the B B to the side. nsert new
product B B and connect to tubing that was just cleaned.
7. Select Prime Pump 1 or 2 based on which tube the new product B B is attached to.
Once priming cycle is complete, discard the contents of the container.
8. Repeat steps 2 – 7 with other tubing.

B STRO TOUCH LARGE CAPAC TY PN 128308 20230717
Technical Service: 1-800-556-3926
13
MACHINE PROGRAMMING
To access the lower level of machine programming, tap the center of the lower bar three
times, circled in red on the image to the right. For the upper level, tap the center of the upper
bar (blue circle) three times, then the center of the lower bar (red circle) three times. f a
brewing icon is accidentally touched, use the back arrow to return to the drink selection
menu.
Tap the upper divider 3
times where circled in
blue, then tap the
lower divider 3 times,
where circled in red.
Tap the lower divider 3
times where circled in
red.
Tap the lower right
hand corner 3 times
where circled in red.
Tap the upper divider 3
times where circled in
blue, then tap the
lower divider 3 times,
where circled in red.

B STRO TOUCH LARGE CAPAC TY PN 128308 20230717
Technical Service: 1-800-556-3926
14
MAINTENANCE
Remaining gallons on the filter will only show up if you set
your filter size in Programming Setup, page 15. This is a
count down to show the number of gallons left before you
need to change the water filter.
Reset the Water Filter countdown after changing filters.
The Whipper Seal needs to be changed after 5000
specialty drink cycles.
Reset the Whipper Seal countdown after changing the
Whipper Seal.
See page 12 for cleaning and priming instructions.
Exit will take you to the Programming Menu.
STATISTICS
This screen shows the various statistics the Bistro can track.
By default, tracking settings are set to Off. See page 15 to
enable tracking.
Total run cycles and total water usage will never reset.
Chocolate powder tracking and milk powder tracking will
reset after the respective hopper is refilled.
Exit will take you to the main Programming Menu.

B STRO TOUCH LARGE CAPAC TY PN 128308 20230717
Technical Service: 1-800-556-3926
15
SETUP
WATER TEMPERATURE
Temperature of the hot water tank, has a range of 140°F -
205°F, defaults to 180°F.
POWDER TRACKING
Turns powder tracking on or off, with a default of off.
ENERGY SAVE MODE
OFF (DEFAULT)
Power stays on, and hot water tank remains at brewing
temperature.
SEMI
Hot water tank temperature set point is reduced until any
interaction is detected.
FULL
Hot water tank heater is disabled until any interaction is
detected.
Note: After 72 hours of non-use, the heater will
automatically turn off. Any interaction will turn the heater
back on.
ENERGY SAVE TIME
Allows the user to set the idle time before the selected energy save mode is enabled. The
range is 0.5-4.0 hours in 0.5 hour increments.
CUP LIGHT
Sets when the light in the cup area is on, choosing between Off, Dispense Only (default), or
Always On.
WATER FILTER SIZE
Turns water filter tracking off when set to off (default), and on when set between 500 and
3000 gallons.
GLOBAL RATIO REGULAR AND DECAF
Sets the water to coffee ratio across all recipes. Ranging from 25:1 to 45:1, with a default of
30:1 for both coffee and decaf
CALL FOR SERVICE NUMBER
Entry for servicer contact information, shown on “Call for Service” screens.
PUMP SPEED ADJUST REGULAR AND DECAF
Sets the speed of the pumps, changing the strength of the coffee drink. Using the global
ratio as a base, increasing the pump speed will increase the strength of the coffee drink.

B STRO TOUCH LARGE CAPAC TY PN 128308 20230717
Technical Service: 1-800-556-3926
16
DRINK SELECTION MENU
The Drink Selection screen enables you to turn off a drink
type, drink strength, or drink size. t also has the option to set
the default cup size.
Note: At least one size and one strength must be enabled
in order to exit this menu. Default cup size must be a size
that is enabled, i.e. if only Medium and Large are enabled,
default cup size cannot be Small.
ROAST 1 AND 2
Set the name for the type of coffee present in the upper
(Roast 1) and lower (Roast 2) B Bs of the sidecar.

B STRO TOUCH LARGE CAPAC TY PN 128308 20230717
Technical Service: 1-800-556-3926
17
CALIBRATION
Please read all instructions before calibrating your
machine.
AUGER CALIBRATIONS
1. Ensure hopper is full of powder product.
2. Highlight which auger you are calibrating, then open
the door to view the hoppers.
3. Place a container (at least 12 oz) on scale, and tare.
4. Remove whipper chamber, and then place tared
container under the elbow of selected hopper.
5. Press “Start Cal Cycle”, powder product will begin
dispensing into container.
6. Weigh (in grams) the container of powder product and
input into calibration screen.
7. Press “Save” to complete auger calibration. Repeat
steps for other auger.
MIXING BOWL CALIBRATION
1. Place a container (at least 32 oz) on scale and tare.
2. Place tared container on drip tray to collect water from
dispense point.
3. Press “Start Cal Cycle”, water will begin dispensing into container.
4. Weigh (in ounces) the container of water and input into calibration screen.
5. Press “Save” to complete mixing bowl calibration.
WATER CALIBRATION
1. Place a container (at least 32 oz) on scale and tare.
2. Place tared container on drip tray to collect water from dispense point.
3. Press “Start Cal Cycle”, water will begin dispensing into container.
4. Weigh (in ounces) the container of water and input into calibration screen.
Press “Save” to complete water calibration.
BYPASS WATER CALIBRATION
1. Place a container (at least 32 oz) on scale and tare.
2. Place tared container on drip tray to collect water from dispense point.
3. Press “Start Cal Cycle”, water will begin dispensing into container.
4. Weigh (in ounces) the container of water and input into calibration screen.
Press “Save” to complete the bypass water calibration.

B STRO TOUCH LARGE CAPAC TY PN 128308 20230717
Technical Service: 1-800-556-3926
18
RECIPE ENTRY
Recipes were developed for optimal taste preference.
t is not recommended to change these settings, as these
recipes cannot be restored using factory reset.
Note: If any changes are made, then “Save Recipe” must
be pressed to keep the changes.
PERI PRETIME
This parameter sets how long the pump runs to pull product
from the B Bs.
WATER VOLUME
Amount of water to mix the concentrated coffee with, in
0.1 ounce increments.
COFFEE DELAY
Used for specialty drinks, allows other ingredients to be
dispensed before coffee.
PUMP STRENGTH
n this entry the user may set the DC pump strength in the
range of 10% to 100% with the default at 35%.
MIXING BOWL VOLUME
For specialty drinks, this is the amount of water dispensed into the mixing bowl for powders.
This parameter ranges from 5-120, with each increment being 0.1 ounces.
f the current recipe is for a non specialty drink, then this parameter is unavailable.
CHOCOLATE AND MILK GMS/OZ
Amount of chocolate or milk powder to be used in the recipe.
Please note that Newco takes time to develop recipes.
LOCAL SETUP
BREWING SCREEN
Display slate screens as a default when a coffee based
drink is brewing. For non-coffee based drinks, or if set to
logo, a brewer logo is displayed.
Additional features on this screen are for future use.

B STRO TOUCH LARGE CAPAC TY PN 128308 20230717
Technical Service: 1-800-556-3926
19
SERVICING THE MACHINE
Always unplug brewer from power and water sources, and allow hot water tank to cool,
before servicing the machine.
ACCESS POINTS
FRONT PANEL ACCESS
Loosen 3 screws, circled. Provides access to pumps.
BACK PANEL ACCESS
Remove 4 screws, circled. Provides access to most
components in the machine, side panels may be
removed for easier access.
SIDE PANEL ACCESS
Remove 2 screws, circled. Left and right side panels are
mirrored, image shows screws for left side panel.
DRAINING THE HOT WATER TANK
CAUTION- The water is extremely hot and can cause harmful burns, unless the hot water tank
is left to cool. Do not store in freezing conditions as residual water may remain in machine.
The drain tube is connected to black plug on rear lower panel of machine. Tank holds
approx. 1 US gallon. Remove hose plug from drain hose, and aim into a container or drain.
Slide the drain hose clamp to release the water.
Once water has finished draining, slide the drain hose clamp to close off the drain tube.
Replace the drain hose plug and tuck the drain hose back into the machine.
Back Pane Access
Front Pane Access
Side Pane Access

B STRO TOUCH LARGE CAPAC TY PN 128308 20230717
Technical Service: 1-800-556-3926
20
ERROR MESSAGES
BREWER ERRORS
FILL TIME OUT
Check all water line connections. Check if water line is weak or shut off. f
all connections are secure, and water line is good and stable, you may
need to replace the nlet Solenoid Valve Assembly (PN 120378), or the
Control Board (call your servicer).
THERMISTOR ERRORS
Check thermistor connections. f all connections are
secure, replace thermistor (PN 151677). f this error returns
after replacing the thermistor, then there is a possibility of a
control board failure.
HEATER ERROR
Water is not heating up at expected rate- at least 1°F rise in temperature
over 4 minutes, or heater has been running continuously for 30 minutes.
Check Hi Limit Thermostat (PN XXXXXX), then check heating element (PN
120928), lastly check heater relay (PN 110958).
OVERHEAT ERROR
Temperature in the tank has reached 214°F or higher. Possible relay failure
(PN 110958).
Table of contents
Other Newco Brewing System manuals

Newco
Newco KK airpot User manual

Newco
Newco CX-TOUCH User manual

Newco
Newco KB Series Setup guide

Newco
Newco 805044 User manual

Newco
Newco Bistro Touch BISTRO-TCH Instruction Manual

Newco
Newco LITTLE JOE COMPONENT ACCESS User manual

Newco
Newco KB-APF Setup guide

Newco
Newco 20:1 User manual

Newco
Newco 767377 Guide

Newco
Newco KB1 Setup guide