manuals.online logo
Brands
  1. Home
  2. •
  3. Brands
  4. •
  5. Keithley
  6. •
  7. Multimeter
  8. •
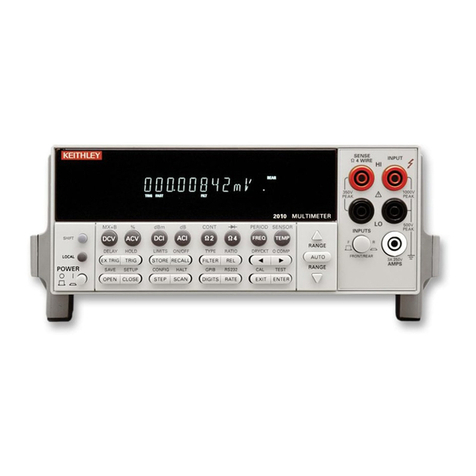
  9. Keithley 164 User manual

Keithley 164 User manual

INSTRUCTION MANUAL
MODELS 164,164TT
DIGITAL MULTIMETER
KEITHLEY INSTRUMENTS. I N C.
CONTENTS
PRmTED OCT. 74
ILLUSTRATIONS
164. 164l-T
Figure Ii”. Title Page NO.
1 Front Panel 1
2
Front Panel Controls b Terminals, Model 164 3
3 Rear Panel Controls b Terminals, Model 164 3
4 Four-Terminal Resistance Measurements 8
5 Timing Diagram for AID COnVerfer 12
6 Typical Open-Collector outpue 13
7 Pill Designations For Printer output 13
8 Front & Rear Panels, Model 164TT 14
9 Multimeter Block Diagram 15
10 Analog Amplifier Block Diagram 16
11
A/D
Converter Block Diagram 18
12 Integrator Simplified Diagram 19
13 RANGEKnob Assembly 25
14 Chassis Assembly 25
15 servicing Of Chassis 26
16 PC Board I.ocacions 27
17 Side View of Chagsis 28
18 Chassis, Bottom
View
31
19 Calibration Controls 32
20 Calibration of Milliohm Current Source 34
21 Top Cover Assembly 37
22 Botfom cover Assembly 37
23 Component Layout, PC-254 50
24 Component Layout. PC-251 51
25 Component Layout, PC-248 51
26 cmlponent Layout, PC-255 52
27 Camponene Laywf, PC-250 52
28 Component Layout, PC-287 53
29 componenr Layout, PC-348 54
SPECIFICATIONS MODELS164, 164TT
SPECIFICATIONS
I
iv
0)
0474
KEITHLEY
Sheet I of I
1275
INSTRUMENTS. INC
CAUTION
To ensure the integrity of the chassis to earth ground connection only a Keithley
part number CO-7 line cord should be used for replacement. If a different line cord
is used ensure that the wiring polarity is the same as shown in the following dia-
gram.
NEMA
5-l5P
WHiTE WHiTE
Keithley Models to which this warning applies: 160, 163, 164, 165, 171, 180, 190, 227,
616, 6162, 702, 780
MODELS 164, 164TT GENERAL 1NFORMATION
SECTION 1. GENERAL INFORMATION
l-l. GENERAL.
a. mm Mode. The Model 164 serves as a line aper-
ated 3-l/2 digit multimeter having wide ranges for
measllrement of voltage, currerlt, and resiseance. I"
the D"M mode. the 164 offers seven dc volrage ranges
(from 1 microvolt per digit to 1000 volts). eight dc
current ranges (from 0.1 nanoampere per digif to 2
amperes), and eight resistance ranges (from 0.1 ohm
per digit LO 2000 megohms).
b. Milliobmmerer-Obmeter Mode. The Model 164
also Provides five additional resistance ra"ze8 for
mas";eme"fa requiring resolution to 10 microbm per
digit. Four-terminal measurement technique minimizes
the effects of lead and contact resistance in 1orre-
sistance measurements.
C. Electronic High/Low Limit Trip option. The
Model 164TT provides independent electronic trip
CirCUitS for high and low limits. me trips are
"on-latching. I" addftio" to front pane1 indiG-
to= lamps, the Model 164TT offers rear panel r-e-
lay contacts.
d. Di.sital Oue~ut Accessory. The Model 1602 is a
field-installable BCD output which my be used to inter-
face the Model 164 wit31 a digital printer or computer.
@
0474
e. AC/DC Probe Accessory. The Model 1601 AC/DC
Probe permits ac voltage meas”reme”ts to 250
volts
rms over a spa” of 45
Hz Co 45kHr. A probe mounted
switch enables selection of ac or dc operation vich-
out disconnecting the probe.
1-2. APPLICATIONS. The Model 164 is a general pur-
pose instrument - used Fn Basic Research, Electronics
Development. and Process Control.
a. I" the Research Lab - When used vith a suitable
probe, transducer, or electronic circuit, Model 164
can be used for
digital indication of volts. amps.
or ohms. or through conversion, any physical para-
meter such aa temperature, pressure, and rpm.
b. I" Electronics oevelopmene Acriviry - "seable
for basic electrical m?as"reme"ta of voltage. cur-
rent. or resistance.
1
GENERAL INFOFwAT1ON
i
I:
I!
Control
RANGE SWITCH
In", "
"A, IIA. mA
n, krl, MO
Power
DMM
mn,n
SOURCESWITCH
operate
Volt Limit
ZERO CONTROL
nn SO"RCE TERMINALS
Red
Black
Red
Black
MODELS164. 164~~
TABLE l-1.
l+O"f Panel Controls and Terminals
Sets the full range seneiei"ity and parameter to be measured (volts,
amperes, or ohms in the D"N made, or milliohms/obms in the Milliobm-
meter made).
Providea S.z"t?" voltage ranges from 1 mflli"olL full range to 1000 "OltS
full range.
Provides eight current ranges from 100 nanoampere full range to 1000
milliamperes full range.
Provides eight resistance ranges from 100 ohms full range to 1000 meg-
ohms full range.
Controls ac line power to insfrument
Sets instrument for DMMmode of operation
sets instrumenf for any one of five resistance ranges from 10 miniohm
full range to 100 ohms full range. (Milliobm current source terminals
m"st be connected to ""know".)
sets instrument for normal millioblmneter operation (non-voltage limit
made).
Sefs instrument for "elf-limit operation such that maximum open-circuit
voltage is limited to 20 millivolts. In this mode, measurement accuracy
is degraded depending on the resistance to be measured. see X-9.2.
Sets instrument for compensating thermal emfs in the milliobmmeter
mode. (Used in conjunction with the Zer" control.)
Permits adjustment of display zero.
currene source low (negative polarity)
Input high
Input law
Case ground
Paragraph
2-2b
2-b
2-k
2-9e
2-2d
*-la
Z-la
TABLE l-2.
I Rear Panel Controls and Terminals
Control Functional Description Paragraph
Line Switch Sets instrument for either 117 or 234 volt lina power. 2-3a
(117-234V)
AC Power Receptacle
1 zero Control
output Recepracle
BCD output Receptacle
Mates with 3-"tie ac line cord.
screwdriver adjusrmenr for zeroing o* 1 mv
Analog Output. (r 1 volt dc at full range at up to 1 milliampere).
Optional BCD output available with Model 1602 Digital Output Kit.
2-4b
2-3b
2-12
2-14 I
2 0774
MODELS 164, 164TT GENERAL mFOF.MATlON
I
Jl203
MILL1 RANGE
SOU SWITCH
SlOl
d204
HI LO CASE SOURCE ZERO MODE/POWER
JlOl J102 5104 SWITCH CONTROL SWITCH 51201
s1202 R1215
OMMINPUT
FIGURE 2. FronL Panel Controls h Terminals, Model 164.
ZERO
CONTROL
R505
OUTPUT
RECEPTACLE
5103
LINE
SWITCH
s202
AC POWER
RECEPTACLE
5201
FIGURE 3. Rear Panel Controls b Terminals. Model 164.
0414 3
SECTION 2. OPERATING INSTRUCTIONS
1-l. 1NPUT CONNECTIONS.
a.
“inding Pose Terminals.
L. DMMMode. Uinding post terminals are pro-
vided o” the front panel for connections EO input
HI (Red), input LO (Black), and chassis ground
(ccee”). For voltmeter, ameter, and ohmmeter
measurements, the source should be conneceed be-
tween the lower set of red and black termi”als.
Tile green rennin=1 may be connected to input LO
by use of a shorting link when grounded operation
is desired. see paragraph 2-11 for a discussion
Of fl”aZi”g operation.
‘. Xilliobmecer Mode. A separate pair of red
and black terminals is provided for use when making
four-rermina1 reSiSLa”ce nleaeurements. The rnilli-
ohm ct~rrent source provides a positive dc current
at ihe iHI (Red) terminal and is used in conjuncrio”
wietl ci,e DMMterminals. See paragraph 2-9 for a
discussion of milliohmeeer operation. The Model
1641 Kelvin Test Lead Set (furnished with the Model
L64) simplifies connections co the resistance to be
measured. The Test Lead provides clip-o” connec-
tions for both voltage and current leads without
the need for separate cables.
b. Noise Considerations. The limit of resolution
in voltage and current measurements is derermined
largely hy rhe noise generated in the source. Stray
low-level noise is present in some form in nearly al1
electrical circuits. The instrument does not distin-
guish between stray and signal voltages since it mea-
sures the net voltage. When using the 1 mV and 10 mV
ranges, consider the presence of low-level elecrrical
phenomena such a~ thermocouples (thermoelectric ef-
fect,, flexing of coaxial cables (triboelectric ef-
fect), apparent residual charges on capacitors (die-
lectric absorption,, and battery actFan of two dFf-
ferenr contact materials (galvanic action).
1. Thermal Ems. Thermal ‘auf.9 (thermoelectric
porentiale) are generated by thermal differences
between two junctions of dissimilar metals. To
minimize ehe drift caused by thermal emfs, use cop-
per leads to connect ehe circuit to the i”s~rume”t.
The front or rear panel ZERO control cm, be used
to buck out thermal offsets if aecessary.
The KeiChley accessory Model 1483 Low Thermal Con-
nection Kit confains a11 necessary materials for
making very low thermal cop,xr crimp connections
for minimizing thermal effecrs.
2. A-C Electric Fields. The presence of elec-
tric fields
generaced
by power lines or other
s”“rceB can have an effect on instrument operation.
A-C voltages which are very large with respect to
the full-scale range sensieivicy could drive the
a-c amplifier into saturafian, thus producing a”
err”“e”“s d-c oq.tpue.
4
NOTE
The inscrumen~ provides attenuation of line
frequency noise superimposed on an input
signal. The a-c rejection is specified as
f0110!.W:
WXR: Greater rha” 80 dB above one digit
for a voltage of line frequency or rwice
line frequency an the nw5t sensitive range?.
decreasing to 60 dB on the 100-millivolt
and higher ranges. 1000 volts peak-to-peak
mCXXim”m.
CMRR: Greater than 120 dB above one digit
at dc and 40 to 100 Hz ac. 500 volts dc,
100 volts peak-to-peak ac maximum
Proper shielding as described in paragraph 2-1,~
can minimize noise pick-up when rhe insrrumenc is
in the presence of excessive a-c Eiclds or when very
sensitive measurements are being made.
3. Magnetic Fields. ‘The presence Of strong mag-
“etic fields can be a potential source of a--c noise.
Magnetic flux lines which cut a conductor can pro-
duce large a-c noise especially at power line fre-
quencies. The voltage induced due t” magnetic flux
is proportional to the area enclosed by the circuit
as well as the race of change of maflnetic flux. 2%”
effective wag co minimize magnetic pickup is LO ,’
=rra”ge all wiring SO Chaf fhe loop area enclosed
is as small as possible (such as twisting input leads).
h Second way t” minimize mnR”etic pickup is to use
shielding as described in paragraph 2-1,~.
C. Shielding.
1. Electric Fields. Shielding is usually “eces-
say, when the instrument is in the presence of very
large a-c fields or when very sensitive measureme”ts
are being made. The shields of the measurement cir-
cuit and leads should be connected together t” ground
at only one point. This provides a “tree” config-
uration, which minimizes ground loops.
2. Magnetic Fields. Magnetic shielding is use-
ful where very large magnetic fields are present.
Shielding. which is available in the form of plates,
foil or cables, ca” be used to shield the measuring
circuit, the lead wires, or the instrument itself.
3. other Considerations.
a) Voltmeter Measurements. “se shielded in-
put leads when so”rcr resistances are greater
than lmegohm or when long input cables are used.
0414
MODELS164, 164TT
b) current Measurements. on the InA CUrrent
ranges, no special shielding precautions need be
taken. “rawever, on the UA and nA ranges, shield-
ed input leads are recormended.
put leads and =o”rce are recommended for m===“r=-
menes an the 10 megohm through 1000 megoh ranges
2-2. FRONT PANEL CONTROLS.
a. Power/Mode Switch. This switch permits selec-
tion of onerafine mode. The DMMoosirio” allows the
Model 164 co be used as a voltme&, ameter, and
ohmmeter. The mn and n positions allow the Model 164
to be used as a four-terminal resistance measuring
instrument. The Power OFF pcxition disconnects line
power to the instrument.
b. Range Switch. This switch permits selection
Of function and full range in the mm mode.
2. “oltage Funcrio”. The voltage sectors of the
Range Switch are designated in millivolts (mV) and
Volts (“) for full ranges from 1 millivolt to 1000
Volts. A full stop at the 1000 Volt range prevents
inad”erranL Switching to the nanaampere ranges with
clockwise switch rOCatlo*.
3. Resistance Function. The resisrance (ohms)
sectors of the Range Switch are designated in ohms
(n), kilohms (K!?), and Megohms for full ranges
from 10” ohms to 1000 megohms.
4. Current Function. The current (amperes) s=c-
fors of the Range Switch are designated in “a”“-
amperes (*), microamperes (NY), and milliamperes
(ma), for full ranges from 100 nanoamperes fO 1000
milliamperes.
C. Source Switch. This switch permits selection
of operate, Volt Limit, or zero operation when using
rhe mR, n modes.
1. operate Position. This position permits *or-
ma1 operation of the Model 164 as a four-terminal
resistance measuring instrument.
2. Volt Limit Position. This position limits the
ope”-circ”it voltage of the mi11*otlm current source
to 20 millivolts. ln this mode, measurement =CCU-
racy is degraded depending 0” the resi=t=“C= to be
measured. POT example, if a full range resistance
is connected (such as 10 0” the 1Q Range) the I”===-
urement accuracy is degraded by 5% since a 2On re-
sistance is shunting the input.
0774
3. Zero Posltia”. This position disconnects the
current source from the ““k”0w” for zeroing the
Model 164 in the milliohmeter mode only.
d. Zero Conerol. This conrro1 is uSed in co”-
,unction with the Source Switch (Zero Position) to
zero the reading in the milliohmeter mode. The co”-
rral may also br used in the DMMmode for adJustme”ts
on the 1 mV and 10 m” ranges. (A rear panel zero
adjusrmenr ie also provided for making co==== zero
=d,ustme”fs.) Place a short =cro== “oltm=t=r t=r-
minals before ad,usfi”g zero in Voltmeter mode.
For maximum operaeor safety, connect the ground wire
of the line cord LO earth ground. This will ensure
that the CASE is at graund potential.
d. Funcfion,Ra”~e Selection. sehxr the PU”Cti0”
and Sensitivity using the RANGEswitch. I” MILLI-
OHMMETERmode, the RANGEswitch is used in co”ju”c-
tion with the MODESvirch as described in paragraph
2-9.
5
I “PERKrINGINSTRUCTIONS
---.-____I
HODELS 164, 164~
2-5. MODESOF OPERATION. The Model 164 permits meas-
urements in either of two modes of operation, 1, Multf-
meter ?lode (DMM) or 2) Ohmmeter-Milliobmmeter Mode (n,
mn).
a. Elulrimeter Mode (DMM .1 I" the DMMmode, rbe
Model lb4 permifs measurement of uolrage, current,
and resiseance (LO 0.U per digit) for conventional
cAeas*relne*ts. To select the DMNmode, set the Mode
Switch to the DMMposition. men set rhe Range
Switch to the appropriate function and range.
b. Ohmmeter-Milliohmmeter Mode (0, mi2). I" either
thz1 or mil modes, the Model 164 permits mea~"=ement
Of resistance using a four-terminal voltage-current
method. To select the n or mii modes, set the Mode
Smirch to the desired "ohms" position. Separate
rerminals ace provided for cu==ent and voltage se"-
sing. rhe Model 1641 Kelvin Test Lead Set ifurnish-
ed with the Model 164) simplifies connections to the
resiSta"ce to be measured. The terminals identified
as "m;2 SOURCE" provide a c"==ent in five decades
from 10 microamperes to 100 milliamperes, co==eg-
pending to positions on the Made Switch identi-
fied as IOK?, IOn, I!,, 100m0, o= 10mrt. The ter-
minals normally used for "MB measurements are for
voltage sensing when making four terminal resis-
tance meusurements. The Range Switch Of the Model
164 nl"Sf he set to rile lrn" function when using the
oirmmeter-milliohmmeter modes.
2-6. VOLTMETEROPERATION @MMNode). This mode of b. Co""ecfio*s.
operation enables voltage meaS"=eme"eS from il micro- Connect the input twminals so as
to place the Multimeter in series with the current to
volt per digit (1 millivolt full range) to tlOO0 volts. be measured.
Range Selection. To select "oltmeLe= operation
se:'the !Iode Switch t" DMM, then set the Range Switch
to the appropriate full range voltage. as a "olr-
meter, the Model 164 provides seven ranges as given
in Table 2-l.
C. Measurement Accuracy. The current accuracy is (?
specified as '0.2% of reading, fl digit on all ranges:
Since the accuracy is specified ac the input terminals,
the loading effects should also be considered. See
Table 2-2 for values of shu"t resisfors.
TABLE z-1.
"olmeter operation d. Off-Ground Measurements. The Model 164 low
terminal can be floated t500 volts above CASE ground
for current measu=eme"ts. Refer to paragraph 2-11
for complete instructions.
I El
Range setcin Full P.a"Se Display Overrange Display
I
1 In” 1.000 In” 1.999 In"
10 In" 10.00 rn" 19.99 rn"
100 II" 100.0 mv 199.9 in"
1 " 1.000 " 1.999 "
10 v 10.00 v 19.99 "
100 " 100.0 v 199.9 "
1000 " 1000. " 1000. v*
*Maximum allowable input is 1000 volts continuous in-
p"t on 1-"OlC to 1000~volt ranges. 1000 volts momen-
tary, 300 volts co"rin"ous on lower ranges.
b. Measurement Accuracy. The voltage a~curac,. is
t(O.l% of reading + 1 digit) on all ranges.
C. Overload Recovery. The instrument will recover
from 300-volt overloads within five seconds on the
lm" range. "p CO 1000 volts peak may be applied
momentarily on any range without damaging the i"st=u-
ment .
d. Innut resistance. The input haa a reeist="Ce
"f 10 m=whms 0" the 10 millivolt and higher =a"~*,
1 megohm on the l-millivolt range. FO= lomv and
higher =a"Ses, a 1000 ohm source eestatance will
introduce only 0.01% e==o=. 'ro maintain rated acw-i
racy o" the 1mV =a"~. the source reaiseance should
not exceed 100 ohms.
e. Off-Ground Measurements. The instrument low
terminal can be floated *500 volts above CASE ground
for voltage ,~~~%S"re?me"t~. Refer to paragraph 2-11
for complete instructions.
f. AC Voltage Adapter Probe. The Model 1601 AC/DC
Probe permits convenient a-c voltage meaguremenfs from
0.1 volt to 250 volts rms o"e= a span of 4s HZ to 45
kkh. A probe-mounted switch provides convenient se-
lection of,a-c o= d-c operation without disconnecring
the probe. Therefore, the probe may be pe=manently
attached.
2-7. aMMETEROPERATION (DMMMode). This mode of
operation enables current meaS"=eme*ts from 0.1 "ano-
ampere per digit (100 nanoamperes full range) to 2
amperes with 100% overranging on all ranges.
a. Range Selection. To select ammeter operarion,
set the Mode Switch to DMM, the" set the RanSe Switch
to the appropriate full range cu==e"t. As an ammeter,
the Model 164 provides eight ranges as given in Table
2-2.
2-S. OWMMETEROPERATION @MMMode). TXhis mode of
operaeion enables resistance meaS"=eme"eS from 0.1
ohm per digit (100 ohms full range) to 2000 megohms.
2,. Range Selection. TO select ollmmeter operation
@MMmode), set the Mode Switch to DMM, then set the
Range Switch to the appropriate full range resistance.
As an ohmmeter, the Model 164 provides eighr ranges
as given in Table 2-3.
b. Voltage Across the Unknown. "olfage drop is
100 millivolts at full range with 1.5 V max. into
a" open circuit. Thus the current through the "n-
known is determined by dividing the 100 millivolts
by the full range resistance.
c. Maximum Overload. Maximum voltage ac=oss the
input tennina1s is 20 voles momentary and 1 Volt
co"ti""o"s.
d. Accuracy. As shown in Table 2-4.
6 0474
1 UA 1.000 LlA
10 II.4 10.00 pA
100 “A 100.0 DA
ImA 1.000 mA
10 m.4 10.00 mA
100 m.4 100.0 mA
1000 mA 1000. m.4
19.99 mA 1 0
199.9 InA 0.1 a
1999. m.4 0.1 1
TABLE 2-3.
ohmmeter operation
Range setting
100 n
1 !4
10 !4
100 kn
1 MST
10 Mn
100 MO
1000 Mn
Full Range Display
100.0 n
1.000 !4
10.00 kn
100.0 kn
1.000 MCI
10.00 MO
100.0 Mn
1000. Mrl
i
Full Scale RanRe
100 n
1 km
overrange Display
199.9 n
1.999 kl2
19.99 I&
199.9 kli
1.999 MO
19.99 km
199.9 Mn
1999. Mn
.xXx
x.xX
xX.x
xxx.
Impressed current
ImA
0.1 mA
0.01 mA
1 “A
0.1 )A
0.01 U.4
1 “A
0.1 n.4
Accuracy of Reading*
to.32 k 0.1 :i
20.3%
10.3%
$0.3%
!O
0474
OPEP‘4TING 1NSTR”CTIONS
z-9. OHMMETER-MILLIOIIMMETCROPERATION ($2, “!i Mode).
I" the :r,mr moties, the Model 164 permits meaS"reme"t
Of resisrance from lOUS per digit to 2oon "Sing a
four-cermina1 voltage-current method.
d summary of operation.
1. cannect OMMand ml2 source terminals to resis-
tance LO be measured.
2. set RANGE ta h"
3. set ?foLte Switch to desired range: l"lDil,
lOOmA, I::, 102, or 1000.
4. set source Switch to ZERO.
5. Adjust Zero Control for zero display.
6. Set Source Switch tc, OPERATE (except for "OLT-
LIMIT operation). Refer to section 2s9e for "OlC
Limit Operation.
b. cannectians. separate pairs of rermina1s are
provided for rile current source and voltmeter to fa-
CiliCaLe four-terminal resistance measurements. me
rermina1s identified as "n& SOURCE" provide a current
which may be selected in five decade steps from 10
microamperes to 100 milliamperes. me terminals nor-
mally used for mm meaSureme"tS (lower pair) are the
"oltmeter terminals.
c. Range Selection. I" the mn,n mode, the current
supplied at the "Inn SOURCE" terminals (upper pair)
may be selected in five decade steps from 10 micro-
amperes co 100 milliamperes. when the Range switch
is ser to 1 In" sensitivity, the" the five positions
on ciie Mode svitch correspond to full ranges of 1cmn,
lOOna, 1.2, 1052, or 10057. since the full range resis-
tance is determined by the current impressed at the
"l"G SO"RCE" terminals and the voltage sensitivity,
r
8
.-
MODELS164, 164'~
the displayed reading tlust be interpreted by calcula-
ting Ohm's law where R = V/r. we,, using the 1 m"
RP"c- setting, no calculation is necessary since the
Model 164 provides direct-reading ranges as marked
on the Mode SWiTCh. If any other "Oltage range is
used (other than 1 rn") the resistance must be deter-
mined by calculation since all decimal points will r),
be lighted (therefore the decimal p~int location will
be ambiguous). The direct-reading ranges available
on the Model 164 are shovn in gable 2-s.
d. Current Source. The current source in the
Node1 164 provides a constant current which may be
selected in five decade steps from 10 microamperes
to 100 milliamperes. The source can provide a corn-
plia*ce "oltage up to 2 volts (in OPERATEmode only)
on au mnin mode settings. For example, the Model
164 may be used co furnish a currenf of 100 milli-
amperes to a load resisrance of.20 ohms (giving a 2
volt drop). I" the "OPERATE" mode, the Model 164
has an open-circuit voltage of approximately 15 volts
In the "VOLT LIMIT" mode, the Model 164 has an onen
circuit voltage of 20 millivolts.
NOTE
If the resistance LO be measured is polarity
sensitive, the” care should be take” to con-
nect the red (positive) terminal to the un-
known so chat the desired polarity is obtain-
ed. (Conventional current flow is out Of the
red terminal and into the black terminal.)
MODEL 164
VOLTAGELEADS Vl,VZ
CURRENTLEADS Cl, C2
RESISTANCE UNDERTEST
FIGURE 4. Four-Terminal Resistance Measurements
MODELS164, 164TT OPERATING INSTRUCTIONS
TABLE 2-5.
Full Ranges in mn and il Modes
0
Max. Reading
Mode setting hange Setting* (wirh 100% overranping)
10 roil 1 m"* 19.99 mn
100 mil 1 Ill"* 199.9 mn
1 n 1 In"* 1.999 !!
10 !I 1 mv* 19.99 .i
100 11 1 In"* 199.9 '2
*decimal location is valid only when lm" range is selected.
mu source
100 mA
10 ULA
lti
0.1 mA
0.01 ti
e. Voltage Limit Operation. The VOLT LIMIT mode
limits rhe own-circuit volraae across the m.GSOURCE
terminals to-20 millivolts. This feature is useful
when testing relays and switches to determine if a
"dry circuit" contact is present. (For a discussion
of "dry circuit" measurements, refer to ASTM Specifi-
l cation 8539-70.)
NOTE
MeaS”reme”LS performed in VOLT LIMIT InOde
should be used for approx. readi",qs &
since a portion of the mn Source current
is shunted through the limit resisror
(R1210, 1211, 1212, 1213, or 1214) as
shown on schematic 262420.
For “dry circuit:’ testing, set SOURCEswitch to VOLT
LILlIT. If an on-scale reading is indicated. the”
switch to OPERATEmode and record resistance of the
display. If an over-range condition is indicated then
a "dry circuit" open condition is present. since the
valcage is limited to 20 mV, the 164 canmt breakdown
the contact resistance unless switched CO OPERATE
care should be taken t" amid a transient
current pulse which may result from an over-
shoot of the SOURCESwitch when switching
from ZERO to VOLT LIMIT positions. When
making dry circuit measurements, the re-
commended procedure is to check the read-
I
I
I
.o
0414
f. Power Dissipation in Unknown. The power dis-
sipated in the unknown is a function of the current
impressed by the Model 164 current source. Power
developed. Worst-case, is dependent on the range sel-
ected and the compliance limit.
1. Volt Limit Mode. I” this mode, the compliance
voltage limit is set at 20 millivolts. The w"rst
case power dissipation would be a function of " x I
as shown in Table 2-6.
TABLE 2-6.
10 mn 20 In” 2 InilliwattS
100 mn 20 m” 200 microwatts
1 0 20 In" 20 microwatts
10 n 20 m" 2 miCrowattS
100 n 20 m" 0.2 microwatt
2. OPERATE“ode. I” OPERATE mode, the power
dissipation is a funcrion of range selected es
shown in Table 2-7.
g. Milliohmmeter Zero Adjpsc. set the source
Switch to ZERO. the Mode Switch to 10011 (or Lhe de-
sired range), and the Range Switch t" 1 mV. Connecr
the unknown to the four terminals as described in
paragraph 2-9a. Adjust the Milliohmeter Zero con-
trol to give a zero reading with a flashing r display.
ing in VOLT LIMIT mode, Lhen switch to ZERO
to adjust for zero offsets before taking a
reading in OPERATE. CAOTION
The transient voltage which can be generated
by avershoor of the SOURCESwitch could be as
large as 15 volts. This voltage transient may
be sufficient to explode devices such as det-
"namrs and squibs if measured in the milli-
obmneter mode.
9
OPmATING niSTR”CTIONS
“erS”S Currenf lneasurements are required. since the
mR currenf source in rhe Model 164 has a compliance
voltage range up to 2 volts, the Model 164 can be
used for material resting or semiconductor diode
checkout using the ranges given in Table 2-8.
TABLE 2-8.
V-I Characteristic Measurements
ode setting current Range setting Full Range.
10 mn 100 mA 1 rn" 10 mn
100 mn 10 "IA 1 "I" 100 mn
1 0 lti 1 In" 1 0.
10 n 0.1 n!A 1 El" 10 n
100 ii 0.01 mA 1 In" 100 0
10 mn 100 DA 10 mv* 100 mn*
100 ms2 10 * 10 Ill"* 1 n*
1 n ImA 10 mv* 10 n*
10 0 0.1 mA 10 mv* 100 **
100 n 0.01 In4 10 nlv* 1000 n*
-
10 Inn 100 mA 100 a"* 1 **
100 nIlI 10 mA 100 "Iv* 10 n*
1 n 1mA 100 In"* 100 n*
10 n 0.1 mA 100 In"* 1000 n*
100 ;! 0.01 mA 100 "Iv* 10 kn*
10 In<, 100 mA 1 v* 10 **
100 mn 10 mA 1 v* 100 n*
1 2 1mA 1 v* 1000 cl*
10 !I 0.1 nA 1 v* 10 k&l*
100 P 0.01 m.4 1 v* 100 ki2"
*NOTE: Decimal point 1ocacion is not indicated when
the Range Swirch is set fo any posirion other than ~mv,
since all decimal points will be lighted. However,
decimal paint can be determined by a sample calculation
uf V : I for a given range.
2-10. DIGITAL DISPLAY OPERATION.
1. When the Range Switch is placed in voltage
positions 1 mv through 1000". the digital display
ind*caCes the actual voltage measured.
2. me Flange SWifCh is designated in convenienr
engineering units, rn" (millivolt*) and " ~"OlCS)
with the decimal point automacica11y positioned in
the display.
3. me full voltage range is determined by the
Range Switch.
4. A" overrange display up to a maximum of 1999
is provided by an overrange "I" Lndicator.
For an input greater than 1999, all digits will be
blanked except the overrange "1" indicator. The
polarity indicator will remain lighted indicating
the correct polarity. TO remo"e an overload con-
dition, change the Range Switch to a lees sensitive
position or decrease the input signal magnitude.
MODELS164, 16433
NOTE
The maximum conc~nuous input voltage is
:lOOO volts an the 1000 volf xange.
1. when the Range Switch is placed in Ampere t),; 4
positions 100 "A through 1000 mA, the MultimeLer
digit.31 display indicates the voltage across a
calibrated, self-contained resistor. The Range
Switch au~amatically selects the calibrated
ran
lo- 7
e resistor for current measurements from 1 x
to 1 ampere full range.
2. The Range Switch is designared in conven-
ient engineering units, "A (nanoamperes), PA
(microamperes) and al.4 (milliamperes) with the
decimal point automatically positioned in the 3
display.
3. me full-scale current is determined by the
Range Switch. Refer to Table 2-9 for the full- ,
range current ranges available on the Model 164.
Ampere Range
1 x 10⁻⁷
1.x 10-6
1 x 101;
1 x 1om3
1 x 10⁻²
1 x 10
1 x 10-l
I
C. ohmmeter Display.
1. When rhe Range Switch is placed in Ohms posi-
tions 100 n through 1000 MO, the Multimeter digital
display designates the valrage across the unknown
resistor with a fixed current applied.
2. The Range Switch is designated in convenient
engineering units, 0 (ohms), KO (kilohms) and M,i
(megohm) with the decimal point automatically
positioned in the readout. /
3. The full-scale resistance is determined by
the Lange Switch. Refer to Table 2-10 for the full-
range resistance ranges available on the Model 164. ,
TABLE Z-10.
Resistance Display
1 x lo2
1 x 10³
1 x 10⁴
1 x 10⁵
1 x 10⁶
1 x 10'
1 x lo8
1 Y 109
01
0474
i 4
OPERATING INSTR”CTIONS
a. me low terminal can be floated above CASE
0
ground by removing the shorting link between the I.0
and CASE. 1salatian from circuit ground to chassis
ground is greater than 100 megohms shunted by less
than 0.02 microfarad. Circuit ground may be floated
up to k500 volts with respect LO chassis ground in
the voltage and current modes.
b. When the inserument is used far off-ground
voltage or current measurements, rhe low terminal is
at floating potential. The instrument case ground
should be connected to earth ground through the line
and ground terminal. The shorting link between LO
and CASE must be disconnected.
4 2-12. ANALOGOUTPUT. me instrumenr has an analog
output of 21 volt (non-inverting) at up to 1 milli-
ampere for recording purposes. For off-ground oper-
ation, the analag 21 volt OUTPUT should not be con-
nected unless a" external recorder is capable of
floating at !500 volts with greater than 100 megohms
iSOl&iO".
2-13. ZERO AD.J”STmNTS.
a. Short Lhe input terminals with a 10” terminal
connection - preferably a short copper wire or clip
range.
C.
set the front pane1 zero control (P.1215) to
the full clockwise position.
d. If the digital display does not indicate +11
to +13 mv, use the rear panel ZERO Control to adjust
the instrumenr.
e. Readjust front panel zero. zero is indicated
by flashing t polarity lights.
f. Check for zero reading on all ranges fro" 10 In"
to 1000 ".
NOTE
If there is an off zero reading on the 1 volr
range, it "ill be necessary to adjust CT‘? cm-
RENT OFFSET ADJ. 0" the underside of the chassis.
Refer to Figure 18.
g. set the Range Switch to ohms positions 1000 m
to 100 n while checking the readout so that zero is
indicated 0" all ranges.
NOTE
If clip leads are used on the input terminals,
the lead resistance may be indicated on the
100 n range since the last digit sensitivity
is 0.1 n per digit.
0474
h. Set the Range Switch to Amperes positions 1000
mA to 100 "ii while checking the readout so that *era
is indicated 0" all ranges.
i. RemoVe the Short circuit at the input terminals
1. Volts Ranges. me in?.trument will normally
read off zero a small nmount o" the 1 m" through
100 In" ranges because Of sensitivity co random
noise. The readout should remain at zero on the
ranges 1" through 1000".
2. Ohms Ranges. All Ohms ranges should indicate
a readout overload where all digits except a "1" in
the overrange position are blanked.
3. Amperes Ranges. All current ranges should
indicate a zero readout, except for noise fluctuations.
j. After the preceding checkout is made, the in-
strument should be useable for a11 measurements WiCh
no further adjustments necessary.
2-14. DIGITAl. OUTPUTSAND EXTERNAL CONTROLS.
a. General.
1. The Model 1602 Oigiral Output Kit provides
opriona1 BCO OUtputS and controls.
2. Included is a 50-pin PRINTEK/CONTROL Connector
(receptacle) for mounting an the instrument rear
panel.
3. An output buffer card plugs into a prewired
connector on the chassis for either factory or user
installation. Buffer card replaces PC-255 inter-
connecting card.
b. OUtpUt Codes and Levels.
1. The PRINTER/CONTROL 0"fp"tS are Binary Coded
oechl (~0) ~lgnals with I-2-4-8 standard code.
2. me standard signal levels are as follows:
output l.Qgic "1" see Table 2-11 (pg. 12)
output Logic "0" see Table 2-11 (pg. 12)
3. me Buffer stages uti1i7.e "Open Collector"
O"Lp"t transistors.
c. OUtpUt Information.
11
OPERATING INSTRUCTlONS MODELS164, 164TT
TABLE 2-l'.
Model 1602 Outputs
i
rJICITAL OUTPUT: Em (1, 2, 4, 8) open collector
logic (Motorola MC 858P) represents each of 3
digits, averrange digit, overload ("I"), polar-
ity (+ = "1"). and decimal position (2 bits).
TIMING 0"TPUTS:
Clock: ~"ternal clock pulses (10 kHz count
rate).
OUTPUTLOGIC LEVELS:
output Logic "1": open transistor collector to
ground with less than 100 microamperes leakage.
+6 volts maximum allowable applied voltage.
Ouf~uf Logic "0": transistor switch closure to
ground with less than 0.5 volt saturation volt-
age. +3s milliamperes maximum allowable current.
count Interval: Logic "0" appears during count REMOTECONTROLS:
interval (i.e. pulse width is proportional to Strobe: Open circuit to ground inhibits all out-
analog inpur signal). put lines from conducting (closure to ground en-
Flag: Logic "1" appears for a 300 millisecond ables conduction).
interval out of a ~onversio" time of 500 milli- Hold: Closure to ground retains result of last
seconds. No change in buffer storage is made conversion in both the output register and the
outside this interval. display.
I INTEGRATE - COUNTd ZERO-+/
INPUT
INTEGRATOR
ZERO
CROSSING
DETECTOR
BUFFER
STORE
PULSE
n
COUNT INTERVAL
FLAG
+ZOOmSA 200mS+lOOmS4
PICURE 5. Timi”! Diagram for A/D Converter.
i
---. ~
MODELS164, 164TT OPERATING INSTR"CTIONS
TABLE 2-12.
Model 1602 PRINTER/CONTROL Connector Pi" Identification
Pin No. ouepuc Function Pi" NO. Output Function
1 1 x 100
loo Data 26 COGZIIO"
2 2 x 100 Data 27 COU!lllO"
3 4 Y loo Data 28 Blank ---
4 8 x Data 29 10 kHZ Cl‘Xk
_--______---______--------------------------------.------------------------------------~------
* 1 Y 101
6 2 x 101 Data 30 Blank
lo1 D.Sfa 31 Blank
7 4 x 101 rat.3 32 Blank ---
8 8 x Data 33 Blank ---
9 1 x 10² Data 34 Bh"k
10 2 x lo2 Data 35 Blank _-_
11 4 x lo2 Data 36 Blank ___
12 8 x lo2 Ilate 37 Blank
__---____----____-______________________-~~-
13 1 x lo3 Data 38 Bh"k
14 + = Lo ic "1" Polarity 39 Blank
15 1 x 10⁶ Decimal Point 40 Blank _-_
16 2 x 100 Decimal Point 41 Blank _--
17 Blank 42 Blank _--
18 Logic "1" Overload 43 Blank --_
19 Blank 44
20 count Interval see Table 2-11. 45 Blank
21 Blank
22 Blank
23 Flag
24 CO*O"
25 COINTIO"
-__
---
See Table Z-11.
--_
46 Blank
47 Hold
48 Blank
49 SLrObe
50 Blank
see Table 2-11.
_--
see Table z-11.
--_
FIGURE 6. Typical Open-Collector Output. FIGURE 7. Pi” Designation For Printer output.
13
OPERATING INSTRUCTIONS MODELS164, 164TT
z-15. TRIP OPERATION (Model 164K1. The Model 164TT
is identical to the standard Model 164 except for the
"dditio" of high and law limit "on-latching trip cir-
cuits.
a. mip mimics. The Model 164TT has two indepen-
denely adjustable trips: one high limit and one low
limit type, non-latching.
b. Trip Levels. -200% to fZOO% of full range for
each trip. For example, if the high trip level were
set co trip at a display reading of f1000, the Model
164
would indicate a "Trip" level whenever the dis-
play exceeded +I~000 regardless of the function or
decimal puinr location.
C. Trip Setting. The Model 164TT provides front
pa"el screwdriver adjusrments for the high and low
trip circuits.
1. HI Trip. The front panel trip indicator lamp
serves as a "I level trip indicator and a momen-
tar" contact p"shb"tto". when the button is de-
pressed, the Model 164TT will display the trip
reference setting. The display indicates borh the
polarity and reference level setfing of the trip
circuit. A small chisel blade screwdriver is "eed-
ed to make the adjustment.
the Model 164 will display ehe trip reference set-
ting. The display indicates both the polarity and
reference level setting pi the trip circuit. A
small chisel blade screwdriver is needed ea make
the adjustment. a
3. Set Precision. The Model 164TT will indicate
a trip condition when the reading is within a ml-
erance ?O.l% of full range with respect to the re-
ference setting. Repeatability is fO.l% of full
range. Reference stability is iO.1% of full range,
"C.
4. Hysteresis. me trip circuit has a hysteresit
of less than 0.6% of full range. For example, once
the trip circuit is "tripped" the input signal must
vary by at least 0.6% of full range before the trip
can reset.
d. Trip Indication.
1. HI and LO Indicators. The Model 164TT pro-
vides visual indication of eriP point via front
panel indicator lamps.
2. Trip Contacts. One set of form A mntacfs
are furnished for each trip. Rear panel terminals
are provided.
2. LO Trip. The front ,mnel indicator lamp serves 3. contap Ratings. 10 volt-amperes, 0.5 ampere,
as a LO level trip indicator and a mmenrary con- 120 volts rms ac maximum. 6 watts, 0.5 ampere, 12
tact pushbutton. When the button is depressed, "olts dc maximum.
SECTION 3. THEORY OF OPERATION
.
a. DMMMode. The basic digital voltmeter consises
ot two sections packaged together in one chassis: 11
analog amplifier 2) analog to digital converter. me
analog amplifier utilizes a modulator/demodulator tech-
nique to achieve high dc stability. me analog-to-
digital converter is a dual-slope converter with two
readings/second conversion rate.
b. Milliohmmeter Node. The milliohqneter circuitry
includes a currene source which provides current in
decade steps from 10 microamperes to 100 milliamperes.
Two addiLianal terminals are provided on the front
pane1 to permit four-terminal resistance meaS"renle"tS.
The voltmeter circuitry of the basic instrument is
used to monitor the voltage drop across the "MM Cer-
minals.
3-L. ANALOCAHPLIFIER OPERATION. A simplified black
diagram of the analog amplifier is shown in Figure lo.
a. voltage Amplifier Operation. The amplifier has
a full-ranee sensitivitv which is selected from 1
millivolt to 100 millivolts. *hove 100 millivolts,
the input signal is divided down to the 100 m" full-
scale level. The signal flow path can be described
as fallows: An input signal applied at the Input
High terminal is aetenuaced by a resistor divider,
The signal is filtered and applied to a modulator cir-
cuit The a-c signal is then applied and demodulared.
h final variable gain d-c amplifier provides a d-c
signal for the Analog out,x,t and A-to-D converter.
'rhe output is fedback to provide overall gain stability.
1. Input Resistor Divider. The i"P"L signal is
attenuated by a divider network for FU\NGESwitch
IV, 10". 100" and iOOOV full-range positions.
2. Filter Network. The filter network provides
filtering of Normal Mode noise.
3. Modulator Circuit. This circuit converls Lk
law level d-c input to an a-c signal.
7. Chopper Drive circuit. 'This circuit generaces
the drive voltage for the mod-demod cho,,pers.
C. OhmmeCer operation (Omltl. me illStr”ne”L
provides a known constant current which is applied
to the unknown resiseance. The voltage output is
proportional eo the resistance measured.

This manual suits for next models

1

Other Keithley Multimeter manuals

Keithley AUTO-PROBE 167 User manual

Keithley

Keithley AUTO-PROBE 167 User manual

Keithley 178 User manual

Keithley

Keithley 178 User manual

Keithley 2001 Use and care manual

Keithley

Keithley 2001 Use and care manual

Keithley 195A User manual

Keithley

Keithley 195A User manual

Keithley DAQ6510 User manual

Keithley

Keithley DAQ6510 User manual

Keithley 1765 User manual

Keithley

Keithley 1765 User manual

Keithley 171 User manual

Keithley

Keithley 171 User manual

Keithley 2110 Use and care manual

Keithley

Keithley 2110 Use and care manual

Keithley DMM6500 User manual

Keithley

Keithley DMM6500 User manual

Keithley 2701 User manual

Keithley

Keithley 2701 User manual

Keithley DMM7510 User manual

Keithley

Keithley DMM7510 User manual

Keithley 2002 Parts list manual

Keithley

Keithley 2002 Parts list manual

Keithley DMM7510 Use and care manual

Keithley

Keithley DMM7510 Use and care manual

Keithley DAQ6510 User manual

Keithley

Keithley DAQ6510 User manual

Keithley 2701 User manual

Keithley

Keithley 2701 User manual

Keithley 3700A Series Instruction Manual

Keithley

Keithley 3700A Series Instruction Manual

Keithley 2001 User manual

Keithley

Keithley 2001 User manual

Keithley 179A User manual

Keithley

Keithley 179A User manual

Keithley 169 User manual

Keithley

Keithley 169 User manual

Keithley 196 User manual

Keithley

Keithley 196 User manual

Keithley 2002 Use and care manual

Keithley

Keithley 2002 Use and care manual

Keithley DMM7510 User manual

Keithley

Keithley DMM7510 User manual

Keithley 165 User manual

Keithley

Keithley 165 User manual

Keithley 2110 User manual

Keithley

Keithley 2110 User manual

Popular Multimeter manuals by other brands

Fluke 175 user manual

Fluke

Fluke 175 user manual

Contrel EMM-4L instruction manual

Contrel

Contrel EMM-4L instruction manual

Kaise KF-20 instruction manual

Kaise

Kaise KF-20 instruction manual

3B SCIENTIFIC PHYSICS E 1006809 instruction sheet

3B SCIENTIFIC PHYSICS

3B SCIENTIFIC PHYSICS E 1006809 instruction sheet

HP 3490A Operating and service manual

HP

HP 3490A Operating and service manual

Velleman INIA011 user manual

Velleman

Velleman INIA011 user manual

FLIR Extech Instruments MultiMaster MM560A user guide

FLIR

FLIR Extech Instruments MultiMaster MM560A user guide

Extech Instruments MN62 user guide

Extech Instruments

Extech Instruments MN62 user guide

INNO V30 user manual

INNO

INNO V30 user manual

C-LOGIC 520 instruction manual

C-LOGIC

C-LOGIC 520 instruction manual

Greenlee CM-1500 instruction manual

Greenlee

Greenlee CM-1500 instruction manual

ES TMX-589 user manual

ES

ES TMX-589 user manual

Clarke CDM3 operating instructions

Clarke

Clarke CDM3 operating instructions

EZ Digital DM-530SRS Operation manual

EZ Digital

EZ Digital DM-530SRS Operation manual

Amprobe 5XP-A user manual

Amprobe

Amprobe 5XP-A user manual

Clarke CDM-35 operating instructions

Clarke

Clarke CDM-35 operating instructions

TECPEL DMM-136A Operation manual

TECPEL

TECPEL DMM-136A Operation manual

Gossen MetraWatt METRAHIT ULTRA operating instructions

Gossen MetraWatt

Gossen MetraWatt METRAHIT ULTRA operating instructions

manuals.online logo
manuals.online logoBrands
  • About & Mission
  • Contact us
  • Privacy Policy
  • Terms and Conditions

Copyright 2025 Manuals.Online. All Rights Reserved.