manuals.online logo
Brands
  1. Home
  2. •
  3. Brands
  4. •
  5. Keller
  6. •
  7. Measuring Instrument
  8. •
  9. Keller LEO 5 User manual

Keller LEO 5 User manual

Hochauösendes Manometer mit Peak- und Aufzeichnungs-Funktion
High Resolution Manometer with Peak and Record Function
Manomètre haute résolution avec fonctions d’enregistrement et de mesure des pics de pression
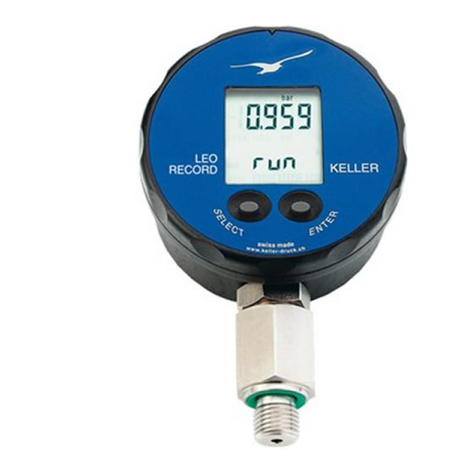
LEO 5
Betriebsanleitung · Operating Instructions · Notice d’utilisation
Swiss Made
1
www.keller-druck.com
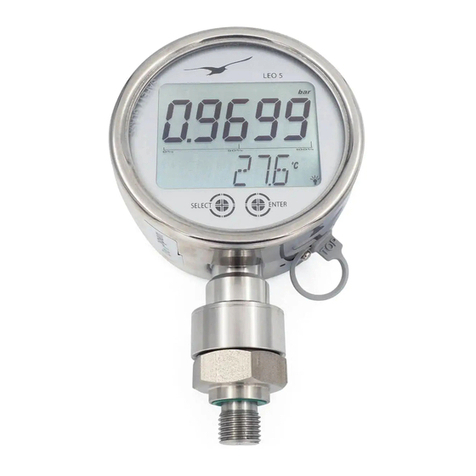
LEO 5 – Hochgenaues Manometer für Druck- und Temperaturmessung, mit
Druckspitzen- (Peak) und Aufnahme- (Record) Funktion. Hohe Messwertauö-
sung (20 Bit ADC), lange Betriebslaufzeiten dank internem Akkumulator und ein
robustes Gehäuse (IP66) ergänzen die Produktspezikationen.
LEO 5 – High-precision manometer for measuring pressure and temperature
with a Peak and Record function. High measuring resolution (20 bit ADC), long
operating cycles thanks to an internal accumulator, and a sturdy case (IP66)
round off the product specications.
LEO 5 – Manomètre ultraprécis pour mesure de pression et de température,
avec fonction pics de pression (Peak) et enregistrement (Record). Ce produit se
distingue en outre par sa haute résolution (convertisseur analogique/numérique
de 20 bits), sa grande autonomie (appareil équipé d’une batterie interne) et son
boîtier robuste (IP 66).
LEO 5 verfügt über zwei Touch Keys. Ein Tastendruck wird durch die Berührung des
Feldes «SELECT» oder «ENTER» eingeleitet und durch Loslassen nach mindestens
0,5 Sekunden ausgeführt (bewegen Sie den Finger mindes-
tens 1 cm weg vom Display).
LEO 5 is equipped with two touch keys. A
keypress is initiated by touching the «SE-
LECT» or «ENTER» key eld and activated
by releasing it after at least 0.5 second
(move your nger at least 1 cm away from
the display).
Le manomètre LEO 5 est doté de deux
touches tactiles portant les mentions «SE-
LECT» (sélectionner) et «ENTER» (entrer).
Ces touches réagissent au moindre efeure-
ment. Pour actionner l’une des touches, il vous
suft de maintenir le doigt dessus pendant 0,5
seconde, puis de le relever (attention: votre doigt ne
doit pas se trouver à moins d’un centimètre de l’écran).
Berührungsempfindliche Tasten / Touch Keys / Touches tactiles
Beschreibung / Description / Description
DeutschEnglishFrançais
2
www.keller-druck.com
Einschalten: Durch Drücken von «SELECT» startet das Display. Das Gerät zeigt
«PRESS ENTER» an. Drücken Sie «ENTER» um das Manometer zu starten, dann
«SELECT», um zwischen den Funktionen zu wählen. Um einen Befehl auszuführen
drücken Sie wieder «ENTER». Das Gerät hat folgende Hauptfunktionen:
MENÜ: Zugang zu den Funktionen, die im Abschnitt «MENU» und «UNTERMENU»
dieses Handbuchs aufgeführt sind.
RESET: Min.-/Max.-Wert werden dem aktuellen Druck gleichgesetzt.
OFF: Schaltet das Gerät aus.
Hinweis: Wird während 10 Sekunden keine Taste gedrückt, wechselt das Display
zurück zum Hauptbildschirm.
Turn ON: Touching the «SELECT» key turns on the display. «PRESS ENTER»
appears on the device. Press «ENTER» to start the manometer and use «SELECT»
to choose between different functions. To execute a selected command, press «EN-
TER» again. The device has the following main functions:
MENU: Provides access to the functions that are specied in the «MENU» and
«SUB-MENU» section of these instructions.
RESET: The min./max. values are set to the actual pressure.
OFF: Turns the device off.
Note. If no keys are pressed for 10 seconds, the display switches back to the
main screen.
Mise en service: l’écran s’allume par un simple actionnement de la touche
«SELECT». L’appareil afche «PRESS ENTER» (appuyer sur la touche ENTER).
Appuyez sur la touche «ENTER» pour mettre l’appareil en service et choisissez l’une
des fonctions grâce à la touche «SELECT». Pour effectuer une opération, appuyez de
nouveau sur «ENTER». Les fonctions principales de cet appareil sont les suivantes:
MENU: accès aux fonctions des rubriques «MENU» et «SOUS-MENU» de ce
manuel;
RESET (réinitialisation): les valeurs minimale et maximale sont réinitialisées à valeur
de la pression actuelle;
OFF (arrêt): mise hors tension de l’appareil.
Remarque: si aucune touche n’est pressée au bout de 10 secondes, le menu princi-
pal s’afche à nouveau.
Einschalten, Basis-Menu / Turn ON, Basic Menu / Mise en service, Menu de base
3
www.keller-druck.com
Die USB-Schnittstelle wird zum Laden und Kommunizieren mit dem Manometer
verwendet. Für den Zugriff auf die USB-Schnittstelle den Gummischutz auf der
Rückseite des Gerätes entfernen.
Achtung: Der Gummischutz ist auch ein Sicherheits-
ventil bei Überdruck. Überschreitet der innere
Druck einen kritischen Punkt, fällt es heraus.
The USB interface is used to load and com-
municate with the manometer. Remove the
rubber protection on the back of the device
to access the USB interface.
Note: The rubber also acts as an overpres-
sure safety valve. It will fall off if the internal
pressure exceeds a critical level.
Retirez le cache en caoutchouc à l’arrière de
l’appareil pour accéder à l’interface USB.
Remarque: cette protection offre de surcroît
une certaine sécurité en cas de surpression.
En effet, elle se détache de l’appareil dès que
la pression interne atteint un seuil critique.
Rec ON
Startet eine Aufzeichnung (Record). Die Einstellun-
gen für Messintervall, Startzeitpunkt etc. werden
vorgängig über die Computersoftware konguriert.
Starts the Record process. Settings for measure-
ment interval, start time, etc. are precongured
via the computer software.
Effectue un enregistrement (Record). Les pa-
ramètres de l’intervalle de mesure, de l’heure de
démarrage, etc. sont congurés au préalable à partir
du logiciel informatique.
USB-Schnittstelle / USB Connection / Connexion USB
Menü / Menu / Menu
4
www.keller-druck.com
Rec OFF
Beendet einen aktiven Record.
Ends an active record.
Arrête un enregistrement en cours.
Peak START
PEAK OFF: Normaler Messmodus mit 2 Messungen
pro Sekunde. PEAK ON: Schneller Messmodus mit
5000 Messungen pro Sekunde.
Im Peak-Modus beträgt die Batterielaufzeit ca. 160
Stunden. Die Aufzeichnungsfunktion (Record) ist
auch im Peakmodus möglich. Das Gerät erfasst
5000 Messwerte pro Sekunde und ermittelt dabei
den aufgetretenen Minimal- (PMin) und Maximalwert (PMax) für Druck. Zusätzlich
wird ein Druckwert (P1) und die Temperatur vom ausgewählten Messintervall (TOB1)
max. 1x pro Sekunde gespeichert.
PEAK OFF: Normal measuring mode with 2 measurements per second. PEAK ON:
Fast measuring mode with 5,000 measurements per second.
In Peak mode, the battery has a life of around 160 hours. The Record function is
also available in Peak mode. The device records 5,000 measurements per second
and calculates the minimum (PMin) and maximum (PMax) pressure values from tho-
se recorded. In addition, a pressure value (P1) and the temperature in the selected
measuring interval (TOB1) are saved at most once per second.
PEAK OFF: mode de mesure normale avec 2 mesures/seconde. PEAK ON: mode
de mesure rapide avec 5000 mesures/seconde
En mode Peak, l’autonomie de l’appareil est de 160 heures. La fonction
d’enregistrement (Record) est également disponible en mode Peak. L’appareil
effectue 5000 mesures par seconde et détermine les valeurs minimale (PMin) et ma-
ximale (PMax) de la pression. En outre, l’appareil peut enregistrer à chaque seconde
une valeur de pression (P1) et la température relevée durant l’intervalle de mesure
sélectionné (TOB1).
5
www.keller-druck.com
RF BT ON/OFF
Für die LEO 5-Bluetoothfunktion (optional) auf «ON»
oder «OFF» schalten. Bei «ON» hält der Akkumula-
tor etwa 40 Stunden.
Switch the LEO 5 Bluetooth module (optional) «ON»
or «OFF» to communicate wirelessly. If turned
«ON», one battery charge lasts for about 40 hours.
Permet d‘activer (ON) et de désactiver (OFF) la
fonction Bluetooth (optionnelle) de l‘appareil. Si cette
fonction est activée (ON), la batterie de l’appareil a
une autonomie d’environ 40 heures.
ZERO SET
Setzt einen neuen Druck-Nullpunkt.
Sets a new zero reference point.
Dénit une nouvelle valeur comme référence de
mesure (nouveau point zéro).
Messablauf im Peak-Mode (5000 Messungen/Sekunde)
Measuring curve of the Peak-Mode (5000 meas./s)
Courbe de mesure en mode PEAK (5000 mesures/s)
04
2
P
t [ms]
RESET
Messungen
PEAK
min.
PEAK
max.
6
www.keller-druck.com
ZERO RESET
Setzt den Druck-Nullpunkt auf Werkseinstellung.
Sets the zero pressure point to its factory setting.
Le point zéro est réinitialisé à sa valeur d‘origine
(paramètre d‘usine).
EXIT
Verlassen Sie ein Untermenü mit «ENTER», solange
«EXIT» angezeigt wird. Das Display wechselt zurück
zum Hauptmenü.
Each sub-menu can be left by pressing «ENTER» while
«EXIT» is displayed. The display will switch back to the main menu.
Pour quitter un sous-menu, appuyez sur la touche «ENTER» lorsque la mention
«EXIT» (quitter) s’afche. Le menu principal s’afche à nouveau.
UNIT
Einheitenwahl
Unit selection
Sélection de l’unité de mesure
bar, mbar, hPa, kPa, MPa, PSI, kp/cm2, cmH2O,
mH2O, inH2O, ftH2O, mmHg, inHg
Untermenü / Submenu / Sous-menu
7
www.keller-druck.com
CONT
Dauerbetrieb
Continuous mode
Mode continu
CONT ON: Deaktiviert die automatische Ausschaltfunktion.
CONT OFF: Aktiviert die automatische Ausschaltfunktion (das Gerät schaltet sich
15 Minuten nach der letzten Tastenbetätigung automatisch aus).
CONT ON: Deactivates the automatic turn-off function.
CONT OFF: Activates the automatic turn-off function (the device turns off 15 minutes
after a key was last pressed).
CONT ON: désactive la fonction d’arrêt automatique
CONT OFF: active la fonction d’arrêt automatique (l’appareil s’arrête automatique-
ment 15 min après le dernier actionnement d’une touche).
DISPL
Auswahl Hauptdisplay
Main display selection
Sélection de l’afchage principal
8
www.keller-druck.com
Wechselt zwischen der Temperatur-Anzeige und der Min./Max. Druck-Anzeige.
Switches between the temperature display and the min./max. pressure value display.
Commute entre deux modes d’afchage: température et pression minimale/maximale.
BACKL
Einstellung Hintergrundbeleuchtung
Backlight setting
Réglage du rétro-éclairage
Die Hintergrundbeleuchtung kann auf «ONOFF», «ON» oder «OFF» gesetzt werden.
«ONOFF» aktiviert die automatische Ausschaltfunktion, welche die Hintergrundbe-
leuchtung bei Berührung aktiviert und 10 Sekunden nach der letzten Tastenbetäti-
gung ausschaltet.
The backlight can be set to «ONOFF», «ON» or «OFF». «ONOFF» launches the
automatic turn-off function, which activates the backlight when it is pressed and turns
the backlight off 10 seconds after a key was last pressed.
Le rétro-éclairage peut être réglé sur «ONOFF», «ON» ou «OFF». L’option
«ONOFF» active la fonction automatique qui allume le rétro-éclairage dès qu’on
touche l’appareil et l’éteint 10 secondes après.
9
www.keller-druck.com
RESL
Auösungswahl
Resolution selection
Sélection de la résolution
Legen Sie die Auösung des Messwerts auf 0 bis 4 Dezimalstellen fest.
Sets the measuring resolution to between 0 and 4 decimal places (full scale dependent).
Règle la résolution de mesure entre 0 et 4 décimales.
ACCU
Informationen zu Akkumulator und Ladestatus
Accumulator information and charge status
Informations et état de charge de la batterie.
Zeigt die Akkumulator-Spannung und den Ladestand
an.: 3,2 Volt steht für einen leeren Akkumulator, 4,2 Volt
für einen voll aufgeladenen.
Displays the accumulator voltage and charge level. 3.2
volts indicates an empty accumulator, 4.2 volts a fully
charged one.
Afche la tension et le niveau de charge de la batterie.
Une valeur de 3,2 volts correspond à une batterie vide,
contre 4,2 volts pour une batterie chargée.
10
www.keller-druck.com
Das LEO 5 wird mit einem Akkumulator betrieben, welcher ausschliesslich mit Hilfe
eines USB-Kabels geladen werden kann. Der Akkumulator ist fest im Gerät einge-
baut. Der Austausch des Akkumulators darf nur durch den Hersteller vorgenommen
werden. Durch das unbefugte Öffnen des Gerätes erlischt die Gewährleistung. Um
eine Tiefenentladung zu vermeiden, ist bei Nichtgebrauch des Manometers die
Peak-, Record- und Bluetoothfunktion zu deaktivieren und der Akkumulator jährlich
nachzuladen.
Akkumulatoren dürfen nicht über den normalen Hausmüll entsorgt werden. Zur Ver-
meidung möglicher Umwelt- oder Gesundheitsschäden durch unkontrollierte Müllent-
sorgung muss dieses Produkt von anderen Abfällen getrennt und ordnungsgemäss
recycelt werden, um den nachhaltigen Gebrauch der Rohstoffe zu gewährleisten.
LEO 5 is powered by a rechargeable battery which can only be charged using an
USB cable. The rechargeable battery is welded into the device. Only the manufac-
turer may replace the accumulator. Opening the device without authorization voids
the warranty. To prevent total discharge, the manometer’s Peak, Record and Blue-
tooth functions must be deactivated when it is not in use and the accumulator must
be recharged once a year.
Batteries must never be disposed of in normal household waste. To prevent possi-
ble damage to the environment or to health due to uncontrolled waste disposal, this
product must be separated from other waste and recycled correctly in order to
ensure sustainable use of the raw materials.
Le LEO 5 fonctionne avec une batterie qui ne peut être rechargée qu’à l’aide d’un
câble USB. La batterie est entièrement intégrée à l’appareil. Le remplacement
doit impérativement être réalisé par le fabricant. Toute ouverture non autorisée de
l’appareil annule la garantie. An d’éviter toute décharge excessive, il est recom-
mandé, en cas de non-utilisation du manomètre, de désactiver les fonctions Peak,
Record et Bluetooth, puis de recharger la batterie au moins une fois par an.
Les batteries ne doivent pas être jetées parmi les ordures ménagères. An d’éviter
toute pollution ou atteinte à la santé résultant d’une élimination incontrôlée des
déchets, ce produit doit être séparé des autres déchets et dûment recyclé an de
garantir une utilisation durable des matières premières.
11
www.keller-druck.com
Richtlinien für den sicheren und efzienten Einsatz
Stellen Sie vor der Installation, der Inbetriebnahme und der Bedienung sicher, dass
das Produkt entsprechend den technischen Spezikationen in Bezug auf den Mess-
bereich, das Design und die spezischen Messbedingungen geeignet ist.
• Montieren Sie das Gerät nur an Systeme, die sich im drucklosen Zustand
benden.
• Versuchen Sie nicht, das Gerät zu manipulieren und / oder zu öffnen.
• Lassen Sie das Gerät nicht fallen und werfen Sie es nicht.
• Betreiben Sie das Gerät niemals bei über 80° C.
Guidelines on safe and efcient use
Before installing, commissioning and operating the product, ensure that it complies
with the technical specications relating to measurement range, design and the
specic measuring conditions.
• Only install the device on depressurised systems.
• Do not try to modify or open the device.
• Do not drop or throw the device
• Never operate the device at temperatures over 80°C.
Directives pour une utilisation sûre et efcace
Avant l’installation, la mise en service et l’utilisation du manomètre, vériez que
l’appareil est adapté à l’usage prévu en vous référant aux spécications techniques
(étendue de mesure, design et conditions de mesure spéciques).
• Installez l’appareil uniquement sur des systèmes préalablement hors pression.
• Ne tentez pas de modier ou d’ouvrir l’appareil.
• Ne faites jamais tomber l’appareil et ne le lancez pas.
• Ne faites jamais fonctionner l’appareil à une température supérieure à 80 °C.
Wichtige Informationen / Important Information / Informations importantes
12
www.keller-druck.com
KELLER übernimmt keinerlei Verantwortung für Datenverlust jedweder Art und leistet
bei Datenverlust keinen Schadenersatz. Bei Reparatur oder Austausch des Pro-
duktes können im Produkt gespeicherte Daten verloren gehen. Sie sollten deshalb
immer eine Sicherheitskopie aller im Produkt gespeicherten Daten erstellen, bevor
Sie das Produkt für eine Reparatur oder einen Austausch aushändigen.
KELLER assumes no responsibility for data loss of any nature, and shall not pay any
compensatory damages in the event of data loss. Data stored in the product may be
lost if the product is repaired or replaced. You should always make a backup of all
data stored in the product before handing it in for repair or replacement.
KELLER décline toute responsabilité en cas de perte quelconque de données et par
conséquent ne verse aucun dommage et intérêt. Lors de la réparation ou du rem-
placement du produit, il peut arriver que les données enregistrées soient perdues.
Vous devrez donc toujours sauvegarder toutes les données enregistrées dans le
produit avant d‘expédier votre produit pour réparation ou remplacement.
Im Download-Bereich von www.keller-druck.com kann sämtliche KELLER-Software
heruntergeladen werden. Die Seite enthält stets die aktuellsten Softwareversionen
sowie Datenblätter und Bedienungsanleitungen zu den entsprechenden Produkten.
In the download section on www.keller-druck.com, you will nd all KELLER software
free of charge. The site contains the latest software versions together with data-
sheets and operating instructions for the corresponding products.
À l’adresse www.keller-druck.com, vous trouverez une rubrique Software où vous
pourrez télécharger gratuitement l’ensemble des logiciels KELLER. La page web
contient les dernières versions des logiciels ainsi que les ches techniques et les
notices d’utilisation pour les produits correspondants.
Datensicherheit / Data Security / Sécurité des données
KELLER-Software / KELLER Software / Logiciel KELLER
13
www.keller-druck.com
Die Garantie gilt nicht für Fehler am Gerät, die durch normalen Verschleiss, falsche
Benutzung oder Missbrauch entstanden sind.
Service und Support
Für Service und Support setzen Sie sich bitte mit Ihrem lokalen Händler in Verbin-
dung oder benutzen eine Kontaktmöglichkeit der Website www.keller-druck.com
The warranty does not apply to faults on the device caused by normal wear and tear,
incorrect use or misuse.
Service and Support
For service and support, please contact your local dealer or contact us via
www.keller-druck.com
La garantie ne s’applique pas aux défauts dus à une usure normale, à une
utilisation non conforme ou un usage abusif, ainsi qu’en cas de non-respect de la
présente notice.
Service après-vente et assistance technique
Pour toute demande de service après-vente ou d’assistance technique, veuillez vous
adresser à votre revendeur local ou nous contacter directement via l’adresse:
www.keller-druck.com
Garantiebedingungen / Warranty Conditions / Conditions de garantie
14
www.keller-druck.com
KELLER AG St. Gallerstrasse 119 CH-8404 Winterthur Tel. +41 52 235 25 25
KELLER GmbH Schwarzwaldstrasse 17 D-79798 Jestetten Tel. +41 7745 9214 0
Jestetten, 5. Juni | 5 June | 5 Juin 2014
Hannes W. Keller
Geschäftsführender Inhaber | Managing Owner | Propriétaire et gérant de l’entreprise
mit rechtsgültiger Unterschrift | with legally effective signature | dûment autorisé à signer
Konformitätserklärung
Für die folgenden Erzeug-
nisse…
Digitales Manometer
LEO 5
…wird hiermit bestätigt, dass es
den Anforderungen folgender
EG-Richtlinien entspricht:
EMV-Richtlinie 2004/108/EG
Dieses digitale Manometer LEO
5 wurde entsprechend den
folgenden Normen geprüft:
Declaration of Conformity
We hereby declare that the
following products…
Digital Manometer
LEO 5
meet the basic requirements
which are established in the
following Directives of the
European Community:
Directive 2004/108/EC
As criteria, the following stan-
dards for this digital manometer
LEO 5 are applied:
Déclaration de conformité
Par la présente, nous attestons
que les produits…
Manomètre numérique
LEO 5
satisfait aux exigences
prescrites par les directives de
la Communauté Européenne:
Directive CEM 2004/108/CE
Le manomètre numérique LEO
5 répond aux normes:
Diese Erklärung wird verant-
wortlich für den Hersteller:
This declaration is given for the
manufacturer:
La présente déclaration est
fournie pour le fabricant:
abgegeben durch die in full responsibility by par:
KELLER AG für Druckmesstechnik, St. Gallerstrasse 119, CH-8404 Winterthur
KELLER GmbH, Schwarzwaldstrasse 17, D-79798 Jestetten
EN 61000-6-1:2007 EN 61000-6-2:2005 EN 61000-6-3:2007
EN 61000-6-4:2007 EN 61326-2-3:2006
KELLER AG St. Gallerstrasse 119 CH-8404 Winterthur Tel. +41 52 235 25 25
KELLER GmbH Schwarzwaldstrasse 17 D-79798 Jestetten Tel. +41 7745 9214 0
www.keller-druck.com

Other manuals for LEO 5

3

Other Keller Measuring Instrument manuals

Keller CellaTemp PA 4 Series User manual

Keller

Keller CellaTemp PA 4 Series User manual

Keller LEO 1 Ei User manual

Keller

Keller LEO 1 Ei User manual

Keller CellaTemp PKF Series User manual

Keller

Keller CellaTemp PKF Series User manual

Keller LEX 1 User manual

Keller

Keller LEX 1 User manual

Keller ECO 2 User manual

Keller

Keller ECO 2 User manual

Keller dV-2 Cool User manual

Keller

Keller dV-2 Cool User manual

Keller LEO 1 User manual

Keller

Keller LEO 1 User manual

Keller ITS CellaPort PT 11 Series User manual

Keller

Keller ITS CellaPort PT 11 Series User manual

Keller LEO 1 User manual

Keller

Keller LEO 1 User manual

Keller LEO 5 User manual

Keller

Keller LEO 5 User manual

Keller CellaCast PA 80-K002 User manual

Keller

Keller CellaCast PA 80-K002 User manual

Keller CellaTemp PA 1 Series User manual

Keller

Keller CellaTemp PA 1 Series User manual

Keller LEX 1 User manual

Keller

Keller LEX 1 User manual

Keller CellaCast PA8 Series User manual

Keller

Keller CellaCast PA8 Series User manual

Keller LEO 2 Ei User manual

Keller

Keller LEO 2 Ei User manual

Keller LEO 5 User manual

Keller

Keller LEO 5 User manual

Keller CellaTemp PX1 Series User manual

Keller

Keller CellaTemp PX1 Series User manual

Keller Lex 1 User manual

Keller

Keller Lex 1 User manual

Keller dv-2 User manual

Keller

Keller dv-2 User manual

Keller LEX 1 Ei User manual

Keller

Keller LEX 1 Ei User manual

Keller LEO1-Ei User manual

Keller

Keller LEO1-Ei User manual

Keller CellaTemp PX 41 User manual

Keller

Keller CellaTemp PX 41 User manual

Keller CellaTemp PX1 Series User manual

Keller

Keller CellaTemp PX1 Series User manual

Keller ECO2-Ei User manual

Keller

Keller ECO2-Ei User manual

Popular Measuring Instrument manuals by other brands

Endress+Hauser LPGmass Brief operating instructions

Endress+Hauser

Endress+Hauser LPGmass Brief operating instructions

A&D MF-50 instruction manual

A&D

A&D MF-50 instruction manual

Ascentac OLM300 user guide

Ascentac

Ascentac OLM300 user guide

Phenix Technologies KVM50A manual

Phenix Technologies

Phenix Technologies KVM50A manual

Liquid Controls M Series Installation Manual & Setup Guide

Liquid Controls

Liquid Controls M Series Installation Manual & Setup Guide

Teledyne HVG-2020A instruction manual

Teledyne

Teledyne HVG-2020A instruction manual

SPI Ground Gard Traveler Operation, Troubleshooting and Calibration

SPI

SPI Ground Gard Traveler Operation, Troubleshooting and Calibration

TSI Quest SoundPro instruction manual

TSI Quest

TSI Quest SoundPro instruction manual

Benning CM 4 operating manual

Benning

Benning CM 4 operating manual

Reed Instruments R7900 instruction manual

Reed Instruments

Reed Instruments R7900 instruction manual

Jet BP-1272 Operating instructions and parts manual

Jet

Jet BP-1272 Operating instructions and parts manual

Hioki 3470 instruction manual

Hioki

Hioki 3470 instruction manual

Hioki 9605-01 instruction manual

Hioki

Hioki 9605-01 instruction manual

ATS BBR3 instruction manual

ATS

ATS BBR3 instruction manual

Brookfield LV operating instructions

Brookfield

Brookfield LV operating instructions

Beckman Coulter Cytomics FC 500 Instructions for use

Beckman Coulter

Beckman Coulter Cytomics FC 500 Instructions for use

ELPRO Site Monitoring Kit user manual

ELPRO

ELPRO Site Monitoring Kit user manual

Viavi CellAdvisor JD700B Series user guide

Viavi

Viavi CellAdvisor JD700B Series user guide

manuals.online logo
manuals.online logoBrands
  • About & Mission
  • Contact us
  • Privacy Policy
  • Terms and Conditions

Copyright 2025 Manuals.Online. All Rights Reserved.