manuals.online logo
Brands
  1. Home
  2. •
  3. Brands
  4. •
  5. Keller
  6. •
  7. Measuring Instrument
  8. •
  9. Keller dV-2 Cool User manual

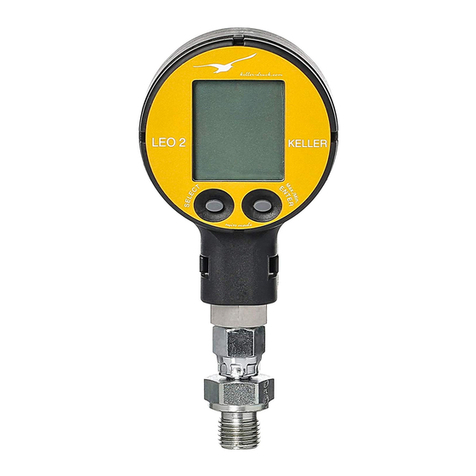
Keller dV-2 Cool User manual

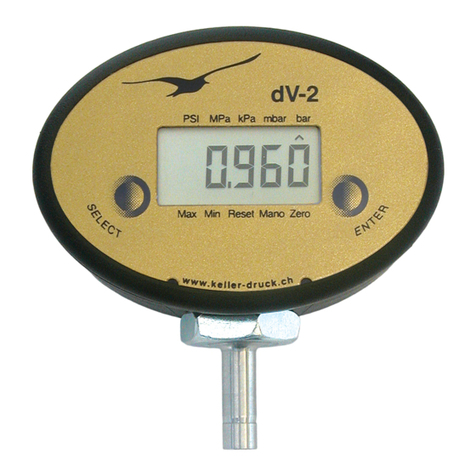
Aktueller Druck- oder Temperatur-Wert
Current pressure or temperature value
Valeur de pression ou de température actuelle
SELECT-Taste
SELECT key
Touche SELECT
Kältemittel
Refrigerant
Fluide frigorigène
Druckanschluss 7/16 UNF
Pressure connection 7/16 UNF
Raccord pression 7/16 UNF
dV-2 Cool
ENTER-Taste, Ein/Aus
ENTER key, on/off
Touche ENTER,
Marche/Arrêt
Digitales Manometer zur Prüfung von Kühlsystemen
Digital Manometer to test Cooling Systems
Manomètre numérique pour le côntrole de systèmes à uides frigorigènes
Version | Edition
08/2018
www.keller-druck.com
Das dV-2 Cool ist ein digitales
Manometer zum messen von
Drücken mit hoher Auösung
und Genauigkeit.
Das Manometer kann im ge-
samten Bereich universell
zum Druckmessen eingesetzt
werden, wobei der Messbereich
bei Vakuum beginnt und bis zum
Maximal Druck reicht. Durch die
hohe Auösung eignet es sich
auch für Dichtigkeitsprüfung,
bzw. Leckagemessungen an
Kälteanlagen.
Wird das dV-2 Cool an einer
Kälteanlage angeschlossen,
so misst es den Druck und be-
rechnet daraus die im System
herrschende Temperatur nach
der Dampfdruckkurve des an-
gewählten Kältemittels. Per
Tastendruck kann auf eines
der 5 Kältemittel, die im Gerät
gespeichert sind, umgeschaltet
werden.
Einschalten:
Das Drücken auf eine der beiden
Tasten schaltet das Gerät ein.
Bei Einschalten mit der rech-
ten Taste (ENTER) zeigt das
dV-2 Cool unmittelbar den
aktuellen Druck an. Beim Ein-
schalten mit der linken Taste
wird zuerst die Softwareversion,
dann der werkseitig abgegli-
chene Druckbereich (in bar)
angezeigt.
Ausschalten:
Ein Betätigen der rechten Taste
(ENTER) schaltet das Gerät aus.
The dV-2 Cool digital mano-
meter is used to measure pres-
sures with high resolution
and
accuracy. The manometer
can
be used universally throughout
the entire range for pressure
measurements; the range starts
from a vacuum and extends
to maximum pressure. The
manometer’s high resolution
also makes it suitable for tight-
ness testing or for measuring
leakages on refrigeration sys-
tems.
If the dV-2 Cool is connected
to a refrigeration system, it
measures the pressure and
uses this value to calculate the
temperature prevailing in the
system according to the vapor
pressure curve for the selected
refrigerant. Users can switch to
any one of the ve refrigerants
stored in the device by pressing
a key.
Turn on:
Pressing either key turns the
instrument on. When pressing
the right key (ENTER), the dV-2
Cool immediately indicates the
actual pressure. When turning
on with the left key, the instru-
ment rst displays the software
version, followed by the full sca-
le pressure range (in bar).
Turn off:
Pressing the right key (ENTER)
turns the instrument off.
Le dV-2 Cool est un manomètre
numérique pour la mesure de
pressions en haute résolution
et avec haute précision. Ce ma-
nomètre peut être utilisé de ma-
nière universelle sur l’ensemble
du spectre de pressions qui
s’étend du vide jusqu’à la pres-
sion maximale de conception.
Sa haute résolution le rend
apte aux contrôles d’étanchéité,
voire aux mesures de fuites sur
les installations frigoriques.
Lorsque le dV-2 Cool est
raccordé à une installation fri-
gorique, il mesure la pression
et calcule à partir de celle-ci
la température régnant dans
le système en fonction de la
pression de vapeur du uide
frigorigène sélectionné. Une
simple pression sur un bouton
permet de sélectionner l’un des
5 uides frigorigènes enregis-
trés dans l’appareil.
Mise en route :
Une action sur l’une des deux
touches met l’instrument en
service. Lorsqu’il est mis en
service avec la touche de droite
(ENTER) le dV-2 Cool afche
immédiatement la pression
actuelle; lorsque la touche de
gauche est utilisée, la version
du logiciel s’afche d’abord et
ensuite l’étendue de mesure
calibrée (en bar).
Arrêt :
Pour arrêter l’instrument, appuyer
sur la touche de droite (ENTER).
- 2 -
Anzeige / Display
Bei eingeschaltetem dV-2 Cool
zeigt ein Pfeil (^) auf die ver-
wendete Druckeinheit oder das
angewählte Kältemittel und
die zugehörige Temperatur-
Einheit.
Leuchtet das Batteriesymbol
() auf, muss die Batterie er-
setzt werden.
Ein Dreieck mit Ausrufezeichen
() zeigt an, dass sich das
Gerät im Dauerbetrieb bendet
(ansonsten schaltet das Gerät
ca. 15 Minuten nach der letzten
Tastenbetätigung aus).
Anzeigemodus wechseln:
Durch das Drücken der
SELECT Taste wechselt die
Anzeige zwischen Druck- und
Kältemitteltemperatur-Anzeige.
Wird innerhalb von 5 Sekun-
den die Taste ENTER gedrückt
(Bestätigung durch done), dann
bleibt die aktuelle Anzeige er-
halten, ansonsten schaltet das
Gerät nach 5 Sekunden zur vor-
herigen Anzeige zurück.
Dauerbetrieb
ON oder OFF:
Nach 2x drücken von SELECT
zeigt das Gerät die aktive Ein-
stellung für Dauerbetrieb. Die
Anzeige ist auf ON, wenn die
automatische Ausschaltfunktion
(15 Min.) aktiviert ist, OFF be-
deutet Dauerbetrieb. Durch drü-
cken der ENTER-Taste erfolgt
Display
When the instrument is turned
on, an arrow (^) is pointing to
the pressure unit in use or the
selected refrigerant and the
corresponding temperature unit.
If the battery symbol ( ) lights
up, the battery must be re-
placed.
A triangle with an exclamation
mark ( ) indicates that the
instrument is in the continuous
operation mode (if not, the in-
strument turns off 15 minutes
after the last key function).
Display Mode:
Press the SELECT key to switch
the display to/from pressure
and refrigerant temperature
readings. Press the ENTER
key within 5 seconds (conrmed
by „done“) to retain the current
display; otherwise, the device
will switch back to the previous
display after 5 seconds.
Continuous mode
ON or OFF:
Press SELECT twice, and the
device will show the active set-
ting for continuous mode. The
display shows ON, if the au-
tomatic shutdown function (15
min.) is enabled, and OFF
indicates continuous operating
mode. Press the ENTER key to
Afchage
Lorsque le dV-2 Cool est en
service, une èche (^) indique
l’unité de pression utilisée ou
le uide frigorigène sélectionné
et l’unité de température corre-
spondante.
Si le symbole de la pile s’allume
(), cette dernière doit être rem-
placée.
Un triangle avec un point
d’exclamation ( ) indique que
l’instrument est en fonctionne-
ment continu (sinon l’instrument
s’éteindra environ 15 minutes
après la dernière manipulation
des touches).
Mode d’afchage :
Une pression sur la touche
SELECT permet de basculer
l’afchage entre la pression
et la température du uide fri-
gorigène. Lorsque la touche
ENTER est actionnée dans
les 5 secondes (conrmation
par «done»), l’afchage actuel
est mémorisé, sinon l’appareil
revient après 5 secondes à
l’afchage précédent.
Fonctionnement permanent
ON ou OFF .
Après une double pression sur
SELECT, l’appareil afche le
réglage actif de fonctionnement
permanent. L’afchage indi-
que ON lorsque la fonction
d’arrêt automatique (15 mi-
nutes) est activée, sinon OFF
signie
fonctionnement per-
- 3 -
ein Wechsel zwischen ON
und OFF. Bei Dauerbetrieb ist
das -Zeichen im Anzeigemo-
dus (bzw. im Display) sichtbar.
Kühlmittelwahl:
SELECT 3x drücken. Die An-
zeige ist auf GAS und der obere
Pfeil zeigt auf ein Kältemittel.
Durch Drücken von SELECT
wandert der Pfeil durch die
aufgedruckten Kältemittel. Ein
Druck auf ENTER (innerhalb
von 5 Sekunden) aktiviert das
angezeigte Kältemittel. Auf der
Anzeige erscheint DONE als
Bestätigung für den Wechsel
des Kältemittels. Wird nicht be-
stätigt, kehrt das dV-2 Cool auf
das ursprünglich ausgewählte
Kältemittel zurück.
Anzeigeeinheiten wechseln
bar / °C <=> PSI / °F
SELECT drücken bis Units
erscheint. Durch Drücken von
ENTER wechselt das dV-2 Cool
die Einheiten der Anzeige. Es
kann zwischen dem Anzeige-
paar bar/°C und PSI/°F gewech-
selt werden.
Hinweise
1)
Die Funktionen und Ein-
heiten können auch durch
konstantes Drücken der
SELECT-Taste angewählt und
durch Loslassen zur Aktivie-
rung freigegeben werden.
change from ON and OFF
and vice-versa. In case of con-
tinuous operation, the symbol
is visible in view mode (or on the
display).
Coolant Selection:
Press SELECT 3x. The display
shows GAS and the upper ar-
row points to a refrigerant. Pres-
sing SELECT causes the arrow
to move through the refrigerants
printed on the device. Pressing
ENTER (within 5 seconds) acti-
vates the indicated refrigerant.
The display indicates DONE to
conrm the change of refrige-
rant. If it is not conrmed, the
dV-2 Cool returns to the origi-
nally selected refrigerant.
Change display units:
bar / °C <=> PSI / °F
Press SELECT until Units ap-
pears. Pressing ENTER chan-
ges the unit display. The view
can be switched between two
pairings: bar/°C and PSI/°F.
Notes
1)
The functions and units can
also be called up by keeping
the SELECT key depressed.
Releasing the key enables the
displayed function or unit to be
activated with the ENTER key.
manent.
L’action
sur la touche
ENTER permet de basculer en-
tre ON et OFF. En fonction-
nement continu, l’écran afche
le signe en mode d’afchage
(par ex. sur l’écran).
Choix du uide frigorigène :
Appuyer 3x sur SELECT.
L’afchage passe à GAS et la
èche supérieure indique un
uide frigorigène. Appuyer sur
la touche SELECT pour faire
déler les uides frigorigènes
mémorisés. Une action sur la
touche ENTER (dans l’intervalle
de 5 secondes) permet de sé-
lectionner le uide frigorigène
afché. Le message DONE
apparaît à l’afchage, conr-
mant le changement de uide
frigorigène. En cas d’absence
de conrmation, le dV-2 Cool
retourne au uide frigorigène
initialement sélectionné.
Modier l’unité d’afchage
bar / °C <=> PSI / °F
Appuyer sur SELECT jusqu’à
ce que Units apparaisse. Une
action sur ENTER permet de
changer l’unité d’afchage du
dV-2 Cool. Il est possible de
choisir entre les paires d’unités
afchées bar /°C et PSI /°F.
Remarques
1) Les fonctions et unités peu-
vent également être appelées
par une action maintenue sur
la touche SELECT et sélec-
tionnées dès relâchement de
la touche.
- 4 -
2) Wird die angewählte Funktion
oder Einheit nicht innerhalb
von 5 Sekunden durch die
ENTER-Taste aktiviert, kehrt
dV-2 Cool ohne Änderung
einer Einstellung in den
Messmodus zurück.
3) Beim Ein- und Ausschalten
(oder beim Batteriewechsel)
bleiben die zuvor getätigten
Einstellungen erhalten.
4)
Kann ein Druck oder eine Tem-
peratur auf dem Display nicht
dargestellt werden, erscheint
UFL (underow) oder OFL
(overow) auf der Anzeige.
5) Wird ein Druck ausserhalb
des Messbereichs des Ge-
rätes angelegt, wird der
letzte gemessene gültige
Druckwert blinkend angezeigt
(Warnung vor Überlast).
6)
Error erscheint, wenn eine Be-
rechnung der Gastemperatur
aufgrund eines Über- oder Un-
terschreiten des Druckes nicht
möglich ist.
7)
Bei Gasgemischen (Zeotrop)
wird die mittlere Temperatur
(Mittelwert zwischen Siede-
und Taupunkttemperatur) be-
rechnet und angezeigt.
8) Bei Temperaturen ausserhalb
0… 60 °C kann die Lesbarkeit
des Displays beeinträchtigt
werden.
2) If the selected function or
unit is not activated within
5 seconds with the ENTER
key, the dV-2 Cool returns to
the measuring mode without
changing any settings.
3) Turning the dV-2 Cool on and
off (or a battery change) does
not inuence any of the pre-
vious settings.
4) If a pressure or a temperature
cannot be shown on the dis-
play, UFL (underow) or OFL
(overow) appears.
5) If the actual pressure goes
beyond the measuring range
of the instrument, the last
valid pressure value that was
measured starts ashing on
the display (overload war-
ning).
6) Error appears if a calculation
of the gas temperature is not
possible due to exceeding or
under-running the pressure.
7)
For gas mixtures (zeotropic),
the average temperature
(mean value of boiling point
and dew point temperatures)
is calculated and displayed.
8)
Temperatures outside of 0…
60 °C
could impair the read-
ability of the display.
2) Si la fonction ou l’unité
choisie n’est pas validée
dans les 5 secondes avec
la touche ENTER, le dV-2
Cool bascule automatique-
ment sans modication des
réglages en mode mesure.
3)
La mise en marche et l’arrêt (ou
un changement de pile) du dV-2
Cool ne modient pas les ré-
glages précédemment validés.
4)
Si une pression ou une tem-
pérature ne peut être afchée,
le message UFL (underow)
ou OFL (overow) apparaît à
l’écran.
5) Si une pression se situant en
dehors de l’étendue de me-
sure de l’instrument est ap-
pliquée, la dernière valeur de
pression mesurée est afchée
clignotante (avertissement de
surcharge)
6) Le message Error apparaît
lorsqu’un calcul de la tempé-
rature du gaz n’est pas possi-
ble en raison d’une pression
trop faible ou du dépasse-
ment de la pression.
7)
Dans le cas de mélanges de
gaz (azéotrope), l’appareil
calcule et afche la tempéra-
ture moyenne (température
moyenne entre température
d’ébullition et température de
point de rosée).
8)
La lisibilité de l’afchage peut
être affectée à une tempéra-
ture hors de 0…60 °C.
- 5 -
Installation
Das dV-2 Cool in den Druckan-
schluss drehen und über
den Sechskant des Druckauf-
nehmers (Druckanschluss)
anziehen (max. 50 Nm). Falls
erforderlich, Manometergehäu-
se ausrichten.
Das Gerät darf nur von autori-
siertem Fachpersonal installiert
und betrieben werden.
Batteriewechsel /
-lebensdauer
Den frontseitigen Deckel vor-
sichtig von Hand nach vorne
ziehen. Die Batterie, wie ab-
gebildet, an der Plus-Seite mit
einem schmalen Gegenstand
aus dem Batteriehalter lösen
und eine neue Batterie einset-
zen (Typ CR 2032 Lithium 3,0
V). Deckel wieder einsetzen und
auf Einrasten prüfen.
Installation
Screw the dV-2 Cool into the
pressure port and tighten using
the hexagon of the transducer
(pressure connection) (max.
50 Nm). If necessary, adjust the
manometer housing.
The instrument may only be
installed and operated by autho-
rized qualied personnel.
Battery Change
Carefully pull forward the front-
sided cover by hand. Remove
the battery from its holder on the
plus side using a small object,
as shown and pull the battery
out of the battery holder and
insert a new one (type CR 2032
Lithium 3,0 V). Snap the cover
back into its place.
Installation
Visser dV-2 Cool sur l’installation
et le serrer à l’aide de l’écrou
6 pans (max. 50 Nm). Si né-
cessaire, ajuster le boîtier du
manomètre.
L’instrument doit être installé et
manipulé uniquement par des
personnes qualiées et auto-
risées.
Remplacement et
durée de vie de la pile
Tirer prudemment à la main
le couvercle frontal vers
l’avant. Retirez la pile de son
support du côté plus au mo-
yen d’un objet étroit, comme
illustré et insérer une nouvelle
pile (type CR 2032 Lithium
3,0 V). Remettre le couvercle en
place et s’assurer qu’il est bien
encliqueté.
- 6 -
Bereich / Abgleich
Die Werkseinstellung des Null-
punktes ist bei 0 bar absolut.
Allgemeine
Sicherheitshinweise
Bitte beachten Sie bei Montage
und Betrieb des digitalen Mano-
meters die entsprechenden
Sicherheitsvorschriften.
Montieren Sie das digitale Ma-
nometer nur an Systeme, wel-
che sich in drucklosem Zustand
benden.
Bei Druckbereichen ≥61 bar
können die Druckanschlüsse pro-
duktionsbedingt Restmengen an
Hydrauli köl aufweisen.
Bitte beachten Sie auch das
zugehörige Datenblatt.
Ranges / Calibration
The factory setting of the zero is
at 0 bar absolute.
General Safety
Instructions
When installing and operating
the digital manometer, attention
should be paid to the correspon-
ding safety regulations.
Only mount the digital mano-
meter onto unpressurized
systems.
On pressure ranges ≥61 bar,
the pressure connections
could show residual hydrau-
lic oil.
Please also note the correspon-
ding data sheet.
Etendue / Calibration
Le réglage d’usine du zéro est à
0 bar absolu.
Consignes de
sécurité
Lors du montage et de
l’utilisation du manomètre nu-
mérique veiller à respecter les
réglementations de sécurité.
L’installation du manomètre nu-
mérique doit être effectuée sur
des systèmes hors pression.
Pour des pressions ≥61 bar, le
raccord pression peut présenter
des traces d’huile hydraulique
d’étalonnage.
Veuillez également consulter la
che technique du manomètre.
- 7 -
Zubehör, Ersatzteile / Accessories, Spare Parts / Accessoires, Pièces Détachées
• Battery Typ CR2032, Lithium 3,0 V Order Number 557005.0015
• Gummischutzhülle / Protective rubber covering /
Coque de protection en caoutchouc Order Number 309030.0019
• Tragetasche / Carrying bag / Sacoche de transport Order Number 309030.0003
Konformitätserklärung
Für das folgenden Erzeugnis…
Digitales Manometer dV-2 Cool
wird hiermit bestätigt, dass sie
den Anforderungen folgender
EU-Richtlinien entsprechen:
EMV-Richtlinie 2014/30/EU
RoHS-Richtlinie 2011/65/EU
Dieses digitale Manometer
dV-2 wurde entsprechend den
folgenden Normen geprüft:
Declaration of Conformity
Herewith we declare, that the
following product…
Digital Manometer dV-2 Cool
meet the basic requirements, which
are established in the guidelines of
the European Union:
Directive EMC 2014/30/EC
Directive RoHS 2011/65/EC
As criteria, the following norms
for this digital manometer
dV-2
are applied:
Déclaration de Conformité
Nous attestons que le produit…
Manomètre numérique
dV-2 Cool
répond aux exigences prévues
par les directives de la Union
Européenne :
CEM 2014/30/CE
Directive RoHS 2011/65/CE
Le manomètre numérique
dV-2 répond aux normes:
KELLER AG für Druckmesstechnik
CH-8404 Winterthur
+41 52 235 25 25
[email protected]
KELLER Ges. für Druckmesstechnik mbH
DE-79798 Jestetten
+49 7745 9214 0
[email protected]
Version | Edition
08/2018
www.keller-druck.com
Diese Erklärung wird verant-
wortlich für den Hersteller:
abgegeben durch die
This declaration is given for the
manufacturer:
in full responsibility by
La présente déclaration est
fournie pour le fabricant :
par :
KELLER AG für Druckmesstechnik, St. Gallerstrasse 119, CH-8404 Winterthur
KELLER GmbH, Schwarzwaldstrasse 17, DE-79798 Jestetten
Jestetten, 14. August | août 2018
Hannes W. Keller
Geschäftsführender Inhaber | Managing Owner | Président Directeur Général
mit rechtsgültiger Unterschrift | with legally effective signature | dûment autorisé à signer
EN 61000-6-1:2007 EN 61000-6-2:2005 EN 61000-6-3:2011 EN 61000-6-4:2011
EN 61326-1:2013 EN 61326-2-3:2013

Other Keller Measuring Instrument manuals

Keller LEO1-Ei User manual

Keller

Keller LEO1-Ei User manual

Keller Lex 1 User manual

Keller

Keller Lex 1 User manual

Keller ITS CellaPort PT 11 Series User manual

Keller

Keller ITS CellaPort PT 11 Series User manual

Keller ADT1 User manual

Keller

Keller ADT1 User manual

Keller CellaTemp PKF Series User manual

Keller

Keller CellaTemp PKF Series User manual

Keller CellaTemp PR11 User manual

Keller

Keller CellaTemp PR11 User manual

Keller MANO GAUGE User manual

Keller

Keller MANO GAUGE User manual

Keller CellaCast PA8 Series User manual

Keller

Keller CellaCast PA8 Series User manual

Keller CellaTemp PA 4 Series User manual

Keller

Keller CellaTemp PA 4 Series User manual

Keller ECO 1 User manual

Keller

Keller ECO 1 User manual

Keller CellaTemp PA 4 Series User manual

Keller

Keller CellaTemp PA 4 Series User manual

Keller EV-97 User manual

Keller

Keller EV-97 User manual

Keller CellaTemp PA 1 Series User manual

Keller

Keller CellaTemp PA 1 Series User manual

Keller ADT1-LR User manual

Keller

Keller ADT1-LR User manual

Keller LEX 1 Ei User manual

Keller

Keller LEX 1 Ei User manual

Keller LEX 1 User manual

Keller

Keller LEX 1 User manual

Keller CellaTemp PX 4 Series User manual

Keller

Keller CellaTemp PX 4 Series User manual

Keller LEX 1 User manual

Keller

Keller LEX 1 User manual

Keller ITS CellaCast PX 8 Series User manual

Keller

Keller ITS CellaCast PX 8 Series User manual

Keller LEO 5 User manual

Keller

Keller LEO 5 User manual

Keller ECO 2 User manual

Keller

Keller ECO 2 User manual

Keller CellaTemp PX1 Series User manual

Keller

Keller CellaTemp PX1 Series User manual

Keller LEO 2 User manual

Keller

Keller LEO 2 User manual

Keller CellaTemp PK Series User manual

Keller

Keller CellaTemp PK Series User manual

Popular Measuring Instrument manuals by other brands

Flexim FLUXUS F401 Operating	 instruction

Flexim

Flexim FLUXUS F401 Operating instruction

Emerson Daniel 3818 Maintenance and troubleshooting manual

Emerson

Emerson Daniel 3818 Maintenance and troubleshooting manual

Milwaukee SM700 user manual

Milwaukee

Milwaukee SM700 user manual

HBK C2 Mounting instructions

HBK

HBK C2 Mounting instructions

Burkert 8012 Series operating instructions

Burkert

Burkert 8012 Series operating instructions

Hanna Instruments HI 93102 instruction manual

Hanna Instruments

Hanna Instruments HI 93102 instruction manual

Mark-10 Series 4 user guide

Mark-10

Mark-10 Series 4 user guide

Ametek AMEVision 3050-OLV user manual

Ametek

Ametek AMEVision 3050-OLV user manual

CAB XENO 4 Assembly instructions

CAB

CAB XENO 4 Assembly instructions

Electrex FEMTO 96 installation guide

Electrex

Electrex FEMTO 96 installation guide

Watts HF Scientific AccUView LED Ex installation instructions

Watts

Watts HF Scientific AccUView LED Ex installation instructions

Sub-Zero MFM443-T instruction manual

Sub-Zero

Sub-Zero MFM443-T instruction manual

TESTO 0555 6451 operating instructions

TESTO

TESTO 0555 6451 operating instructions

SKC 701-001NBS operating instructions

SKC

SKC 701-001NBS operating instructions

LEM Analyst 2050 operating instructions

LEM

LEM Analyst 2050 operating instructions

KJ Instrument KJ6013 Operation manual

KJ Instrument

KJ Instrument KJ6013 Operation manual

RTX 6001 user manual

RTX

RTX 6001 user manual

Leister EXAMO 300F USB operating instructions

Leister

Leister EXAMO 300F USB operating instructions

manuals.online logo
manuals.online logoBrands
  • About & Mission
  • Contact us
  • Privacy Policy
  • Terms and Conditions

Copyright 2025 Manuals.Online. All Rights Reserved.