www.kenall.com |P: 800-4-Kenall |F: 262-891-9701 |10200 55th Street Kenosha, Wisconsin 53144, USA
This product complies with the Buy American Act: manufactured in the United States with more than 50% of the component cost of US origin. It may be covered by patents
found at www.kenall.com/patents.Content of specication sheets is subject to change; please consult www.kenall.com for current product details. ©2019 Kenall Mfg.Co.
2
INSTALLATION INSTRUCTIONS
F-3842
INSTALLATION (cont’d)
METSR (stud spacing 16” – rough opening 10 ¾” x 14 ½”)
• Mounting: Locate and remove appropriate (4)
5/16” dia. mounting holes. Locate and remove
appropriate (1) 7/8” hole for supply wire entry.
Place HOUSING over rough opening. Using
1/4-20 fasteners and anchors suitable for
the mounting surface (not supplied), attach
HOUSING to structure. Attach conduit
to HOUSING.
• Mounting-New Construction: Place the mounting
tray as shown in gure 3. Locate and drill (4)
pilot holes in mounting surface using MOUNTING
TRAY as template. Secure with fasteners and
anchors suitable for the mounting surface (not
supplied). Place HOUSING over rough opening.
Line-up (4) holes in HOUSING with studs
on MOUNTING TRAY; secure with provided
hardware. Attach conduit to HOUSING.
• Mounting-Existing Construction: Place the
mountingtray as shown in gure 4. Locate and
drill (4) pilot holes in mounting surface using
MOUNTING TRAY as template. Secure with
fasteners and anchors suitable for the mounting
surface (not supplied). Place HOUSING over
rough opening. Line-up (4) holes in HOUSING
with studs on MOUNTING TRAY; secure with
provided hardware. Attach conduit to HOUSING.
CMEXR
(Wall thickness 5/8” – stud spacing 16” – rough opening 10 ¾” x 14 ½”)
www.kenall.com |P: 800-4-Kenall |F: 262-891-9701 |10200 55th Street Kenosha, Wisconsin 53144, USA
This product complies with the Buy American Act: manufactured in the United States with more than 50% of the component cost of US origin. It may be covered by patents
found at www.kenall.com/patents.Content of specication sheets is subject to change; please consult www.kenall.com for current product details. ©2019 Kenall Mfg.Co.
2
INSTALLATION INSTRUCTIONS
F-3842
INSTALLATION (cont’d)
METSR (stud spacing 16” – rough opening 10 ¾” x 14 ½”)
• Mounting: Locate and remove appropriate (4)
5/16” dia. mounting holes. Locate and remove
appropriate (1) 7/8” hole for supply wire entry.
Place HOUSING over rough opening. Using
1/4-20 fasteners and anchors suitable for
the mounting surface (not supplied), attach
HOUSING to structure. Attach conduit
to HOUSING.
• Mounting-New Construction: Place the mounting
tray as shown in gure 3. Locate and drill (4)
pilot holes in mounting surface using MOUNTING
TRAY as template. Secure with fasteners and
anchors suitable for the mounting surface (not
supplied). Place HOUSING over rough opening.
Line-up (4) holes in HOUSING with studs
on MOUNTING TRAY; secure with provided
hardware. Attach conduit to HOUSING.
• Mounting-Existing Construction: Place the
mountingtray as shown in gure 4. Locate and
drill (4) pilot holes in mounting surface using
MOUNTING TRAY as template. Secure with
fasteners and anchors suitable for the mounting
surface (not supplied). Place HOUSING over
rough opening. Line-up (4) holes in HOUSING
with studs on MOUNTING TRAY; secure with
provided hardware. Attach conduit to HOUSING.
www. kenall.com P: 800-4-Kenall F: 847-360-1781 1020 Lakeside Drive Gurnee, Illinois 60031
2
INSTALLATION INSTRUCTIONS
F-3842
INSTALLATION (cont’d)
METSR (stud spacing 16” – rough opening 10 ¾” x 14 ½”)
• Mounting: Locate and remove appropriate (4)
5/16” dia. mounting holes. Locate and remove
appropriate (1) 7/8” hole for supply wire entry.
Place HOUSING over rough opening. Using
1/4-20 fasteners and anchors suitable for
the mounting surface (not supplied), attach
HOUSING to structure. Attach conduit
to HOUSING.
• Mounting-New Construction: Place the mounting
tray as shown in gure 3. Locate and drill (4)
pilot holes in mounting surface using MOUNTING
TRAY as template. Secure with fasteners and
anchors suitable for the mounting surface (not
supplied). Place HOUSING over rough opening.
Line-up (4) holes in HOUSING with studs
on MOUNTING TRAY; secure with provided
hardware. Attach conduit to HOUSING.
• Mounting-Existing Construction: Place the
mountingtray as shown in gure 4. Locate and
drill (4) pilot holes in mounting surface using
MOUNTING TRAY as template. Secure with
fasteners and anchors suitable for the mounting
surface (not supplied). Place HOUSING over
rough opening. Line-up (4) holes in HOUSING
with studs on MOUNTING TRAY; secure with
provided hardware. Attach conduit to HOUSING.
CMEXR
(Wall thickness 5/8” – stud spacing 16” – rough opening 10 ¾” x 14 ½”)
www. kenall.com P: 800-4-Kenall F: 847-360-1781 1020 Lakeside Drive Gurnee, Illinois 60031
1
INSTALLATION INSTRUCTIONS
F-3842
IMPORTANT SAFEGUARDS
When using electrical equipment, basic safety precautions
should always be followed, including the following:
THIS PRODUCT MUST BE INSTALLED IN ACCORDANCE WITH THE
APPLICABLE INSTALLATION CODE BY A PERSON FAMILIAR WITH
THE CONSTRUCTION AND OPERATION OF THE PRODUCT AND
THE HAZARDS INVOLVED. DISCONNECT POWER TO ALL CIRCUITS
BEFORE WIRING FIXTURE. INSTALL IN ACCORDANCE WITH
ALL NATIONAL, STATE, AND LOCAL CODES. DO NOT CONNECT
TO AN UNGROUNDED SUPPLY. READ ALL FIXTURE MARKINGS
AND LABELS TO ENSURE CORRECT INSTALLATION OF FIXTURE.
SUPPLEMENTAL INSTRUCTIONS MAY BE LOCATED ON THE
FIXTURE, IN ADDITION TO THIS INSTRUCTION SHEET, REGARDING
ORIENTATION, OR MOUNTING RESTRICTIONS.
SAVE THESE INSTRUCTIONS
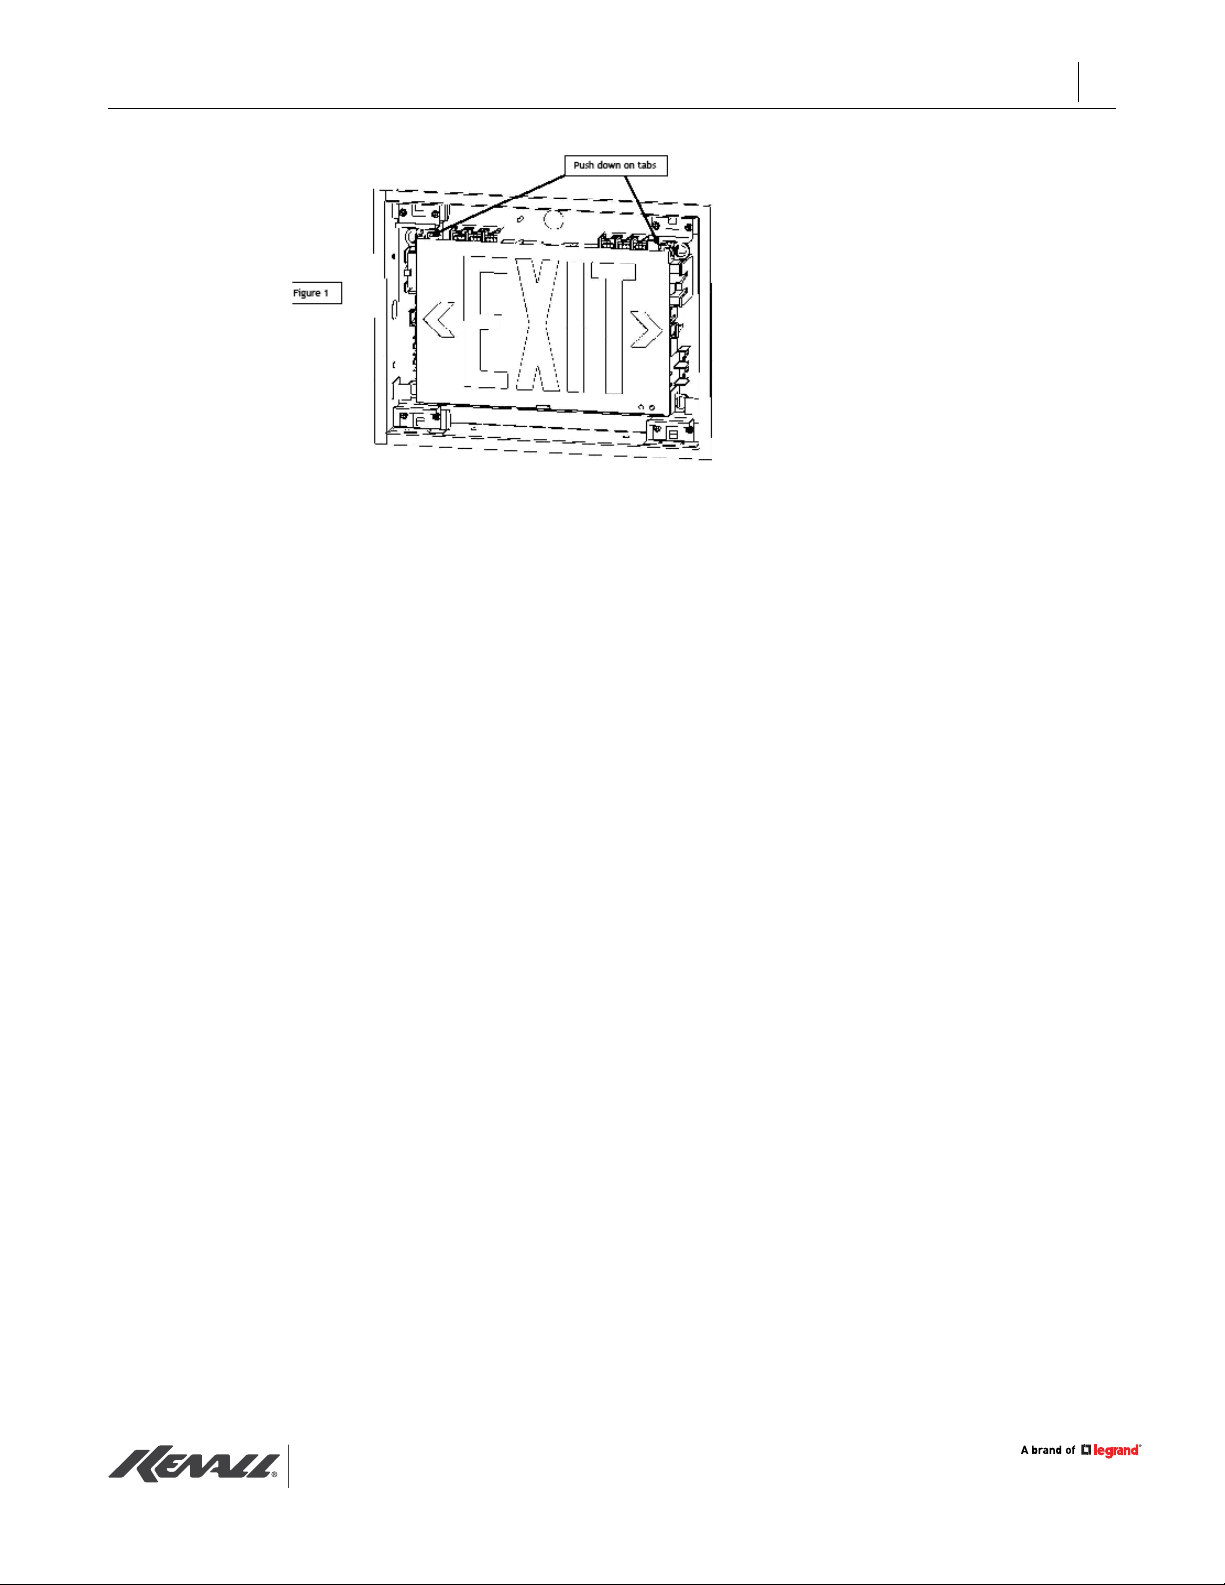
•All Mounting Types (Figure 1) Remove
ELECTRICAL CHASSIS by pushing down on
tabs and pulling out.
•MMEX Wall Mounting:
Locate and remove (4) 5/16” dia.
knockouts and (1) 7/8” dia. knockout on
back surface of HOUSING. Place HOUSING
over an installed electrical junction box
Locate and drill (4) pilot holes in mounting
surface using HOUSING as template. For wet
location installation, remove tear-off sections
of self-adhesive pad GASKET and attach
to HOUSING. Using 1/4-20 fasteners
and anchors suitable for the mounting
surface (not supplied), attach HOUSING
to structure.
•Canopy Mounting (Figure 2): Locate
and remove (2) 5/16” dia. knockouts
and (1) 7/8” dia. knockout either from
end (for side canopy mounting) or top
(for top canopy mounting) of xture.
Place MOUNTING PLATE over an installed
electrical junction box (slotted holes
provided for temporary j-box attachment
prior to permanent mounting). Locate and
drill (4) pilot holes in mounting surface using
MOUNTING PLATE as template. For wet
MIGHTY MAC™
location installation, attach self-adhesive pad
GASKET to MOUNTING PLATE. Using 1/4-
20 fasteners and anchors appropriate for
the mounting surface (not supplied), attach
MOUNTING PLATE to structure. Connect supply
ground to GROUND WIRE provided. For wet
location installation, attach self-adhesive pad
GASKET to CANOPY COVER. Using HARDWARE
provided, attach CANOPY COVER and
HOUSING to CANOPY MOUNTING PLATE.
INSTALLATION INSTRUCTIONS
MMEX SERIES
Install HOUsInG as OUtlIned On tHe fOllOwInG paGes.
Install HOUsInG as OUtlIned On tHe fOllOwInG paGes.
CMEXR
(Wall thickness 5/8” – stud spacing 16” – rough opening 10 ¾” x 14 ½”)
Install HOUsInG as OUtlIned On tHe fOllOwInG paGes.