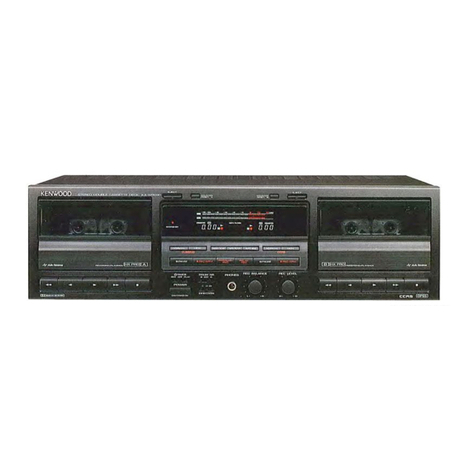
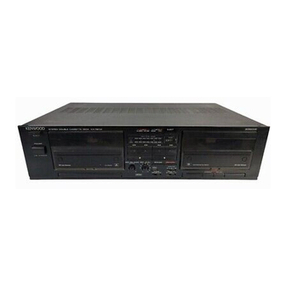
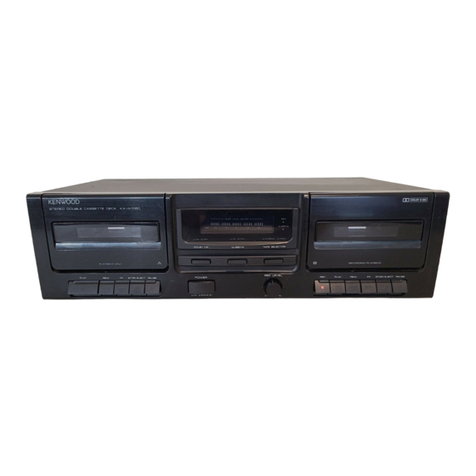
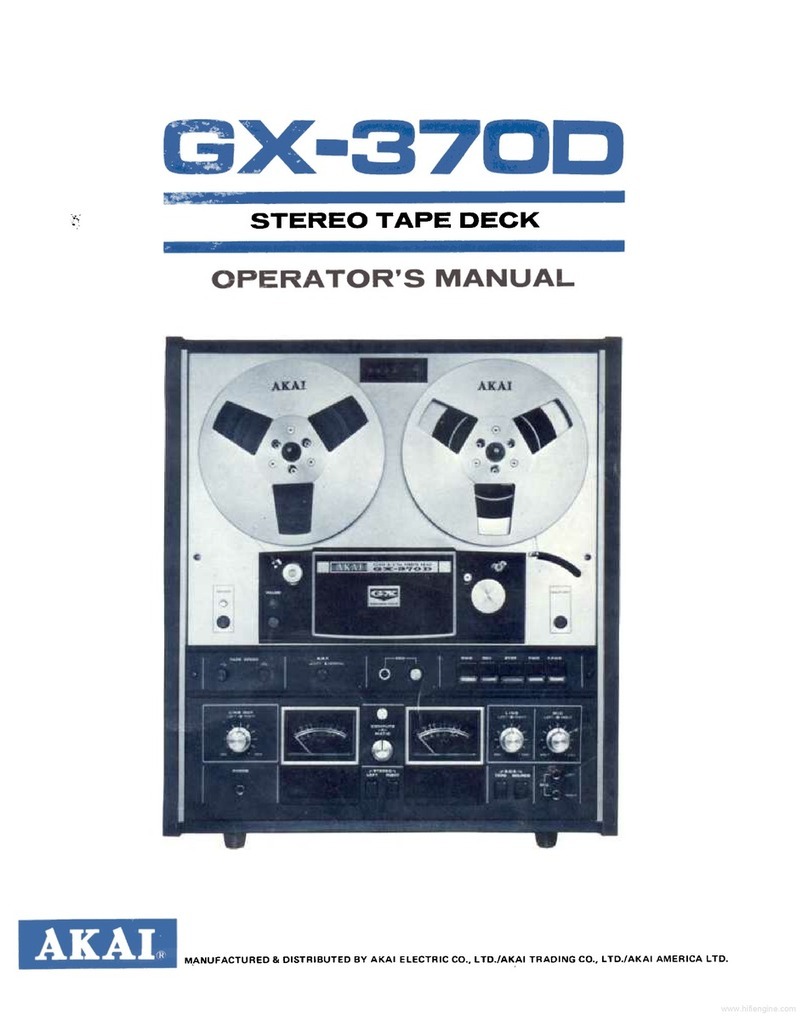
Kenwood KX-77CW User manual

STEREO
CASSETTE
TAPE
DECK
KX-77CW
KENWOOD
INSTRUCTION
MANUAL
©PRINTED
IN
JAPAN
B50-8960-00(K,P,U,UE,M,X,E)(A)
88/12
1110987654321
Introduction
Your
choice
of
this
product
indicates
that
you
are
a
de-
votee
to
excellence
in
souna
reproduction.
We
appreciate
your
patronage
and
take
pride
in
the
long
tradition
of
quality
components.
So
that
you
can
get
the
most
out
of
your
unit,
we
sug-
gest
that
you
take
the
time
to
read
through
this
manual
before
you
hook
up
and
operate
your
system.
This
will
acquaint
you
with
operating
features,
and
system-con-
nection
considerations,
so
that
your
listening
pleasure
will
be
enhanced
right
from
the
start.
You
will
notice
that
in
all
aspects
of
planning,
engineering,
styling,
operating
convenience
and
adaptability,
we
have
sought
to
anticip-
ate
your
needs
and
desires.
Keep
this
manual
handy
for
future
reference.
For
your
records
Record
the
serial
number,
found
on
the
back
of
the
unit,
in
the
spaces
designated
on
the
warranty
card,
and
in
the
space
provided
below.
Refer
to
the
model
and
serial
numbers
whenever
you
call
upon
your
dealer
for
infor-
mation
or
service
on
this
product.
Model
KX-77CW
Serial
Number
Unpacking
Unpack
the
unit
carefully
and
make
sure
that
all
acces-
sories
and
cables
are
put
aside
so
they
will
not
be
lost.
Examine
the
unit
for
any
possibility
of
shipping
damage.
If
your
unit
is
damaged
or
fails
to
operate,
notify
your
dealer
immediately.
If
your
unit
was
shipped
to
you
di-
rectly,
notify
the
shipping
company
without
delay.
Only
the
consignee
(the
person
or
company
receiving
the
unit)
can
file
a
claim
against
the
carrier
for
shipping
damage.
We
recommend
that
you
retain
the
original
carton
and
packing
materials
for
use
should
you
transport
or
ship
the
unit
in
the
future.
Contents
Z\Before
applying
power
A\Safety
precautions
AX|mportant
safeguards
System
connections
Connections,
indicators
and
connectors
Tape
playback
WARNING
NOTICE:
IN
MOST
CASES
IT
IS
AN
INFRINGEMENT
OF
COPY-
RIGHT
TO
MAKE
COPIES
OF
TAPES
OR
DISCS
WITH-
OUT
THE
PERMISSION
OF
THE
COPYRIGHT
OWNERS.
ANYONE
WISHING
TO
COPY
COMMER-
CIALLY
AVAILABLE
TAPES
OR
DISCS
SHOULD
CON-
TACT
THE
MECHANICAL
COPYRIGHT
PROTECTION
SOCIETY
LIMITED
OR
THE
PERFORMING
RIGHT
SO-
CIETY
LIMITED.
DOLBY
and
the
double-D
symbol
are
trademarks
of
Dol-
by
Laboratories
Licensing
Corporation.
Noise
reduction
circuit
made
under
license
from
Dolby
Laboratories
Licensing
Corporation.
Accessories
RCA
Pin-plud
cord).
ciscus
2st
bebe
eta
ee
eres
2
System
control
cord
(Except
for
some
areas)...
0...
eee
ee
eee
1
Caution
:
Read
the
following
pages
marked
Z\
carefully
to
keep
your
safety.
Tape
recording
Timer
stand
by
operation
Maintenance
In
case
of
difficulty
Specifications

Before
applying
power
ZX
Caution:
Read
this
page
carefully
to
keep
your
safety.
Important!
U.S.A.,
Canada,
Australia,
and
Europe
Units
shipped
to
the
U.S.A.
and
Canada
are
designed
for
operation
on
120
V
AC
only.
Units
shipped
to
Australia
are
designed
for
operation
on
240
V
AC
only.
Units
shipped
to
Europe
are
designed
for
operation
on
220V
AC
only.
These
units
are
not
equipped
with
an
AC
voltage
selector
switch
and
the
discussion
of
such
a
switch
that
follows,
should
be
disregarded.
All
other
countries
Units
shipped
to
countries
other
than
the
above
countries
are
equipped
with
an
AC
voltage
selector
switch
on
the
rear
panel.
Refer
to
the
following
paragraph
for
the
proper
setting
of
this
switch.
AC
voltage
selection
This
unit
operates
on
120
volts
or
220-240
volts
AC.
The
AC
voltage
selector
switch
on
the
rear
panel
is
set
to
the
voltage
that
prevails
in
the
area
to
which
the
unit
is
shipped.
Before
connecting
the
power
cord
to
your
AC
outlet,
make
sure
that
the
setting
position
of
this
switch
matches
your
line
voltage.
If
not,
it
must
be
set
to
your
voltage
in
accordance
with
the
fol-
lowing
direction.
Note:
——_—____________________________"_"____
Our
warranty
does
not
cover
damage
caused
by
excessive
line
vol-
tage
due
to
improper
setting
of
the
AC
voltage
selector
switch.
AC
110-120V~4®AC
220-240V~
AC
110-120V~\4®AC
220-240V%
=e
[AI
e
This
shows
switch
This
shows
switch
lever
is
locked
in
lever
is
locked
in
110-120V~
220-240V~
position.
position.
Safety
precautions
Move
switch
lever
to
match
your
line
voltage
with
a
smail
screw
driver
or
other
WARNING:
inted
tool.
.
ee
.
TO
PREVENT
FIRE
OR
ELECTRIC
SHOCK,
DO
Pe
epee
ey
ees
NOT
EXPOSE
THIS
APPLIANCE
TO
RAIN
OR
MOISTURE.
CAUTION
CAUTION:
TO
REDUCE
THE
RISK
OF
ELECTRIC
SHOCK,
DO
NOT
RISK
OF
ELECTRIC
SHOCK
REMOVE
COVER
(OR
BACK).
NO
USER-SERVICEABLE
PARTS
INSIDE.
Seo
rE
REFER
SERVICING
TO
QUALIFIED
SERVICE
PERSONNEL.
THE
LIGHTNING
FLASH
WITH
ARROWHEAD
SYMBOL,
WITHIN
AN
EQUILATERAL
TRIANGLE,
1S
INTENDED
TO
ALERT
THE
USER
TO
THE
PRESENCE
OF
UNINSU-
LATED
“DANGEROUS
VOLTAGE”
WITHIN
THE
PRODUCT'S
ENCLOSURE
THAT
MAY
BE
OF
SUFFICIENT
MAGNITUDE
TO
CONSTITUTE
A
RISK
OF
ELECTRIC
SHOCK
TO
PERSONS.
THE
EXCLAMATION
POINT
WITHIN
AN
EQUILATERAL
TRIANGLE
IS
INTENDED
TO
ALERT
THE
USER
TO
THE
PRESENCE
OF
IMPORTANT
OPERATING
AND
MAINTENANCE
(SERVICING)
INSTRUCTIONS
IN
THE
LITERATURE
ACCOMPANY-
ING
THE
APPLIANCE.
2
KX-77CWIK)

Important
safeguards
Please
read
all
of
the
safety
and
operating
instructions
before
operating
this
unit.
For
best
results,
follow
all
warnings
placed
on
the
unit
and
adhere
to
the
operating
and
use
instructions.
These
safety
and
operating
instructions
should
be
retained
for
future
reference.
1.
Power
sources
—
The
unit
should
be
connected
to
a
power
supply
only
of
the
type
described
in
the
operating
instructions
or
as
marked
on
the
ap-
pliance.
2.
Power-cord
protection
—
Power-supply
cords
should
be
routed
so
that
they
are
not
likely
to
be
walked
on
or
pinched
by
items
placed
upon
or
against
them,
pay
particular
attention
to
cords
at
plugs,
convenience
receptacles,
and
the
point
where
they
exit
from
the
unit.
Never
pull
or
stretch
the
cord.
3.Grounding
or
polarization
—
Precautions
that
should
be
taken
so
that
the
grounding
or
polariza-
tion
means
of
this
unit
is
not
defeated.
4.
Ventilation
—
The
unit
should
be
situated
so
that
its
location
or
position
does
not
interfere
with
its
proper
ventilation.
To
maintain
good
ventilation,
do
not
put
records
or
a
table-cloth
on
the
unit.
Place
the
unit
at
least
10
cm
away
from
the
walls.
Do
not
use
the
unit
on
a
bed,
sofa,
rug
or
similar
surface
that
may
block
the
ventilation
openings.
5.
Water
and
moisture
—
The
unit
should
not
be
used
near
water
—
for
example,
near
a
bathtub,
washbowl,
kitchen
sink,
laundry
tub,
in
a
wet
base-
ment,
or
near
a
swimming
pool,
etc.
AX
Caution:
Read
this
page
carefully
to
keep
your
safety.
6.
10.
Temperature
—
The
unit
may
not
function
pro-
perly
if
used
at
extremely
low,
or
freezing
temperatures.
The
ideal
ambient
temperature
's
above
+5°C
(41°F).
_Heat
—
The
unit
should
be
situated
away
from
heat
sources
such
as
radiators,
heat
registers,
stoves,
or
other
units
(including
amplifiers)
that
produce
heat.
_
Electric
shock
—
Care
should
be
taken
so
that
object
do
not
fall
and
liquid
are
not
spilled
into
the
enclosure
throuch
openings.
If
a
metal
object,
such
as
a
hair
pin
or
a
needle,
comes
into
contact
with
the
inside
of
this
unit,
a
dangerous
electric
shock
may
result.
For
families
with
children,
never
permit
children
to
put
anything,
especially
metal,
inside
this
unit.
.Enclosure
removal
—
Never
remove
the
enclosure.
If
the
internal
parts
are
touched
ac-
cidentally,
a
serious
electric
shock
might
occur.
AC
outlets
—
Do
not
connect
other
audio
equip-
ment
with
a
power
consumption
larger
than
that
specified
to
the
AC
outlet
on
the
rear
panel.
Never
connect
other
electrical
units,
such
as
an
iron
or
toaster,
to
it
to
prevent
fire
or
electric
shock.
~
~
—_
KX-77CW(K)
3

11.
Magnetic
fields
—
Keep
the
units
away
from
a
source
of
magnetic
fields
such
as
TV
sets,
speaker
systems,
radios,
motorized
toys
or
magnetized
ob-
jects.
12.
Cleaning
—
Do
not
use
volatile
solvents
such
as
alcohol,
paint
thinner,
gasoline,
or
benzine,
etc.
to
clean
the
cabinet.
Use
a
clean
dry
cloth.
13.
Nonuse
periods
—
The
power
cord
of
the
unit
should
be
unplugged
from
the
outlet
when
left
unused
for
a
long
period
of
time.
ZX
Caution:
Read
this
page
carefully
to
keep
your
safety.
14.
Abnormal
smell
—
!f
an
abnormal
smell
or
smoke
is
detected,
immediately
turn
the
power
OFF
and
pull
out
the
power
cord.
Contact
your
dealer
or
nearest
service
station.
“S\
£4
POWER
OFF!
erie
a
g|
==
©
|
g
—{vd
15.
Damage
requiring
service
—
The
unit
should
be
serviced
by
qualified
service
personnel
when:
A.
The
power-supply
cord
or
the
plug
has
been
damaged;
or
B.
Objects
have
fallen,
or
liquid
has
been
spilled
into
the
unit;
or
C.
The
unit
has
been
exposed
to
rain;
or
D.
The
unit
does
not
appear
to
operate
normally
or
exhibits
a
marked
change
in
performance;
or
E.
The
unit
has
been
dropped,
or
the
enclosure
damaged.
16.
Servicing
—
The
user
should
not
attempt
to
ser-
vice
the
unit
beyond
that
described
in
the
operating
instructions.
All
other
servicing
should
be
referred
to
qualified
service
personnel.
17.
Outdoor
antenna
grounding
—
If
an
outside
antenna
is
connected
to
the
receiver,
be
sure
the
antenna
system
is
grounded
so as
to
provide
some
protection
against
voltage
surges
and
built
up
static
charges.
Section
810
of
the
National
Elec-
trical
Code,
ANSI/
NFPA
No.
70—1984,
provides
information
with
respect
to
proper
grounding
of
the
mast
and
supporting
structure,
grounding
of
the
lead-in
wire
to
an
antenna
discharge
unit,
size
of
grounding
conductors,
location
of
antenna-
discharge
unit,
connection
to
grounding
elec-
trodes,
and
requirements
for
the
grounding
elec-
trode.
See
Figure.
®Use
No.
10
AWG
(5.3
mm?)
copper,
No.
8
AWG
(8.4
mm?)
alu-
minum,
No.
17
AWG
(1.0
mm?)
copper-clad
steel
or
bronze
wire,
or
larger,
as
a
ground
wire.
®
Secure
antenna
lead-in
and
ground
wires
to
house
with
stand-off
in-
sulators
spaced
from
4
—
6
feet
(1.22
—
1.83
m)
apart.
©
Mount
antenna
discharge
unit
as
close
as
possible
to
where
lead-in
enters
house.
9Use
jumper
wire
not
smaller
than
No.
6
AWG
(13.3
mm?)
copper,
or
the
equivalent,
when
a
separate
antenna-grounding
electrode
is
used
See
NEC
Section
810-21{)).
SERVICE
ENTRANCE
EQUIPMENT
POWER
SERVICE
GROUNDING
ELECTRODE
SYSTEM
(e.g.
interior
metal
water
pipe)
POWER
LINES
SERVICE
ENTRANCE
CONDUCTORS
STANDOFF
INSULATORS?
MAST
ANTENNA
LEAD-IN
WIRE
ANTENNA
Ef
©
DISCHARGE
UNITS
NN
TO
EXTERNAL
ANTENNA
TERMINALS
OF
PRODUCT
BONDING
JUMPER®
GROUND
CLAMPS
OPTIONAL
ANTENNA
GROUNDING
ELECTRODE
DRIVEN
8
FEET
(2.44
m)
INTO
THE
EARTH
IF
REQUIRED
BY
LOCAL
CODES.
SEE
NEC
SECTION
810-21(f).
FIGURE
EXAMPLE
OF
ANTENNA
GROUNDING
ACCORDING
TO
THE
NATIONAL
ELECTRICAL
CODE
INSTRUCTIONS
18.
Power
lines
—
An
outdoor
antenna
should
be
CONTAINED
IN
ARTICLE
810
—
“RADIO
AND
located
away
from
power
lines.
TELEVISION
EQUIPMENT’
Notes:
1.
Item
3
is
not
required
except
for
grounded
or
polarized
equipment.
2.
Item
10
is
not
required
except
for
units
provided
with
AC
outlets.
3.
Item
17
and
18
are
not
required
except
for
units
provided
with
antenna
terminals.
A
KX-77CwIK}

System
connections
Connection
to
stereo
amplifier
or
receiver
—
KX-77CW
LIME
1M—LIME
OUT:
PLAY/LINE
OUT
jacks
To
AC
outlet
REC/LINE
IN
jacks
Supplied
cables
Amplifier
or
receiver
Swaieneo
TOTAL
100W
MAX.
o
—
a
C120
Dei
Except
for
some
areas.
Connection
by
audio
cords
Two
pairs
of
red
and
white
audio
cords
with
standard
phono
plugs
attached
(i.e.
LINE
OUT
cables
and
LINE
ing
any
system
connections.
IN
cables)
are
provided
with
your
KX-77CW.
Make
connections
as
follows:
The
colors
are
to
identify
the
right
and
left
stereo
chan-
1.
Connect
the
left
and
right
PLAY/LINE
OUT
plugs
to
nels;
red
indicates
the
right
channel
and
white
the
left
the
Tape
Play
jacks
on
your
amplifier.
channel.
2.
Connect
the
REC/LINE
IN
plugs
to
the
Tape
Rec
(re-
Use
of
these
cords
is
recommended
for
optimum
per-
cord)
jacks
on
your
amplifier.
formance
in
terms
of
noise
and
frequency
response.
KX-77CW(K}
To
AC
outlet
To
protect
your
speakers,
turn
off
all
power
before
mak-
5

Controls,
indicators
and
connectors
KX-77CW
KENWOOD
STEREO
DOUBLE
CASSETTE
DECK
KX-77CW
EJECTA
zs
|
|
L
Ol
1@
|
ane
=o
ao
PHONES
«<&
Auto
Reverse
praveack
AX
——
SC
2S
Auto
Reverse
recononG/ecaveack
EQ
cic
1
an
<<
Pay
‘SsTOP
INDEX
SCAN
PUR
SSTOP
NPAUSE
REC/ARM
J}
DOpereran}
eee
DIRECTION
==>
rO
©
TIMER
Wasa
—.
OFF
—PLav
mals
=|
@
A
deck
EJECT
button
Pressing
this
button
opens
the
A
deck
cassette
holder.
@
POWER
switch
Use
this
switch
to
turn
the
power
on
and
off.
©
PHONES
JACK
Plug
stereo
headphones
into
this
jack
to
monitor
record-
ings
or
tape
playback.
O
©
A,
B
deck
operation
keys
@
Rewind
key
(<<)
Press
to
rewind
tape.
Tape
will
move
from
the
right
reel
to
the
left
reel
at
high
speed.
When
this
key
is
pressed
during
playback,
tunes
are
skipped
in
the
reverse
direc-
tion
each
time
the
key
is
pressed.
When
this
key
is
pressed
together
with
the
forward
play
key
(BP),
the
tape
is
rewound
and
the
tape
is
played
back
from
the
first
tune
of
side
A.
@
Fast
forward
key
(>
>)
Press
to
rapidly
advance
the
tape.
Tape
will
move
from
the
left
reel
to
the
right
reel
at
high
speed.
When
this
key
is
pressed
during
playback,
tunes
are
skipped
in
the
forward
direction
each
time
the
key
is
pressed.
When
this
key
is
pressed
together
with
the
reverse
play
key
(
<4
),
the
tape
is
rewound
and
the
tape
is
played
back
from
the
first
tune
of
side
B.
@
Reverse
play
key
(<4)/indicator
Press
to
play
tape
in
the
reverse
direction
(side
B).
When
this
key
is
pressed
more
than
twice,
the
current
tune
is
played
back
repeatedly
(16
times).
To
release
the
current
tune
being
played
back
repeatedly,
press
the
stop
key
(m).
When
the
reverse
play
key
(<)
is
pressed
with
tapes
loaded
in
both
A
and
B
decks,
the
unit
enters
relay
play
back
mode.
6
kKx-77ewWIK)
0
NORMAL
BALANCE
a,
HIGH
©
Forward
play
key
(>)
/indicator
Press
to
play
the
tape
in
the
forward
direction
(side
A).
When
this
key
is
pressed
more
than
twice,
the
current
tune
is
played
back
repeatedly
(16
times).
To
release
the
current
tune
being
played
back
repeatedly,
press
the
stop
key
(@).
When
the
torward
play
key
(B)
is
pressed
with
tapes
loaded
in
both
decks,
the
unit
enters
relay
playback
mode.
@
Stop
key
(m)
Press
to
stop
tape
travel.
This
will
also
release
the
previ-
ous
mode
of
operation.
®
REC/ARM
key
(only
B
deck)
Press
this
key
to
start
recording.
The
REC
indicator
lights.
The
recording
mode
can
only
be
entered
from
the
stop
mode.
@
Pause
key
(18)
(only
B
deck)
When
this
key
is
pressed
during
playback,
recording,
dubbing
or
high-speed
dubbing,
the
unit
temporarily
stops.
To
release
playback
pause
mode,
press
the
play
key.
To
release
rec
pause
mode,
press
the
REC/ARM
key.
@
INDEX
SCAN
key
(only
A
deck)
This
key
is
for
A
deck
only.
Press
this
key
to
select
the
desired
turn.
When
this
key
is
pressed,
the
beginning
of
each
tune
is
played
back
for
about
10
seconds.
©
Normal-speed
dubbing
key
(NORMAL
>
)
When
this
key
is
pressed,
the
normal
dubbing
indicator
lights
and
dubbing
from
Deck
A
to
Deck
B
starts.

LINE
IN
—
LINE
OUT.
@
High-speed
dubbing
key
(HIGH
>
P
)
When
this
key
is
pressed,
the
high-speed
dubbing
indi-
cator
lights
and
high-speed
dubbing
from
Deck
A
to
Deck
B
starts.
@
See
No.
@
on
page
6.
©
B
deck
EJECT
button
Pressing
this
button
opens
the
B
deck
cassette
holder.
@
TAPE
COUNTER
and
reset
button
The
TAPE
COUNTER
provides
a
means
of
locating
pas-
sages
on
the
tape.
When
starting
a
recording,
set
the
counter
000
by
depressing
the
reset
button.
@
PRAK
LEVEL
METER
indicate
the
peak
values
of
the
input
levels
for
recording
or
the
output
levels
for
playback.
@
DOLBY
NR
switch
To
record
or
play
back
a
tape
with
Dolby
NR,
set
the
switch
to
B
or
C.
@®
DIRECTION
switch
Normal
mode
(
=
)
—
In
this
position,
one
side
play-
back
or
recording
is
possible.
When
the
end
of
tape
is
reached,
the
operation
mode
is
released
and
the
tape
stops.
When
the
tape
reaches
its
end
in
playback
mode,
the
tape
loaded
on
the
other
deck
is
played
back.
Reverse
mode
{
=
)
—
In
this
position,
both
sides
can
be
played
back
or
recorded.
In
this
mode,
recording
and
playback
do
not
automatically
change
from
side
B
to
side
A.
Endless
mode
(CD)
—
In
this
position,
tape
is
played
back
repeatedly.
DPSS,
index
scan
are
carried
out
twice
(2
sides).
In
endless
mode
(
CD),
relay
playback
is
not
possi-
ble.
@
TIMER
stand-by
switch
This
switch
is
used
along
with
an
audio
timer
when
an
unattended
recording
or
timer-playback
is
performed.
Set
this
switch
to
the
REC
position
for
unattended
re-
cording,
to
the
PLAY
position
for
timer-playback
and
to
the
OFF
position
when
the
timer
is
not
used.
For
timer
operation,
B
deck
has
the
priority.
@®
REC
LEVEL
CONTROL
knob
Adjust
the
right
and
left
recording
levels,
with
these
knobs.
@®
Balance
adjust
knob
for
L/R
recording
levels
This
adjusts
the
balance
of
recording
levels
so
that
these
of
L/R
channels
are
equal.
@
REC
indicator
This
indicator
lights
during
recording
or
dubbing.
@®
PAUSE
indicator
This
indicator
lights
when
the
pause
key
(m#)
is
pressed.
®
Dubbing
indicators
NORMAL
—
Lights
when
the
normal
speed
dubbing
key
is
pressed.
HIGH
—
Lights
when
the
high
speed
dubbing
key
is
pressed.
@
REC/LINE
IN
jacks
Connect
to
the
Tape
Rec
jacks
of
your
amplifier
using
the
audio
cables
(supplied).
@
PLAY/LINE
OUT
jacks
Connect
to
the
Tape
Play
jacks
of
your
amplifier
using
the
audio
cables
(supplied).
@®
Jack
©
(For
system
control)
Connect
to
the
system
control
of
audio
components.
(Except
for
some
areas.)
@®
Power
cord
Plug
in
to
a
convenient
AC
outlet.
KX-77CW(K)
7

Tape
playback
Proceed
in
the
order
of
numbers
in
the
illustration.
@
Press
to
open
the
cassette
holder
and
load
a
cas-
sette.
For
A
deck
playback.
Q
Select
Dolby
NR
B
or
C.
O
For
B
deck
playback
@
Set
to
ON.
@
Set
to
OFF,
EVECTA
amore
>,
”
praveack
J&
mms
ore
eae
;
a]
a
«$7
Aulo
Reverse
recorpinc/pcaveack
EB
INDEX
SCAN
@
For
A
deck
playback,
press
A
deck
play
key
(
m
).
@
Use
the
volume
control
of
the
amplifier
to
adjust
For
B
deck
playback,
press
B
deck
play
key
{
B
),
the
sound
level.
To
play
back
a
tape
in
the
reverse
direction
press
the
reverse
play
key
(
<@
).
Forward
DPSS
selection
Reverse
DPSS
selection
When
the
tune
you
want
to
listen
to
is
before
or
after
When
the
tune
you
want
to
listen
to
is
before
or
after
the
current
tune
with
the
tape
running,
just
pressing
the
the
current
tune
with
the
tape
running,
in
the
reverse
fast
forward
(PP)
or
rewind
(<<)
key
several
times
direction,
just
pressing
the
fast
forward
(
PP)
or
rewind
selects
the
desired
tune.
(
<4<q)
key
several
times
selects
the
desired
tune.
1.
When
the
desired
tune
is
before
the
current
tune,
1.
When
the
desired
tune
is
before
the
current
tune,
press
the
rewind
key
(<4<@).
When
the
rewind
key
press
the
fast
forward
key
(
»P®
).
When
the
fast
for-
(<4)
is
pressed
once,
the
tape
is
rewound
to
the
ward
key
(BP
)
is
pressed
once,
the
tape
is
rewound
beginning
of
the
current
tune.
When
the
desired
tune
to
the
beginning
of
the
current
tune.
When
the
desired
is
the
fourth
one
before
the
current
tune,
press
the
tune
is
the
fourth
one
before
the
current
tune,
press
rewind
key
(
4
<4)
5
times.
the
fast
forward
key
(BP
)
5
times.
2.
To
select
a
tune
after
the
current
tune,
press
the
fast
2.
To
select
a
tune
after
the
current
tune,
press
the
re-
forward
key
(DP).
The
number
of
tunes
that
will
wind
key
(<<).
The
number
of
tunes
that
will
be
be
skipped
will
equal
the
number
of
times
the
key
is
skipped
will
equal
the
number
of
times
the
key
is
pressed.
pressed.
When
the
fast
forward
key
(BP
)
is
pressed
once,
the
When
the
rewind
key
(
<<)
is
pressed
once,
the
tape
tape
is
rapidly
advanced
to
the
beginning
of
the
next
is
rapidly
advanced
to
the
beginning
of
the
next
tune.
tune.
When
the
desired
tune
is
the
fourth
one
after
When
the
desired
tune
is
the
fourth
one
after
the
cur-
the
current
tune,
press
the
fast
forward
key
(PP
}
rent
tune,
press
the
rewind
key
(
<<)
4
times.
4
times.
@
This
function
is
applicable
to
sixteen
tunes
before
the
®
This
function
is
applicable
to
sixteen
tunes
following
current
tune.
the
current
tune.
lf
the
rewind
key
(<4)
is
pressed
just
after
a
tune
If
the
rewind
key
(<<)
is
pressed
just
after
a
tune
is
played
or
the
fast
forward
key
(BP)
is
pressed
is
played
or
the
fast
forward
key
(D>)
is
pressed
near
the
end
of
a
tune,
a
tune
of
the
next
program
near
the
end
of
a
tune,
a
tune
of
the
next
program
may
possibly
be
skipped.
may
possibly
be
skipped.
Forward
DPSS
selection
(
=
)
Reverse
DPSS
selection
(
~a
)
Current
tune
Current
tune
I
t
Unrecorded
section
Unrecorded
section
4
Unrecorded
section
Unrecorded
section
Playback
head
Playback
head
8
kx-77eWIK)

Note:
Since
the
DPSS
circuit
functions
by
detecting
the
non-
recorded
section
of
more
than
approx.
4
seconds
between
tunes,
the
following
tapes
may
cause
the
DPSS
not
to
work
properly,
be
careful.
1.
Tapes
having
more
than
4
seconds
interval
during
selection
such
as
conversation.
2.
Tapes
having
extremely
tow-level
portions
or
non-
recorded
sections
during
tunes
such
as
classical
music.
3.
Tapes
having
too
noisy
section
recorded
between
tunes.
4.
Tapes
having
less
than
4
seconds
blank
sections
between
tunes.
5.
Tapes
recorded
in
extreme
low
levels.
Note:
The
DPSS
selection
will
be
repeated
twice
(2
sides)
with
the
MODE
switch
set
to
the
reverse
mode
(
=_))
or
to
endless
mode
(CD).
Repeat
playback
1.
To
repeat
the
tune
currently
being
played,
press
the
forward
play
(B)
or
reverse
play
(<4)
key
again
ac-
cording
to
the
direction
of
tape
travel.
2.
When
the
tune
which
you
want
to
hear
repeatedly
is
not
the
current
tune,
select
the
tune
by
DPSS
selec-
tion
and
press
the
forward
play
(P)
or
reverse
play
(<4)
key
again
in
playback
mode
according
to
the
di-
rection
of
tape
travel.
When
the
tape
is
in
stop
mode,
press
the
key
twice.
3.
When
the
current
tune
has
been
repeated
16
times,
the
unit
goes
back
to
the
normal
playback
mode.
4.
To
release
the
repeat
play
mode,
press
the
stop
key
(m).
Auto
reverse
play
back
1.
Set
the
DIRECTION
switch
to
the
reverse
mode
(
=).
2.
Press
the
forward
play
key
(BP).
Both
sides
are
played
back,
then
the
other
deck
is
set
to
playback
mode.
Note:
———_——____________....
The
direction
of
the
tape
travel
is
indicated
by
the
FORWARD/RE-
VERSE
indicators.
DIRECTION
switch
keys
(ON)
Both
sides
repeat
playback
1.
Set
the
DIRECTION
switch
to
the
endless
mode
(
CD).
2.
Press
the
forward
play
(b>)
or
reverse
play
(<4)
key
according
to
the
direction
of
tape
travel.
3.
Both
sides
are
played
back
continuously.
Rewind
playback
1.
To
rewind
playback
in
the
forward
direction
(side
A),
press
the
forward
play
key
(>)
and
rewind
key
(<<)
simultaneously.
The
tape
is
rewound
to
the
left
reel
and
played
back
from
the
first
tune
on
side
A.
2.
To
rewind
playback
in
the
reverse
direction
(side
B),
press
the
reverse
play
key
(<@)
and
fast
forward
key
(mp)
simultaneously.
The
tape
is
rewound
to
the
right
reel
and
played
back
from
the
first
tune
on
side
B.
Index
scan
(Only
A
deck)
Press
the
INDEX
SCAN
key.
The
tape
is
rapidly
advanced
while
the
beginning
of
each
tune
is
played
back
for
about
10
seconds.
Relay
playback
Relay
playback
between
A
deck
and
B
deck.
1.
Load
the
tapes
in
both
A
and
B
decks.
When
A
deck
forward
play
key
(PB)
or
reverse
play
key
(<4)
is
pressed,
relay
playback
starts
from
A
deck.
When
B
deck
forward
play
key
(B)
or
reverse
play
key
(<4)
is
pressed,
relay
playback
starts
from
B
deck.
When
the
tape
reaches
its
end,
the
tape
is
rewound
to
the
beginning,
and
the
other
tape
starts
playback
(in
normal
mode
(
=
)).
2.
To
release
relay
playback,
press
the
stop
key
(m)
of
the
deck
in
playback
mode.
3.
In
reverse
mode
(
2),
both
is
sides
are
played
back
from
A
side,
and
the
other
deck
enters
both-side
playback
mode.
In
endless
mode
(C>),
relay
playback
is
not
possible.
Note:
When
the
forward
play
key
(B)
or
reverse
play
key
(<4)
is
pressed
with
tapes
loaded
in
both
A
and
B
decks,
the
unit
is
automatically
set
to
relay
playback
mode.
To
play
back
one
deck
only,
do
not
load
a
tape
in
the
other deck.
Forward
play
key (P)
or
Reverse
play
key
(<4)
One-side
relay
playback
(endless)
Both-side
relay
playback
(endless)
(on)
Both-side
full
repeat
playback
(endless)
No
relay
playback
Repeat
and
relay
playback
KX-77CWikK})
9

Tape
recording
Recording
level
The
recording
level
is
strongly
related
to
sound
quality,
distortion,
S/N
ratio,
frequency
response,
etc.
When
it
is
very
high,
S/N
ratio
is
improved
but
distortion
and
fre-
quency
response
are
degraded.
When
it
is
too
low,
the
opposite
results.
The
best
recording
levels
can
be
deter-
mined
by
referring
to
the
PEAK
LEVEL
METER.
It
is
easy
to
record
a
disk
or
FM
broadcast
because
their
sound
le-
vel
is
limited
to
a
certain
extent.
However,
it
is
difficult
to
set
the
recording
level
when
recording
live
sounds
or
Preceed
in
the
order
of
numbers
in
the
illustration.
©
select
Dolby
B
or
C
NR.
@
Set
to
ON.
@
Set
to
OFF.
when
recording
from
an
open
reel
tape
on
which
live
sound
is
recorded
because
the
sound
level
varies
within
a
very
wide
range.
Notes:
1.
The
optimum
recording
level
varies
according
to
the
sound
source
and
the
type
of
tape.
Find
out
the
optimum
recording
level
by
re-
cording
and
playing
several!
times.
2.
PEAK
LEVEL
METER
readings
during
playback
may
differ
from
those
observed
during
recording.
This
is
related
to
tape
sensitivity
and
is
no
problem.
@
Press
to
open
the
cassette
holder
and
load
a
blank
cassette.
KENWOOD
reneo
couse
casseTre
DECK
Kx-770W
esecT
eB
fe]
Lane
|
«$7
Auto
Reverse
pcaveack
AX
@®
Set
to
normal
mode
(=~)
except
when
recording
on
both
side.
@
Adjust
the
recording
level
while
observing
the
PEAK
LEVEL
METER.
How
to
make
a
blank
section
To
obtain
the
best
performance
from
DPSS,
blank
sec-
tions
are
essential.
Leave
blank
sections
as
follows:
1.
Press
REC/ARM
key
twice.
A
blank
sections
of
about
4
seconds
is
made
and
the
unit
enters
the
rec
pause
mode.
During
recording
from
the
turntable
player,
the
unit
may
not
automatically
enter
auto
rec
mute
mode.
At
this
time,
press
the
REC/ARM
key,
then
press
the
same
key
again
slowly.
2.
To
make
a
blank
section
of
more
than
4
seconds,
keep
the
REC/ARM
key
pressed
the
second
time.
A
blank
section
equals
to
the
time
the
key
is
kept
pressed
is
made.
When
the
REC/ARM
key
is
re-
leased,
the
unit
enters
the
rec
pause
mode.
3.
To
make
a
blank
section
of
less
than
4
seconds,
press
the
REC/ARM
key
twice
and
press
the
REC/
ARM
key
again
within
4
seconds.
The
unit
enters
the
recording
mode.
When
the
pause
key
(as)
is
pressed
after
the
REC/ARM
key
has
been
pressed
twice,
the
unit
enters
the
rec
pause
mode.
10
kx-77cWwik)
a9
@—,
a
2.
maven
see
REC
LEVEL
ats
S
Auto
Reverse
RecoroNna/eLaveack
ES
@
Press
the
REC/ARM
key
and
pause
key
(848).
simultaneously.
The
unit
enters
the
rec
pause
mode.
©
When
the
REC/ARM
key
is
pressed
once,
recording
will
start.
Quick
re-recording
If
you
accidentally
include
unwanted
material
while
you
are
recording
an
FM
broadcast,
etc.,
you
can
go
back
to
the
beginning
of
that
section
of
tape
to
start
over
again
by
using
the
following
procedure.
A
blanc
section
of
more
than
4
seconds
is
necessary
before
the
beginning
of
the
tape
recording.
1.
When
the
tape
is
moving
in
the
forward
direction,
press
the
rewind
key
(<<).
The
recording
stops,
the
tape
is
rewound
to
the
beginning
of
the
recording,
a
blank
section
of
about
2
seconds
is
left
and
the
tape
stops.
2.
When
the
tape
moves
in
the
reverse
direction,
press
the
fast
forward
key
(®).
The
recording
stops,
tape
is
rewound
to
the
beginning
of
the
recording,
a
blank
section
of
about
2
seconds
is
left
and
the
tape
stops.
3.
To
resume
recording,
make
a
4-second
blank
section
by
pressing
the
REC/ARM
key
twice,
then
press
the
same
key
again.
Note:
if
you
use
this
function
at
the
beginning
of
the
recording,
this
will
not
often
operate
normally.

Both
side
recording
Continuous
recording
from
side
A
to
side
B
is
possible.
1.
Set
the
DIRECTION
switch
to
the
reverse
mode
(
=).
2.
If
the
FORWARD
indicator
is
not
lit,
press
the
forward
play
key
(B)
to
change
the
tape
running
direction
and
press
immediately
the
stop
key
(ml).
3.
Press
the
REC/ARM
key
to
start
recording.
When
the
tape
reaches
the
end
of
side
A,
the
recording
is
auto-
matically
continued
on
side
B.
Notes:
1.
Continuous
recording
from
side
B
to
side
A
is
not
possible.
2.
When
continuous
recording
is
not
came
out,
always
set
the
DIRECTION
switch
to
the
normal
mode
(
2
).
Failure
to
do
so
will
sometimes
erase
a
valuable
recording
on
side
B.
3.
Tape
running
will
stop
even
in
the
endless
mode
(C))
when
recording
on the
other
side
stops.
Dubbing
1.
When
the
dubbing
key
is
pressed,
dubbing
from
A
to
B
deck
starts.
2.
When
the
dubbing
key
is
pressed,
during
dibbing,
dubbing
is
automatically
muted
and
the
unit
enters
rec
pause
mode,
leaving
about
4-second
blank
section
(6
seconds
during
hith
speed
dubbing)
on
the
tape.
3.
When
an
A
deck
operation
key
is
pressed
during
dubbing,
A
deck
enters
the
mode
of
the
pressed
key,
and
B
deck
stops
dubbing
temporarily,
leaving
about
4-second
blank
section
(6
seconds
during
high
speed
dubbing).
To
restart
dubbing,
press
the
dubbing
key.
4.
When
a
B
deck
operation
key
is
pressed
during
dubb-
ing,
the
dubbing
mode
is
released,
B
deck
enters
the
mode
of
the
pressed
key
and
A
deck
stops.
5.
During
dubbing,
the
dubbing
indicator
and
the
REC
in-
dicator
light.
When
the
DUBBING
key
is
pressed
dur-
ing
dubbing,
the
indicators
flash.
When
the
deck
en-
ters
rec
pause
mode,
the
dubbing
indicator,
REC
indi-
cator
and
PAUSE
indicator
light.
High-speed
dubbing
To
make
the
dubbing
speed
increased,
press
the
high-
speed
dubbing
key
(HIGH
®
).
Notes:
1.
Dubbing
is
not
possible
unless
both
A
and
B
decks
are
in
the
stop
mode.
2.
During
dubbing,
it
is
not
possible
to
adjust
the
recording
level.
So
load
the
tape
recorded
with
the
optimum
recording
level.
3.
During
dubbing,
regardless
of
ON/OFF
of
Dolby
NR
switch,
you
cannot
change
Dolby
switch.
(The
same
tape
as
the
one
in
A
deck
is
made.)
e.g.
When
the
tape
in
A
deck
is
recorded
with
Dolby
B,
the
tape
in
B
deck
will
be
recorded
with
Dolby
B.
4.
Dubbing
from
the
dubbed
tape
degrades
the
sound
quality.
It
is
therefore
recommended
to
load
the
original
tape
in
A
deck.
5.
TV
noise
may
be
recorded
during
high-speed
dubbing
if
TV
is
near
the
system,
In
this
case,
keep
TV
away
from
the
system.
tt
KX-77CW(K)
11

Timer
stand
by
operation
By
using
the
built-in
TIMER
STAND
BY
mechanism
in
combina-
tion
with
an
audio
timer
(available
from
many
dealers),
the
deck
begins
to
record
or
play
at
any
desired
time.
Unattended
recording
1.
Connect
the
power
cords
to
the
components
and
set
the
timer
so
that
power
is
supplied
to
each
component.
(Timer
setting
procedures
vary
with
the
type
of
timer
used.
Fol-
low
the
instructions
of
the
timer’s
manual.)
2.
Turn
on
the
power
switches
of
the
components
to
be
used
for
recording.
Tune
on
the
station
desired
and
set
the
record
level.
4.
Set
the
volume
control
of
the
amplifier
to
its
minimum
setting.
5.
Set
the
timer
to
the
required
time
referring
to
the
timer’s
instruction
manual
so
that
the
power
will
be
switched
ON
at
the
preset
time.
6.
Load
a
tape
for
recording
into
deck
B
or
deck
A.
The
relay
recording
from
deck
B
to
deck
A
can
be
also
setting
the
DIRECTION
switch
to
norma|l
mode
(
=
)
or
reverse
mode
{
>
)
position.
7.
Set
the
DUBBING
speed
key
to
NOR.
(2)
(Normal).
8.
Set
the
DOLBY
NR
switch
to
ON
if
the
recording
is
to
be
made
using
the
noise
reduction
system.
9.
Set
the
TIMER
switch
to
REC.
10.
Power
to
the
components
will
be
switched
ON
at
the
preset
time
and
recording
will
start.
11.
Recording
stops
when
the
tape
end
is
reached.
w
Note:—2
To
ensure
that
the
automatic
shut
off
switch
operates
before
the
power
is
shut
off,
set
the
timer
so
that
it
operates
for
a
little
longer
than
the
playing
time
of
the
tape.
Timer-controlled
playback
1.
Connect
the
timer
as
described
for
“Unattended
record-
ing”.
2.
Set
the
timer
so
that
power
is
supplied
to
each
compo-
nents.
3.
Turn
on
the
power
switches
of
the
components
used
for
playback.
Load
a
recorded
tape
and
set
each
switch
referring
to
“Tape
playback”.
Adjust
the
volume
control
of
the
amplifier.
Rewind
the
tape
to
the
start.
Set
the
timer
to
the
required
time.
Set
the
TIMER
switch
to
PLAY.
The
tape
will
automatically
start
playback
at
the
preset
time.
pa
ODN
Notes:
1.
Do
not
use
a
timer
for
the
dubbing
procedure.
2.
Use
either
A
or
B
deck
for
a
timer-playback.
KX-77CW
To
amplifier
AC
outlet
Audio
timer
To
AC
outlet
Maintenance
As
the
tape
rubs
against
the
heads
during
recording
and
playback,
oxide
debris
from
the
tape
accumulates
on the
heads,
guides,
and
pinch
roller.
To
maintain
the
optimum
recording
and
playback
performance,
periodically
clean
the
entire
tape
path,
including
the
heads
(about
every
10
hours
of
use).
Cleaning
the
heads
section
1.
Press
the
EJECT
button
and
the
cassette
holder
will
slide
forward.
2.
Turn
on
POWER.
Clean
the
heads,
pinch
roller
and
capstan
with
a
cotton
swab
slightly
dampened
with
cleaning
solvent
(or
denatured
alcohol).
Note:
The
heads
and
guides
in
the
tape
path
are
precisely
adjusted.
Do
not
exert
excessive
pressure
on
any
parts
while
cleaning.
120
kx-77CWiK)
Cotton
swab
Capstan
Capstan
Pinch
roller
Pinch
rojlor
Head
Head
demagnetization
The
magnetized
record/play
head
may
degrades
the
sound
quality
and
increases
the
noise.
In
this
case,
use
the
commercially
available
Head
Eraser
to
demagnetize
the
head.

In
case
of
difficulty
What
appears
to
be
a
malfunction
may
not
always
be
serious.
First,
check
the
following
items
before
consult
the
service
per-
sonnel.
—
Symptom
Causes
eee
Recording
is
impossible
by
press-
1.
The
safety
tab
provided
with
the
ing
the
REC/ARM
key.
cassette
shell
is
broken.
2.
Cassette
holder
is
not
closed
completely.
3.
Record
input
level
knob
is
set
to
mini-
mum
position.
Sound
is
not
heard
even
when
the
playback
key
is
pressed.
1.
Audio
cords
are
connected
incorrectly.
.
Head
is
dirty.
.
Tape
cannot
be
advanced
caused
by
un-
even
winding.
.
Unrecorded
tape
is
used.
.
Use
the
cassette
with
its
safety
tab.
(When
recording
using
the
cassette
with
the
tab
broken,
block
hole
with
adhesive
tape.)
.
Close
the
cassette
holder
completely.
.
Refer
to
the
‘Tape
recording”
section.
.
Refer
to
the
‘‘Connections”
section.
_
Refer
to
the
Maintenance”
section.
.
Replace
the
cassette.
.
Use
the
recorded
tape.
Sound
is
husky
or
high
frequency
notes
are
not
heard.
1.
Head
is
dirty.
.
Tape
is
damaged.
Sound
is
distorted.
j=
=
.
Recording
level
is
too
high
when
record-
ing.
.
Source
itself
is
distorted.
Too
noisy
Sound
is
wow
condition.
.
Head
is
magnetized.
.
Noise
is
inducted
from
the
external
equipment.
.
Recording
level
is
too
low.
.
Dolby
NR
encoded
tape
is
played
back
with
Dolby
NR
switch
OFF.
1.
Capstan
or
pinch
roller
is
dirty.
2.
Tape
is
wound
unevenly.
1.
Refer
to
the
“Maintenance”
section.
.
Replace
the
cassette.
.
Demagnetize
the
head
using
head
eraser.
.
Keep
the
unit
away
from
other
elec-
trical
equipment.
_
Refer
to
the
‘‘Tape
recording”
section.
.
Set
the
Dolby
NR
switch
to
ON.
It
is
recommended
to
perform
record-
ing
always
using
the
Dolby
NR
switch
ON.
.
Refer
to
the
“Maintenance”
section.
.
Wind
the
tape
again
by
fast-forward-
ing
or
rewinding.
i
.
Playback
or
recording
starts
when
the
power
is
turned
ON.
al
_—
Timer
stand-by
switch
is
set
to
PLAY
or
REC
position.
Set
the
Timer
Stand-by
switch
to
OFF
when
the
timer-playback
or
timer-
recording
is
not
used.
The
unit
does
not
function
even
when
the
operation
key
is
pressed.
ee
a
1.
The
operation
key
is
pressed
immedi-
ately
after
the
power
is
turned
on
(be-
fore
3
seconds
have
elapsed).
Cassette
tape
is
not
loaded.
The
tape
cannot
be
wound
(advanced)
because
the
tape
is
wound
unevenly.
2.
3.
1.
After
3
seconds
have
elapsed
since
the
power
is
turned
ON,
press
the
operation
key.
2.
Load
a
cassette.
3.
Replace
the
cassette.
DPSS
does
not
function
correctly.
The
unsuitable
tape
having
shorter
blank
Refer
to
the
‘‘DPSS”
section.
section
between
tunes
is
used.
any
operation
keys.
Operation
is
impossible
by
pressing
Remeete
holder
is
not
closed
completely.
ra
be
Close
the
cassette
holder
completely.
Note:
@
Owing
to
the
type
of
a
cassette
tape,
the
noise
will
be
sometimes
heard
when
the
tape
stops
automatically.
It
is
not
a
malfunction
of
the
unit,
but
to
ensure
the
certain
transport
of
the
tape.
©
The
120-minute
cassette
tapes
are
unrecommendable
because
they
are
too
thin
and
may
be
demaged
by
the
repeated
use.
KX-77CWIK)
13

Specifications
TY
Sancta
es
erehial:
Stereo
Double
Reverse
Full
Logic
Cassette
Deck
with
Dolby
B.
C
NR
system
Track
System.....0000000000
ee
4-track,
2-channel
stereo/mono,
recording/playback
Recording
System.................0....005
AC
bias
system
(Bias
frequency:
105
kHz)
Erasing
System
.......0..00..
AC
system
Tape
Speed
oo.
ccc
ee
4.76
cm/sec
(1-7/8
ips)
Heads
e..3:8ce2eich
iis
ieee
enue
Hard
permalloy
playback/record
head
x
1
Hard
permalloy
playback
head
x
1
Double
gap
ferrite
erasing
head
x
1
(0
(0)
coe
ee
Peo
Electronically-controlled
DC
motor
x
2
Fast
Winding
Time
.........................
Approx.
110
seconds
with
C-60
tape
Frequency
Response:
Normal
Tape
syeMe
Mie
cat
eti
arti
eiad
20
Hz
to
15,000
Hz
(30
Hz
to
14,000
Hz,
+3
dB)
CrO,
Tape:
cect
saute
dedi
20
Hz
to
16,000
Hz
(30
Hz
to
15,000
Hz,
+3
dB)
Metal
Tape...
20 Hz
to
16,000
Hz
(30
Hz
to
15,000
Hz,
+3
dB)
Signal-to
Noise
Ratio:
Dolby
C
Type
NR
ON...
72
dB
(Normal
tape)
Dolby
B
Type
NR
ON..................
65
dB
(Normal
tape)
Dolby
NR
OFF...
57
dB
(Normal
tape)
Harmonic
Distortion
................00........
Less
than
0.6%
(at
1
kHz,
0
dB
with
normal
tape)
Wow
and
Flutter......000..
0.08%
(W.R.M.S),
0.22%
(DIN)
Input
sensitivity/Impedance:
LINE
06:2
oe
ice
oe
77.5
mV/50
kohms
Output
Level/Output
Impedance:
LINE
Xi
2
tiie
Sooo
chicane
nce
270
mV/3.9
kohms
Headphones
x
1...
0.2
mW/8
ohms
Power
Consumption
.................0..0.
25
W
Dimensions
....0..0.0.0.0.000ccccceeeeeees
W:
420
mm
(16-9/16")
H:
119
mm
(4-11/16")
D:
266
mm
(10-15/32")
Weight
(Net)
..........0...0...
cee
5.3
kg
(11.7
Ib)
Reference
Tapes
..................0..
Normal:
KENWOOD
ND-60
CrO,z:
KENWOOD
CD-60
Metal:
KENWOOD
MD-60
Note:
We
follow
a
policy
of
continuous
advancements
in
development.
V4
kx.77CWIkK)
For
this
reason
specifications
may
be
changed
without
notice
Table of contents
Other Kenwood Tape Deck manuals

Kenwood
Kenwood KX-880G User manual

Kenwood
Kenwood KX-W1060 User manual

Kenwood
Kenwood KX-620 User manual

Kenwood
Kenwood KX-9050 User manual

Kenwood
Kenwood CT-201 User manual

Kenwood
Kenwood X-SE7 User manual

Kenwood
Kenwood KX-W892 User manual

Kenwood
Kenwood KX-W5040 User manual

Kenwood
Kenwood CT-405 User manual

Kenwood
Kenwood CT-201 User manual

Kenwood
Kenwood KX-W6060 User manual

Kenwood
Kenwood KX-7030 User manual

Kenwood
Kenwood CT-203 User manual

Kenwood
Kenwood KX-W8070S User manual

Kenwood
Kenwood CT-203 User manual

Kenwood
Kenwood KX-W8040 User manual

Kenwood
Kenwood X-7WX User manual

Kenwood
Kenwood 1050CT User manual

Kenwood
Kenwood KX-W6030 User manual

Kenwood
Kenwood X-W320 User manual