4
BEFORE STARTING ASSEMBLY |
AVANT DE COMMENCER LE MONTAGE
| ANTES DE EMPEZAR EL ARMADO |
VOR
MONTAGEBEGINN
| VOORDAT U BEGINT TE MONTEREN |
PRIMA DI INIZIARE L’ASSEMBLAGGIO
| ANTES DE INICIAR A MONTAGEM
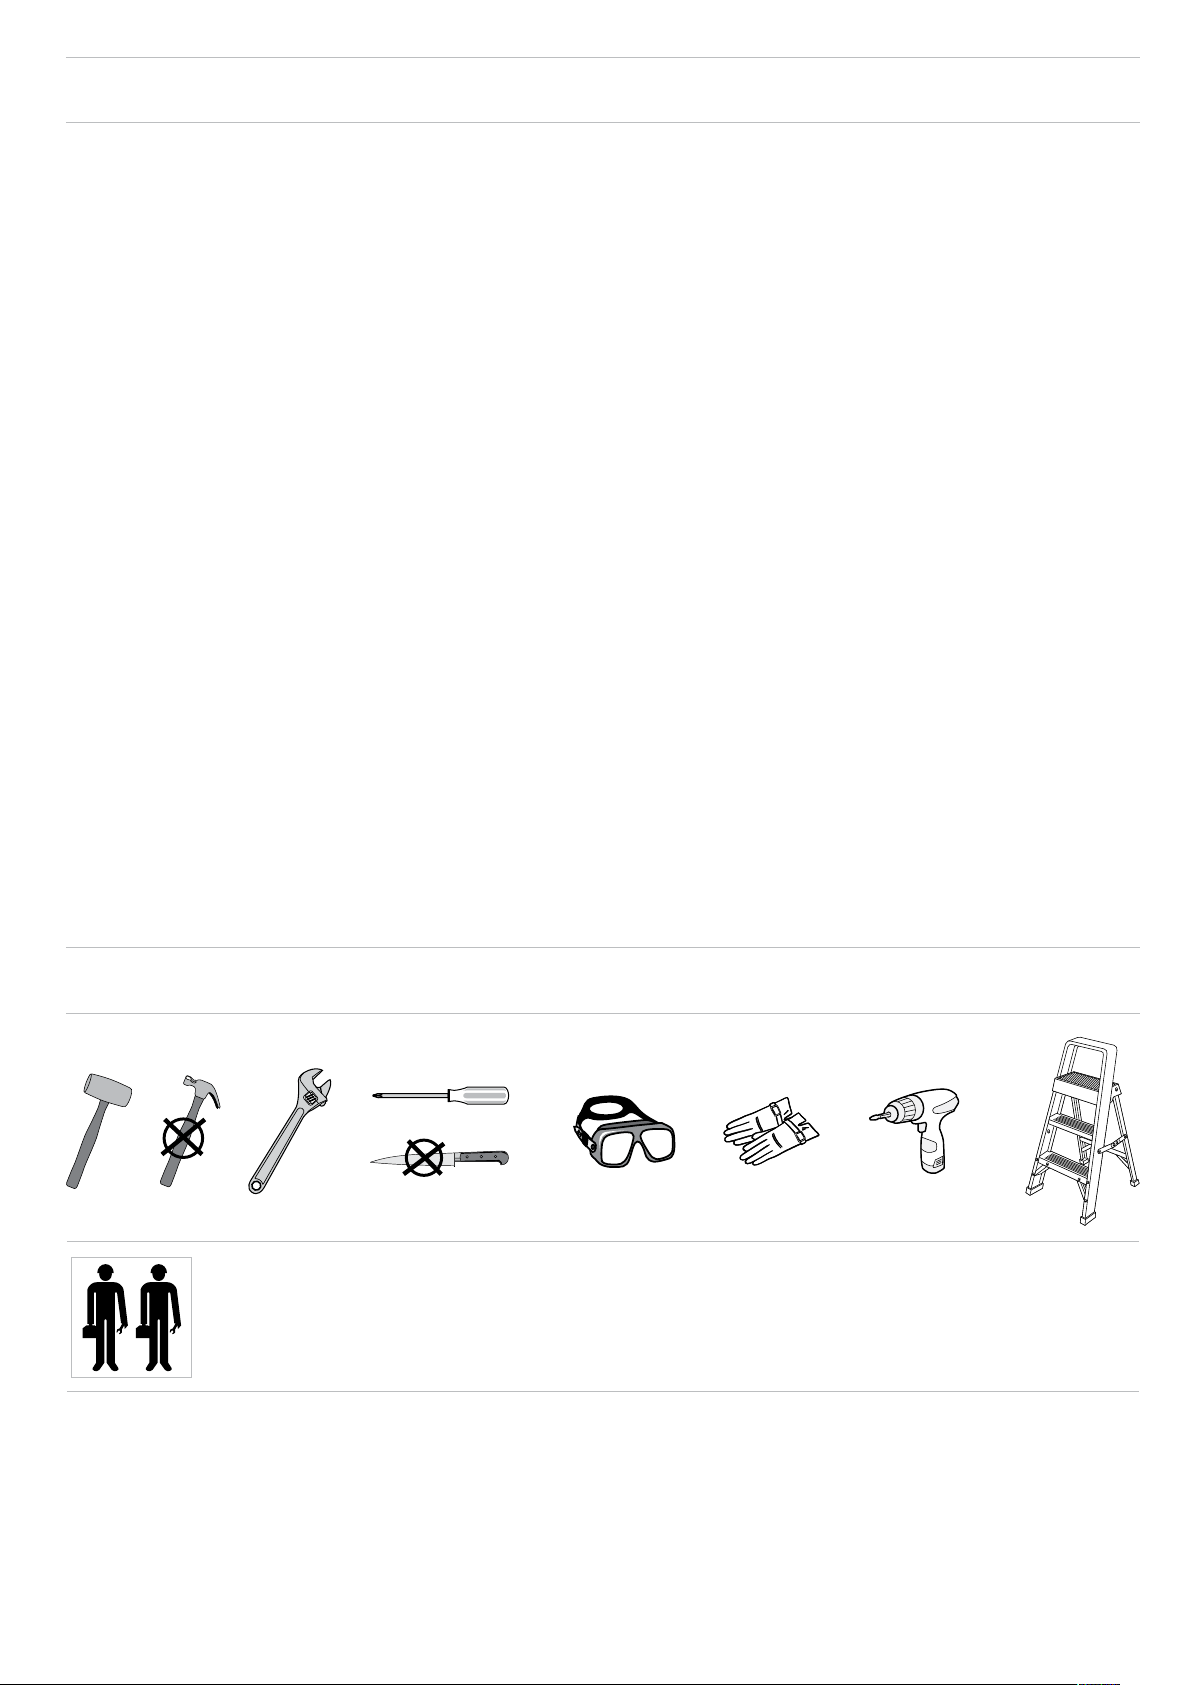
REQUIRED TOOLS | OUTILS EXIGÉS | HERRAMIENTAS NECESARIAS | BENÖTIGTE WERKZEUGE | BENODIGD GEREEDSCHAP |
ATTREZZATURA OCCORRENTE | FERRAMENTAS NECESSÁRIAS
Read the care and safety guidelines at the end of this manual | Check to ensure that there are no missing or damaged
parts BEFORE starting or arranging assembly | Remove all parts from the package(s) and spread them out on a clean work
surface | Review all assembly instructions | Assemble all the parts according to the directions in this manual. Do not skip
any steps.
Lea las intrucciones de precauciones y seguridad que están al final de este manual | Asegúrese de que no faltan piezas ni
están dañadas ANTES de comenzar o disponer el montaje | Saque todas las piezas del paquete o paquetes y póngalas
sobre una superficie de trabajo limpia | Revise todas las instrucciones de montaje | Monte todas las piezas según las
instrucciones de este manual. No se saltee ningún paso.
Lisez les instructions de précaution et de sécurité à la fin de ce manuel | Assurez-vous qu’il n’y a pas de pièces manquantes
ou endommagées AVANT de commencer ou d'organiser l'assemblage | Retirez toutes les pièces du/des paquet(s) et étalez-les
sur une surface de travail propre | Lisez toutes les instructions de montage | Assemblez toutes les pièces selon les instructions
de ce manuel. Ne sautez aucune étape.
Lesen Sie die Sicherheitsrichtlinien am Ende des Benutzerhandbuchs durch | Prüfen Sie bitte VOR dem Zusammenbau, dass
keine Teile beschädigt sind oder fehlen | Nehmen Sie alle Teile aus der Verpackung und breiten Sie sie auf einer sauberen
Arbeitsfläche aus | Gehen Sie noch einmal die komplette Aufbauanleitung durch | Bauen Sie alle Teile entsprechend der
Anleitung in diesem Handbuch zusammen. Lassen Sie dabei keinen Arbeitsschritt aus.
Lees de richtlijnen over zorg en veiligheid achterin deze handleiding | Controleer of er geen onderdelen ontbreken of
beschadigd zijn, VOORDAT u met de montage begint | Haal alle onderdelen uit het pakket (of uit de pakketten) en leg ze
op een schoon werkoppervlak | Bekijk alle montagehandleidingen | Monteer alle onderdelen volgens de aanwijzingen van
deze handleiding. Sla geen stappen over.
Leggere le linee guida di assistenza e sicurezza alla fine di questo manuale | Assicurarsi che non ci siano parti mancanti o
danneggiate PRIMA di iniziare l’assemblaggio | Estrarre tutti i componenti dall’imballo e posizionarli su una superficie di lavoro
pulita | Consultare tutte le istruzioni di montaggio | Assemblare tutti i componenti secondo le istruzioni contenute nel
manuale. Non saltare nessuna fase.
Leia as diretrizes de cuidados e segurança que constam da parte final deste manual | Verifique para se assegurar de que
não há peças em falta ou danificadas ANTES de começar a preparar a montagem | Retire todas as peças da embalagem e
espalhe-as numa superfície de trabalho limpa | Reveja todas as instruções de montagem | Monte todas as peças de acordo
com as instruções do manual. Não salte quaisquer passos.
ASSEMBLY REQUIRES TWO PEOPLE | LE MONTAGE DOIT ÊTRE EFFECTUÉ PAR DEUX PERSONNES | SE
NECESITAN DOS PERSONAS PARA EL MONTAJE | ZWEI PERSONEN ZUR MONTAGE NOTWENDIG | MONTAGE
VEREIST TWEE PERSONEN | L’ASSEMBLAGGIO RICHIEDE DUE PERSONE | A MONTAGEM EXIGE DUAS PESSOAS
MOFFL (x2) MOFF9 (x4)
NEDSM (x1)
NEDOR (x1)NEDOL (x1)
FLOOR PARTS | ÉLÉMENTS DU PLANCHER | PARTES DEL SUELO | BODENTEILE | VLOERPANELEN | COMPONENTI DEL
PAVIMENTO | PEÇAS DO CHÃO
SHED PARTS | PIÈCES DE L’ABRI | PARTES DEL COBERTIZO | TEILE DES SCHUPPENS | ONDERDELEN VAN HET SCHUURTJE
| COMPONENTI DELLA CASETTA | PEÇAS DO ABRIGO
WALL PARTS | PIÈCES DES MURS | PARTES DE LAS PAREDES | WANDELEMENTE | WAND ONDERDELEN | COMPONENTI
DELLE PARETI | PAINÉIS LATERAIS
DOOR PARTS | PIÈCES DE LA PORTE | PARTES DE LA PUERTA | TÜRELEMENTE | DEURONDERDELEN | COMPONENTI DELLA
PORTA | PEÇAS DAS PORTAS
NUHG (x2) NUHH (x2) NU
HB
(x1) NU
HA
(x1)
NU
HC
(x1) NUHD (x1) NUHE
(x1)
NU
HF
(x2)
Remove all parts from the package(s) and spread them out on a clean work surface. Code letters are imprinted on each
part for easy identification | Retirez toutes les pièces du/des paquet(s) et étalez-les sur une surface de travail propre. Des
lettres sont imprimées sur chaque pièce pour une identification facile | Saque todas las piezas del paquete o paquetes y
póngalas sobre una superficie de trabajo limpia. El código de letras está marcado en cada pieza para que sea más fácil
identificarla | Nehmen Sie alle Teile aus der Verpackung und breiten Sie sie auf einer sauberen Arbeitsfläche aus. Auf jedem T
eil sind Kennbuchstaben aufgedruckt, die die Zuordnung der einzelnen Teile erleichtern | Haal alle onderdelen uit het pakket
(of uit de pakketten) en leg ze op een schoon werkoppervlak. Op ieder onderdeel zijn codes aangebracht om ze eenvoudig
te kunnen herkennen | Rimuovere tutti i componenti dall’imballo e posizionarli su una superficie di lavoro pulita. I codici
identificativi sono impressi in ogni componente per una semplice identificazione | Retire todas as peças da embalagem e
espalhe-as numa superfície de trabalho limpa. Existem letras de código impressas em cada peça para fácil identificação
NSDP (x11) NSDC (x4)NSDW (x2) OKCB (x4)
OKCM (x2)
NSDUP (x1)
NSDFP (x2)