manuals.online logo
Brands
  1. Home
  2. •
  3. Brands
  4. •
  5. Keter
  6. •
  7. Garden House
  8. •
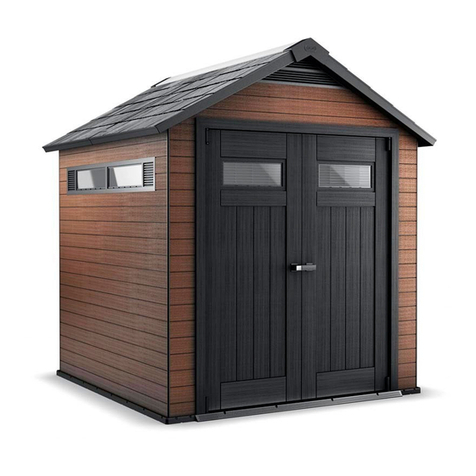
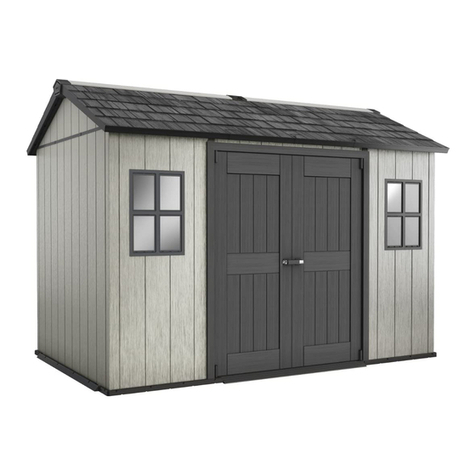
  9. Keter FACTOR 8x8 User manual

Keter FACTOR 8x8 User manual




FACTOR
8x8
USER
MANUAL
I
MODE D'EMPLOI
I
MANUAL DEL USUARIO
I
GEBRAUCHSANLEITUNG
I
GEBRUIKSHANDLE
I
D
I
N
G
I
MANUALE PER L:UTENTE
I
MANUAL
DO
UTILIZADOR








US,Canad
a:
T
el
:
+1-888
-
374
-
4262
Fax:+1
-
317-57
5
-
4502
U
K
:
Tel:
+4
4
-
121-506-0008
Fax:44-12
1
-
422
-
0808
Sp
a
i
n
:
T
lf:
34-949-277-421
Fax:34
-
949
-
348-976
Other European
Coun
t
ries
:
Tel:
+3
1
-
16
1
2
-
28301
,
Fax:
+3
1
-
1612
-
28322




WWW
.
KETER.COM
S
K
U:17197916
D
2
3

A B
a
SITE PREPARATION
I
PREPARATION
DU SITE
I
PREPARACION
DEL
LUGAR
I
VORBEREITUNG
DES
AUFSTELLUNGSORTES
I
VOORBEREIDING
V A N
HET
TERREIN
I
PREPARAZIONE
DEL
LUOGO
01
MONTAGGIO
I
PREPARAI;AO
DO
LOCAL
BEFORE STARTING
ASSEMBLY
I
AVANT DE COMMENCER LE MONTAGE
I
ANTES DE EMPEZAR EL ARMADO
I
VOR
MOI'JTAGEBEGINN
I
VOORDAT
U
BEGINTTEMONTEREN
I
P
R
I
M
A
DIINI
Z
IARE
I L
MON
T
AGG
I
O
I
ANTES
D
E
INICIAR A
MONTAGEM


Levelthe
ground surface
I
Egalisez la surface du
sol
i
Niveel la
superficie
delsuelo
I
Ebnen Sie die Bodenoberflache
I
Maak de bodem vlak
I
Livella
l
a
superfi
c
i
e
de
l
terrene
I
Nivele
a
superficie
do
solo





Recommendation
:
Construct
a wooden or concrete base as a foundation
I
Recommandation:fabriquez
une base en bois
ou
en beton en guise de fondation
I
Recomendaci6n:
construya una base de madera o de cemento a modo de cimiento
I
Empfehlung
:
Bauen Sie als Fundament eine Grundflache aus
H
o
z
l
oder Beton
I
Aanbeveling:maak
een houten of
betonnen
ondergrond als fundering
I
Raccomandazione: costruisci una base di legno o di cemento come fondamenta
I
Recomendac;iio:Construa uma base de madeira ou de cimento como fundac;ao
Read the care and safety guidelines at the end of this
manual
I
Review all assembly
instructions
I
Assemble all the
parts
according to the directions in this manual.
Do
not skip any steps.

Lisez les instructions de precaution et de securite
a
la fin de ce
manuel
I
Lisez toutes les instructions de montage
I
Assemblez
toutes les
pieces
seton les instructions de ce manuel. Ne
sautez aucune
etape.

Lea las intrucciones de precauciones y seguridad que estan
alfinalde
este manual(
Revise
todas las instrucciones de
montaje
I
Mcmte
todas las
piezas
segun las instrucciones de este manual. Nose saltee ningun
paso
.

Les,n Sie die
Sicherheit
s
r
ic
h
tlinien
am Ende des Benutzerhandbuchs durch I Gehen Sie noch einmal die
komplette
A
ufb
a
uan
l
eitun
g
durch
I
B
auen
Sie
alle
Teile entsprechend
der Anleitung in diesem Handbuch
zusammen.Lassen
Sie
da
b
ei
keinen
ArbHitsschritt aus.

Lee:s de
richtlijnen
voor zorg en veiligheid achterin deze handleiding
I
Bekijk alle montagehandleidingen
I
Monteer
alle
ond
•
erdelen
volgens de aanwijzingen van
deze
handleiding.Sla
geen
stappen
over
.

Leg9i le linee guida di
assistenza
e sicurezza alla fine di questa manuale
I
Consulta tutte
l
e
istr
u
z
ioni
di montaggio I
Manta
tutti
i
component
i
secondo
le
i
struzion
i
contenute
in questa manuale
.
Non saltare
nessuna
fase.
Option
I
Opci6n
I
optie
I
opzione
I
opc;ao
Option
I
Opci6n
I
optie
I
opzione
I
opcrao
Leia1
as diretrizes de cuidados e
seguranc;a
que constam da parte finaldeste
manual!
Reveja
todas
as
instru
c;
o
es
de
montagem
I
Mcmte todas
as
pec;as
de acordo com as
instruc;oes
do manual. Nao salte quaisquer
pa
ss
os.


REOUIRED TOOLS
I
OUTILS EXIGES
I
HERRAMIENTAS NECESARIAS
I
BENOTIGTE WERKZEUGE
I BENODIGD
GEHEEDSCHAP
I
AT
T
REZZATURA
OCCORRENTE
I
FERRAMENTAS
NECESSARIAS










For
external
access during
assembly
,
make sure to leave enough room
around
the outside of the shed assembly
site.
Pour un acces externe au cours
du
montage, veillez laisser suffisamment
de
place auteur du site de
montage.
Para tener un acceso exterior
durante
el
montaje, asegurese de dejar
suficiente
espacio
alrededor dellugar
de montaje
del
cobertizo.
Lassen Sie am Aufstellungsort
aul1erhalb
des Schuppens ausreichend Platz, so
dass
Sie wahrend des Aufbaus von aul1en
Zugang zum Schuppen
haben
.
Om tijdens de montage aan de
buitenkant
van het
schuurtje
te kunnen
werken,
moet
u ervoor zorgen dat u genoeg
ruimte
laat
aan de
buitenkant
van de
montageplaats.
Pe
r
l
'
accesso
esterno durante
il
montaggio,
assicurati di lasciare abbastanza
spazio
intorno alla parte esterna del luogo
di
montaggio deldeposito
attrezz
i
.
Para ter acesso externo
durante a
montagem
certifique-se
de que
deixa
espa
c
;
o
suficiente em redor do exterior
do
localde
montagem
do
abrigo.
Externalfloor
measurements
are
:
I
Les
measures externes
de la
etage sent:
I
Las
medidas
delsuelo externo
son
:
I
D
i
e
Auf3e
n
-
Bodenmaf3
e
betragen:
I
De
afmetingen van
de
externe
vloer zijn
:
I
Le
misure
delpavimento estemo sono:
I
A
s
medida
s
externas do chao
s
a
o
:





ASSEMBLY REQUIRES
lWO
PEOPLE
I
LE
MONTAGE
DOlT tTRE
EFFECTUE
PAR
DEUX PERSONNES
I
SE
NECESITAN
DOS
PERSONAS
PARA
ARMARLO
I
ZWEI PERSONEN ZUR
MONTAGE NOTWENDIG
I
MONTAGE
VEREIST
lWEE
PERSONEN
I
M
O
N
T
AGG
I
O
R
I
C
H
I
E
D
E
DUE PERSONE
IA
MONTAGEM EXIGE DUAS
PESSOAS
4
5

SHED PARTS
I
PIECES
DE L'ABRI
I
PARTES
DEL
COBERTIZO
I
TEILE
DES SCHUPPENS
I
ONDERDELEN
VAN
HET
SCHUURTJE
I
COMPONENT!
DEL
DEPOSITO
ATTREZZII
PECAS DO
ABRIGO
FLQiOR PARTS
I
ELEMENTS
DU
PLANCHER
I
PARTES
DE
L
SUELO
I
BODENTEILE
I
VLOERPANELE
N
I
PARTI
DE
L
PAVIMENTO
I
PE9AS DO
CHAO

Remove all parts from the package(s) and spread them out on a clean work
surface
I
Code
letters
are imprinted on each part
for
easy identification
I
Retirez toutes les pieces du/des paquet(sl et
etalez-les
sur une
surface
de travail propre I Des lettres
sont
imprimees sur chaque piece pour une identification facile
I
Saque todas las piezas del
paquete
o
paquetes
y p6ngalas sabre
una
superficie
de
trabajo
lim
pia
I
El
c6digo de
tetras
esta marcado en cada pieza para que sea mas facil
identificarla
I
Nehmen Sfe
alle
Teile aus der Verpackung und breiten Sie sie auf einer
sauberen
ArbeitsfUkhe aus I Auf
je
d
e m Teil sind
Kennbuchstaben
aufgedruckt, die die Zuordnung der einzelnen Teile
erleichtern
I
Haal alle onderd elen uit het pakket (of uit de
pakketten)
en leg ze
op een
s
c
hoon
werkoppervlak
I
Op ieder
onderdeel
zijn codes
aangebracht
voor een
gemakkelijke
identificatie
I
R
i
muovi tutti
i
componenti dal pacchetto
Iii
e spargili su una superficie di lavoro pulita I Le lettere del codice sono state
stampate
su
ciascun
componente
per una facile identificazione
I
Retire
todasas
pec;as
da
embalagem
e
espalhe-as
numa superffcie de trabalho
limpa
IExistem letras de c6digo
impressas
em cada
pe
para
facil identificac;ao



ROOF
PARTS
I
PIECES DU
TOIT
I
PARTES DEL TECHO
I
DACHELEMENTE
I
DAKONDERDELEN
I
PARTI DEL TETIO
I
PE9AS
DO
TELHADO

FS(X2) FG(X2)








FLE(X1)
FGE(X2)
FRE(X1]
J








TFF(X1)
T88
(
X4
)
F
C(X3)
DOOR
PARTS
I
PIECES
D
E
LA
PORTE
I
PARTES
DE
LA PUERTA
I
TURELEMENTE
I
DEURONDERDELE
N
I
PARTI
DELLA
PORTA
I
PE9AS DAS
PORTAS



FTV(X2)
088(1
)
[X2
)
TCR£1)[X2l


TCL(1)(X2)
t:::J8




DH2(X1) DH1[X1) SFR[X20) TRP(X4)


F
MC(
X
1
l
DL88(1)(X2) DR88(1)(X2) SKC(X1)

FGD(X2)
0
-@
FGV(X1) FTC(X2]
FTH(X1) FTS(X4) FBT(Xll


IH(X2] FLA(X2) HG(X4] DS(X2]
DX
(
X
2)




SN(X21
SQ(X21
<:; MS(X4)







SHELVES
I
ETAGERES
I
REGALE
I
ESTANTES
I
PLANKEN
I
MENSOLE
I
P R A T E L E I R A S
4
5

cz:::=7
\
FFD[X2) FML(X1] FMR(X1] FP2[X1)
FP
1
(
X1
J
FCL(X1)
FC
R
(
X1
J
)



WINDOW PARTS
I
PIECES DE LA
FENETRE
I
PARTES DE
LA
VENTANA
I
FENSTERELEMENTE
I
VENSTERONDERDELEN
I
PAfHI
DELLA FINESTRA
I
PE9AS
DA
JANELA


r
YWI[X1)
FWO
(
X
1
l
FWT[
X
1
l
_)
6

I
:
WALL
PARTS
I
PIECES OU CONTOUR
I
PARTES
D
E
LAS PAREDES
I
WANDELEMENTE
I
MUURONDERDELEN
I
PARTI
DELLA
PARETE
I
PAINEIS
LATERAlS





CO[X24)

0


WA[X24) SP[X2) SPLW[X1) SPL[X3) FO[X4) CS[X3) FMK[X3)



SCREWS
I
VIS
I
TORNILLOS
I
SCHRAUBEN
I
SCHROEVEN
I
VITI
I
PARAFUSOS



SC15[X54)
1.6cml0.63"
rꞏrlTTf
lljllll
jlllljlllllllllplllplll
p111]
I
,-
,
s26b[X37)
2
.
6cm
l1"
I'
I llljlllljiiii.TiflT TITIIIjlllljlliljlllll

@alllllllli!II>
SC12(X4)
5cm
l
1
.
97"
ITT
n
!111111111
1111
II
I
llrll!lllljlllfl
(
ij
)
!mmsrsmmm
P
.
t
lll
llllllllllllllllll
I'
I I I
I
I I I I
I
I I I I
I
I
HICH S I
IJ
.
1ne:t 5
J
1'
!
I
noel!
.,.
1 1
c;
.



SCW8[X4)
1
.6c
ml
0.63''
IIII
jillI jillI
jillI jillI
jillI
jillI
jlllljlllljiiiiJ
I
::m
'
t 2
J
•

fl-,,1'-,l"lr-1"1
.-1
,.-.-
,
.
,
.
r-
.
.
"
.
-
1
-
,
,
,
I
I
SC8(X7)
4.3cml1.7"
rrrrq
lllljllllj
llllj
lllljlllljlllljllll jll;ljlllll
lcm
1
:.
4
1
.

om}))))))))-)]))))))))m))))))))))))))))))
;

I
11--rr111 111111111
li!!_r
h
£t.5
1
1
c.
.


SC5(X4)
1.25cml0.49"
lllljlllljll.lljlllljlllljlllljlllljlllljlllljlllll
l
t'm
l
t
••
a

I
I I
I
I
I I I I
I
I I I
'I
'-"ln,.;c:..:.fl
_
_:_:-"=-.
-
1
I
J








SCN8(X7)
1.::.0
t
1
c
.


Packaging
ma
y contain some additional small parts for use as spare parts
I
L'emballage peut contenir de petites pieces
supplementaires
a
utiliser
comme
pieces
de rechange
I
El
envoltorio
puede contener algunas piezas
pequefia
s
adicionales
que se pueden utilizar como repuestos
I
In
der
Verpackung
konnen kleine
Zus<1tzteile
enthalten sein, die als Ersatzteile
genutzt
werden
konnen
I
De
verpakking
kan
een aantal
kleine
extra onderdelen
bevatten, die
als reserveonderdeel gebruikt
kunnen worden
I
La
confezione
potrebbe contenere piccole parti supplementari da
utilizzare
come parti
di ricambio
I
A
embalagem
pode
canter algumas pequenas
pes:as adicionais
para
utilizac;ao
como
pes:a
s
de reposis:ao


NOTE:Due
to variations in production, the actual assembled size
may
vary slightly from the specified
dimensions
.
REMARQUE:En
raison de variantes dans
La
production,
la
taille
de montage reelle peut
differer
quelque peu des dimensions
in
d
i
quees.
NOTA:debido
a
las
variacionesen
la
producci6n,
el
tamano real
al
montarlo puedevariar ligeramente
co n
respect
o a
lasdimensiones
especificadas.
BITTE BEACHTEN:Aufgrund von Abweichungen in
der Herstellung kann
die
tatsachliche
GroBe leicht von
den angegebenen
MaBen
abweichen.
LET
OP:vanwege
afwi
j
kingen
in de
productie kan
d
e
werkelijke
afmet
i
ng na
montage
een
klein beetje
afwi
j
ken
van de
opgegeven
afmetingen.
NOTA:a
causa
di
variazioni nella produzione,la
dimensione
effettiva
del
prodotto
assemblato
pubvariare
leggermente
dalle dimensioni
menzionate. NOTA:
Devido
a varias;oes na
produc;:ao
o tamanho real da montagem
pod
e r a variar ligeiramente das dimensoes
espec
ificadas.
8
9

I
s26b(X12l
@mlllllllii>









FLE
[
X1]
FGE
(
X2]
FRE
[
X1]























/•
FRE
81
1
s26b
[
X3l
@nlllllllllii>




















s26b









I
s26b[X12l
@:nlllllllllllt>



























DOOR/FRONT
PORTE/
L'AVANT
TURE
/VORDERSEITE
PUERTA
/PARTE DELANTERA
DEUR/VOORKANT
PORTA/ PARTE ANTERIORE
PORTA
I
PARTE DA
FRENTE
10

8
1
CS(X3)
I
FMK(X3)








WALL
ASSEMBLY
I
MONTAGE
DU MUR
I
ARMADO DE
PAREDES
I
MONTAGE
DERWANDE
I
MONTAGE
VAN
DE
MUREN
I
ASSEMBLAGGIO
DELLE
PARETI
I
MONTAGEM
DA PAREDE
I
COIX3) I
I
WAIX3)
0
I
FOIX1]




FO




















DOOR/
FRONT
PORTE
/
L'AVANT
TORE
/VORDERSEITE
PUERTA/ PARTE
O
E
LANTERA
DEUR/VOORKANT
PORTA/ PARTE
ANTERIORE
PORTA/
PARTE
DA
FRENTE
12 13

&
•
I
SPL/SPLW[X1)







This side
out
•
Cote
exterieur
•
tar
a
exterior
•
Diese seite nach
Aussen
•
Deze
kant
buiten
•
Lato
rivolto
verso
L'estemo
•
Este
lado para
fora

I
SPL/SPLW(X1)










SPL/SPLW









DOOR/
FRONT
PORTE
I
L
'
AVANT
TORE /VORDERSEITE
PUERTA
I
FY1.RTE
DELANTERA
DEU
R
IVOORKANT
PORTA
I
PARTE
ANTERIORE
PORTA
I
PARTE
DA
FRENTE


CS+FMK
(
X1
)








I
FO(X1)
I
CO(X3)
I
WA[X3l
0



14
15

[
X1
]
I
D88(1)(X1)
1
1
1
1
1
0

DL88(1)!X1)
DR88(1)(X1]
CO[X2]
WA
[X2]





f)
oRss111
e
1
1
1
1
1
0
1
FO[X1] CO(X3] WA[X3] [X1]


























I
f§t
I
0
I
CS+FMK
Uil3
I
SP
(
X21

CO[X3] WA(X3]

ꞏ
I
-
D88(1)[X1]






DL88(1)[X1] DR88(1)[X1] CO[X2]
WA
[X2)

T
ROOF ASSEMBLY
I
MONTAGE
DU TOIT
I
ARMADO
DEL
TECHO
I
DACHMONTAGE
I
DAKMONTAGE
I
MONTAGGIO DEL TETTO
I
MONTAGE
M
DO
TELHADO

I
TFB[X1)
I
FTV[X1)












FTV



















I
SC15[X6l
I



FTS
(X2
v





I
SC15
T
I


























16
19
18

I
FBl
i
X
1)
::::
:---
g
I
SC15
(
X1
)
p
-
I
CO(X4)
I
WAIX4)
0
I
SC15
(
X1
)
p





































20
21

9
DOOR
ASSEMBLY I
MONTAGE
DE LA
PORTE
I
ARMADO DE LA PUERTA
I
MONTAGE
DER TUR
I
DEURMONTAGE
I
MONTAGGIO DELLA PORTA
I
MONTAGEM DA
PORTA

I
FP1
(
X
1
1
I
H
G
(
X
4
1
db
I
FFD( X21


I
FP2(X1]
I
D
X
(X2]


I
FCL
(
X
1
1
I
FC
R
(
X
1
I


HG
•











D
22 23

I
ROOF ASSEMBLY
I
MONTAGE
OU TOIT
I
ARMADO DEL TECHO
I
DACHMONTAGE
I
DAKMONTAGE
I
MONTAGGIO DEL TETTO
I
MONTAGEM DO
TELHADO -81 G3
TFF[X1)
I
FTV(X1]













FTV












TFF
TFF(X1] FTH[X1] TCL(1)(X1] TCR(1)(X1)





8
1
SC15(X6)
p











T T
SC15
T
I
I



I
;:;
I
:
s26b(X2)
"""'""'
24
25

8
1
MBB
I
Y
M
I
FM
C
(
X1
1
/
f;11
SK
C
(
X11
I
SC15(X1)
p




•
I
CO(X41
I
WAIX41
0
••
I
MBB(X
g
I
SC15(X1l
p
27
26

I
BSS[X21
I
SF36[X41
@sm
nun
l>





































I
SF36[X4)
@mmmm>


I
FG
D
(
X2
)
./
28

t
•
I
FG
H
(
X
1
1
1 IFGV(X1]
@





I
SC8(X2)
o-ꞏ..ꞏ
1
SCN8(X2)
@
30
31

o
1
F88(
.......--
-fa
1
SC15(X41
®
)
liDIIIIID


-
SC8[X4)
Qmlmm•um•
I
SCN8(X4) ®
l
s26b[X2
)
@runllllllllt>






32
33

-,
T88
(
X4)
















. .
.
. .
.
i
.
.

.
'
34
35

I
SF36{X20)
@mnn>
I
SFR[
X2
0
)
tt

I
IHI
X2
)
)
I
s26b
i
X4
)
®
)m1mliD
































I
SC15[
X12)
p




I
DH1
IX
1
)
II









Left
Gauche
Izquierdo
Verl
i
efl
Link
s
S
i
n
i
s
t
ra
E
s
querdo
I
SC5{X2)
{i)m1llrs>
I
FMLIX1)
®
---.-...............................






Left
Gauche
Izquierdo
VerlieB
0
0
Links
0 Sinistra
Esquerdo

0
0
0


0



0
0
0



ll
0





FML
0



I FLA{X2) I
SCWB{X41
®Jmm>
-
1
DS{X2)
B




Left
Gauche
Izquierdo
VerlieB
Links
Sinistra
Esquerdo










36

Other manuals for FACTOR 8x8

2

Other Keter Garden House manuals

Keter MANOR 6x5DD User manual

Keter

Keter MANOR 6x5DD User manual

Keter NEWTON 759 User manual

Keter

Keter NEWTON 759 User manual

Keter NEWTON 759 User manual

Keter

Keter NEWTON 759 User manual

Keter DuoTech ARTISAN 9x7 User manual

Keter

Keter DuoTech ARTISAN 9x7 User manual

Keter MANOR PENT User manual

Keter

Keter MANOR PENT User manual

Keter FUSION 757 User manual

Keter

Keter FUSION 757 User manual

Keter DUOTECH OAKLAND 754 User manual

Keter

Keter DUOTECH OAKLAND 754 User manual

Keter MONTFORT 757 User manual

Keter

Keter MONTFORT 757 User manual

Keter Manor Pent 6x4 User manual

Keter

Keter Manor Pent 6x4 User manual

Keter Manor Pent 6x6 User manual

Keter

Keter Manor Pent 6x6 User manual

Keter OAKLAND 1175SD User manual

Keter

Keter OAKLAND 1175SD User manual

Keter MANOR 6x3DD User manual

Keter

Keter MANOR 6x3DD User manual

Keter FORTIS 8x11 User manual

Keter

Keter FORTIS 8x11 User manual

Keter Manor Pent 6x6 User manual

Keter

Keter Manor Pent 6x6 User manual

Keter SCALA 6x8 User manual

Keter

Keter SCALA 6x8 User manual

Keter Scala User manual

Keter

Keter Scala User manual

Keter FACTOR 6x6 User manual

Keter

Keter FACTOR 6x6 User manual

Keter MANOR 6x5SD User manual

Keter

Keter MANOR 6x5SD User manual

Keter MANOR 4x6S User manual

Keter

Keter MANOR 4x6S User manual

Keter 17201311 User manual

Keter

Keter 17201311 User manual

Keter DuoTech ARTISAN 9x7 User manual

Keter

Keter DuoTech ARTISAN 9x7 User manual

Keter Bellevue User manual

Keter

Keter Bellevue User manual

Keter OAKLAND 1175SD User manual

Keter

Keter OAKLAND 1175SD User manual

Keter DUOTECH OAKLAND 757 User manual

Keter

Keter DUOTECH OAKLAND 757 User manual

Popular Garden House manuals by other brands

Biohort AvantGarde Assembly manual

Biohort

Biohort AvantGarde Assembly manual

Palmako ELT18-5733 installation manual

Palmako

Palmako ELT18-5733 installation manual

Forest Timberdale WORKSHOPS DOUBLE DOOR 8x10 instructions

Forest

Forest Timberdale WORKSHOPS DOUBLE DOOR 8x10 instructions

Mercia Garden Products 01PTOSBA0806SDFW-V1 General instructions

Mercia Garden Products

Mercia Garden Products 01PTOSBA0806SDFW-V1 General instructions

GARDY SHELTER CCP-EKO 504040 Assembly instructions

GARDY SHELTER

GARDY SHELTER CCP-EKO 504040 Assembly instructions

Palmako FRB34-4040 installation manual

Palmako

Palmako FRB34-4040 installation manual

Mercia Garden Products 0619LOG018-V4 General instructions

Mercia Garden Products

Mercia Garden Products 0619LOG018-V4 General instructions

Palmako Hanna installation manual

Palmako

Palmako Hanna installation manual

Dancover SkyLight manual

Dancover

Dancover SkyLight manual

Palmako FRG28-5038-3FSC installation manual

Palmako

Palmako FRG28-5038-3FSC installation manual

Mercia Garden Products 0619PNNE0324HGDD2SW-V1 General instructions

Mercia Garden Products

Mercia Garden Products 0619PNNE0324HGDD2SW-V1 General instructions

Backyard Products Yardline AUBURN GABLE manual

Backyard Products

Backyard Products Yardline AUBURN GABLE manual

OLT SR812-FJ-Ply Assembly manual

OLT

OLT SR812-FJ-Ply Assembly manual

Palmako FR40-4040 installation manual

Palmako

Palmako FR40-4040 installation manual

Lemeks Palmako Emily installation manual

Lemeks

Lemeks Palmako Emily installation manual

Palmako PM70-6436 installation manual

Palmako

Palmako PM70-6436 installation manual

Palmako PM70-5957 installation manual

Palmako

Palmako PM70-5957 installation manual

Project Timber My Den Metal Roof Building instructions

Project Timber

Project Timber My Den Metal Roof Building instructions

manuals.online logo
manuals.online logoBrands
  • About & Mission
  • Contact us
  • Privacy Policy
  • Terms and Conditions

Copyright 2025 Manuals.Online. All Rights Reserved.