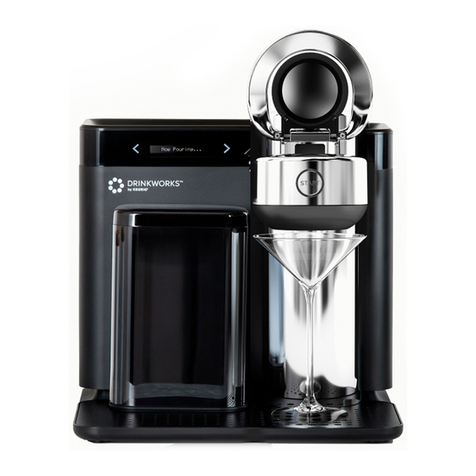
Keurig DRINKWORKS Home Bar User manual

HOME BAR CARE GUIDE
Bar-quality drinks
at the push of a button.
Cheers!

drinkworks.com
Welcome.
We recommend that you review and carefully follow
this guide as well as all warnings and instructions that
accompany the Home Bar®to make the most of your
Drinkworks®experience. This guide includes use, care,
maintenance and troubleshooting information to help
you make remarkable drinks every time.

3
Electrical warnings ............................................................4
Home Bar warnings ............................................................6
Home Bar components.........................................................7
Using the Home Bar. . . . . . . . . . . . . . . . . . . . . . . . . . . . . . . . . . . . . . . . . . . . . . . . . . . . . . . . . . . .8
Positioning the Home Bar ....................................................8
Filling the water tank .......................................................8
Making a drink .............................................................9
Getting connected ........................................................12
Home Bar controls ...........................................................13
Home Bar care and cleaning ....................................................14
Start button indicators ........................................................16
Troubleshooting ............................................................. 17
Helpful hints ................................................................18
Contents.

Electrical warnings.
When using any electrical appliance, basic safety precautions should be followed,
including the following:
General
Read all instructions before using.
The Home Bar must be properly installed
and positioned in accordance with these
instructions before it is used.
Clean Home Bar components as specied in
this guide.
Always keep the water tank lid on the
water tank, unless you are relling it.
Do not attempt to lift the Home Bar handle
while making a drink.
To protect against re, electrical shock
and injury, do not immerse cords, plugs or
the Home Bar in water or other liquids.
Do not use the Home Bar for anything other
than its intended use.
The use of non-authorized accessories may
cause injury and/or damage the Home Bar.
Positioning
Ensure that sufcient space is left around all
sides of the Home Bar to allow air to circulate.
Do not obstruct the vents on the sides and
rear of the Home Bar.
4
Do not place the Home Bar on or near a hot
gas or electric burner, or in a heated oven.
Keep the Home Bar away from direct sunlight
and heat sources.
Do not use outdoors. The Home Bar is
intended for indoor use only.
Do not let the cord hang over the edge of a
table or counter, or touch hot surfaces.
Use of accessory attachments is not
recommended by the manufacturer and may
result in re, electrical shock or injury.
Cords and Grounding
The Home Bar is equipped with a power cord
having grounding wires with a grounding plug.
GROUNDING INSTRUCTIONS: This Home Bar
must be grounded. In the event of malfunction
or breakdown, grounding provides a path of
least resistance for electric current to reduce
the risk of electric shock. This Home Bar is
equipped with a cord having an equipment-
grounding conductor and a grounding plug.
The plug must be plugged into an appropriate
outlet that is properly installed and grounded
in accordance with all local codes and
ordinances.

5
Figure 1
(A)
GROUNDING
PIN
Cords and Grounding (Cont.)
WARNING: Improper connection of the
equipment-grounding conductor can result
in a risk of electric shock. The conductor
with insulation having an outer surface that
is green with or without yellow stripes is the
equipment-grounding conductor. If repair or
replacement of the cord or plug is necessary,
do not connect the equipment-grounding
conductor to a live terminal. Check with a
qualied electrician or serviceman if the
grounding instructions are not completely
understood or if in doubt as to whether
the Home Bar is properly grounded. Do not
modify the plug provided with the Home Bar—
if it will not t the outlet, have a proper outlet
installed by a qualied electrician.
This appliance is for use on a nominal 120V
circuit and has a grounding plug that looks like
the plug illustrated in sketch (A) in Figure 1.
SHORT CORD INSTRUCTIONS: A short power
supply cord is provided to reduce the risk
of becoming entangled in or tripping over a
longer cord. If an extension cord is used, (1)
the marked electrical rating of the cord set
or extension cord should be at least as great
as the electrical rating of the appliance, (2)
the cord should be arranged so that it will not
drape over a countertop or table top where it
can be pulled on by children or tripped over
unintentionally and (3) the extension cord
must include a three-prong grounding plug.
EXTERNAL CLEANING: It is recommended
that the Home Bar is unplugged while cleaning
the exterior of the appliance.
WHEN UNPLUGGING POWER: To
disconnect, turn off the power switch, then
remove plug from outlet.
Do not unplug by pulling on the cord. To
unplug, grasp the plug, not the cord.
THIS PRODUCT IS FOR
COMMERCIAL USE ONLY.

6
Any servicing other than cleaning and user
maintenance should be performed by an
authorized Drinkworks representative.
Attempting other maintenance or servicing
could cause injury or damage.
Disposal
The above symbol on the product or its
packaging indicates: Do not dispose of
electrical appliances or batteries as unsorted
municipal waste; use separate collection
facilities.
Contact your local authority for information
regarding the collection systems available.
If electrical appliances are disposed of in
landlls or dumps, hazardous substances
can leak into the groundwater and get into
the food chain, damaging your health and
well-being.
Contact your local or regional waste authority
for more information on collection, reuse and
recycling programs.
Home Bar warnings.
Read and follow all warnings and instructions before use. Misuse of the Home Bar may result
in serious personal injury or property damage.
Positioning
Set up the Home Bar on a at, weight-bearing,
stable, heat-resistant surface away from hot
surfaces, sources of heat or open ames.
Keep out of reach of children.
Keep upright. Do not use the Home Bar unless
it is in its upright position.
Use
Use only with Drinkworks Pods. Use with any
other Pod may result in injury or damage to
the appliance.
Use only ice and water in the Home Bar. Do not
put any other liquids or substances in the water
tank except as noted in cleaning instructions.
Do not overll the water tank.
Do not move the Home Bar during the
drink-making process.
Keep the Home Bar’s operating temperature
between 41°F and 86°F (5°C and 30°C).
You must be 21 years or older to purchase or
consume alcoholic beverages.
Care
Perform maintenance only as directed in
this Home Bar Care Guide.

7
Home Bar components.
A. Drinkworks Pod (Not
included)
B. Water Tank
C. Power Button
D. Power Cord
E. Display
F. Touch Arrow
Buttons
G. START Button
H. Drip Tray
I. Pod Basket
J. Pod Door
K. Handle
L. Tap
M. Half-Gallon Container (Not included)
K.
I.
A.
G.
J.
L.
E.
F.
D.
B.
C.
M.
H.

8
Positioning the Home Bar
Place the Home Bar in an open, uncluttered area in your kitchen or bar area. Leave at least 2
inches (5 centimeters) around the appliance from any wall.
Filling the water tank
Always remove the water tank from the Home Bar when lling with ice or water. Do not bring
the appliance to the sink to rell the water tank.
Fill the water tank with water or ice water only.
Do not ll beyond the max ll line.
Using bottled or ltered water is recommended, but optional.
Using the Home Bar.

9
3. Place a Drinkworks Pod in the Pod basket. Make sure the
Pod is fully inserted, with the bar code on the Pod label at
a 12 o’clock position (i.e., away from you).
2. Lift the handle on the Pod door to reveal the Pod basket.
1. Fill the water tank as instructed by the display with ice
and water.
Making a drink
Using the Home Bar.
12 o’clock

10
5. Place the appropriate size of glass underneath the tap on
top of the drip tray. The display will alert you to the correct
size of glass to use based on the drink you have selected.
4. Close the Pod door by pulling the handle down. Wait for
the Home Bar to recognize your drink and prepare the
recipe.
XAM

11
6. When the recipe is ready, the start button will ash
blue. Press START to make a drink.
NOTE: If you do not press START within 60 seconds, the
light will stop flashing blue. Reload the drink recipe by
opening and closing the Pod door.
7. The display will notify you when your drink is ready. Top with
ice and enjoy responsibly.
NOTE: We recommend that you remove the empty Pod
from the Pod basket after your drink has been made.
XAM

12
Getting connected
The Home Bar comes with built-in Bluetooth Low Energy 4.2 technology. This technology allows the
Home Bar to communicate with the Drinkworks app about its performance in order to help us improve
its function. Once connected to the Drinkworks app, you will have a choice to opt in to share Home Bar
data with Drinkworks for these and other purposes described during the opt-in process. This feature is
optional. It is not required for the Home Bar to function properly.
Download the Drinkworks app from the Apple App Store or Google Play store for Android and connect to
the Home Bar to unlock all of its features.
After downloading the Drinkworks app, you can choose to get connected to the Home Bar via the following
steps:
1. Enable the Bluetooth feature on your phone through its settings.
2. Create an account on the Drinkworksapp and pair it with the Home Bar by following the
instructions on the initial Drinkworks app log-in.
3. The Home Bar will send a unique key for use with pairing the app that you must conrm via by
pressing the right touch arrow button next to the display panel.
4. Complete the Drinkworks app registration and ensure that the Home Bar is paired and connected
by viewing the dashboard in the Drinkworks app.
5. To disconnect from the Bluetooth, go to your phone settings and select Forget Device.
Use the Drinkworks app to:
Set up and register your Home Bar
•Shop for Pods and accessories
• Rate your drinks
•Watch helpful videos
•Access tips and answers to commonly asked questions
Using the Home Bar.

13
Display Screen
Messages appear on the display screen. Follow the prompts
on the screen to complete activities.
Solid Arrow
The touch arrow buttons appear on either side of the display.
Use them to move backward and forward through options.
Blinking Arrow
Touch a blinking arrow button to continue to the next step.
Start Button
Press START to conrm an action or select an option.
To access the Rinse Cycle, press and hold the start button for 3
seconds.
NOTE: These functions require the use of an empty half-gallon
container that fits under the tap. The Home Bar does not include
this container. Any appropriately sized container can be used for
this purpose.
Arrows and start button
Home Bar controls.

14
Home Bar care and cleaning.
Cleaning the exterior
Keep the Home Bar looking its best by cleaning the exterior after
making drinks. Wipe down the surface with a clean, moist, lint-free,
non-abrasive cloth. Never immerse the Home Bar in water or other
liquids.
Cleaning the drip tray
The drip tray can accumulate up to 10 ounces of liquid before it
overows. To remove the drip tray, slide it toward you, keeping it
level at all times to avoid spilling its contents. The drip tray should
occasionally be rinsed between cleanings. Clean the drip tray with
a damp, soapy, lint-free, non-abrasive cloth.
Cleaning the Pod basket
Wash the Pod basket once a week, and a quick rinse after each drink
is recommended—especially after making avorful cocktails. The
Pod basket is removable and can be cleaned with a damp, soapy, lint-
free,non-abrasiveclothorinthetoprackofthedishwasher. Keeping
the Pod basket clean helps maintain drink quality.
WARNING: Some Pods may contain allergens such as milk, egg,
wheat, nuts or soy, or have been produced in a facility that
produces products containing such allergens. Check the Pod
packaging for allergen information. If you use such a Pod, remove
and clean the Pod basket before your next drink, as there may be
trace amounts of allergens on it.
XAM

15
Running the Rinse Cycle
Periodically run the Rinse Cycle, which empties and rells the internal chilling tank so that drinks can be made
with fresh water. Access the Rinse Cycle from the menu and follow the prompts on the display. It takes about
10 minutes to complete a Rinse Cycle. Make sure to keep the Pod basket in the Home Bar while running the
Rinse Cycle.
1. Rinse the lter screen with the strong force of water from a
faucet.
2. If you have a sprayer, aim the water spray at the lter screen.
3. Fill the water tank with approximately 2 inches of clean water,
put the lid on and shake.
4. Empty the water tank, then ll it with clean water and return it to
the Home Bar. If needed, repeat the above steps.
Cleaning the water tank
The water tank and its lid should be periodically inspected and cleaned. Neither part should be cleaned
in the dishwasher but rather with a damp, soapy, lint-free, non-abrasive cloth. Rinse the water tank
thoroughly so that no cleaners or cleaning solutions remain in the tank, as they may contaminate the water
supply in the Home Bar. Do not dry the inside of the water tank with a cloth, as lint or other particles may
transfer from the cloth to the tank.
To clean the lter screen at the base of the water tank, empty the tank and follow one or all of the following
steps:

16
Start button indicators.
Use the guide below to determine what the colored ring around the start button says
about the Home Bar’s status.
Unlit
The Home Bar is off or in standby mode. To wake up from standby
mode, simply press START or lift the handle on the Pod door.
Solid Blue
The Home Bar is working.
Flashing Blue
The Home Bar is ready to prepare a drink.
Red
The Home Bar needs assistance. See the display for information.
Flashing Red
A more serious error has occurred. Contact Drinkworks support at
1-888-231-9397.

17
Troubleshooting.
What do I do if...
The Home Bar does not recognize a Pod?
If the Home Bar fails to recognize your authentic Drinkworks
Pod, open the Pod door and re-insert the Pod. Make sure the
bar code is at a 12 o’clock position. After two failed attempts to
determine the type of Drinkworks Pod you selected, the Home
Bar will enter an override state. Follow the instructions on the
display and do the following:
1. Open the Pod door by lifting up the handle, and
remove the Pod.
2. Find the Drinkworks Pod type printed on the Pod label.
It will be a capital letter located in a triangle under “Pod
type.”
3. Scroll to the corresponding letter on the display using
the touch arrow buttons.
4. Press START to select the appropriate Pod type.
5. Re-insert the Pod and close the lid.
6. Press START to make your drink.
THIS UNIT NOT LABELED FOR
INDIVIDUAL SALE
PACKED BY DRINKWORKS
TM
WILLISTON, VT
NON-ALCOHOLIC
1.7 FL OZ MAKES 6.8 FL OZ AS SERVED BY YOUR DRINKMAKER
Bright Lemon Flavor and a Hint of
Muddled Basil
Serve over cubed ice in a highball
glass with a lemon wedge, with or
without gin of your choice.
SWEETNESS
HERBAL CITRUS
NOTES:
PART GEOMETRY CONTROLED BY CAD FILE OF SAME NUMBER. REFER TO GENERAL TOLERANCE BLOCK
1.
TO CONTROL TOLERANCES NOT SHOWN.
PART MUST MEET ALL REQUIREMENTS LISTED IN DESIGN SPECIFICATION #70002554
2.
FLAT PARTS DRAWN OUTSIDE UP.
3.
40000609
BRANDING LABEL, 50ml
M. FANTAUZZI
C
70002556
TITLE
MATERIAL
DRAWN BY
REV
PART NUMBER
PANTONE
427C
PANTONE
Cool Gray 6
Black
The Home Bar does not have power?
Make sure it is plugged in securely.
Make sure the power button has been turned on.
Plug it into an independent outlet and/or a different outlet.

18
Helpful hints.
Plug the Home Bar directly into a
grounded outlet
If the electric circuit is overloaded with
other appliances, the Home Bar may not
function properly. It should be operated on its
own circuit, separate from other appliances.
Keep the Home Bar turned on
To make your favorite drinks anytime you
want, keep the Home Bar plugged in and
powered on all the time. This helps to prevent
long wait times to set up the Home Bar and
chill water before you can prepare your
favorite drink.
Download the Drinkworks app
For the latest software updates, download the
Drinkworks app and connect the appliance.
Add ice to the water tank
Always start your drink-making experience by
lling the water tank with ice, then water. Be
sure to shake the water tank to get the coldest
water possible.
Use bottled or ltered water
Water quality varies from place to place.
If you notice an undesirable taste in your
drinks (such as chlorine or other mineral
tastes), try using bottled water or water from
a ltration system. For best results, follow the
manufacturer’s instructions when using any
water ltration system.
Remove Pods after use
Do not leave empty Pods in the Pod basket.
Remove each Pod after your drink has
been made. See page 9 for drink-making
instructions.
Clean the Pod basket weekly
Once a week, remove the Pod basket and
either hand-wash it or place it in the top rack
of the dishwasher.
For more information, visit
micromatic.com/drinkworks.

Contains FCC ID: 2AC7Z-ESP32WROVERB
This device complies with Part 15 of the FCC Rules. Operation is subject to the following two conditions: (1) this device
may not cause harmful interference, and (2) this device must accept any interference received, including interference
“that may cause undesired operation.”
Drinkworks Pods and other available accessories are sold separately.
This Home Bar is designed to prepare alcoholic beverages and is intended for use by persons 21+ years old.
Please enjoy responsibly.
The Drinkworks®name and logo are the property of Bedford Systems LLC.
All third-party trademarks or logos referenced in this guide are the property of their respective owners.
KEURIG®is a trademark of Keurig Green Mountain, Inc., used under license.
© 2021 Bedford Systems LLC

Other manuals for DRINKWORKS Home Bar
1
Table of contents
Other Keurig Kitchen Appliance manuals
Popular Kitchen Appliance manuals by other brands

Cuisinart
Cuisinart GR030E instructions

Breville
Breville VST025 user manual

Russell Hobbs
Russell Hobbs 25600-56 user manual

La Sommeliere
La Sommeliere SLS32DZBLACK User instructions

Robert Sorby
Robert Sorby RS205 instruction manual

King Kooker
King Kooker OUTDOOR COOKERS WITH GAS SHUT-OFF TECHNOLOGY use and care manual