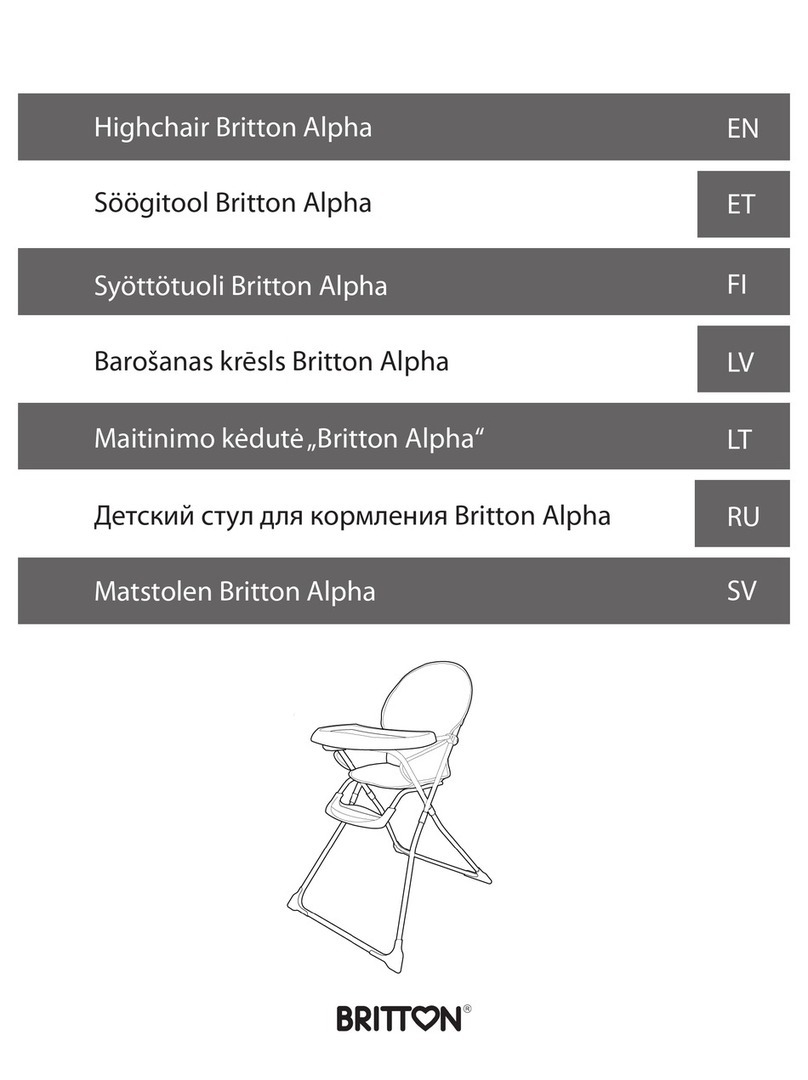
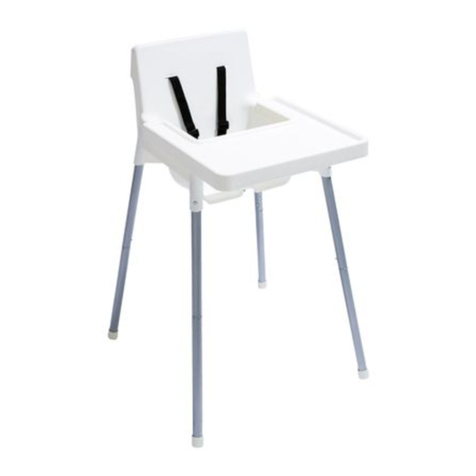
KIDWELL EATAN User manual

INSTRUKCJA OBSŁUGI
USER MANUAL
BENUTZERHANDBUCH
PL
EN
DE
Krzesełko do karmienia
High chair
Fütterungsstuhl
EATAN / EATAN WOOD

MODEL: KRWYEAT01A0, KRWYEAT02A0, KRWYEAT01A1, KRWYEAT02A1
6
11
16

3
x 10
1
2

4
4
3
5

5
7
6

6
Dziękujemy za zakup produktu marki Kidwell.
Priorytetem dla nas jest bezpieczeństwo dziecka oraz tworzenie pięknych
wspomnień.
W przypadku jakichkolwiek pytań, prosimy o kontakt na adres e-mail:
Prosimy o dokładne przeczytanie niniejszej instrukcji oraz podążanie za jej
poleceniami. Celem instrukcji jest dostarczenie informacji o tym, jak prawidłowo
i bezpiecznie korzystać z produktu.
Po złożeniu produktu proszę upewnić się czy wszystkie funkcje działają
prawidłowo oraz są zabezpieczone zgodnie z zaleceniami instrukcji (elementy
mocujące, nakrętki, śrubki, łączenia itp.).
Montaż produktu Kidwell powinien być wykonany przez osobę dorosłą.
Brak zastosowania się do poleceń zawartych w tym dokumencie może
spowodować poważne obrażenia.
WAŻNE: Produkt do samodzielnego montażu
Nieprzestrzeganie procedur zawartych w niniejszej instrukcji obsługi
może doprowadzić do poważnych uszkodzeń ciała dziecka!
Pamiętaj by usunąć i wyrzucić wszystkie elementy opakowania, które były
zawarte wraz z produktem, tak aby nie pozostały w zasięgu dziecka, co mogłoby
spowodować ryzyko krzywdy, np. zagrożenie zadławienia (elementy kartonu,
plastikowe folie itp.). Folia nie jest zabawką i po rozpakowaniu przez osobę
dorosłą folię należy natychmiast wyrzucić. Zabawa folią grozi uduszeniem!
WAŻNE! PRZECZYTAJ UWAŻNIE I ZACHOWAJ NA PRZYSZŁOŚĆ JAKO
ODNIESIENIE.
OSTRZEŻENIE
• Nigdy nie pozostawiaj dziecka bez opieki
• Krzesełko może być składane i rozkładane tylko przez osobę dorosłą
• Zawsze stosuj system ograniczający
• Upewnij się, czy pasy bezpieczeństwa są prawidłowo dopasowane i nie
mają zbyt dużych luzów
• Dziecko powinno być zawsze zabezpieczone pasami
• Zagrożenie upadkiem: Nie dopuść, aby dziecko wspinało się na produkt
• Nie używaj produktu, jeżeli wszystkie elementy nie są prawidłowo
zamontowane i wyregulowane

7
• Miej świadomość ryzyka przewrócenia, jeżeli dziecko potra odepchnąć się
stopami od stołu lub jakiejkolwiek innej konstrukcji
• Miej świadomość ryzyka otwartego ognia i innych źródeł silnego ciepła w
pobliżu produktu
• Ustawienie wysokiego krzesełka w bezpośredniej bliskości otwartego
płomienia i innych źródeł silnego ciepła, takich jak grzejnik z elektrycznie
ogrzewanymi prętami, grzejnik gazowy itp. grozi niebezpieczeństwem
• Należy zaprzestać użytkowania krzesełka, gdy jakakolwiek jego część
jest uszkodzona, rozdarta lub gdy jej brakuje. Jeżeli krzesełko jest
w jakikolwiek sposób uszkodzone, należy niezwłocznie zaprzestać jego
użytkowania oraz skontaktować się ze sprzedawcą
• Nie wolno zbyt mocno dociskać tacki do dziecka. Należy zostawiać nieco
przestrzeni na swobodne oddychanie
• Po zmontowaniu krzesełka należy upewnić się, czy wszystkie śruby zostały
dokładnie dokręcone i co jakiś czas sprawdzać, czy się nie poluzowały
• Tacka nie służy jako zabezpieczenie dziecka przed wypadnięciem
• Krzesełko przeznaczone wyłącznie dla dzieci do 15kg, które potraą
samodzielnie siedzieć
• Nie należy stosować produktu, dopóki dziecko nie będzie potrało
samodzielnie siedzieć
• By uniknąć obrażeń upewnij się, że dziecko przebywa z dala od miejsca
montażu, podczas składania czy rozkładania produktu
• Zawsze upewnij się czy wszystkie części pasują jak nakazuje tego instrukcja
• Nie podnoś produktu gdy dziecko nadal się w nim znajduje
• Nie podnoś produktu za tackę do karmienia
• Nie podmieniaj części ani akcesoriów na inne niż zatwierdzone przez
producenta
• Nie podejmuj się napraw lub modykacji produktu. Tylko wykwalikowani
technicy serwisowi są do tego upoważnieni
• Nie dodawaj przedmiotów do produktu, które mogą zagrozić jego
prawidłowemu funkcjonowaniu lub przedmiotów, które mogłyby wyrządzić
krzywdę dziecku lub żadnych materiałów tekstylnych, które mogą
doprowadzić do uduszenia się dziecka
• Nie kładź przedmiotów na produkt, które mogą zagrozić jego prawidłowemu
funkcjonowaniu lub przedmiotów, które mogłyby wyrządzić krzywdę dziecku
• Kładzenie dziecka lub ciężkich przedmiotów na tackę do karmienia może
spowodować uszkodzenie produktu lub uszczerbek na zdrowiu dziecka
• Nigdy nie korzystaj z produktu gdy znajduje się on na niestabilnym podłożu:
• Podwyższeniach
• Miękkim podłożu (materac, poduszka)
• Nierówne powierzchnie

8
• Schody, stopnie
• Nie narażaj produktu na działanie wysokich i niskich temperatur, a także
na wysoką wilgotność
• Jeśli krzesło przebywało w mocno nasłonecznionym miejscu, przestaw je
w cień i odczekaj by się schłodziło przed ponownym użytkowaniem
• Podczas regulacji części krzesła (takich jak oparcie, tacka do karmienia)
upewnij się, że dziecko siedzi w bezpiecznej pozycji i nie dotyka żadnych
ruchomych elementów
• Nie reguluj wysokości krzesła gdy dziecko się w nim znajduje
• Upewnij się po rozłożeniu krzesła, że blokada działa poprawnie
• Nie należy składać/rozkładać krzesełka gdy dziecko się w nim znajduje.
Rysunki i zdjęcia mają wyłącznie charakter poglądowy. Rzeczywisty wygląd
produktu może się różnić od wizualizacji w instrukcji.
CZĘŚCI ZESTAWU (patrz rys. 1)
Siedzisko z wyściółką i pasami
bezpieczeństwa
Podstawa siedziska
Nogi (4 szt.)
Nakładki na nogi krzesełka z
podkładkami antypoślizgowymi
Podnóżek
6
7
8
9
10
11
1
2
3
4
5
Stolik z odczepianą tacką
Przegroda zabezpieczająca
Metalowe listwy stabilizujące (3 szt.)
Zatyczki blokady siedziska
Śruby (10 szt.)
Wkrętak krzyżowy
OPIS
• 4w1: wysokie krzesełko do
karmienia dla młodszych dzieci;
niskie krzesełko do karmienia dla
młodszych dzieci; wysoki taboret dla
starszych dzieci; niski taboret dla
starszych dzieci
• Stabilne nogi z antypoślizgowym
wykończeniem
• Krzesełko do karmienia
przeznaczone dla dzieci w wieku
od 6 do 36 miesięcy ( max. waga
dziecka 15 kg) z możliwością
przekształcenia krzesełka w taboret
dla starszych dzieci
• 2-stopniowa regulacja długości nóg
• Regulowana i odczepiana tacka ze
zdejmowanym blatem
• Wyprolowany blat z miejscem na
kubek
• Komfortowy kształt siedziska
• Łatwo zmywalna powłoka siedziska
• Tapicerka z miękkiej ekoskóry
• 5-punktowe pasy bezpieczeństwa
• Zabezpieczenie przed wysunięciem się
dziecka z krzesełka

9
MONTAŻ KRZESEŁKA
1
1. Umieść nogi (rys. 1.3) w dedykowanych otworach znajdujących się w podstawie
siedziska (rys. 2.1). Zwróć przy tym uwagę, że przednie nogi krzesełka mają od fronfu
dodatkowe otwory na śruby do przykręcenia podnóżka.
2. Przykręć załączonym wkrętakiem śruby w celu unieruchomienia i zespolenia nóg z
podstawą siedziska (rys. 2.2).
3. Na zakończenia nóg załóż nakładki (rys. 1.4) służące jako podstawa antypoślizgowa
(rys. 3).
4. Zgodnie z (rys. 4) przykręć śrubami metalowe wzmocnienia nóg (rys. 1.8), służące do
stabilizacji i usztywnienia konstrukcji krzesełka.
5. Przykręć śrubami podnóżek (rys. 1.5) do przednich nóg krzesełka (rys. 5).
Na tak przygotowaną konstrukcję można zamontować wyprolowane siedzisko (rys. 1.1).
W tym celu umieść siedzisko w podstawie (rys. 6.1), a następnie zablokuj specjalnymi
zatyczkami, które uniemożliwią łatwy demontaż siedziska (rys. 6.2). Zatyczka zatrzaśnie
się w dedykowanym otworze i unieruchomi siedzisko w podstawie.
Na końcu zamontuj stolik do karmienia (rys. 1.6) z przegrodą (rys. 1.7), która dodatkowo
zabezpieczy dziecko przed wysunięciem się z krzesełka.
W tym celu od spodu stolika zamocuj przegrodę (rys. 7.1), a następnie wsuń stolik z
przegrodą na podłokietniki siedziska, naciskając jednocześnie przyciski od spodu stolika
(rys. 7.2 ). Przyciski służą do odblokowania zaczepów stolika w celu jego montażu,
demontażu oraz regulacji odległości od dziecka.
W razie potrzeby, górną tackę można łatwo odczepić od stolika.
UWAGA: Pamiętaj że przegroda jest tylko dodatkowym zabezpieczeniem. Podstawowym
zabezpieczeniem dziecka w krzesełku, jest prawidłowo dostosowany i zapięty pas
bezpieczeństwa.
2
Pasy przymocowane do siedziska można regulować, żeby dopasować je do wzrostu i
wygody dziecka. Dostosuj pasy i upewnij się, że dziecko siedzi w krzesełku bezpiecznie
i wygodnie. Następnie zapnij pas w celu zabezpieczenia dziecka przed wypadnięciem
z krzesełka. Żeby rozpiąć pasy bezpieczeństwa, naciśnij przycisk znajdujący się na
klamrze.
33
Krzesełko posiada opcję obniżenia poprzez skrócenie długości nóg o połowę. By obniżyć
wysokość krzesełka należy wykręcić dolne części wszystkich nóg, a następnie na
skrócone nogi krzesełka, nałóżyć nakładki będące ich podstawą antypoślizgową.
4
Żeby zdemontować pasy, przełóż zaczepy blokujące pasy przez otwory znajdujące się
w tylnej części oparcia oraz pod siedziskiem. Po usunięciu pasów można również łatwo
zdjąć pokrowiec z siedziska.
PASY BEZPIECZEŃSTWA
PRZEKSZTAŁCENIE KRZESEŁKA
ZDEJMOWANIE PASÓW I POKROWCA

10
ŚRODOWISKO
Dla dobra środowiska, po zaprzestaniu użytkowania produktu, prosimy
o jego utylizację do odpowiedniego obiektu na odpady, zgodnego z lokalną ustawą.
CZYSZCZENIE I KONSERWACJA
• Produkt ten wymaga systematycznej konserwacji.
• Czyszczenie i konserwacja powinna być wykonywana przez osobę dorosłą.
• Krzesło należy czyścić za pomocą wilgotnej szmatki w roztworze mydła i wody.
• By uniknąć tarcia ruchomych części, co może spowodować uszkodzenie krzesła,
upewnij się, że są one czyste i nie dostał się do nich brud, piasek ani kurz.
• Kontroluj czy krzesło nie ma uszkodzonych, podartych lub brakujących części. Jeśli
którykolwiek z elementów wydaje się być uszkodzony, zaprzestań użytkowania
produktu.
• Kontroluj czy materiał i szwy są w dobrym stanie za każdym razem, gdy myjesz
krzesło.
• Długotrwałe narażanie produktu na bezpośrednie działanie promieni słonecznych,
wysokich temperatur lub innych warunków pogodowych może spowodować
odbarwienia na materiale obiciowym lub deformację części.
• Więcej informacji można znaleźć na etykietach przymocowanych bezpośrednio do
produktu.
• Nie używaj wybielacza do czyszczenia, nie używaj wirowania na sucho, nie prasuj
oraz nie pierz chemicznie.
Gwarancja nie obejmuje zgubienia lub zniszczenia poszczególnych elementów na
skutek upadku, otarcia, nieprawidłowego montażu lub użytkowania niezgodnego
z instrukcją.
OGRANICZENIA GWARANCJI
6
7
8
5
1. Naciśnij przycisk zwolnienia blokady oraz wyjmij zaciski blokujące po obu stronach
siedziska.
2. Naciścnij przyciski zwalniające blokadę po obu stronach siedziska jednocześnie i
wysuń siedzisko ku górze oraz wyjmij z podstawy.
DEMONTAŻ SIEDZISKA

11
Dear Customer!
Thank you for choosing Kidwell.
For us, the highest priority is the safety of your child and the creation
of beautiful memories.
We hope you will enjoy our product, in case of any questions please contact us
Please read through the entire manual carefully, and follow all instructions.
Before you start using our product make sure all functions are working as
intended and are secure (fasteners, nuts, screws, etc.). The assembly must
be performed by an adult. Failure to comply with the instructions and safety
warnings could result in serious injuries.
IMPORTANT: product intended for self-assembly
Not following the procedures contained in this manual may lead
to serious injuries to the child!
Remove and dispose of all packaging materials which were included
with the product, and keep them out of children’s reach to avoid the risk
of harm. The foil is not a toy and after being unpacked by an adult all plastic
packaging should be removed or destroyed. Playing with the foil may result in
suocation!
IMPORTANT! READ CAREFULLY AND KEEP FOR FUTURE REFERENCE
WARNING:
• Never leave your child unattended
• The chair may only be folded and unfolded by an adult
• Always use the restraint system
• Make sure that the straps are properly tted and are not too loose
• The child should always wear safety straps
• Risk of falling: Do not allow the child to climb the product
• Do not use the product in case not all of its parts are properly installed and
adjusted
• Be aware that the chair may tip over if the child can push themselves o the
table or any other structure
• Mind open re and other sources of strong heat near the product
• It may be dangerous to place the high chair in close proximity to open re
and other sources of strong heat, such as an electric bar heater, gas heater,
etc.

12
• Stop using the chair if any part of it is damaged, torn or missing. If the chair
is damaged in any way, stop using it immediately and contact the seller
• Do not push the tray too close to the child Leave some space to let the child
breathe freely
• When you have installed the chair, make sure that all screws are tight and
every now and then make sure that they have not come loose
• The tray does not protect the child against slipping out of the chair
• The chair is designed only for children weighing up to 15 kg who can sit
unaided
• Do not use the product if the child cannot sit unaided
• To avoid injuries, make sure that the child stays away from the place of
installation when you fold or unfold the product
• Always make sure that all parts t as specied in the product manual
• Do not lift the product when the child is sitting in it
• Do not lift the product by holding the feeding tray
• Do not replace parts or accessories with elements other than those
approved by the manufacturer
• Do not attempt to repair or modify the product. Only qualied service
technicians are authorized to do so
• Do not supplement the product with objects that may compromise its proper
functioning, objects that could harm the child or any fabric that may be a
choking hazard to the child
• Do not place on the product any objects that may compromise its proper
functioning or harm the child
• Placing the child or heavy objects on the feeding tray may cause damage
to the product or the child’s health
• Never use the product on unstable ground:
• Elevated surfaces
• Soft surfaces (a mattress, a pillow)
• Uneven surfaces
• Stairs, steps
• Do not expose the product to high and low temperatures, as well as high
humidity
• If the chair was exposed to strong sunlight, move it to the shade and wait
for it to cool down before you use it again
• When you adjust parts of the chair (such as the backrest or the feeding
tray), make sure that the child is sitting in a safe position and cannot touch
any moving elements
• Do not adjust the height of the chair when the child is sitting in it
• When you unfold the chair, make sure that the lock works properly
• Do not fold or unfold the chair when the child is sitting in it.

13
Drawings and photos are for illustrative purposes only. The actual appearance
of the product may dier from the visualisation in the product manual.
PARTS INCLUDED IN THE SET (see Figure 1)
Seat with padding and harness
Seat base
Legs (4 pcs.)
Leg covers with anti-slip pads
Footrest
Table with a detachable tray
7
8
9
10
11
1
2
3
4
5
6
Safety column
Stabilising metal rails (3 pcs.)
Seat lock plugs
Bolts (10 pcs.)
Cross-head screwdriver
DESCRIPTION
• 4in1: a high chair for younger
children; a low chair for younger
children; a high stool for older
children; a low stool for older children
• Stable legs with an anti-slip nish
• Feeding chair designed for children
from 6 to 36 months of age
(maximum weight of the child: 15
kg), convertible into a stool for older
children
• 2-level adjustable legs
• Adjustable and detachable tray with a
detachable top
• Shaped top with a cup holder
• Comfortably shaped seat
• Easily washable seat covering
• Soft articial leather upholstery
• 5-point harness
• Protection against slipping out of the
chair
CHAIR INSTALLATION
1
1. Place the legs (Fig. 1.3) in designated holes in the base of the seat (Fig. 2.1). Note
that the front legs of the chair have additional bolt holes on the front in order to x the
footrest in place.
2. Tighten the bolts using the screwdriver to immobilise the legs and x them to the seat
base (Fig. 2.2).
3. Put covers on the ends of the legs (Fig. 1.4), they serve as anti-slip pads (Fig. 3).
4. Follow (Fig. 4) to x metal leg reinforcements with bolts (Fig. 1.8), they stabilise and
stien the chair structure.
5. Fix the footrest with bolts (Fig. 1.5) to attach it to the front legs of the chair (Fig. 5).
When this structure is ready, the seat can be installed on it (Fig. 1.1). To do that, place the
seat in the base (Fig. 6.1) and lock it using special plugs that make it impossible to easily
remove the seat (Fig. 6.2). When a plug clicks into place in the designated hole, it secures
the base of the seat in place.
Finally, install the feeding table (Fig. 1.6) with the column (Fig. 1.7), which additionally
protects the child against slipping out of the chair.

14
2
The straps attached to the seat can be adjusted to the height of the child so as to make the
child comfortable. Adjust the straps and make sure that the child is safe and comfortable
in the chair. Then fasten the harness to protect the child against slipping out of the chair.
To unfasten the harness, press the button on the buckle.
33
The chair can be turned into a low chair when you reduce the leg length by half. To lower
the height of the chair, unscrew the lower parts of all the legs and then put anti-slip covers
on the shortened chair legs.
4
To remove the straps, put the xing elements which lock the straps in place through the
holes on the back of the backrest and under the seat. When your remove the straps, you
can also easily remove the covering from the seat.
SAFETY HARNESS
TRANSFORMING THE CHAIR
REMOVING THE STRAPS AND COVERING
ENVIRONMENT
For the sake of the environment, when you no longer use the product, dispose of it in a
suitable waste management facility in accordance with local law
CLEANING AND MAINTENANCE
• This product requires regular maintenance.
• It needs to be cleaned and maintained by an adult.
6
7
5
1. Press the lock release button and remove the locking elements on both sides of the
seat.
2. Press the lock release buttons on both sides of the seat at the same time and slide
the seat upwards to remove it from the base.
REMOVING THE SEAT
To do this, x the column to the bottom of the table (Fig. 7.1) and then slip the table with
the column over the armrests, at the same time pressing the buttons on the bottom of the
table (Fig. 7.2). The buttons are used to unlock the xing elements of the table in order
to x it in place, remove it or adjust its distance from the child.
If necessary, the upper tray can be easily detached from the table.
NOTE: Remember that the anti-slip column is just an additional protection. The basic
protection for a child sitting in the chair is a properly adjusted and fastened harness.

15
The warranty does not cover destruction or loss of individual elements due to falling,
abrasion, incorrect assembly and usage which disagrees with the user manual.
LIMITATIONS OF WARRANTY
8
• Clean the chair with a damp cloth, using water with soap.
• To avoid friction between moving parts, which may cause damage to the chair,
make sure that such parts are clean and there is no dirt, sand or dust in them.
• Regularly make sure that no part of the chair is damaged, torn or missing. If any
part appears to be damaged, stop using the product.
• Make sure that the fabric and seams are in good shape whenever you wash the
chair.
• If the product is exposed to direct sunlight, high temperatures or other weather
conditions for a long time, the upholstery may become discoloured and chair parts
may become deformed.
• More information can be found on labels attached directly to the product.
• Do not use bleach for cleaning, do not spin-dry, do not iron and do not dry clean.

16
Wir danken Ihnen für den Kauf des Produkts der Marke Kidwell.
Absolute Priorität für uns hat die Sicherheit Ihres Kindes und die Schaung
schöner Erinnerungen. Im Falle irgendwelcher Fragen bitten wir um
Kontaktaufnahme unter folgender E-Mail-Adresse: [email protected]
Wir bitten um genaues Studium dieser Bedienungsanleitung und exakte
Einhaltung der in ihr enthaltenen Vorgaben. Ziel dieser Bedienungsanleitung
ist es, Ihnen genaue Informationen über die richtige und sichere Nutzung des
Produkts zu liefern.
Die Nichtbeachtung der in dieser Betriebsanleitung enthaltenen Maßnahmen
kann zu schweren Verletzungen des Kindes führen!
Vergewissern Sie sich bitte nach dem Zusammenbau des Produkts, dass
alle Baugruppen korrekt funktionieren und nach den Vorgaben dieser
Bedienungsanleitung gesichert sind (Befestigungselemente, Muttern,
Schrauben, Verbindungen usw.).
Die Montage des Produkts von Kidwell muss von einem Erwachsenen
durchgeführt werden. Die Nichteinhaltung der in dieser Bedienungsanleitung
genannten Vorgaben kann ernsthafte Verletzungen bewirken.
WICHTIG: Es ist daran zu denken, alle am Produkt vorhandenen
Verpackungselemente zu beseitigen, so dass diese nicht in die Reichweite des
Kindes geraten (u.a. Papp- und Kunststoelemente, Folie usw.). Dies könnte
zu Schäden, u.a. der Gefahr des Verschluckens, führen. Die Folie ist kein
Spielzeug und sollte sofort nach dem Auspacken durch einen Erwachsenen
entsorgt werden. Erstickungsgefahr beim Spielen mit der Folie!
WICHTIG! SORGFÄLTIG LESEN UND FÜR SPÄTERE VERWENDUNG
AUFBEWAHREN
WARNUNG:
• Das Kind niemals unbeaufsichtigt lassen
• Der Stuhl darf nur von einem Erwachsenen zusammen- und aufgeklappt
werden
• Stets ein Rückhaltesystem verwenden
• Vergewissern Sie sich, dass die Sicherheitsgurte richtig sitzen und nicht zu
viel Spiel vorhanden ist
• Das Kind sollte immer mit Gurten gesichert werden.
• Absturzgefahr: Erlauben Sie nicht, dass das Kind das Produkt hochklettert
• Das Produkt darf nicht verwendet werden, wenn nicht alle Elemente richtig
montiert und eingestellt sind
• Seien Sie sich der Kippgefahr bewusst, wenn das sich Kind mit den Füßen
vom Tisch oder von einer anderen Konstruktion abstoßen kann

17
• Gefahr durch oenes Feuer und andere starke Wärmequellen in der Nähe
des Produkts beachten
• Beim Aufstellen des Hochstuhls in unmittelbarer Nähe von oenen
Flammen und anderen Wärmequellen wie zum Beispiel ein Heizgerät mit
elektrisch geheizten Stäben, Gasheizgerät etc. droht Gefahr.
• Der Stuhl darf nicht benutzt werden, wenn ein Teil des Stuhls beschädigt
oder gerissen ist oder fehlt. Wenn der Stuhl in irgendeiner Weise beschädigt
ist, muss seine Verwendung sofort eingestellt und der Händler kontaktiert
werden.
• Das Tablett soll nicht zu fest an das Kind gedrückt sein. Man soll etwas
Freiraum für ungehindertes Atmen lassen.
• Nach der Montage des Hochstuhls soll man sich vergewissern, dass alle
Schrauben genau zugedreht wurden und ab und zu kontrollieren, ob sie
sich nicht gelockerten
• Das Tablett dient nicht als Absicherung des Kindes vor dem Absturz
• Der Hochstuhl ist ausschließlich für Kinder bis 15kg bestimmt, die
selbständig sitzen können
• Man darf das Produkt nicht verwenden, solange das Kind selbstständig
nicht sitzen kann
• Um Verletzungen zu vermeiden, sollte darauf geachtet werden, dass sich
das Kind bei der Montage des Produkts, beim Zusammenklappen oder
Aufklappen des Produkts nicht in seiner Nähe aufhält
• Man sollte sich stets vergewissern, dass alle Teile wie vorgeschrieben
zueinander passen.
• Heben Sie das Produkt nicht, wenn sich das Kind noch darin bendet.
• Heben Sie das Produkt nicht, indem Sie das Tablett anfassen
• Tauschen Sie keine Teile oder Accessoires gegen die vom Hersteller
genehmigten aus
• Führen Sie keine Reparaturen oder Anpassungen des Produktes durch.
Dazu sind ausschließlich qualizierte Servicetechniker befugt
• Bringen Sie keine Gegenstände am Produkt an, die sein einwandfreies
Funktionieren gefährden oder dem Kind schaden könnten, bringen Sie
auch keine Textilstoe an, die zur Erstickungsgefahr führen können
• Legen Sie keine Gegenstände auf dem Produkt ab, die sein einwandfreies
Funktionieren gefährden oder dem Kind schaden könnten.
• Das Aufsetzen des Kindes oder das Legen von schweren Gegenständen auf
das Tablett kann zur Beschädigung des Produkts oder zur Beeinträchtigung
der Gesundheit des Kindes führen
• Nutzen Sie niemals das Produkt, wenn es sich auf einem unstabilen
Untergrund bendet:
• Podium
• Weicher Untergrund (Matratze, Kissen)

18
SET-ELEMENTE (siehe Abb. 1)
Sitz mit Auage und
Sicherheitsgurten
Sitzgestell
Beine (4 Stück)
Kappen für Stuhlbeine mit Anti-
Rutsch-Pads
Fußstütze
6
7
8
9
10
11
1
2
3
4
5
Tischchen mit abnehmbaren Tablett
Sicherheitstrennelement
Stabilisierende Metallleisten (3 Stück)
Stopfen für die Sitzblockade
Schrauben (10 Stück)
Kreuzschraubendreher
BESCHREIBUNG
• 4in1: Hochstuhl zum Füttern für
Kleinkinder; niedriger Essstuhl für
Kleinkinder; hoher Hocker für ältere
Kinder; niedriger Hocker für ältere
Kinder;
• Stabile Beine mit Anti-Rutsch-Pads
• Stuhl zum Füttern für Kinder im
Alter von 6 bis 36 Monaten (max.
Kindergewicht 15 kg) mit der
Möglichkeit der Umwandlung des
Stuhls zu einem Hocker für ältere
Kinder
• 2-stuge Verstellung der Beinlänge
• Verstellbares und demontierbares Fach
mit abnehmbarer Platte
• Proliertes Blatt mit Platz für einen
Becher
• Komfortable Sitzform
• Leicht abwaschbare Sitzbeschichtung
• Polsterung aus weichem Kunstleder
• 5-Punkt-Sicherheitsgurte
• Schutz gegen Herausrutschen des
Kindes aus dem Stuhl
• Unebene Flächen
• Treppen, Stufen
• Setzen Sie das Produkt weder der Einwirkung der hohen und niedrigen
Temperaturen noch der hohen Feuchtigkeit aus
• Stand der Hochstuhl an einem Platz mit übermäßiger Sonneneinstrahlung,
stellen Sie ihn an einen schattigen Platz und warten Sie bis er abkühlt,
bevor Sie ihn erneut benutzen
• Während der Regulierung von Stuhlelementen (wie Lehne, Tablett)
vergewissern Sie sich, dass das Kind in einer sicheren Position sitzt und
keine beweglichen Elemente berührt
• Regulieren Sie die Stuhlhöhe nicht, wenn sich das Kind darin bendet.
• Vergewissern Sie sich nach dem Aufklappen des Hochstuhls, dass die
Blockade korrekt funktioniert
• Regulieren Sie die Stuhlhöhe nicht, wenn sich das Kind darin bendet.
Drawings and photos are for illustrative purposes only. The actual appearance
of the product may dier from the visualisation in the product manual.

19
STUHLMONTAGE
1
1. Stellen Sie die Beine (Abb. 1.3) in die dafür vorgesehenen Önungen, die sich im
Sitzgestell benden (Abb. 2.1). Achten Sie darauf, dass die Vorderbeine des Stuhls
von der Frontseite zusätzliche Löcher für Schrauben für das Anbringen der Fußstütze
haben.
2. Mit dem beigefügten Schraubendreher drehen Sie die Schrauben ein um die Beine
mit dem Sitzgestell fest zu verbinden (Abb. 2.2).
3. Bringen Sie an die Beinenden die Beinkappen (Abb. 1.4), mit Anti-Rutsch-Pads (Abb.
3) an.
4. Entsprechend (Abb. 4) befestigen Sie mit den Schrauben die Metallverstärkungselemente
der Beine (Abb. 1.8), die der Stabilisierung und der Versteifung der Stuhlkonstruktion
dienen.
5. Befestigen Sie mit den Schrauben die Fußstütze (Abb. 1.5) an die Vorderbeine des
Stuhls (Abb. 5).
Auf so vorbereitete Konstruktion kann man den prolierten Sitz montieren (Abb. 1.1).
Zu diesem Zweck platzieren Sie den Sitz in dem Gestell (Abb. 6.1) und blockieren Sie
ihn mit speziellen Stopfen, die das leichte Abnehmen des Sitzes ermöglichen (Abb. 6.2)
Der Stopfen wird in dem dafür vorgesehenen Loch einrasten und den Sitz in dem Gesell
festmachen.
Zuletzt montieren Sie das Esstischchen (Abb. 1.6) mit Trennelement (Abb. 1.7), das das
Kind vor dem Herausrutschen aus dem Stuhl zusätzlich absichert.
Zu diesem Zweck montieren Sie das Trennelement an der Unterseite des Esstischchens
(Abb. 7.1), anschließend schieben Sie das Esstischchen auf die Armlehnen des Sitzes
und drücken Sie zugleich die sich unten bendenden Tasten (Abb. 7.2). Die Tasten lösen
die Verbindungselemente des Esstischchens zwecks seiner Montage, Demontage und
Regulierung der Entfernung vom Kind.
Bei Bedarf kann man das Tablett von dem Tischchen einfach abnehmen.
HINWEIS: Denken Sie daran, dass das Trennelement nur eine zusätzliche Absicherung
darstellt. Die wesentliche Absicherung des Kindes im Hochstuhl ist der ordentlich
angepasste und angeschnallte Sicherheitsgurt.
2
Die am Sitz festmontierten Gurte kann man regulieren und an die Größe des Kindes
anpassen, um ihm den nötigen Komfort zu bieten. Passen Sie die Gurte an und
vergewissern Sie sich, dass das Kind sicher und bequem im Stuhl sitzt. Danach schnallen
Sie den Gurt an, um das Kinde vor dem Absturz zu sichern. Um die Sicherheitsgurte
aufzumachen, drücken Sie die Taste, die sich auf der Schnalle bendet.
SICHERHEITSGURTE
33
Man kann den Stuhl niedrig machen, indem man die Beine um die Hälfte kürzt. Um die
UMWANDLUNG DES STUHLS

20
4
Um die Gurte abzunehmen, legen Sie die Verbindungselemente, die die Gurte blockieren,
durch die Önungen, die sich im hinteren Teil der Lehne und unter dem Sitz benden.
Nachdem die Gurte abgenommen werden, kann man auch den Schonbezug vom Sitz
leicht abnehmen.
ABNEHMEN DER GURTE UND DES SCHONBEZUGS
UMWELT
Im Sinne unserer Umwelt, entsorgen Sie bitte das Produkt nach
Beendigung seiner Benutzung entsprechend den geltenden lokalen Vorschriften.
REINIGUNG UND WARTUNG
• Das Produkt soll systematisch gewartet werden.
• Die Reinigung und die Wartung soll von einem Erwachsenen durchgeführt werden.
• Der Stuhl ist mittels eines feuchten Tuches mit einer Lösung von Seife und Wasser
zu reinigen.
• Um die Reibung beweglicher Elemente zu vermeiden, was zu einer Beschädigung
des Stuhls führen kann, vergewissern Sie sich, dass sie sauber sind und dass sie
von Schmutz, Sand oder Staub befreit sind.
• Kontrollieren Sie, ob der Stuhl keine beschädigten, zerrissenen oder fehlenden
Teile hat. Sollte irgendein Element beschädigt erscheinen, benutzen Sie das
Produkt nicht.
• Kontrollieren Sie, ob der Sto und die Nähte im guten Zustand sind, immer wenn
Sie den Stuhl abwischen.
• Die lange Exposition des Produkts gegenüber der Sonne, den hohen Temperaturen
oder anderen Umwelteinüssen kann zu Verfärbungen der Polsterung oder zur
Deformation der Elemente führen.
• Mehr Informationen nden Sie auf den Etiketten, die direkt am Produkt angebracht
sind.
• Verwenden Sie keine Bleiche zum Reinigen, kein Trockenschleudern, kein Bügeln
und keine chemische Reinigung.
6
7
5
1. Drücken Sie den Löseknopf der Blockade und nehmen Sie die Stopfen, die sich an
beiden Seiten des Sitzes benden.
2. Drücken Sie die Löseknöpfe der Blockade an beiden Seiten des Sitzes gleichzeitig
und schieben Sie den Sitz nach oben und nehmen Sie ihn aus dem Gestell.
DEMONTAGE DES SITZGESTELLS
Stuhlhöhe zu reduzieren, soll man die unteren Teile aller Beine rausdrehen und auf die
gekürzten Beine die Beinkappen mit Anti-Rutsch-Pads anbringen.
This manual suits for next models
1
Table of contents
Languages:
Other KIDWELL High Chair manuals