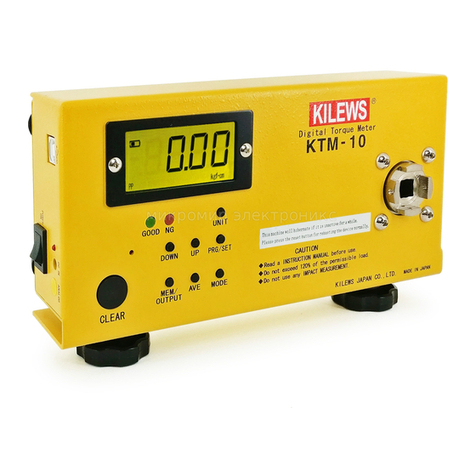
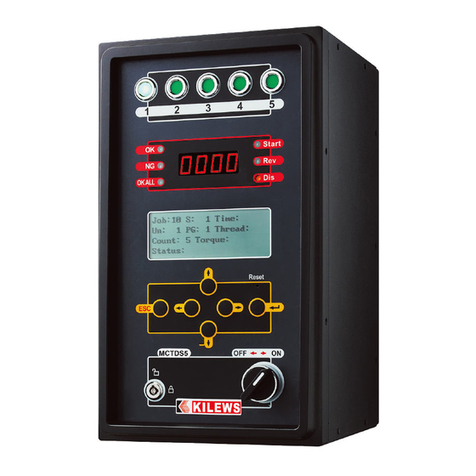
Kilews KTM-IWT50 User manual

1
一.安全規範
警告!
◼為了事前預防火災、觸電、受傷等等事故,請務必遵守下述「安全注意事項」。
◼使用前,請確實閱讀此「安全注意事項」後,依照指示正確使用。
◼在閱讀過所有安全資訊之前請勿擅自操作,沒有依照程序會導致產品損壞或者身體受傷。
◼閱讀後請保管在使用者可以隨時看到的地方。
安全資訊
•
使用此產品時,請勿穿戴任何項鍊等物品。
•
使用此產品時,請穿戴適當的服裝(例如:穿戴工作眼鏡、工作褲,鋼頭鞋)。
•
開始操作產品前,請先檢察周圍是否有電線以及其他鬆弛的線。
•
請將產品以及充電器遠離水,隨時放置在乾燥以及安全的環境。
•
請勿在易燃燒及爆炸的環境操作產品。
•
切勿對本機施加超過最大扭矩值的扭矩,否則可能導致設備損壞和操作員受傷。
•
未授權人士是不允許使用此產品。
•
請勿使用非本廠商提供的零件做更換與操作。
•
請在乾淨的環境操作此產品
。
•
此產品需保持著乾淨及乾燥,並請遠離油污以及油脂。
•
請在進行清理,維修前,隨時將插頭拔除。
•
請務必依照維修流程指示進行維修,如果沒有按照指示做可能會導致產品損壞。
•
請勿拉扯電線。從插座上插拔接頭時請勿用力拉扯電線。
•
為了能夠安全且有效率的作業
◼請定期檢查儀器本體、起子頭、測試座等等,請勿使用變形磨損的零部件。
◼更換配件時請依操作手冊更換。
◼請定期檢查電線及延長線,破損時請更換。
•
以下狀況時請關掉儀器本體的開關並拔掉插頭。
◼不使用時。
◼維修時。
◼其他可能引起危險時。
•
維修請委託經銷商,請勿任意改裝機台。
•
請勿自行維修此產品,除非您有正式受訓過維修技術;需維修時請務必聯繫購買的經銷商。若是由非專業
技術人員維修,除了無法充分發揮性能,也會引起事故或受傷。
•
本產品為精密儀器,請勿拆解或是強烈撞擊、震動。
◼過強的撞擊或震動導致機器故障時,除了無法充分發揮性能,也會引起事故或受傷。
◼請小心觸電。請勿以潮濕的手碰觸電源插頭以免觸電。
•
請勿將電池(裝於儀器本體內)丟入火中。可能會產生爆裂或是有毒物質。
•
連接外部機器時,請將全部機器的電源關掉後再連接,否則可能造成觸電或機器損壞。
•
發生操作手冊內容以外的狀況時,請馬上停止使用並連絡經銷商。
警告!
•
由於扭矩測試儀的高扭矩測試能力,與扭矩測試座的重複測試會導致測試座明顯的溫度累積。如果測試座
變得燙手,再繼續測試之前請先冷卻測試座再進行測試。
•
如果沒有依照指示進行,可能會造成人身傷害或損傷。

2
前言
SKC-PTM衝擊式起子數位扭力計,採用新式專利設計用於測試各種動力型敲擊式扳手、油壓脈衝式扭力
扳手、失速型扭力扳手與離合器型扭力扳手,亦可測試手動式扭力扳手。
測試範圍:50 N m、400 N m。
功能
•
可設定扭力峰值取樣時間(0至99 秒)。
•
可設定扭力峰值取值時間啟始扭力值。
•
雙螢幕顯示,可同時顯示峰值與即時測試值。
•
可自動清除峰值。
•
三種扭力單位選擇:kgf‧cm / kgf‧m, cNm/N m, lbf‧in / lbf‧ft (依客戶需求)。
•
RS232 輸出。
•
電源:100-240 VAC。
•
精度:±10% of reading,±1 LSD。

3
操作說明
顯示器
上排顯示為即時扭力值顯示,下排顯示為所設定時間值的扭力值。(詳細操作說
明請參照扭力顯示器操作說明書)
操作程序
•
開機後需溫機至少 30 分鐘,建議可以不關機。
•
測試扳手應參照表 1 建議的扭力值,選取適當尺寸螺絲。表 1
螺絲尺寸
M6
M8
M10
M12
M14
M16
扭力值(N m)
10
25
50
90
150
240
最大扭力值(N m)
12
29
59
100
162
255
•
測試前應先檢視螺絲表面是否損壞,並將其做適當之潤滑(二硫化鉬類潤滑油脂)。
KTM-IWT系列在操作鎖拔螺絲約50次需上油保養保持潤滑,平時鎖拔螺絲不順時或鎖拔螺絲約5000次請檢查
螺絲是否受損及上油保養,避免鎖拔不順導致損壞或數值不穩。
•
將測試器預負載。
•
釋放自動歸零鍵,並重新按下歸零。
•
扳手測試需注意螺絲必須直線行進,不可偏斜。
•
測試完成後應再一次檢視測試前應先檢視螺絲表面是否損壞,並將其做適當之潤滑(二硫化鉬類潤滑油脂
)。
警告!
依照ISO898/1標準(螺栓等級12.9)
扭矩對於在操作過程實現所需的夾緊力而言至關重要,絕大多數的常規螺釘和螺栓,未經處理且為公制粗牙
螺紋的浸油螺釘(摩擦係數=0.125)操作時,建議採用最大擰緊扭矩,扭矩對應大致62%的拉伸載荷,故建議
不要大於62%拉伸載荷使用避免螺絲損壞或斷裂導致數位扭力計受損,因此所造成的品質不良或受損本公司
不負責保修與賠償。

4
6位數扭力顯示器(多段警報\類比輸出\RS-232)
** 首次操作請先熟悉面板上各按鍵及指示燈之功能
1.1 顯示面板指示燈說明
1.2 按鍵操作說明
按鍵符號
按鍵名稱
按鍵說明
功能選擇按鍵
1.在正常顯示畫面時,按此鍵可執行FKEY設定之功能(AZ/MrSt/Unit.C).
進入參數設定鍵
資料儲存鍵
1.在正常顯示畫面時,按此鍵可進入參數設定群組.
2.在參數修改模式時,按此鍵可儲存修改後之數值並進入下一個參數.
向左移位鍵
警報設定鍵
1.在正常顯示畫面時,按此鍵(3秒)可進入警報設定值之顯示及修改.
2.在參數設定頁面時,按此鍵可進入參數修改模式.
3.在參數修改模式時,按此鍵可將閃爍的游標向左循環移動.
顯示值設定鍵
向上遞增鍵
1.在正常顯示畫面時,按此鍵(3秒)可進入顯示值設定群組之顯示.
2.在參數設定頁面時,按此鍵可回到上一個參數設定頁面.
3.在參數修改模式時,按此鍵可將閃爍之游標數值向上遞增.
4.在參數diSP設定為MAX時,按此鍵可些換順/逆向最大值保持顯示幕.
類比輸出設定鍵
向下遞減鍵
1.在正常顯示畫面時,按此鍵(3秒)可進入類比輸出設定群組之顯示.
2.在參數設定頁面時,按此鍵可進入下一個參數設定頁面.
3.在參數修改模式時,按此鍵可將閃爍之游標數值向下遞減.
4.在參數diSP設定為MAX時,按此鍵可切換順/逆向最大值保持顯示幕
複合按鍵
1.在任何畫面時,按此複合鍵可回到正常顯示畫面.
2.在蜂鳴器作動時,按此複合鍵可使蜂鳴器靜音.
1.3 外觀及開孔尺寸圖
Unit1:單位1指示燈 AZ:顯示值歸零指示燈
Unit2:單位2指示燈 Max亮:順向最大值指示燈
Unit3:單位3指示燈 Max閃爍:逆向最大值指示燈
Max熄:MAX無動作
TX:- AL1:第一段警報動作指示燈
RX:- AL2:第二段警報動作指示燈
功
能
鍵
進入參數設定鍵
資料儲存鍵
向左移位鍵
警報設定鍵
顯示值設定鍵
順/逆向切換鍵
類比輸出設定鍵
順/逆向切換鍵

5
配線圖
2.1操作流程及顯示

6
2.2 警報設定值(AL)之顯示及修改
** 在正常顯示畫面時,按3 秒可進入警報設定值之顯示及修改
顯示畫面
預設值
畫面名稱
修改參數及流程說明
警報 1設定值
(AL1)
1.設定範例:
如需顯示 50.0 時,AL1 警報動作,
此處 AL1 必須設定為 50.0。
2.按進入參數修改模式,該數值會閃爍.
3.按或是 可修改警報之設定值.
可修改範圍:-199999~999999.
4.設定完成按 儲存修改後的參數,
並進入下一個參數設定頁面.
警報 2設定值
(AL2)
2.3 基本單位設定群組
** 在正常顯示畫面時,按3 秒可進入警報設定值之顯示及修改
顯示畫面
預設值
畫面名稱
修改參數及流程說明
顯示零點
偏差修正值
(doFSt)
1.零點修正範例:輸入 0V 額定顯示 0,示為 3此處輸入 3
即可修正偏差。可修改範圍:-199999~999999
2.按進入參數修改,按或是 可修改數值
3.按儲存修改後的參數,並進入下一個參數設定頁面
顯示偏差
修正值
(dGAin)
1.顯示修正範例:輸入 10V 額定顯示 100.0,實際顯示 99.8
顯示值實際顯示=dGAin,100.099.8=1.002 此處需設定 1.002
2.按進入參數修改,按或是 可修改數值
3. 按儲存修改後的參數,並進入下一個參數設定頁面
基本單位
小數點位置設定
(dP)
1.基本單位小數點位置設定:顯示 100.0 需更改為 10.00
此處原本為 1更改為 2 可修改位數:0,1,2,3,4,5(位數)
2.按進入參數修改,按或是 可修改數值
3. 按儲存修改後的參數,並進入下一個參數設定頁面
最低顯示
設定值
(dSPL)
1.設定範例:輸入 0V 最低顯示 10,此處需設定為 10
可修改範圍:-199999~999999
2.按進入參數修改,按或是 可修改數值
3.按儲存修改後的參數,並進入下一個參數設定頁面
※在此頁面按下 Z鍵,可校正最低輸入訊號(適用於荷重元)
順向第 2點顯示
設定值
(r.dSPM)
1.設定範例:LOAD CELL 順向第 2點輸入訊號,需顯示 500
此處需設定為 500。可修改範圍:-199999~999999
2. 按進入參數修改,按或是 可修改數值
3. 按儲存修改後的參數,並回到顯示值設定頁面
※在此頁面按下 Z鍵,可校正順向第 2點輸入訊號
(適用於荷重元)
順向最高顯示
設定值
(r.dSPH)
1.設定範例:LOAD CELL 順向最高輸入訊號,需顯示 1000
此處需設定為 1000。可修改範圍:-199999~999999
2. 按進入參數修改,按或是 可修改數值
3. 按儲存修改後的參數,並回到顯示值設定頁面
※在此頁面按下 Z鍵,可校正順向最高輸入訊號
(適用於荷重元)
逆向第 2點顯示
設定值
(L.dSPM)
1. 設定範例:LOAD CELL 逆向第 2點輸入訊號,需顯示-500
此處需設定為-500。可修改範圍:-199999~999999
2. 按進入參數修改,按或是 可修改數值
3. 按儲存修改後的參數,並回到顯示值設定頁面
※在此頁面按下 Z鍵,可校正逆向第 2點輸入訊號
(適用於荷重元)
逆向最高顯示
設定值
(L.dSPH)
1. 設定範例:LOAD CELL 最高輸入訊號,需顯示-1000
此處需設定為-1000。可修改範圍:-199999~999999
2. 按進入參數修改,按或是 可修改數值
3. 按儲存修改後的參數,並回到顯示值設定頁面
※在此頁面按下 Z鍵,可校正逆向最高輸入訊號
(適用於荷重元)

7
2.4 類比輸出設定群組
** 在正常顯示畫面時,按3 秒可進入類比輸出設定群組之顯示
顯示畫面
預設值
畫面名稱
修改參數及流程說明
最低類比輸出
偏差修正值
(AoFSt)
1.輸出零點修正範例:額定輸出 0V 實際輸出 0.2V
使用 或微調至 0V。可修改範圍-9999~9999
2.按進入參數修改,按或是 可修改數值
3.按儲存修改後的參數,並進入下一個參數設定頁面
※左移至越高位數,調整範圍越廣
最高類比輸出
偏差修正值
(AGAin)
1.輸出修正範例:額定輸出 10V 實際輸出 9.8V
使用 或微調至 10V。可修改範圍-9999~9999
2. 按進入參數修改,按或是 可修改數值
3.按儲存修改後的參數,並進入下一個參數設定頁面
※左移至越高位數,調整範圍越廣
最低類比輸出
對應顯示設定值
(AnLo)
設定範例:
1.需要基本單位顯示 4.0 時輸出 4mA,請將此處修改成 4.0
可修改範圍:-199999~999999
2. 按進入參數修改,按或是 可修改數值
3. 按儲存修改後的參數,並進入下一個參數設定頁面
最高類比輸出
對應顯示設定值
(AnHi)
設定範例:
1.需要基本單位顯示 100 時輸出 20mA,請將此處修改成
100
可修改範圍:-199999~999999
2. 按進入參數修改,按或是 可修改數值
3. 按儲存修改後的參數,並進入下一個參數設定頁面
2.5 異常顯示畫面說明
** 特定規格(RTD,荷重元,電位計)無接線時,會產生下列情形
顯示畫面
畫面說明
輸入訊號高於額定輸入值 120%
輸入訊號低於額定輸入值-10%
輸入訊號高於額定值 180%,或是內部線路損壞
現在顯示值高於顯示溢位設定值 DoFLv.(MAX 999999)
現在顯示值低於最低顯示範圍(-199999)
EEPROM 讀取/寫入時受到外部干擾或是超次(約10 萬次)而發生錯誤
** 發生 E-00 情況,請先選擇 NO,並按 ENT 儲存,如又發生 E-00,請與原廠人員聯絡
2.6 警報動作輸出時序圖

8
3.1 系統參數(SYS)設定群組流程及顯示
** 在輸入通關密碼正確後,即可選擇系統參數設定群組畫面
顯示畫面
預設值
畫面名稱
修改參數及流程說明
Unit1 係數
小數點位至設定
(Un.dP1)
1.Unit 係數小數點位至設定:
可修改位數:0,1,2,3,4,5(位數)
2.按進入參數修改,按或是 可修改數值
3.按儲存修改後的參數,並進入下一個參數設定頁面
Unit1
係數設定值
(Unit1)
1.按進入參數修改模式,該數值會閃爍
2.按或是 可修改數值
可修改範圍:1~999999
3.按儲存修改後的參數,並進入下一個參數設定頁面
Unit2 係數
小數點位至設定
(Un.dP2)
1.Unit2 係數小數點位置設定:
可修改位數:0,1,2,3,4,5(位數)
2.按進入參數修改, 按或是 可修改數值
3. 按儲存修改後的參數,並進入下一個參數設定頁面
Unit2
係數設定值
(Unit2)
1.按進入參數修改模式,該數值會閃爍
2.按或是 可修改數值
可修改範圍:1~999999
3.按儲存修改後的參數,並進入下一個參數設定頁面
Unit3 係數
小數點位至設定
(Un.dP3)
1.Unit3係數小數點位置設定:
可修改位數:0,1,2,3,4,5(位數)
2.按進入參數修改, 按或是 可修改數值
3. 按儲存修改後的參數,並進入下一個參數設定頁面
Unit3
係數設定值
(Unit3)
1.按進入參數修改模式,該數值會閃爍
2.按或是 可修改數值
可修改範圍:1~999999
3.按儲存修改後的參數,並進入下一個參數設定頁面
顯示平均
次數設定值
(AvG)
1.設定說明:此設定適用於現場訊號不穩定
設定值愈大,顯示值愈穩定,顯示值反應的速度較慢
可修改範圍:1~99
2.按進入參數修改,按或是 可修改數值
3.設定完成按 儲存修改後的參數,並進入下一個參數設定頁面
※此功能適用於現場訊號不穩定
顯示低值
遮蔽設定值
(LCUt)
1.設定範例:需要基本單位顯示 10 以下,顯示為 0則此處需設定為 10
可修改範圍:0~9999
2.按進入參數修改,按或是 可修改數值
3.設定完成按 儲存修改後的參數,並進入下一個參數設定頁面
※設定 LCUT=0:
關閉此參數功能(LCUT)&最大值取樣時間(MAX.t)
※此參數設定須配合基本單位設定群組使用
最大值
取樣時間設定值
(MAX.t)
1.設定範例:
當顯示值超過遮蔽值(LUCT),啟動最大值取樣功能
設定範圍:0~99 秒
2. 按進入參數修改,按或是 可修改數值
3. 設定完成按 儲存修改後的參數,並進入下一個參數設定頁面
※設定 0秒:連續最大值取樣
※此參數設定須配合基本單位設定群組使用
零點穩定範圍
千分比設定值
(Zb)
設定範例:(Zb可修改範圍:0~9.999)
1.輸入 4-20mA 顯示 0-6000.0bar 需求穩定數為 1.0bar
穩定範圍零點的±1bar
運算式: (↓千分比)
需求穩定數÷最大輸入顯示數×1000=Zb
2.顯示值回到零點穩定範圍時,自動穩定零點
零點追蹤
時間設定值
(Zdt)
設定說明:
1.顯示值進入 Zb 穩定追蹤範圍後,經過此設定時間,將進行追蹤補償,
可修改時間 0~99 (秒)
2. 按進入參數修改,按或是 可修改數值
3.設定完成按 儲存修改後的參數,並進入下一個參數設定頁面
此功能必須與 Zb 一起使用

9
顯示畫面
預設值
畫面名稱
修改參數及流程說明
輸入穩定範圍
千分比設定值
(Hb)
設定範圍:(Hb可修改範圍:0~9.999)
1.輸入4-20mA顯示0-600.0bar需求穩定數為0.5bar
穩定範圍為輸入值得0.5bar
運算式: (↓千分比)
0.5÷600.0×1000=0.833(Hb)
※顯示值進入穩定範圍內,自動穩定顯示值
輸入追蹤
時間設定值
(Hdt)
設定說明:
1.顯示值進入Hb穩定追蹤範圍後,經過此設定時間,將進行追蹤補償
可修改時間0~99(秒)
2.按進入參數修改,按或是 可修改數值
3.設定完成按 儲存修改後的參數,並進入下一個參數設定頁面
※此功能必須與Hb一起使用
顯示刻度
設定值
(FiLt)
1.設定範例:可修改範圍0,1,2,5
此處如果設定為1,個位數顯示為1,2,3,4(正常顯示)
此處如果設定為2,個位數顯示為2,4,6,8(偶數顯示)
此處如果設定為5,個位數顯示為0,5(5的倍數顯示)
此處如果設定為0,個位數顯示為0(10位數顯示)
顯示溢位
設定值
(DoFLv.)
1.設定範例:基本單位順向最高顯示1000,需要1100顯示溢位,此處
設定為1100 修改範圍:0~999999
2.按進入參數修改,按或是 可修改數值
3.設定完成按 儲存修改後的參數,並進入下一個參數設定頁面
※此參數設定須配合基本單位設定群組使用
下排顯示
設定
(diSP)
設定說明:此設定可選擇下排顯示幕之功能
1.可選擇:
MAX(最大顯示值)下排字幕為順/逆向最大值保持顯示幕
2. 按進入參數修改,按或是 可修改數值
3. 按儲存修改後的參數,並進入下一個參數設定頁面
蜂鳴器
設定
(bUZZ)
設定說明:
1.此功能用於異常狀態指示,異常狀態下蜂鳴器持續發出聲響直到
狀態解除。 可修改範圍:no(不關閉),YES(關閉)
2.按進入參數修改,按或是 可修改數值
3.按儲存修改後的參數,並進入下一個參數設定頁面
功能鍵
設定
(FKEY)
設定說明:
1.此設定可更改F Key 功能 AZ(顯示值歸零)
M.rSt(最大值/Reset)
Unit.C(切換Unit 1/2/3)
2. 按進入參數修改,按或是 可修改數值
3. 按儲存修改後的參數,並進入下一個參數設定頁面
通關密碼
設定值
(CodE)
設定說明: (修改後請務必記住密碼)
1.修改進入系統參數密碼 可修改範圍:0~19999
2. 按進入參數修改,按或是 可修改數值
3. 按儲存修改後的參數,並進入下一個參數設定頁面
面板按鍵鎖
(LoCK)
1.選擇YES除了 鍵以外,其餘按鍵全部鎖定
可修改範圍:no(不鎖),YES(鎖)
2. 按進入參數修改,按或是 可修改數值
3. 設定完成按 儲存修改後的參數,並進入下一個參數設定頁面

10
3.2 警報輸出(roP)設定群組流程及顯示
**在輸入通關密碼正確後, 再按 即可選擇警報輸出設定群組畫面
顯示畫面
預設值
畫面名稱
修改參數及流程說明
警報 1動作
方向設定
(Act1)
1.設定說明:設定 HI 為高於設定動作
設定 LO 為低於設定動作
可修改範圍:Hi(≧警報值動作),
Lo(<警報值動作)
2.按進入參數修改,按或是 可修改數值
3.設定完成按 修改後的參數,並進入下一個參數設定頁面
警報 2動作
方向設定
(Act2)
警報 1動作磁滯
百分比設定值
(HYS1)
設定說明:
1.設定警報 HI 動作後,
顯示值必須低於
警報設定值 ─(警報設定值*磁滯百分比設定值%)
警報才會關閉
範例說明:
警報設定:≧8000.00 起動,<7800.00 關閉
200.00 8 000.00=0.025
警報動作磁滯百分比設定值:0.025%
2.設警報 LO 動作後,
顯示值必須高於
警報設定值 +(警報設定值*磁滯百分比設定值%)
警報才會關閉
範例說明:
警報設定:<8000.00 啟動,≧8200.00 關閉
200.00 8 000.00=0.025
警報動作磁滯百分比設定值:0.025%
可修改範圍:0.0000~1.0000%
3.按進入參數修改,按或是 可修改數值
4.設定完成按 儲存修改後的參數,並進入下一個參數設定頁面
警報 2動作磁滯
百分比設定值
(HYS2)
警報 1動作
延遲設定值
(dEL1)
設定說明:
1.設定 5秒,顯示值到達警報設定值後,必須經過 5秒才會動作
可修改範圍:0~99(秒)
2.按進入參數修改,按或是 可修改數值
3.設定完成按 儲存修改後的參數,並進入下一個參數設定頁面
警報 2動作
延遲設定值
(dEL2)
警報起動延遲
範圍設定值
(Sb)
設定說明:
1.設定 5,顯示值未超過 5警報不動作不比較
可修改:0~99
2.設定 5,顯示值超過 5,需經過 Sdt 設定的時間,警報才動作
3.按進入參數修改,按或是 可修改數值
4.按儲存修改後的參數,並進入下一個參數設定頁面
※此功能用於抑制啟動電流過大造成誤動作
警報起動延遲
時間設定值
(Sdt)
設定說明:
1.顯示值到達警報啟動延遲設定範圍後,必須經過此設定時間
警報才會動作 (P.S.:此功能必須與 Sb 一起使用)
可修改範圍:0~99(秒)
2.按進入參數修改,按或是 可修改數值
3.設定完成按 儲存修改後的參數,並進入下一個參數設定頁面
警告!
KTM-IWT50 最大負載扭力上限 50N.m、KTM-IWT400 最大負載扭力上限 400N.m 若超過負載上限則會發出警
報聲響,若長期超過負載使用會導致測試機受損數值不穩不易調整,因此本公司不保固。

11
3.3 類比輸出(AoP)設定群組流程及顯示
* *在輸入通關密碼正確後, 再按 即可選擇警報輸出設定群組畫面
顯示畫面
預設值
畫面名稱
修改參數及流程說明
類比輸出
極性設定
(PoLAr)
設定說明:
1.選擇 NO 為正極輸出:0~10 Vdc
選擇 YES 為正負極輸出:-10~+10 Vdc
2.按進入參數修改,按或是 可修改數值
3.按儲存修改後的參數,並回到類比輸出設定群組

12
維護與保養
1.更換新測試螺絲應參照表 1 建議的最大扭力值,全負載10 次後以電子式數位扭力扳手查核。
2.建議校正週期:更換螺絲後校正或 6 個月為校正週期,至少 12 個月應校正一次。
3.更換測試螺絲孔座,螺絲孔座固定上蓋螺絲(M10)應使用扭力扳手均勻鎖緊(鎖緊扭力值為
50 N m)。
拆KTM-IWT 數位扭力計(螺絲孔固定
座)
1.從本體取下顯示器。
2.取出外殼前蓋螺絲。
3.取出外殼前蓋。
4.均勻對角拔取本體上蓋螺絲。
5.取出本體上蓋。
6.先取出測試座螺絲再取出測試座。
裝KTM-IWT 數位扭力計(螺絲孔固定座)
1.對準孔位裝上測試座。
6.使用扳手校驗螺絲測試。
2.鎖入測試座螺絲。
7.顯示器微調參數。
3.對準孔位裝上本體上蓋。
8.裝上外殼前蓋。
4.平均對角鎖入本體上蓋螺絲,不鎖緊。
9.平均鎖緊外殼前蓋螺絲。
5.用扳手對角鎖方式鎖緊本體上蓋螺絲至約 50N.m。
10.裝上顯示器。

13
產品規格介紹
注意: 參考用
1.請務必使用本公司工業級衝擊式起子用套筒,避免精準度偏差過大。
2.若使用起子頭轉接套筒的方式作業,會因二次打擊與磨擦係數較大,導致實際打擊的扭力精度偏差
與損耗,依實際打擊扭力為主。
型號
KTM-IWT50
IWT400
重量(Kg)
12.60
29.70
標配螺絲測試座
M6
M8
M10
M10
M12
M14
M16
標配套筒
3/8"W
3/8"W
3/8"W
3/8"W
3/8"W
1/2"W
1/2"W
外部尺寸
IWT50
IWT400

14
Special for Im
1. Safety Regulations
Warning!
⚫In order to prevent fire, electric shock and injury, please be sure to follow the "Safety Precautions" below.
⚫Before using, read this "Safety Precautions" and follow the instructions to use it correctly.
⚫Do not operate without reading all safety information. Failing to follow this procedure could result in product damage or physical
injury.
⚫After reading, please keep this "Safety Precautions" in a place where users can timely see it.
Safety Information
⚫When using this product, do not wear any necklace or others alike.
⚫When using this product, please wear appropriate clothing (for example: work glasses, work pants and steel toe shoes).
⚫Before starting to operate this product, check for electrical wires and other loose wires around this product.
⚫Keep this product and charger away from water and always keep them in a dry and safe environment.
⚫Do not operate this product in a flammable or explosive environment.
⚫Do not apply torque exceeding the max. torque value to this machine; otherwise, it may cause equipment damage and operator
injury.
⚫Unauthorized persons are not allowed to use this product.
⚫Do not use parts other than those provided by the manufacturer for replacement and operation.
⚫Please operate this product in a clean environment.
⚫Keep this product clean and dry; keep it away from oil and grease.
⚫Please unplug this product at any time before cleaning and repairing.
⚫Be sure to perform repairs according to the instructions of the repair process. Failure to follow these instructions may result in
product damage.
⚫Do not pull the wires. Do not pull the cord with force when plugging or unplugging the connector from the socket.
⚫In order to work safely and efficiently:
◼Please check the instrument body, screwdriver head and test stand, etc. regularly. Do not use deformed and worn parts.
◼When replacing accessories, replace them according to the operation manual.
◼Check the electric wires and extension cords regularly; replace them if they are damaged.
⚫In the following situations, please turn off the switch and unplug the instrument.
◼When not in use.
◼During maintenance.
◼When it may cause danger.
⚫Assign the dealer for maintenance; please do not modify the machine arbitrarily.
⚫Do not repair this product yourself unless you have a formal training in repair techniques; always contact the dealer where you
purchased when repairs are needed. If it is repaired by non-professional personnel, in addition to failing to fully perform the
functions, it may also cause accidents or injuries.
⚫This product is a precision instrument. Do not disassemble it or subject it to strong impact or vibration.
◼For excessive impact or vibration may cause accidents or injuries, in addition to fail to fully perform the machine, it may cause
accident or injury.
◼Be careful of electric shock. To avoid electric shock, do not touch the power plug with wet hands.
⚫Do not throw the battery (installed in the instrument body) into a fire, which may burst or become toxic.
⚫Before connecting external machines, turn off the power of all machines first; otherwise it may cause electric shock or damage
the machine.
⚫If any condition beyond the ones stated in this operation manual occurs, stop using it immediately and contact the dealer.

15
Warning!
⚫Due to the high torque test capability of the torque tester, repeated testing with the torque test stand can cause significant
temperature buildup in the test stand. If the test stand becomes hot, cool down the test stand before proceeding other tests.
⚫Failing to follow the directions would result in personal injury or damage.
Preface
SKC-PTM Impact Screwdriver Digital Torque Meter applies a new design specifically for testing various dynamic type beat wrenches,
hydraulic pulse torque wrenches, stall type torque wrenches, clutch type twist wrenches; it also can test the manual torque wrenches.
Test Range: 50N・m, 400N・m.
Function
⚫Can set the torque peak value sampling time (0 to 99 seconds).
⚫Can set the torque peak value time to start the torque value.
⚫The dual screen display can display the peak value and the real-time test value at the same time.
⚫Can automatically clear the peak value.
⚫Options of three torque units: kgf・cm/kgf・m, cNm/Nm, lbf・in/lbf・ft (According to customer needs).
⚫RS232 output.
⚫Power: 100-240 VAC.
⚫Accuracy: ±10% of reading, ±1 LSD.

16
Operating Instructions
The upper row shows an instant torque value display, the lower row shows the torque value of the set time value (For detailed
operating instructions, please refer to the instructions on the monitor operating manual)
Operating Procedures
⚫The tester needs to warm up for at least 30 minutes after booting. It is recommended not to turn it off.
⚫he test wrench should follow the torque value recommended in Table 1 and select an appropriate screw size.
Table 1:
Screw Size
M6
M8
M10
M12
M14
M16
Torque Value (N・m)
10
25
50
90
150
240
Max. Torque Value (N・m)
12
29
59
100
162
255
⚫Before testing, inspect the screw surface for damage and properly lubricate it. (Molybdenum disulfide lubricating grease)
KTM-IWT series needs to be lubricated and maintained after operating the lock and pullout of screw for about 50 times. When
locking and pulling out screws under unsmoothed status or locked are pulled out screws for about 5000 times, check the screws
for damage and make lubrication; avoid the damage caused by unsmoothed lock or pullout or the test value becomes unstable.
⚫Preload the tester
⚫Release the automatic zeroing key and re-press the key to zeroing.
⚫For wrench test, pay attention to that the screw must be fed straight without skewed.
⚫After the test is completed, inspect it again. Before testing, inspect the screw surface for damage and properly lubricate it.
(Molybdenum disulfide lubricating grease)
Warning!
According to ISO898/1 standard (bolt level 12.9)
Torque is very important in achieving the required clamping force during operation. Most of the conventional screws and bolts.
When operating the untreated and metric coarse thread (friction coefficient = 0.125) oil-immersed screws, it is recommended to
use the max. tighten torque, the torque corresponds to approximately 62% of the tensile load; therefore, it is recommended not
to use more than 62% of the tensile load in order to avoid damaging the digital torque meter; we are not responsible for
warranty and compensation due to poor quality or damage.

17
6 digits torque monitor (Multi-segment alerts, analog output, RS-232)
** For the first operation, please be familiar with the functions of the keys and indicators on the panel
1.1 Display Panel Indicator Description
1.2 Key Operating Instructions
Key Symbol
Key Name
Key Description
◎
Function selection
key
1.In the normal display screen, press this key to execute the function of FKEY setting
(AZ/MrSt/Unit.C).
Enter parameter
setting key
Data save key
1.In the normal display screen, press this key to enter parameter setting group.
2.In the parameter modification mode, press this key to save the modified value and enter
the next parameter.
Left shift key
Alarm setting key
1.In the normal display screen, press this key (for 3 seconds) to enter the display and
modification of the alarm setting value.
2.In the parameter setting page, press this key to enter the parameter modification mode.
3.In the parameter modification mode, press this key to cyclic move the flashing cursor to
the left.
Display value
setting key
Upward increasing
key
1.In the normal display screen, press this key (for 3 seconds) to enter the display of the
display value setting group.
2.In the parameter setting page, press this key to back to the previous parameter setting
page.
3.In the parameter modification mode, press this key to increasing the value of the flashing
cursor upward.
4.When the parameter diSP is set to MAX, press this key to switch the forward/reverse
max. hold display screen.
Analog output
setting key
Downward
decreasing key
1.In the normal display screen, press this key (for 3 seconds) to enter the display of analog
output setting group.
2.In the parameter setting page, press this key to enter the next parameter setting page.
3.In the parameter modification mode, press this key to decreasing the value of the
flashing cursor downward.
4.When the parameter diSP is set to MAX, press this key to switch the forward/reverse
max. hold display screen.
+
Composite key
1.In any screen, press this composite key to back to the normal display screen.
2.When the buzzer is activated, press this composite key to mute the buzzer.
1.3 Panel and Opening Hole Size Drawing

18
Wiring Diagram
Upper row output and control wiring diagram
⚫Two-segment relay alarm wiring diagram
⚫Two-segment O.C alarm wiring
Lower row output and control wiring diagram
⚫Load Cell
2.1 Operating Process and Display

19
2.2 Display and Modification of Alarm Set Value (AL)
** In the normal display screen, press for 3 seconds to enter the display and modification of the alarm set value
Display Screen
Default
Screen Name
Modify Parameters and Process Description
Alarm 1 set
value (AL1)
1. Setting example:
If you want to display 50.0, AL1 alarm action.
Here AL1 must be set to 50.0.
2. Press to enter parameter modification mode, the value will
flash.
3. Press or to modify the set value of the alarm.
Modifiable range -199999 ~ 999999
4. After setting is completed, press ENT to save the modified
parameters and enter the next parameter setting page.
Alarm 2 set
value (AL2)
2.3 Basic Unit Setting Group
** In the normal display screen, press for 3 seconds to enter the display value setting group
Display Screen
Default
Screen Name
Modify Parameters and Process Description
Display zero
point deviation
correction value
(doFSt)
1. Zero point correction example: input 0V, the rated display is
0, the actual display is 3, input 3 here to correct the deviation.
Modifiable range: -199999 ~ 999999.
2. Press to enter parameter modification, press or to
modify the value.
3. Press ENT to save the modified parameters and enter the
next parameter setting page.
Display
deviation
correction value
(dGAin)
1. Display correction example: input 10V, the rated display is
100.0, the actual display is 99.8. Actual display = dGAin,
100.0, 99.8 = 1.002, here you need to set 1.002.
2. Press to enter parameter modification, press or to
modify the value.
3. Press ENT to save the modified parameters and enter the
next parameter setting page.
Basic unit
decimal point
position setting
(dP)
1. Set basic unit decimal point position: display 100.0 needs to
be changed to 10.00. Here change the original 1 to 2.
Modifiable digits: 0, 1, 2, 3, 4, 5 (digits)
2. Press to enter parameter modification, press or to
modify the value.
3. Press ENT to save the modified parameters and enter the
next parameter setting page.
Lowest display
setting value
(dSPL)
1. Setting example: input 0V and display the lowest 10, here
you need to set it to 10. Modifiable range: -199999 ~ 999999.
2. Press to enter parameter modification, press or to
modify the value.
3. Press ENT to save the modified parameters and return to the
display value setting page.
* Press the Z key on this page to correct the minimum input
signal. (Suitable for load cell)
Forward 2nd
point display
setting value
(r.dSPM)
1. Setting example: LOAD CELL inputs signal at the forward
2nd point shall display 500. Set it to 500 here. Modifiable
range: -199999 ~ 999999.
2. Press to enter parameter modification, press or to
modify the value.
3. Press ENT to save the modified parameters and return to the
display value setting page.
* Press the Z key on this page to correct the forward 2nd point
input signal. (Suitable for load cell)
This manual suits for next models
1
Table of contents
Other Kilews Measuring Instrument manuals
Popular Measuring Instrument manuals by other brands

Van Walt
Van Walt YSI Pro Plus quick start guide

Greenlee
Greenlee FC-110 instruction manual

Greystone Energy Systems
Greystone Energy Systems CR3 Series installation instructions

Phidgets
Phidgets PhidgetSpatial 0/0/3 Basic manual

Mollet
Mollet LF20 Series Operating instruction

Bullhorn
Bullhorn RM5 I/O4 user guide