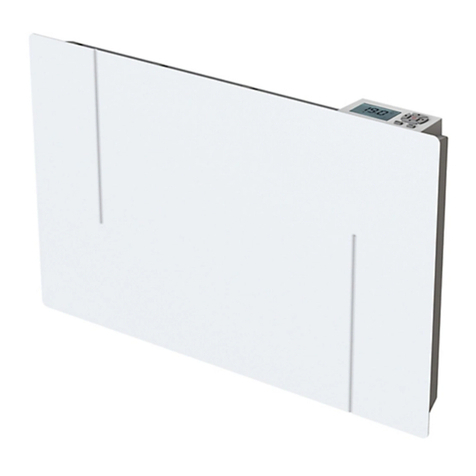
Kingfisher H10MGF5U User manual

GB
IE
Radiant panel heater
Version : 05
Model EAN
H10MGF5U 1000W 3663602911197
This product is only suitable for well insulated
spaces or occasional use.

2
This instruction manual is important to your safety.
Read the entire manual carefully before using the appliance and
keep it for future reference.
Getting started...
Safety 3-5
Before you start 6
Quick start 7-15
In more detail…
Trouble shooting 16
Maintenance and cleaning 17
Environmental protection 18
Technical specications 18-19
Installation 20
Let’s
get started...

3
PLEASE READ THE SAFETY ADVICE CAREFULLY
BEFORE USING THE APPLIANCE
Warning : risk of re, electric shock, physical injuries and
material damage.
Before using this appliance, always follow the safety
advice during assembly, use and maintenance.
SAFETY ADVICE
- This appliance can be used by children aged from 8
years and above and persons with reduced physical,
sensory or mental capabilities or lack of experience
and knowledge if they have been given supervision or
instruction concerning use of the appliance in a safe
way and understand the hazards involved. Children
shall not play with the appliance. Cleaning and user
maintenance shall not be made by children without
supervision.
- Children of less than 3 years should be kept away
unless continuously supervised.
- Children aged from 3 years and less than 8 years shall
only switch on/o the appliance provided that it has
been placed or installed in its intended normal operating
position and they have been given supervision or
instruction concerning use of the appliance in a safe
way and understand the hazards involved.
Children aged from 3 years and less than 8 years shall
not plug in, regulate and clean the appliance or perform
user maintenance.
- CAUTION : Some parts of this product can become
very hot and cause burns. Particular attention has to
be given where children and vulnerable people are
present.
Safety
...

4
PLEASE READ THE SAFETY ADVICE CAREFULLY
BEFORE USING THE APPLIANCE
- WARNING : In order to avoid overheating, do not
cover the heater.
- If the supply cord is damaged, it must be replaced by
the manufacturer, its service agent or similarly qualied
persons in order to avoid a hazard.
- The appliance must not be used outdoors.
- The appliance is intended for domestic use only. Do not
use this appliance for anything other than its intended
purpose.
- Do not operate the appliance in a room where ammable
liquids, solvents or varnishes are stored and/or where
ammable vapours may exist.
- The appliance must be placed at a minimum distance of
one metre from ammable materials and objects (curtains,
bedding, textiles, paper, etc.)
- Do not attempt to disassemble this appliance, repair it or
perform any modications yourself. This appliance does
not contain any parts that can be used separately.
- Keep plastic packaging out of the reach of children.
- Air inlet and outlet vents must not be covered or obstructed
under any circumstances. Do not insert any objects into
these vents.
- Do not exert pressure on or hit the walls of the appliance.
- The appliance must be set upright on its feet.
- The appliance must be set on a horizontal, at, stable and
heat-resistant surface. Any other position is potentially
dangerous.
Safety

5
PLEASE READ THE SAFETY ADVICE CAREFULLY
BEFORE USING THE APPLIANCE
- Do not use this heater in the immediate surroundings of
a bath, a shower or a swimming pool. Keep the appliance
dry.
-The appliance must be unplugged after use and before
moving or cleaning it. Do not unplug it by pulling on the
power cord.
- The heater must not be located immediately below a
socket-outlet.
- CAUTION : In order to avoid a hazard due to inadvertent
resetting of the thermal cut-out, this appliance must not be
supplied through an external switching device, such as a
timer, or connected to a circuit that is regularly switched on
and o by the utility.
- Information on appliance installation is provided in the
Installation section on page 20.
- Always make sure the feet are installed on your appliance
when using it.
- Before connecting the appliance, be sure that the
mains voltage available matches that specied on the
rating plate.
- CAUTION : do a professional install according to installation
standard in each country.
- WARNING : The heater must not be used if the glass
panels are damaged.
IMPORTANT : KEEP THIS INFORMATION FOR
FUTURE REFERENCE. READ CAREFULLY.
Safety

6
Your product
Points to check before beginning
Before you start
For domestic use only.
Children or any other persons incapable of using the appliance
safely must not use this appliance.
Please discard of plastic packaging appropriately and keep it out
of reach of children.
To install your product, please read the installation
guidelines at the end of the instruction manual.
You need (no included)
1 : Control panel
2 : Main part
x4
x2
1
2
1 screwdriver

7
The controls
The icon and the value of the function that are being programmed are blink-
ing. The blinking stops when the setting is validate by the OK button or after
30 seconds of inaction (the modication of the setting is then canceled).
ON-OFF OF THE HEATER
- Press the button to switch the heat on or o (stand-by).
- Two short beeps that increase in pitch sound when switched on and three
beeps that decrease in pitch sound when switched o.
- When switched on, the setpoint temperature and mode are displayed
alternatively every 3 seconds ;
- The heat icon switches on and o cyclically.
- Following a prolonged power cut, the reference then the thermostat usage
time is displayed for 30 seconds on power up.
ECO mode Setpoint Temperature Mode
Comfort mode temperature settings selection
Programme mode
Eco-programme
Prolonged
absence
frost protection
mode ON/
Window OFF
Presence Current Lock
programme Heat
OK or Eco-programme (3 secs)
Quick start

8
LOCKING THE BUTTONS
- Press and hold for 3 seconds on the MENU button to lock and unlock the
buttons ; the icon indicates that it is locked.
The button is never locked.
MODE SELECTION
- Press the ► or ◄ button to select one of the following modes :
- CONFO (Comfort) : Constant temperature that can be set
between 13,5°C and 30°C.
- ECO (Economy) : Constant Temperature that can be set
between 13°C and 29,5°C.
- FrF (Frost protection) : Temperature at 7,5°C not adjustable.
- PrOGr (Programme) : Programmes recorded beforehand for each
day of the week (see § Weekly programming).
- FIL.PI (Pilote Wire) : unused on this model of heater.
- Press the OK button to validate the mode : the mode and the temperature
are displayed alternatively every 3 seconds.
SETTING OF THE COMFORT MODE TEMPERATURE
The Comfort and ECO temperatures are
set separately.
The Comfort mode temperature range is
between 13,5°C and 30°C and can be ad-
justed in increments of 0.5°C. If limited, re-
duce the ECO temperature, as the Comfort
temperature is always higher than the ECO
temperature.
- Select CONFO (Comfort) mode and validate by pressing OK :
- Press the +or -to button to increase or reduce the setpoint temperature ;
the temperature ashes.
- Press OK to validate the selected Comfort temperature.
Quick start

9
SETTING OF THE ECO TEMPERATURE
The Comfort and ECO setpoint tempera-
tures are set separately.
The ECO mode temperature range is
between 13°C and 29.5°C and can be ad-
justed in increments of 0.5°C. If limited, in-
crease the Comfort temperature, as the ECO temperature is always lower
than the Comfort temperature.
- Select ECO mode and validate by pressing OK :
- Press the +or –to button to increase or reduce the setpoint temperature
; the temperature ashes.
- Press OK to validate the selected ECO temperature.
ECO-PROGRAMMES
The 4 Eco-programmes cannot be modied.
They are independent of the weekly program-
ming function.
ACTIVATING AN ECO-PROGRAMME
- Press and hold 3 seconds on the OK button to select the Eco-Pro-
gramme menu.
- Press ► or ◄ to select one of the 4 programmes (ECO.P1 to ECO.P4)
or to stop them (StoP) :
ECO.P1 = Morning : Comfort mode temperature from 6:00 to 8:00.
ECO.P2 = Evening : Comfort mode temperature from 18:00 to 22:00.
ECO.P3 = Morning and Evening : Comfort mode temperature
from 6:00 to 8:00 and 17:00 to 22:00.
ECO.P4 = From Morning till Evening : Comfort mode temperature
from 6:00 to 22:00.
StoP = Stops the Eco Programme.
- Press OK to validate, or press and hold 3 seconds on OK to exit without
conrming.
The little black square above each hour indicates the Comfort tempera-
ture, and in its absence, the ECO temperature.
Quick start

10
STOPPING THE ECO PROGRAMME
- Press the ► or ◄ button to select another
mode (see § Mode selection),
or
- Press and hold 3 seconds on OK then press
► to display StoP.
- Press OK to validate.
ECO-CITIZEN
This function set the Comfort temperature at 19°C and the ECO tempera-
ture at 16°C. It can be used in conjunction with one of the programmes to
optimize energy savings.
- Select the menu Cons (see following chapter).
- Press and hold for 3 seconds on OK to select the menu ECO.Ci menu.
- Press ► or ◄ to start or stop the function ; the €icon indicates that is on.
- Press OK to validate.
The Eco-Citizen function is deactivated when the Comfort or Eco tempera-
ture is adjusted manually.
This function is only accessible after the radiator power is declared (see §
Consumptions).
PRECAUTIONS FOR USE
SETTING THE TEMPERATURE
- The heating power is maximal as long as the setpoint temperature has
not been reached. Programming the setpoint temperature to the maximum
temperature possible, will not heat the room quicker.
- Wait for a few hours for the room temperature to stabilise before adjusting
the temperature setting.
- Switch the appliance o when you air the room.
POWER CUTS
- Following a power cut, the radiator will automatically restart with all of the
settings and programs used before the cut (if it was in operation before the
cut, it will stay on after the cut).
- The programmer clock starts from the time the cut began. This means
that the time and day could be misaligned.
- On start-up, the software version and hours of use is displayed for 30
seconds.
Quick start

11
SETTING THE TIME
- Press MENU to access the menus ; the menu
Hor (Clock) is displayed.
- Press OK to enter this menu.
- Press +or –to set the day of the week : d1 =
Monday, d2 = Tuesday,...., d7 = Sunday.
- Press ► to display the time, then +or –to set
the time.
- Press ► to display the minutes, then on +or –to set the minutes.
- Press ► to display of time setting, then on +or –to set the time automati-
cally or manually.
- Press OK to validate.
- Press MENU to exit the menus.
. If the icon permanently ashes in programme mode (PrOGr), this in-
dicates that the time is oset following a power cut. It is ashing as a time
has not been set.
. Following a power cut, the appliance will automatically restart with all of
the settings used before the cut (if it was on or o before the cut, it will stay
on or o after the cut).
. Automatic time setting is not possible outside France.
. Select manual time setting if daily automatic time setting is incorrect.
WEEKLY PROGRAMMING
The time must be set before programming.
A dierent programme can be set for each day of the week.
These 7 programmes are dierent from the 4 pre-programmed Eco-pro-
grammes.
- Press MENU to access the menus.
- Press ► to select the PrOGr menu.
- Press OK to enter this menu.
1- Press ► or ◄ to select the day of the week
to programme : d1 = Monday, d2 = Tues-
day,...., d7 = Sunday.
2- Press + to select the rst time period from
00:00 to 01:00, which appears transparent.
3- Press ► or ◄ to select the time period to
modify.
4- Press +to program the Comfort tempera-
ture (visible black square) or the Eco temper-
Example :
setting
the time
period from 10:00 to 11:00
Quick start
Secondary programmes and functions

12
ature (no black square) of the selected time period.
5- Repeat steps 3 to 4 for all time periods to be modied.
6- Press OK to validate the programming for the day.
- Repeat steps from 1 to 6 for all of the days of the week to be modied.
- Press MENU to exit the menus.
CONSUMPTIONS
This menu displays the heater’s daily, weekly, monthly or annual consump-
tion to monitor and optimise energy costs.
The consumption is displayed in kWh, as it is on your electricity bill, and
is estimated depending on the heating time and power of the heater.
Consumption is not counted until after the heater’s power has been pro-
grammed.
- Press MENU to access the menus.
- Press ► to select the menu ConS.
- Press OK to enter this menu.
- Press +or –to declare the power of the heater
as written on the label axed to the side of the
appliance ; it can be set in blocks of 100W.
- Press ► or ◄ to set it quicker in blocks of 500W.
- Press OK to save the power.
The heater’s power is only requested the rst time. It determines the accu-
racy of the consumption calculations.
- Press ► or ◄ to display successively the consumption from today (dAy),
yesterday (dAY-1), the week (7- d AY), the month (30dAY), the year (360dA),
the power declared (P1500), and the reset (rESEt) for all consumptions and
power.
- Press MENU to exit the menu.
- dAy : consumption (in hundredths of kWh) of the current day starting at
midnight and ending at midnight.
- dAY-1 : consumption of the previous day starting at midnight and ending
at midnight.
- 7- d AY : consumption (in hundredths of kWh) for the 7 previous days
(example : the consumption displayed on Wednesday 11 started Tuesday 3
at midnight and ended Tuesday 10 at midnight).
- 30dAY : consumption (in kWh) for the 30 previous days (example: the
consumption displayed on 11 May started 11 April at midnight and ended
10 May at midnight).
- 360dA : consumption (in kWh) for the previous 360 days (example : the
consumption displayed on 11 May 2013 started 16 May 2012 at midnight
Quick start

13
and ended 10 May 2013 at midnight).
- rESEt : press and hold more than 3 seconds on OK to reset the appli-
ance’s power and reset the consumption counters.
- P1500 : the appliance’s declared power (for example: P1500 for 1500W).
If you make a mistake, reset to zero (rESEt).
MENU 2
MENU2 access the following secondary functions :
SETTING THE TEMPERATURE OFFSET
This setting compensates for any dierence between the temperature dis-
played by the heater and ambient temperature measured in the room.
This dierence varies from one room to another as it depends on the insu-
lation, room layout and location of the heater.
This dierence must be closed when the ambient temperature is stabilised
after more than 2 hours of heating without changing mode.
This setting changes neither the stability nor the accuracy of the tempera-
ture regulation.
- Press MENU to access the menus.
- Press ► to select MENU2.
- Press OK to access the secondary menus ;
the OFFSt menu is displayed.
- Press OK to enter this menu.
- Press +or – to set the oset between 8°C
and -8°C.
- Press OK to validate the oset.
- Press MENU to exit the menus.
For example, if the heater is set at 20°C and if the ambient thermometer
displays 18°C, the oset must be -2°C.
For example, if the heater is set at 20°C and if the ambient thermometer
displays 22°C, the oset must be 2°C.
Quick start

14
DEROGATION (prolonged absence)
This function maintains frost protection mode
during a prolonged absence then returns to
the initial settings.
- Press MENU to access the menus.
- Press ► to select MENU2.
- Press OK to access the secondary menus
- Press ► to select the DEr menu.
- Press OK to enter this menu.
- Press +or –to select the number of days of
absence from 1 to 99 days (for example, 5
days = 05.d).
The current day must be counted as an absence day.
- Press OK to activate the absence setting ; the number of remaining days
is displayed.
The initial mode (Comfort, Eco or Programme) is re-established at mid-
night on the last day of absence.
- Press MENU to cancel the absence function.
For example, if the absence is programmed on Monday for 3 days, the
heater will remain in frost protection mode until Wednesday at midnight.
OPEN WINDOW
This function switches automatically to frost protection mode when an open
window is detected and returns to the initial mode when the window is
closed.
- Press MENU to access the menus.
- Press ► to select MENU2.
- Press OK to access the secondary menus
- Press ► to select the Und menu (window).
- Press OK to enter this menu.
- Press +or –to permanently activate the func-
tion (Auto), or to activate it once (ΠAnu) or to
deactivate it (StoP).
- Press OK to validate.
The manual position (ΠAnu) puts the heaterr into frost protection mode
for one hour. During this hour, the initial settings can be re-established by
pressing MENU.
The icon ashes when it detects an open window.
When an open window is detected, the heater heats for a few minutes
every half hour to check whether the window is closed.
Quick start

15
Important to note :
- The sensor in the heater detects whether a window is open or closed by
measuring abnormal temperature variations. Detection is carried out sev-
eral minutes after the window is opened or closed.
- Detection may be ineective if these temperature variations are insu-
cient or untimely. This is the case where:
- The dierence between the indoor and outdoor temperature is insu-
cient.
- The heater is too far from the window.
- The temperature gradient in the room does not allow for signicant tem-
perature variations in the heater sensor.
- The ambient temperature is not stabilised at least one hour before the
window is opened.
- The temperature setting or mode were modied manually or by a pro-
gramme before or during detection.
VERSION NUMBERS
This menu displays the equipment and software version number.
- Press MENU to access the menus.
- Press ► to select MENU2.
- Press OK to access the secondary menus
- Press ► or ◄ to select the last menu before Out (exit) ; the equipment
version and software version is displayed alternatively.
- Press MENU to exit the menus.
Quick start

16
Trouble shooting
Trouble shooting
Problem Solutions
- The device does not heat. - Check that the electrical system’s circuit break-
ers are at I or ON.
- Select COMFORT mode.
- Increase the temperature setting.
- Clean the vents underneath the appliance.
- Switch o the appliance for a few minutes to re-
set the thermal circuit breaker.
- The appliance stays in
heat mode.
- Reduce the temperature setting.
- Check that there are no air currents nearby.
- The buttons are not work-
ing.
- Unlock the keypad by pressing and holding for 3
seconds on the MENU button.
- The appliance continues
to heat outside of the pro-
grammed time period.
Outside of the programmed time ranges, the ap-
pliance does not switch o but goes into Eco
mode.
- Reduce the Eco temperature.
- The icon is constantly
ashing.
-The time is out of alignment.
- Set the time.
-‘‘Err’’ is displayed. - Faulty temperature sensor (this fault prevents
the appliance from switching on).
- The appliance gives o a
smell.
This can happen the rst time the appliance is
used or if it has remained unused for a pro-
longed period of time. The smell should disap-
pear quickly.
- Clean the vents underneath the appliance.
IMPORTANT : If the problem persists, disconnect the power supply for 15
seconds then check its operation.

17
Maintenance and cleaning
- Warning : Never use detergent, chemical agents or solvents as they
could damage plastic parts.
- WARNING : Let the appliance cool down completely before handling or
cleaning.
- To prevent risk of re or electrocution, do not pour water or any other liquid
inside the appliance.
- Clean the outside wall of the appliance by rubbing it gently with a soft,
damp cloth, either with or without soap.
- Regularly clean the vents underneath the appliance.
IMPORTANT : Always disconnect from the power
supply before cleaning or maintenance.
PLUG REPLACEMENT
This appliance is supplied with a BS1363 3 pin plug tted with a 7 Amp fuse.
Should the fuse require replacement, it must be replaced with a fuse rated
at 7 Amp and approved to BS1362. In the event the mains plug has to be
removed/replaced for any reason, please note :
IMPORTANT : The wires in the mains lead are coloured in accordance with
the following code : Blue – Neutral
Brown – Live
As the colours of the wires in the mains lead
of this appliance may not correspond with
the coloured markings identifying the termi-
nals in your plug, proceed as follows.
The blue wire must be connected to the ter-
minal marked with an N or coloured black.
The brown wire must be connected to the
terminal marked with an L or coloured red.
NOTE : If a moulded plug is tted and has to be removed take great care
in disposing of the plug and severed cable, it must be destroyed to prevent
engaging into a socket.
N
L
E
BROWN
Live
FUSE
13 Amp
Cord
Clamp
BLUE
Neutral
Maintenance and cleaning
7 Amp

18
- Reference : H10MGF5U
- Power : 1000W
- Dimensions (WxHxD) 61x49x29 cm
- Weight : 8.5 kg
- Supply : 220-240V ~ 50Hz
- Class II
- IP21: Protected against vertically falling drops of water (condensa-
tion).
- Electronic thermostat with Eco-Programmes
- Stops heating by going into standby
- Ambient temperature sensor
- Fail-safe thermal circuit breaker
: Complies with all relevant European Directives.
Technical specications
Environmental protection
This symbol is known as the ‘Crossed-out Wheelie Bin
Symbol’. When this symbol is marked on a product or
battery, it means that it should not be disposed of with your
general household waste. Some chemicals contained within
electrical/electronic products or batteries can be harmful
to health and the environment. Only dispose of electrical/
electronic/battery items in separate collection schemes,
which cater for the recovery and recycling of materials
contained within. Your co-operation is vital to ensure the
success of these schemes and for the protection of the
environment.
yyWxx : Manufacturing date code ; year of manufacturing (20yy)
and week of manufacturing (Wxx).
Environmental protection
Technical specications

19
Technical specications
Information requirements for electric local space heaters
Model identier(s): H10MGF5U
Item Sym-
bol Value Unit
Heat output
Nominal heat output Pnom 0,8 kW
Minimum heat output
(indicative) Pmin 0 kW
Maximum continuous
heat output Pmax,c 0,8 kW
Auxiliary electricity consumption
At nominal heat
output elmax 0 kW
At minimum heat
output elmin 0 kW
In standby mode elSB 0,001 kW
Contact details
Kingsher International Products BV
Rapenburgerstraat 175E 1011 VM
Amsterdam
The Netherlands
Item Unit
Type of heat input, for electric storage local space
heaters only (select one)
manual heat charge control, with integrated
thermostat N.A.
manual heat charge control with room and/or
outdoor temperature feedback N.A.
electronic heat charge control with room and/or
outdoor temperature feedback N.A.
fan assisted heat output N.A.
Type of heat output/room temperature control
(select one)
single stage heat output and no room
temperature control no
Two or more manual stages, no room
temperature control no
with mechanic thermostat room temperature
control no
with electronic room temperature control no
electronic room temperature control plus day
timer no
electronic room temperature control plus week
timer yes
Other control options (multiple selections
possible)
room temperature control, with presence
detection no
room temperature control, with open window
detection yes
with distance control option no
with adaptive start control no
with working time limitation no
with black bulb sensor no
Technical specications

20
FITTING THE FEET
1- Run the power cord through
the raceway of the right foot.
2- Screw in the 2 feet underneath
the appliance (2 screws per foot).
ELECTRICAL CONNECTION
- Before connecting the appliance, be sure that the
mains voltage available matches that specied on the
rating plate.
x4 x2
IMPORTANT : Please follow the safety advice set out on pages 3 to 5.
Installation
This manual suits for next models
1
Table of contents
Languages:
Other Kingfisher Heater manuals
Popular Heater manuals by other brands

Goldair
Goldair Select GSOC117T operating instructions

Arctica Solar
Arctica Solar 1500 Series owner's manual

Melchioni
Melchioni VOLCANO user manual

Haverland
Haverland Anubis instruction manual

iPower
iPower BG-E2B Installation instructions and operators manual

Herschel
Herschel HS500PR Installation & operating instructions

azalp
azalp KUBIC COMBI KKV50SE Instructions for installation and use

Akoma Pet Products
Akoma Pet Products Heat-N-Breeze manual

Sanotechnik
Sanotechnik B450 manual

Heatstore
Heatstore HSP500SSE Installation & Control Guide

Frico
Frico IHW10 Assembly and operating instructions

Philips
Philips HP8560 Service manual