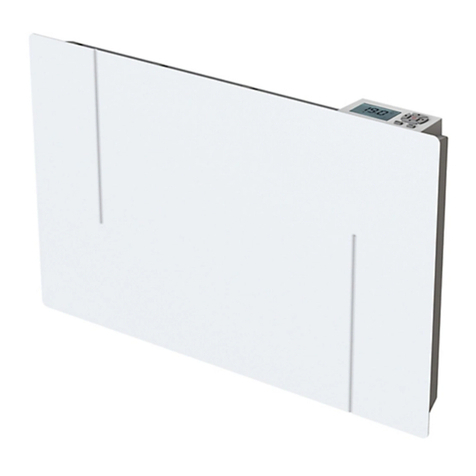
Kingfisher HLXF10A3T41T User manual

GB
IE
V10321 BX220IM
Radiant panel heater
Model EAN
HLXF10A3T41T 1000W 5059340205373
HLXF15A3T41T 1500W 5059340205380
HLXF20A3T41T 2000W 5059340205397
This product is only suitable for well insulated
spaces or occasional use.

2
Getting started...
Safety 3-5
Before you start 6
Quick start 7-17
In more detail…
Trouble shooting 18
Maintenance and cleaning 19
Environmental protection 20
Technical specications 20-23
Installation 24
This instruction manual is important to your safety.
Read the entire manual carefully before using the appliance and
keep it for future reference.
Let’s
get started...

3
PLEASE READ THE SAFETY ADVICE CAREFULLY
BEFORE USING THE APPLIANCE
Warning : risk of re, electric shock, physical injuries and
material damage.
Before using this appliance, always follow the safety
advice during assembly, use and maintenance.
SAFETY ADVICE
- This appliance can be used by children aged from 8
years and above and persons with reduced physical,
sensory or mental capabilities or lack of experience
and knowledge if they have been given supervision or
instruction concerning use of the appliance in a safe
way and understand the hazards involved. Children
shall not play with the appliance. Cleaning and user
maintenance shall not be made by children without
supervision.
- Children of less than 3 years should be kept away
unless continuously supervised.
- Children aged from 3 years and less than 8 years shall
only switch on/o the appliance provided that it has
been placed or installed in its intended normal operating
position and they have been given supervision or
instruction concerning use of the appliance in a safe
way and understand the hazards involved.
Children aged from 3 years and less than 8 years shall
not plug in, regulate and clean the appliance or perform
user maintenance.
- CAUTION : Some parts of this product can become
very hot and cause burns. Particular attention has to
be given where children and vulnerable people are
present.
Safety
...

4
PLEASE READ THE SAFETY ADVICE CAREFULLY
BEFORE USING THE APPLIANCE
- WARNING: Do not use this appliance in small rooms
when they are occupied by persons not capable of leaving
the room on their own, unless constant supervision is
provided.
- WARNING : In order to avoid overheating, do not
cover the heater.
- If the supply cord is damaged, it must be replaced by
the manufacturer, its service agent or similarly qualied
persons in order to avoid a hazard.
- The appliance must not be used outdoors.
- The appliance is intended for domestic use only. Do not
use this appliance for anything other than its intended
purpose.
- Do not operate the appliance in a room where ammable
liquids, solvents or varnishes are stored and/or where
ammable vapours may exist.
- WA R N IN G: To r edu c e t he r i s k o f re, ke ep tex t i l e s , c ur t ain s ,
or any other ammable material a minimum distance of 1
m from the air outlet.
- Do not attempt to disassemble this appliance, repair it or
perform any modications yourself. This appliance does
not contain any parts that can be used separately.
- Keep plastic packaging out of the reach of children.
- Air inlet and outlet vents must not be covered or obstructed
under any circumstances. Do not insert any objects into
these vents.
- Do not exert pressure on or hit the walls of the appliance.
- Do not use this heater if it has been dropped.
- Do not use if there are visible signs of damage to the
heater.
Safety

5
PLEASE READ THE SAFETY ADVICE CAREFULLY
BEFORE USING THE APPLIANCE
- The appliance must be set upright on its feet.
- Use this heater on a horizontal and stable surface, or x it
to the wall, as applicable.
- The appliance must be used on a horizontal, at, stable
and heat resistant surface. Any other position is potentially
dangerous.
- Do not use this heater in the immediate surroundings of
a bath, a shower or a swimming pool. Keep the appliance
dry.
-The appliance must be unplugged after use and before
moving or cleaning it. Do not unplug it by pulling on the
power cord.
- The heater must not be located immediately below a
socket-outlet.
- Information on appliance installation is provided in the
Installation section on page 24.
- Always make sure the feet are installed on your appliance
when using it.
- Before connecting the appliance, be sure that the mains
voltage available matches that specied on the rating
plate.
- A means of disconnection must be provided in the xed
pipes in accordance with the installation rules.
- WARNING: to be installed by a professional in line with
the installation standards applicable in your country
(NF C15-100 for France or equivalent for other countries).
IMPORTANT : KEEP THIS INFORMATION FOR
FUTURE REFERENCE. READ CAREFULLY.
Safety

6
Your product
Points to check before beginning
Before you start
For domestic use only.
Children or any other persons incapable of using the appliance
safely must not use this appliance.
Please discard of plastic packaging appropriately and keep it out
of reach of children.
To install your product, please read the installation
guidelines at the end of the instruction manual.
You need (no included)
1 : Control panel
2 : Main part
x02
x04
1
2
1 screwdriver

7
The controls
Setpoint temperature
Frost protection mode
Heating LED
Lock
Prolonged absence
OK or Boost (3 sec.)
Temperature settings
or Menu selection
Programme mode
ECO mode
Comfort mode
Open window
ON/Standby
Menu
Theiconandthevaluebeingadjustedash.Flashingstopswhentheset-
tingisvalidatedbypressingOK-boost,orafter30secondsofinaction(any
modicationtothesettingisthencancelled).
HEATING ON / STANDBY
- Press the button to switch the heat on or o (standby).
Twoshortbeepsthatincreaseinpitchsoundwhenswitchedonandthree
beepsthatdecreaseinpitchsoundwhenswitchedo.
When switched on, the setpoint temperature and current mode are dis-
playedalternativelyevery3seconds;
Standby ON ON
The iconistheheatingLED.Itisdisplayedonandocyclically.
Quick start

8
LOCKING THE BUTTONS
- Press and hold for more than 3 seconds on the MENU button to lock or
unlock the buttons. The icon indicates that it is locked.
The buttonisneverlocked.
MODE SELECTION
- Press the MENU button to display Πod, then the OK-boost button, then
press + or -to select one of the following modes :
- Con (Comfort): Constant temperature that can be set between
13.5°C and 30°C.
- Pro (Programme): Weekly programming (refer to the Weekly pro-
gramming section).
- EcP (Programme Ecopilote) : Simplied weekly programming (refer
to the Weekly programming section).
- FilP : unused
- FrF (Frost protection): Temperature at 7.5°C, not adjustable.
- Eco (Economy): Constant temperature that can be set between
13°C and 29.5°C.
- Press the MENU button to cancel the setting, or the OK-boost button to
validate the mode: the mode and temperature are displayed alternately
every 3 seconds.
SETTING THE COMFORT MODE TEMPERATURE
The Comfort and ECO setpoint temperatures are
setseparately.
TheComfortmodetemperaturerangeisbetween
13.5°Cand30°Candcanbeadjustedinincrements
of0.5°C.Iflimited,reducetheECOtemperature,as
theComforttemperatureisalwayshigherthanthe
ECOtemperature.
- When Comfort mode (Con) is in operation, press the +or -button to in-
crease or reduce the setpoint temperature ; the temperature ashes.
- Press the MENU button to cancel the setting, or the OK-boost button to
validate the Comfort temperature selected.
Quick start

9
SETTING THE ECO MODE TEMPERATURE
TheComfortandECOsetpointtemperaturesare
setseparately.
The ECO mode temperature range is between
13°C and 29.5°C and can be adjusted in incre-
ments of 0.5°C. If limited, increase the Comfort
temperature, as the ECO temperature is always
lowerthantheComforttemperature.
- When Eco mode is in operation, press the +or -button to increase or
reduce the setpoint temperature ; the temperature ashes.
- Press the MENU button to cancel the setting, or the OK-boost button to
validate the ECO temperature selected.
SETTING THE BOOST
Thetemperaturesettingisautomaticallyforcedto30°Cduringboost.
WhenBoostnishes,thethermostatreturnstothemodeandtemperature
thatwaspreviouslyset.
- Press and hold for 3seconds on the OK-boost
button to switch Boost on or o.
- Press the +or -button to select the Boost time:
5, 10, 15, 20, 30, 45, 60, 90 or 120 minutes (the
default selection is 60 minutes), then press the
OK-boost button to validate the selection; the re-
maining time in Boost is displayed.
- Press the MENU button to stop the Boost.
InProgrammemode,Boostcanbestoppedatanytimebypressingand
holdingfor3 seconds on the OK-boost.FollowingamanualstopinPro-
gramme mode, Boost can only be reactivated by a programme after a
periodof2hours.
Quick start

10
PRECAUTIONS FOR USE
SETTINGTHETEMPERATURE
- The heating power is maximal as long as the setpoint temperature has
notbeenreached.Programmingthesetpointtemperaturetothemaximum
temperaturepossible,willnotheattheroomquicker.
-Waitseveralhoursfortheroomtemperaturetostabilisebeforeadjusting
thetemperaturesetting.
-Turnotheappliancewhenventilatingtheroom.
POWERCUTS
-Followingapowercutandresume,theappliancewillautomaticallyrestart
withallofthesettingsandprogramsusedbeforethecut(ifitwasinopera-
tionbeforethecut,itwillstayonafterthepowerresume).
-Theprogrammerclockstartsfromthetimethecutbegan.Thismeansthat
thetimeanddaycouldbemisaligned.
-Followingapowerresume,thereference,thenthetotaltimetheappliance
isturnedonisdisplayedfor30secondsonpowerresume.
Quick start

11
SETTING THE TIME
- Press MENU to display Πod, then press +to access
the Hor menu.
- Press OK-boost to enter this menu.
- Press +or -to set the day of the week :
d1 = Monday, d2 = Tuesday,...., d7 = Sunday.
- Press OK-boost to validate
- Press +or -to set the hour.
- Press OK-boost to validate.
- Press +or -to set the minutes.
- Press OK-boost to validate.
- Press +or -to select automatic (Aut) or manual (ΠAn) time setting.
- Press OK-boost to validate.
- Press MENU to exit the menu
Ifthe iconpermanentlyashesinprogrammemode(ProorEcP),this
indicatesthatthetimeisosetfollowingapowercut.Itisashingasatime
hasnotbeenset.
Followingapowercut,theappliancewillautomaticallyrestartwithallofthe
settingsusedbeforethecut(ifitwasonorstandbybeforethecut,itwill
stayonorstandbyafterthecut).
AutomatictimesettingisnotpossibleoutsideFrance.
Selectmanualtimesettingifdailyautomatictimesettingisincorrect.
WEEKLY PROGRAMMING
Thetimemustbesetbeforeanyprogramming.
Therearetwoprogrammersavailable.Theycomprise6programs:Pr1 to
Pr6forone,and3programs,Ec1 to Ec3fortheother.SelectingProorEcP
modeactivatesoneortheother.
EachprogramdenesatimeperiodinwhichthesettingcanbeComfortor
Boost(onlyforPr1toPr6).Outsidetimeperiods,thesettingisECO.
Thetimeperiodforoneprogrammayoverlapthetimeperiodofanother.In
thiscase,thehighernumberprogramhaspriority.
Quick start

12
Eachprogramisdenedby:
-itsname:Pr1, Pr2, Pr3, Pr4, Pr5, Pr6, Ec1, Ec2or Ec3,
-itsoperatingmode:Comfort(Con)orBoost(bSt),
-itsdaysofactivation :Monday toSunday (1-7),or Saturdayand
Sunday (6-7), or Monday to Friday (1-5), or a day of the
week(d1, d2, d3, d4, d5, d6, d7),
-itsstarttime,
-itsendtime.
Example of weekly programming
Pr1:MondaytoFridayfrom5:20to7:00inComfortmode.
Pr2:MondaytoSundayfrom17:50to19:30inComfortmode.
Pr3:MondaytoFridayfrom7:00to7:30inBoostmode.
Pr4:Wednesdayfrom16:30to20:00inComfortmode.
Pr5:SaturdayandSundayfrom8:10to20:00inComfortmode.
Pr6:SaturdayandSundayfrom9:20to10:10inBoostmode.
Monday
Tuesday
Wednesday
Thursday
Friday
Saturday
Sunday
Quick start

13
- Press MENU to display Πod, then press +to
access the Pro menu.
- Press OK-boost to enter this menu.
- Press +or -to select the program number (Pr1, Pr2,
Pr3, Pr4, Pr5, Pr6, Ec1, Ec2 or Ec3).
- Press OK-boost to validate.
- (OnlyforPr1 to Pr6)Press +or -to select program
operating mode ; Comfort (Con) or Boost (bSt).
- Press OK-boost to validate.
- Press +or - to select the day(s) of program activation
or inactivation (not); Monday, Tuesday, Wednesday,
Thursday, Friday, Saturday, Sunday (d1 ... d7), from
Monday morning to Sunday evening (1-7), from Sat-
urday morning to Sunday evening (6-7), from Monday
morning to Friday evening (1-5).
- Press OK-boost to validate.
- Press +or -to set the hour of start time of the pro-
gram.
- Press OK-boost to validate.
- Press +or -to set the minutes of the start time in
blocks of 10 minutes.
- Press OK-boost to validate.
- In the same way, press +or -to set the end time of
the program.
Theendtimeisonlyprogrammablebetweenthestart
timeand23:50.
TheBoostfunctionislimitedtoamaximumof2hours.
- Press OK-boost to validate (Pro mode is selected by default).
- Press the MENU button to exit the menu without validating the latest mod-
ications.
Quick start

14
CONSUMPTIONS
This menu displays the actual consumption dura-
tion. It is expressed as a percentage of the total
time.
- Press MENU to display Πod, then press +to access
the EnE menu.
- Press OK-boost to enter this menu.
- Press +or -to successively display the consumption duration from today
(dAY), yesterday (d-1), the week (7-d), the month (30d), the year (360d),
and the reset (rES) for all consumption durations (waitafewsecondsto
seetheconsumptionduration,asforexample“E:32”).
- Press MENU to exit the menu.
- dAY;consumptiondurationofthecurrentdaystartingatmidnightand
endingatmidnight.
- d-1;consumptiondurationofthepreviousdaystartingatmidnightand
endingatmidnight.
- 7-d;consumptiondurationforthe7previousdays(example:thecon-
sumption displayed on Wednesday 11 started Tuesday 3 at mid-
nightandendedTuesday10atmidnight).
- 30d;consumptiondurationforthe30previousdays(example:thecon-
sumptiondisplayedon11Maystarted11Aprilatmidnightandend-
ed10Mayatmidnight).
- 360d; consumption duration for theprevious360 days (example: the
consumption displayed on 11 May 2013 started 16 May 2012 at
midnightandended10May2013atmidnight).
- rES ;pressandholdmorethan3 seconds on OK-boosttoresetthe
consumptioncounters.
Forexample,a1500Wheaterdisplaysitsconsumptionduration
-fortheyear:360d -> E:06(1500Wfor6%ofthetime),
i.e.777.6kW.h(=777600W.h=1500x360x24x0.06).
-forthemonth:30d -> E:14 (1500Wfor14%ofthetime),
i.e.151.2kW.h(=151200W.h=1500x30x24x0.14).
-fortheweek:7-d -> E:21(1500Wfor21%ofthetime),
i.e.52.9kW.h(=52920W.h=1500x7x24x0.21).
-foryesterday:d-1 -> E:28(1500Wfor28%ofthetime),
i.e.10.1kW.h(=10080W.h=1500x24x0.28).
-fortodayupto12:45:dAY -> E:32(1500Wfor32%ofthetimeelapsed
since0:00), i.e.6.1kW.h(6120W.h=1500x12.75(=12:45)x0.32).
Quick start

15
SETTING THE TEMPERATURE OFFSET
Thissettingcompensatesforanydierence(oset)betweenthetempera-
turedisplayedbytheunitandambienttemperaturemeasuredintheroom.
Thisdierencevariesfromoneroomtoanotherasitdependsontheinsu-
lation,roomlayoutandlocationoftheappliance.
Thisdierencemustbeclosedwhentheambienttemperatureisstabilised
aftermorethan2hoursofheatinginComfortorEcomode.
Thissettingchangesneitherthestabilitynortheaccuracyofthetempera-
tureregulation.
- Press MENU to display Πod, then press +to
access the OFS menu.
- Press OK-boost to enter this menu.
- Press +or - to set the oset between 8°C and -8°C
- Press OK-boost to validate the oset.
- Press MENU to exit the menu.
Forexample,iftheapplianceissetat20°Candiftheambientthermometer
displays18°C,theosetmustbe-2°C.
Forexample,iftheapplianceissetat20°Candiftheambientthermometer
displays22°C,theosetmustbe2°C.
DEROGATION (Prolonged absence)
.This function maintains frost protection mode at
7.5°Cduring aprolonged absence thenreturnsto
theinitialsettings.
- Press MENU to display Πod, then press +to
access the dEr menu.
- Press OK-boost to enter this menu.
- Press +or -to select the number of days of absence from 1 to 99 days (for
example, 5 days = 05.d).
Thecurrentdaymustbecountedasanabsenceday.
- Press OK-boost to activate the absence setting; the number of remaining
days is displayed alternately with the setpoint temperature.
Theinitialmode(Comfort,EcoorProgramme)isre-establishedatmidnight
onthelastdayofabsence.
- Press MENU to cancel the absence function.
Forexample,iftheabsenceisprogrammedonMondayfor3days,theap-
pliancewillremaininfrostprotectionmodeuntilWednesdayatmidnight.
Quick start

16
OPEN WINDOW
Thisfunctionswitchesautomaticallytofrostprotectionmodewhenanopen
window is detected and returns to the initial mode when the window is
closed.
- Press MENU to display Πod, then press +to access
the Und menu.
- Press OK-boost to enter this menu.
- Press +or –to permanently activate the function
(Aut), or to activate it once (ΠAn) or to deactivate
it (OFF).
- Press OK-boost to validate.
Themanualposition(ΠAn)putstheheaterintofrostprotectionmodefor
one hour. During this hour, the initial settings can be re-established by
pressingMENU.
The iconasheswhenitdetectsanopenwindow.
Importanttonote:
- The sensor in the heater detects whether a window is open or closed
bymeasuringabnormaltemperaturevariations.Detectioniscarriedout
severalminutesafterthewindowisopenedorclosed.
-Detectionmaybeineectiveifthesetemperaturevariationsareinsu-
cientoruntimely.Thisisthecasewhere:
-Thedierencebetweentheindoorandoutdoortemperatureisinsucient.
-Theheateristoofarfromthewindow.
-Thetemperaturegradientintheroomdoesnotallowforsignicanttem-
peraturevariationsintheheatersensor.
-Theambient temperature is not stabilised at least one hourbefore the
windowisopened.
-The temperaturesetting or mode were modied manuallyor bya pro-
grammebeforeorduringdetection.
DISPLAY OF REFERENCES
This menu displays the equipment and software
references(thesereferencesdieraccordingtothe
model).
- Press MENU to display Πod, then press +to access the references; the ref-
erence for the equipment and the reference for the software are displayed
alternately.
- Press MENU to exit the menu.
Quick start

17
OUT
- Select Out, then press OK-boost to exit the menu,
or
- Press MENU to exit the menu.
__________________________________________________________
...
...
...
...
...
MODE SELECTION
...
Theinformation
displayedonthis
screendiers
accordingtothe
devicereference.
Secondary programmes and functions
Quick start

18
Trouble shooting
Trouble shooting
Problem Solutions
- The appliance does not
display anything.
- Check that a circuit breaker has not cut the
power to the appliance.
- The device does not heat. - Select Comfort mode.
- Increase the temperature setting.
- Switch o the appliance for a few minutes to
reset the thermal safety circuit breaker.
- The appliance stays in
heat mode..
- Stop Boost.
- Reduce the temperature setting.
- Check that there are no air currents nearby.
- The buttons are not work-
ing.
- Unlock the keypad by pressing and holding for
3 seconds on the MENU button.
- The appliance continues
to heat outside of the pro-
grammed time period.
Outsideofthetimeperiods,theappliancedoes
notswitchobutgoesintoEcomode.
- Reduce the Eco temperature.
- Check that another time period is not activated.
- Boost does not work in
Programme mode.
If Boost was stopped manually during Pro-
grammemode,itcanonlybereactivatedauto-
maticallyafteraperiodof2hours.
- Activate Boost manually.
-The icon is constantly
ashing.
Thetimeisoutofalignment.
- Set the time.
-The icon ashes. - This is normal during Boost.
- ‘‘Er’’ ashes. - Faulty temperature sensor (this fault prevents
the appliance from switching on).
- The appliance gives o a
smell.
- When it is used for the rst time or if it has re-
mained unused for a prolonged period of time,
the appliance can release an unpleasant smell,
which should disappear quickly.
IMPORTANT : If the problem persists, disconnect the power supply for 15
seconds then check its operation.

19
Maintenance and cleaning
- Warning : Never use detergent, chemical agents or solvents as they
could damage plastic parts.
- WARNING : Let the appliance cool down completely before handling or
cleaning.
- To prevent risk of re or electrocution, do not pour water or any other liquid
inside the appliance.
- Clean the outside wall of the appliance by rubbing it gently with a soft,
damp cloth, either with or without soap.
- Regularly clean the vents underneath the appliance.
IMPORTANT : Always disconnect from the power
supply before cleaning or maintenance.
Maintenance and cleaning
PLUG REPLACEMENT
This appliance is supplied with a BS1363 3 pin plug tted with a 7 or 10 Amp
fuse. Should the fuse require replacement, it must be replaced with a fuse
approved to BS1362 and rated at:
7 Amp for HLXF10A3T41T (1000W)
10 Amp for HLXF15A3T41T (1500W) and HLXF20A3T41T (2000W)
In the event the mains plug has to be removed/replaced for any reason,
please note:
IMPORTANT : The wires in the mains lead are coloured in accordance with
the following code : Blue – Neutral
Brown – Live
As the colours of the wires in the mains lead-
of this appliance may not correspond with
the coloured markings identifying the termi-
nals in your plug, proceed as follows.
The blue wire must be connected to the ter-
minal marked with an N or coloured black.
The brown wire must be connected to the
terminal marked with an L or coloured red.
NOTE : If a moulded plug is tted and has to be removed take great care
in disposing of the plug and severed cable, it must be destroyed to prevent
engaging into a socket.
N
L
E
BROWN
Live
FUSE
13 Amp
Cord
Clamp
BLUE
Neutral

20
Reference HLXF10A3T41T HLXF15A3T41T HLXF20A3T41T
Power 1000 W 1500 W 2000 W
Dimensions
(L x H x D) 45 x 49 x 29 cm 60 x 49 x 29 cm 75 x 49 x 29 cm
Weight 4 kg 5 kg 6 kg
- Supply : 220-240V ~ 50Hz
- Class II
- IP21: Protected against vertically falling drops of water (condensa-
tion). It is not suitable for a usage in the bathroom.
- Electronic thermostat with Eco-Programmes
- Stops heating by going into standby
- Ambient temperature sensor
: This product complies with conformity requirements
of the applicable European Regulations or Directives.
: This product complies with conformity requirements
of the applicable UK Regulations.
Technical specications
Environmental protection
This symbol is known as the ‘Crossed-out Wheelie Bin
Symbol’. When this symbol is marked on a product or
battery, it means that it should not be disposed of with your
general household waste. Some chemicals contained within
electrical/electronic products or batteries can be harmful
to health and the environment. Only dispose of electrical/
electronic/battery items in separate collection schemes,
which cater for the recovery and recycling of materials
contained within. Your co-operation is vital to ensure the
success of these schemes and for the protection of the
environment.
yyWxx : Manufacturing date code ; year of manufacturing (20yy)
and week of manufacturing (Wxx).
Environmental protection
Technical specications
This manual suits for next models
5
Table of contents
Languages:
Other Kingfisher Heater manuals
Popular Heater manuals by other brands

eka
eka 2 Original instructions

Dyna-Glo
Dyna-Glo WORKHORSE FA43 Series User's manual and operating instructions

Master
Master SSR-822R-IHR User's manual & operating instructions

DeLonghi
DeLonghi CERAMIC FAN HEATER instructions

JML
JML Handy Heater instruction manual

IRSAP
IRSAP RELAX RENOVA operating instructions