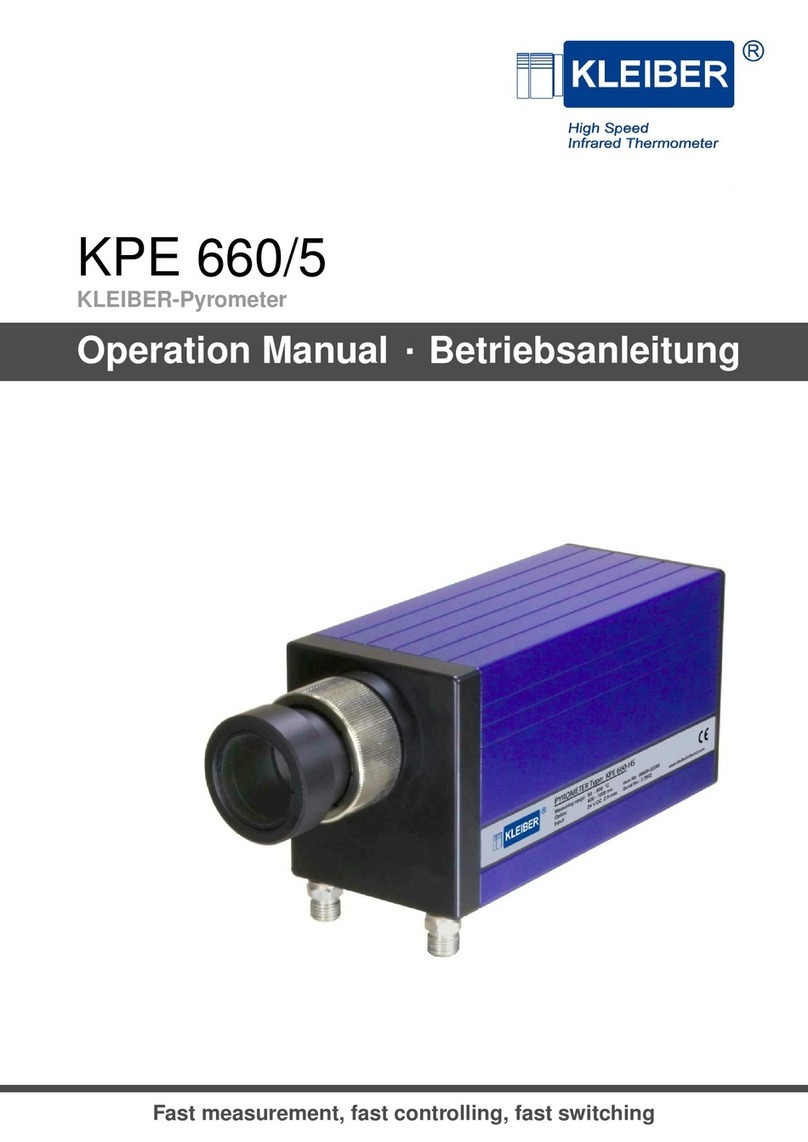
KLEIBER Pyroskop 840 User manual

Pyroskop 840
KLEIBER-Pyrometer
Operation Manual Betriebsanleitung
Fast measurement, fast controlling, fast switching

Darstellungshinweis: Bei Verwendung des Adobe Reader zur Darstellung dieser Betriebsanleitung, stellen
Sie bitte die Option „Dünne Linien deutlicher darstellen “ im Menü Voreinstellungen Seitenanzeige aus.
View note: When using Adobe Reader to display this opertion manual, please disable “Enhance thin lines” in
the menu Preferences Page Display.
Address/Copyright
KLEIBER Infrared GmbH
Am Gewände 3
D-07333 Unterwellenborn
Germany
Phone: +49 (0)3671 / 527 20 - 0
Fax: +49 (0)3671 / 527 20 - 12
E-Mail: inf[email protected]
Internet: www.kleiberinfrared.com
© 2010 - 2018 KLEIBER Infrared GmbH
Any reproduction of this user manual or part thereof, its storage on electronic media and translation of the
manual into foreign languages without written approval of the company KLEIBER Infrared GmbH is strictly
forbidden.
All rights reserved.
© 2010 - 2018 KLEIBER Infrared GmbH
Jegliche Reproduktion der vorliegenden Bedienungsanleitung ganz oder auszugsweise, die Speicherung in
elektronischen Medien sowie die Übersetzung in Fremdsprachen sind ohne schriftliche Genehmigung der
KLEIBER Infrared GmbH untersagt.
Alle Rechte vorbehalten.
Version: August 21, 2018

CONTENTS
Contents
1 Basic Information 1
1.1 NotesfortheUserManual........................................ 1
1.2 Document Structure and Symbols . . . . . . . . . . . . . . . . . . . . . . . . . . . . . . . . . . . 1
1.3 Purpose.................................................. 1
1.4 IntendedUse............................................... 1
1.5 WarrantyandLiability .......................................... 2
2 Safety 3
2.1 Usedsymbolsandkeywords...................................... 3
2.2 GeneralSafetyNotes .......................................... 3
3 Scope of Delivery / Accessories 4
3.1 ScopeofDelivery............................................. 4
3.2 Devicemodels .............................................. 4
3.3 Accessories................................................ 5
3.3.1 General.............................................. 5
3.3.2 Directoptics ........................................... 5
3.3.3 Fiberoptics............................................ 6
4 Technical Data 8
4.1 Properties................................................. 8
4.2 Measurementranges .......................................... 9
4.3 Drawingpyrometer............................................ 10
5 Technical Description 11
5.1 System Design / Principle of Operation . . . . . . . . . . . . . . . . . . . . . . . . . . . . . . . . . 11
5.2 Directoptics................................................ 12
5.2.1 Variooptics............................................ 12
5.2.2 Macrooptics ........................................... 12
5.2.3 Settingthevariooptics...................................... 13
5.3 Fiberoptics................................................ 14
5.3.1 Variooptics............................................ 14
5.3.2 Fixedoptics............................................ 14
5.3.3 Settingthevariofiberoptics................................... 15
5.4 Operating elements and cable connections . . . . . . . . . . . . . . . . . . . . . . . . . . . . . . 16
5.5 Connection for 4-pole connecting cable (Ethernet) . . . . . . . . . . . . . . . . . . . . . . . . . . 16
5.6 Connection for 12-pole connecting cable . . . . . . . . . . . . . . . . . . . . . . . . . . . . . . . . 16
5.7 Cooling connection (for pyrometers with direct optics) . . . . . . . . . . . . . . . . . . . . . . . . 17
5.8 Mounting ................................................. 17
5.9 Emissivity................................................. 17
6 Starting Up 18
6.1 InstallationSiteRequirements...................................... 18
6.1.1 Climaticconditions........................................ 18
Pyroskop 840 iii

CONTENTS
6.1.2 Requirements at the place of use . . . . . . . . . . . . . . . . . . . . . . . . . . . . . . . . 18
6.2 Installation ................................................ 19
6.2.1 Fix and connect the pyrometer . . . . . . . . . . . . . . . . . . . . . . . . . . . . . . . . . 19
6.2.2 Alignpyrometer.......................................... 20
7 Communication 21
7.1 Ethernet.................................................. 21
7.2 RS485 .................................................. 21
8 Display 22
8.1 Displayelements............................................. 22
8.1.1 Informationvalues ........................................ 22
8.1.2 Chart ............................................... 23
8.1.3 Devicestate ........................................... 23
8.2 Configurationmenu ........................................... 24
9 Parameter 25
9.1 Temperaturemeasurement ....................................... 25
9.2 Displaysettings.............................................. 26
9.3 Communicationsettings......................................... 27
10 Troubleshooting 28
11 Transport and Storage 29
11.1TransportofthePyrometer ....................................... 29
11.2StorageofthePyrometer ........................................ 29
12 Maintenance and Care 30
12.1Generalinformation ........................................... 30
12.2CleaningtheOptics ........................................... 30
13 Taking out of service, Disposal 31
13.1Takingoutofservice........................................... 31
13.2Disposal.................................................. 31
14 Licenses of used software 32
iv Pyroskop 840

1 Basic Information
1 Basic Information
1.1 Notes for the User Manual
This user manual describes the structure of the KLEIBER Pyroskop 840 infrared pyrometer for non-contact
temperature measurement and gives the operators all the necessary information related to installation, op-
eration, de-installation along with information related to maintenance and repairs of the pyrometer. When
malfunctions occur, the user manual provides suggestions for their potential causes and their repair.
This user manual is intended for qualified service and maintenance personnel with appropriate technical ex-
pertise including a basic knowledge of temperature measuring technology.
Before you use the pyrometer for temperature measurement, you must have read and understood these oper-
ating instructions! Keep the manual so that it is available at all times.
Take into account all the requirements given in this user manual. This is a precondition for:
• The correct and professional use of the pyrometer
• Proper maintenance, cleaning and care of the pyrometer
• Prevention of risks and strict observance of the essential technical safety regulations
1.2 Document Structure and Symbols
Operating instructions to be performed in sequence are numbered in chronological order. They are grouped
together in operational units and accompanied by the corresponding results.
Listings without a sequential order are presented as bullet points and items in sub-lists are preceded by
dashes.
Safety precautions are shown with pictograms and key words. They provide information about the type,
source and consequences of the hazard, and safety precautions. The meanings of the pictograms and key
words are explained in Safety (section 2) at page 3.
1.3 Purpose
The KLEIBER Pyroskop 840 pyrometer is particularly intended for the non-contact measurement of surface
temperatures on metal, ceramic, plastics and is specially designed for industrial applications as well as appli-
cations in the area of research and development.
The KLEIBER Pyroskop 840 also enables you to solve high speed applications in laser areas by using laser
rejection filters and challenging temperature measurement on silicon or tungsten.
1.4 Intended Use
The KLEIBER Pyroskop 840 pyrometer is to be used exclusively for the non-contact measurement of surface
temperatures . Any applications beyond that area are not allowed! Any damage resulting from this is the sole
responsibility of the operator.
Proper use of the device also includes:
• The observance of the requirements of these operating instructions for transport and storage, assembly,
operation and care of the pyrometer
• The observance of the power requirements specified in Technical Data (section 4) at page 8 and the
operating and environmental conditions
• The compliance with the legal accident prevention and environmental regulations
Among applications/conditions for which the pyrometer is not intended for use are in particular:
• The use of the pyrometer within medical areas
Pyroskop 840 1

1 Basic Information
• The use of the pyrometer in the food industry
• The use of the pyrometer in areas where there is danger of explosion
• The use of the pyrometer outside of the operating and environmental conditions specified in Technical
Data (section 4) at page 8
1.5 Warranty and Liability
KLEIBER Infrared GmbH offers a 2 year warranty for the device starting from the date of invoice. The warranty
covers manufacturing defects. Then the device will be repaired free of charge, however freight charges are
the responsibility of the respective sender.
KLEIBER Infrared GmbH reserves the right to exchange the equipment or parts of the instrument instead of a
repair. After a repair, KLEIBER Infrared GmbH offers a warranty of 12 months on all repaired and/or exchanged
instrument components.
Deviations from the proper use described in this user manual will result in restricted warranty and liability or
the loss in case of damage. Damage to wearing parts (e.g. fuses) is excluded from the guarantee.
Warranty and liability claims for personal injuries and/or material damage are excluded if this or these result
from one or more of the following causes:
• Improper use of the device
• Inappropriate operation and servicing of the device
• Unauthorized modifications to the device without prior consultation with KLEIBER Infrared GmbH
• Rough, mechanical actions or deliberate destruction of the device
• Connection error (overvoltage)
• Frost damage by not observing the permitted environmental conditions and/or by inappropriate storage
• Malfunctions that are caused by non-conformance to this user manual
2 Pyroskop 840

2 Safety
2 Safety
2.1 Used symbols and key words
The following symbols and key words are used in the user manual to indicate hazards and instructions. Safety
precautions always appear before an action.
DANGER:
Indicates a potentially dangerous situation. Failure to abide may result in light or minor injury and
damage.
CAUTION:
Indicates a potentially damaging situation. Failure to abide may result in damage to the product or to
anything near the product.
IMPORTANT:
Indicates useful tips and other specifically useful information that allow any dangerous or damaging
situations to be avoided.
REFERENCE TO ENVIRONMENTAL PROTECTION:
Important instructions for protecting the environment.
2.2 General Safety Notes
The KLEIBER Pyroskop 840 pyrometer has been built in accordance with the currently valid standards of the
technology and the recognized safety regulations and ensures the highest safety level.
The fundamental safety and occupational safety requirements of applicable laws, standards, and guidelines
have been taken into account in the pyrometer design. The safety of the pyrometer is confirmed by the decla-
ration of conformity and the CE mark.
All information related to safety is with reference to the regulations of the European Union currently in force. In
other countries, applicable laws, national directives and safety regulations have to be met.
Apart from the safety instructions given in these operating instructions, you should also take into account the
generally valid regulations for accident prevention and environmental protection as well as the regulations of
the respective professional associations and strictly comply with them.
Note the general safety instructions:
• Commissioning of the pyrometer may only be carried out by persons qualified to do so, taking the safety
instructions into account.
• Pay attention to the installation site requirements and notes for commissioning.
• Only use the original cables provided as accessories for the connection of the pyrometer. Other cables,
especially cables manufactured by yourself, are not permitted.
• Before start-up, carry out a visual inspection for damage to the components of the pyrometer(housing,
optics, cable and pipes). Never operate the pyrometer with damaged components.
Pyroskop 840 3

3 Scope of Delivery / Accessories
3.1 Scope of Delivery
The scope of delivery of the pyrometer includes:
• High speed infrared pyrometer KLEIBER Pyroskop 840
• Retaining bolt ∅14.9 mm, length 100 mm, thread M12
• Water cooling connection (only for Pyrometer with direct optics)
• Inspection sheet
• User manual
IMPORTANT:
The connecting cable is not included in scope of delivery. Please order it according to the length
required.
For pyrometer with fiber optics the optical fiber and the fiber optics should be orderd with the pyrometer.
3.2 Device models
Art.-No. Configuration Measuring range
08400-01000 Direct vario optics 600 . . . 1,600
08400-01100 Direct macro optics
08400-01200 Fiber optics
08400-02000 Direct vario optics 800 . . . 2,300
08400-02100 Direct macro optics
08400-02200 Fiber optics
08401-01000 Direct vario optics 300 . . . 1,400
08401-01100 Direct macro optics
08401-01200 Fiber optics
08401-02000 Direct vario optics 500 . . . 2,500
08401-02100 Direct macro optics
08401-02200 Fiber optics
08402-01000 Direct vario optics 160 . . . 1,000
08402-01100 Direct macro optics
08402-02200 Fiber optics 200 . . . 1,000
08402-03000 Direct vario optics 300 . . . 2,300
08402-03100 Direct macro optics
08402-03200 Fiber optics
08402-04200 Fiber optics 400 . . . 1,300
08402-05200 Fiber optics 400 . . . 3,000
08402-06200 Fiber optics 350 . . . 3,500
4 Pyroskop 840

3 Scope of Delivery / Accessories
3.3 Accessories
3.3.1 General
Connecting cable
Art.-No. Description
30007-14050 Connecting cable, connector, straight, 12-pol., 5.0 m
30007-14100 Connecting cable, connector, straight, 12-pol., 10.0 m
30007-14150 Connecting cable, connector, straight, 12-pol., 15.0 m
30007-14200 Connecting cable, connector, straight, 12-pol., 20.0 m
30007-15050 Connecting cable, connector, straight, 12-pol., jack 12-pol., 5.0 m
30007-15100 Connecting cable, connector, straight, 12-pol., jack 12-pol., 10.0 m
30007-15150 Connecting cable, connector, straight, 12-pol., jack 12-pol., 15.0 m
30007-15200 Connecting cable, connector, straight, 12-pol., jack 12-pol., 20.0 m
Connecting cable Ethernet
Art.-No. Description
30007-41010 Connecting cable, Ethernet, M12 - RJ45 Cat.5e, 1.0 m
30007-41020 Connecting cable, Ethernet, M12 - RJ45 Cat.5e, 2.0 m
30007-41050 Connecting cable, Ethernet, M12 - RJ45 Cat.5e, 5.0 m
30007-41100 Connecting cable, Ethernet, M12 - RJ45 Cat.5e, 10.0 m
30007-41200 Connecting cable, Ethernet, M12 - RJ45 Cat.5e, 20.0 m
Power supply
Art.-No. Description
30001-10060 Power supply in aluminum housing, 230 V AC, 24 V DC
Device mounting
Art.-No. Description
30002-10010 Ball and socket mounting screw mounted
30002-10020 Ball and socket mounting clamp mounted
3.3.2 Direct optics
Accessories for optics
Art.-No. Description
30002-20010 Vario optic
30002-20030 Vario optic with air purge unit
30002-20980 Air purge unit for vario optic
30002-20020 Macro optic
30002-20040 Vario optic with protective glass
30003-03410 Laser rejection filter 1064 nm
Pyroskop 840 5

3 Scope of Delivery / Accessories
3.3.3 Fiber optics
Standard optics
Art.-No. Description Measuring distance in
mm
Measuring field ∅in mm Optical
fiber
30006-12500 LVO 25 80 . . . 300 1.60 . . . 4.30 blue
30006-13500 LVO 35 250 . . . 1,000 3.50 . . . 11.00
Special optics
Art.-No. Description Measuring distance in
mm
Measuring field ∅in mm Optical
fiber
30006-02500 LVA 25 110 . . . 800 0.80 . . . 5.00 red
30006-12501 LVO 25 S - 1 115 . . . 250 0.40 . . . 1.20
30006-12502 LVO 25 S - 2 200 . . . 240 0.85 . . . 1.10
30006-12503 LVO 25 S - 3 78 0.30
30006-12504 LVO 25 S - 4 60 0.50
30006-12505 LVO 25 S - 5 70 . . . 200 1.00 . . . 2.60 blue
30006-12506 LVO 25 S - 6 250 . . . 500 3.50 . . . 6.30
30006-12507 LVO 25 S - 7 70 . . . 280 0.35 . . . 1.60 red
30006-12509 LVO 25 S - 9 74 . . . 284 0.70 . . . 3.00
Accessories for LVO 25 and special optics
Art.-No. Description
30006-33225 Protection glass
30006-32040 Screw cap incl. protection glass - very fast changeable
30006-32050 Screw cap incl. correction lens - very fast changeable (only LVA 25)
30006-32240 Cooling jacket with integrated air purge
30006-33122 Laser rejection filter 920 . . . 1100 nm
30006-32020 90° mirror
30006-32150 Mounting with retaining pin ∅10 mm
30006-32120 Ball and socket mounting
30006-32170 Mounting support, adjustable
30006-32220 Air purge unit
Accessories for LVO 35
Art.-No. Description
30006-33122 Laser rejection filter 920 . . . 1100 nm
30006-32010 90° mirror
30006-32160 Mounting with retaining pin ∅10 mm
30006-32130 Ball and socket mounting
30006-32230 Air purge unit
6 Pyroskop 840

3 Scope of Delivery / Accessories
Optical fiber
Art.-No. Description
30005-14015 Optical fiber 400 𝜇m, blue, stainless steel, 1.5 m
30005-14020 Optical fiber 400 𝜇m, blue, stainless steel, 2.0 m
30005-14025 Optical fiber 400 𝜇m, blue, stainless steel, 2.5 m
30005-14050 Optical fiber 400 𝜇m, blue, stainless steel, 5.0 m
30005-14075 Optical fiber 400 𝜇m, blue, stainless steel, 7.5 m
30005-14100 Optical fiber 400 𝜇m, blue, stainless steel, 10.0 m
30005-14150 Optical fiber 400 𝜇m, blue, stainless steel, 15.0 m
30005-14900 Extension optical fiber 400 𝜇m, blue, stainless steel, per meter
30005-04015 Optical fiber 400 𝜇m, blue, PTFE, 1.5 m
30005-04020 Optical fiber 400 𝜇m, blue, PTFE, 2.0 m
30005-04025 Optical fiber 400 𝜇m, blue, PTFE, 2.5 m
30005-04050 Optical fiber 400 𝜇m, blue, PTFE, 5.0 m
30005-04075 Optical fiber 400 𝜇m, blue, PTFE, 7.5 m
30005-04100 Optical fiber 400 𝜇m, blue, PTFE, 10.0 m
30005-04150 Optical fiber 400 𝜇m, blue, PTFE, 15.0 m
30005-04900 Extension optical fiber 400 𝜇m, blue, PTFE, per meter
30005-12015 Optical fiber 200 𝜇m, red, stainless steel, 1.5 m
30005-12020 Optical fiber 200 𝜇m, red, stainless steel, 2.0 m
30005-12025 Optical fiber 200 𝜇m, red, stainless steel, 2.5 m
30005-12050 Optical fiber 200 𝜇m, red, stainless steel, 5.0 m
30005-12075 Optical fiber 200 𝜇m, red, stainless steel, 7.5 m
30005-12100 Optical fiber 200 𝜇m, red, stainless steel, 10.0 m
30005-12150 Optical fiber 200 𝜇m, red, stainless steel, 15.0 m
30005-12900 Extension optical fiber 200 𝜇m, red, stainless steel, per meter
30005-02015 Optical fiber 200 𝜇m, red, PTFE, 1.5 m
30005-02020 Optical fiber 200 𝜇m, red, PTFE, 2.0 m
30005-02025 Optical fiber 200 𝜇m, red, PTFE, 2.5 m
30005-02050 Optical fiber 200 𝜇m, red, PTFE, 5.0 m
30005-02075 Optical fiber 200 𝜇m, red, PTFE, 7.5 m
30005-02100 Optical fiber 200 𝜇m, red, PTFE, 10.0 m
30005-02150 Optical fiber 200 𝜇m, red, PTFE, 15.0 m
30005-02900 Extension optical fiber 200 𝜇m, red, PTFE, per meter
30005-22020 Optical fiber with vacuum lead 200𝜇m, stainless steel, length in vacuum 1 m, outside 1 m
30005-24020 Optical fiber with vacuum lead 400𝜇m, stainless steel, length in vacuum 1 m, outside 1 m
On request we manufacture other customers specific optical fiber with vacuum lead.
Order information
Please send your orders for accessories to the following address. When ordering, please quote the type, the
name of the accessory part, and the quantity.
Service address
KLEIBER Infrared GmbH Phone: +49 (0)3671 / 527 20 - 0
Am Gewände 3 Fax: +49 (0)3671 / 527 20 - 12
Germany Internet: www.kleiberinfrared.com
Pyroskop 840 7

4 Technical Data
4 Technical Data
4.1 Properties
Measurement outlet analog 0 . . . 20 mA or 4 . . . 20 mA, maximum burden 500 Ω, galvanically sepa-
rated
Update rate of analog output 10 𝜇s (±5 ppm)
Resolution measurement
value
0.1 K
Interface Ethernet: 10/100 MBit, AES / RSA encryption configurable
RS 485: halfduplex, baud rate 3.0 MBd, galvanically separated, Line A
and B terminated with 120 Ω
Accuracy 0.75 % of measured value (at 25 °C , 𝜀= 1)
Reproducibility < 0.3 % of measured value (at 25 °C, 𝜀= 1)
Response time t95 10 𝜇s (internal acquisition, ±5 ppm), higher value configuable
Emissivity 𝜀Adjustable from 0.1 . . . 1 in 0.001 steps
Switching output Digital adjustable, short-circuit proof, short-circuit current
Input 2 pieces, function configurable (pilot light, measurement value marking,
control measurement value recording, storage measurement value clear,
max. 24 V, ULow < 0.8 V, UHigh > 15 V)
Display Configurable display (measurement value, value settings, live chart),
configuration menu
Optic Direct optics or fiber optics
Aiming device LED pilot light
Operating temperature Direct optics:
0 . . . +35
0 . . . +80 °C with water cooling
Fiber optics:
0 . . . +35 °C pyrometer
0 . . . +260 °C for fiber optics and optical fiber
Storage temperature -20 . . . +70 °C
Water cooling connection 2 Tube screw connector 0.25”only for direct optics
Cooling water Temperature 10 . . . 30 °C, pressure maximum 6 bar, flow rate at least 1
l/min
Relative humidity Non condensing conditions
Power supply 24 V DC ±10 %, 0.5 A
Degree of protection IP 54 according to DIN 40 050
CE marking According to EU regulations
Standard reference 2014/30/EU electromagnetic compatibility
2014/35/EU electrical equipment designed for use within certain voltage
limits
Length Direct optics: 180 mm + length optics, overall maximum 330 mm
Fiber optics: 199.5 mm (pyrometer)
Height 70 mm
Depth 70 mm
Weight Direct optics: about 1,200 g
Fiber optics: about 910 g
8 Pyroskop 840

4 Technical Data
4.2 Measurement ranges
Meas. range Spectral range
600 . . . 1,600 °C 0.85 . . . 1.05 𝜇m Pilot light has to switched off during the measurement,
as this may falsify the measurement result.
800 . . . 2,300 °C 0.85 . . . 1.05 𝜇m Pilot light has to switched off during the measurement,
as this may falsify the measurement result.
300 . . . 1,400 °C 1.58 . . . 1.80 𝜇m
500 . . . 2,500 °C 1.58 . . . 1.80 𝜇m
160 . . . 1,000 °C 1.58 . . . 2.20 𝜇m Only for pyrometers with direct optics
200 . . . 1,000 °C 1.58 . . . 2.20 𝜇m
400 . . . 1,300 °C 1.58 . . . 2.20 𝜇m
300 . . . 2,300 °C 2.00 . . . 2.20 𝜇m
400 . . . 3,000 °C 2.00 . . . 2.20 𝜇m
350 . . . 3,500 °C 2.00 . . . 2.20 𝜇m
Possible combinations between fiber optics and measurement ranges
Measuring range
LVO 25
LVO 35
LVA 25
LVO 25 S - 1
LVO 25 S - 2
LVO 25 S - 3
LVO 25 S - 4
LVO 25 S - 5
LVO 25 S - 6
LVO 25 S - 7
LVO 25 S - 9
600 . . . 1,600 °C X X - - - - - X X B-
800 . . . 2,300 °C X X X X - - X X X X -
300 . . . 1,400 °C X X BX- - B B X- -
500 . . . 2,500 °C X X X X -X X X X X -
200 . . . 1,000 °C X X X - - - BX X - -
300 . . . 2,300 °C X X X X - - X X X X -
400 . . . 1,300 °C X X X X -X X X X X -
400 . . . 3,000 °C X X X X X X X X X X X
350 . . . 3,500 °C X X X X X BX X X B B
Legend:
XStandard combination
BCombination possible with
higher effort / noise
- Combination not possible
Pyroskop 840 9

4 Technical Data
4.3 Drawing pyrometer
Display
12-pin
plug connection
4-pin
plug connection
4 buttons
Length tube, variable at vario optics, fix at macro optics
10
170
M 12 for retaining pin
Thread for cooling water tube screw connector
10
7070
Tube Ring nut
Figure 1: Drawing pyrometer with direct optics
Display
12-pin
plug connection
4-pin
plug connection
4 buttons
Connection optical fiber
10
170
M 12 for retaining pin
10
7070
19.5
Figure 2: Drawing pyrometer with fiber optics
10 Pyroskop 840

5 Technical Description
5.1 System Design / Principle of Operation
Figure 3 shows the basic structure of the pyrometer. The basic parts of a pyrometer are the lens, aperture,
filter detector, and the signal processing unit. The infrared radiation coming in from the object to be measured
is gathered by the lens. The aperture blocks unwanted rays at the edges. The filter permits only the desired
spectral range to enter. The rays then pass through to the detector which transforms the infrared radiation into
electric signals. These signals are then linearised in the signal processing unit and changed into a standard
output signal which can then be read in the display, and be used for process control.
Measuring object Lens Aperture Pilotlight Filter Detector Signal processing unit Pyrometer
Figure 3: Structure of the pyrometer with direct optics
Figure 4 shows the basic structure of the pyrometer with fiber optics and optical fiber. The infrared radiation
coming from the object is collected and focused by a fiber optics, that main parts are a lens and an aperture.
Via a optical fiber the infrared radiation is transmitted to the pyrometer. The further signal processing is analog
to the pyrometer with direct optics.
Measuring object Fiber optics Lens Aperture Optical fiber Lens Pilotlight Filter Detector Signal processing unit Pyrometer
Figure 4: Structure of the pyrometer with fiber optics
The operating elements as well as the connections / interfaces are located at the back of the pyrometer (see
Operating elements and cable connections (section 5.4) at page 16).
On the bottom of the pyrometer is a threaded hole for mounting the pyrometer and for pyrometers with direct
optics aslo coolant connections.
Pyroskop 840 11

5 Technical Description
5.2 Direct optics
5.2.1 Vario optics
The vario optics can be adjusted to the required measuring distance and allows small measuring fields for
various distances to the object being measured. The measurement object can be at an arbitrary distance, but
must be at least as large as the measuring field at that distance (see Setting the vario optics (section 5.2.3) at
page 13).
Maximum measuring distance
Minimum measuring distance
Variable length tube extraction (L)
Figure 5: Vario optics
5.2.2 Macro optics
The macro optics is a fixed optics for very small measuring fields, i.e. a certain measuring field diameter is
given for a certain measuring distance.
Fix measuring distance (D) Fix length tube extraction (L)
Figure 6: Macro optics
Spectal range 0.85 . . . 1.05 𝜇m, 1.58 . . . 1.80 𝜇m 1.58 . . . 2.20 𝜇m, 2.00 . . . 2.20 𝜇m
Dain mm 144 140
Lbin mm 144 150
Mcin mm 0.7 1.0
aDistance from optics front edge
bFix length tube extraction
cMeasuring field diameter
IMPORTANT:
The macro tube cannot be adjusted. The distances mentioned must be respected absolutely in order
to ensure the small measuring field.
12 Pyroskop 840

5 Technical Description
5.2.3 Setting the vario optics
Adjust the vario optic as follows:
1. If necessary switch on the pilot light.
2. Loosen the ring nut by turning it in a counter-clockwise direction.
3. Move the vario optic forwards and/or backwards, in order to adjust the pyrometer to the required measur-
ing distance.
Note: The size of the pilot light is identical to the size of the measuring field. The measuring field may
not be larger than the object to be measured at the adjusted distance!
4. After adjusting the measuring distance, lock the annular nut by turning it in a clockwise direction
XThe vario optic is thus adjusted to the required measuring distance.
Tube Ring nut
Figure 7: Setting vario optics
Dain mm 450 600 800 1,000 1,200 1,400 1,600 1,800 2,000 2,500 3,000
Mbin mm 2.5 4.0 6.0 8.0 10.5 11.5 13.0 14.0 15.0 20.0 28.0
aDistance from optics front edge
bMeasuring field diameter
Pyroskop 840 13

5 Technical Description
5.3 Fiber optics
5.3.1 Vario optics
The vario optics can be adjusted to the required measuring distance and allows small measuring fields for
various distances to the object being measured. The object being measured can be at an arbitrary distance,
but must be at least as large as the measuring field at that distance (see Setting the vario fiber optics (section
5.3.3) at page 15).
Optical fiber Ring nut Housing
Length L Maximum measuring distance
Minimum
measuring distance
Figure 8: Vario optics
5.3.2 Fixed optics
The fixed optics is a fixed optics for very small measuring fields, i.e. a certain measuring field diameter is given
for a certain measuring distance.
Optical fiber Ring nut Housing
Length L Measuring distance
Figure 9: Fixed optics
IMPORTANT:
The fixed optic cannot be adjusted. The distances mentioned must be respected absolutely in order to
ensure the small measuring field.
14 Pyroskop 840

5 Technical Description
5.3.3 Setting the vario fiber optics
Adjust the vario fiber optics as follows:
1. If necessary switch on the pilot light.
2. Loosen the ring nut by turning it in a counter-clockwise direction.
3. Hold the screw connector of the optical fiber and turn the housing until length L has been reached,
for the correspondingly measuring distance. Mentioned distances in the data sheet are essential to be
maintained.
4. After adjusting the measuring distance, lock the ring nut by turning it in a clockwise direction.
XThe vario optics is adjusted to the required measuring distance.
Optical fiber Ring nut Housing
Length L Maximum measuring distance
Minimum
measuring distance
Figure 10: Setting the fiber optics
Example (LVO 25)
aain mm 80 100 120 140 160 180 200 220 240 260 280 300
Mbin mm 1.6 1.8 2.0 2.2 2.4 2.6 2.8 3.1 3.4 3.7 4.0 4.3
Lcin mm 63.2 60.0 58.1 56.2 55.4 54.6 54.0 53.6 53.1 52.7 52.4 52.1
aMeasuring distance
bMeasuring field diameter
cLength
Pyroskop 840 15

5 Technical Description
5.4 Operating elements and cable connections
The operating elements and cable connections are located on the rear side of the device.
Display
12-pin
plug connection
4-pin
plug connection
4 buttons
Figure 11: Rear side pyrometer
Element Meaning
Display Configurable display for the current
measured value, pyrometer status
and settings.
Button Switch on / off the pilot light
Back / abort in configuration menu
Button , Element and value selection in con-
figuration menu
Button Open configuration menu
Confirm element and value selection
12-pin plug connection For connecting power supply, current
output, RS 485, switch contact and in-
puts
4-pin plug connection Ethernet cable connection
5.5 Connection for 4-pole connecting cable (Ethernet)
The 4-pole flange plug for the 4 pole ethernet connection cable is located on the device rear side. The contacts
are arranged as follows:
1 2
4 3
Figure 12: Connection Ethernet
Contact Color cable core (EIA
T568B)
Meaning Pin RJ 45
1 White / orange TD+ 1
2 Orange TD- 2
3 White / green RD+ 3
4 Green RD- 6
5.6 Connection for 12-pole connecting cable
The 12-pole flange receptacle for the 12 pole connection cable is located on the device rear side. The contacts
are arranged as follows:
D E F M GH
CB L A K J
Figure 13: Connection 12-pole
cable
Contact Color cable
core
Meaning
K White +24 V supply voltage
A Brown 0 V supply voltage
L Green Analog output 0 / 4 . . . 20 mA +
B Yellow Analog output 0 / 4 . . . 20 mA -
H Grey Digital input 1 0 . . . 24 V
J Pink Digital input 2 0 . . . 24 V
G Red Digital output 0 . . . 24 V
F Black RS 485 - A
D Grey / pink RS 485 - B
E Red / blue RS 485 - GND
M Orange PE
C Violet not used
16 Pyroskop 840
Table of contents
Languages:
Other KLEIBER Measuring Instrument manuals