Klus LOKOM User manual

www.KlusDesign.pl 1
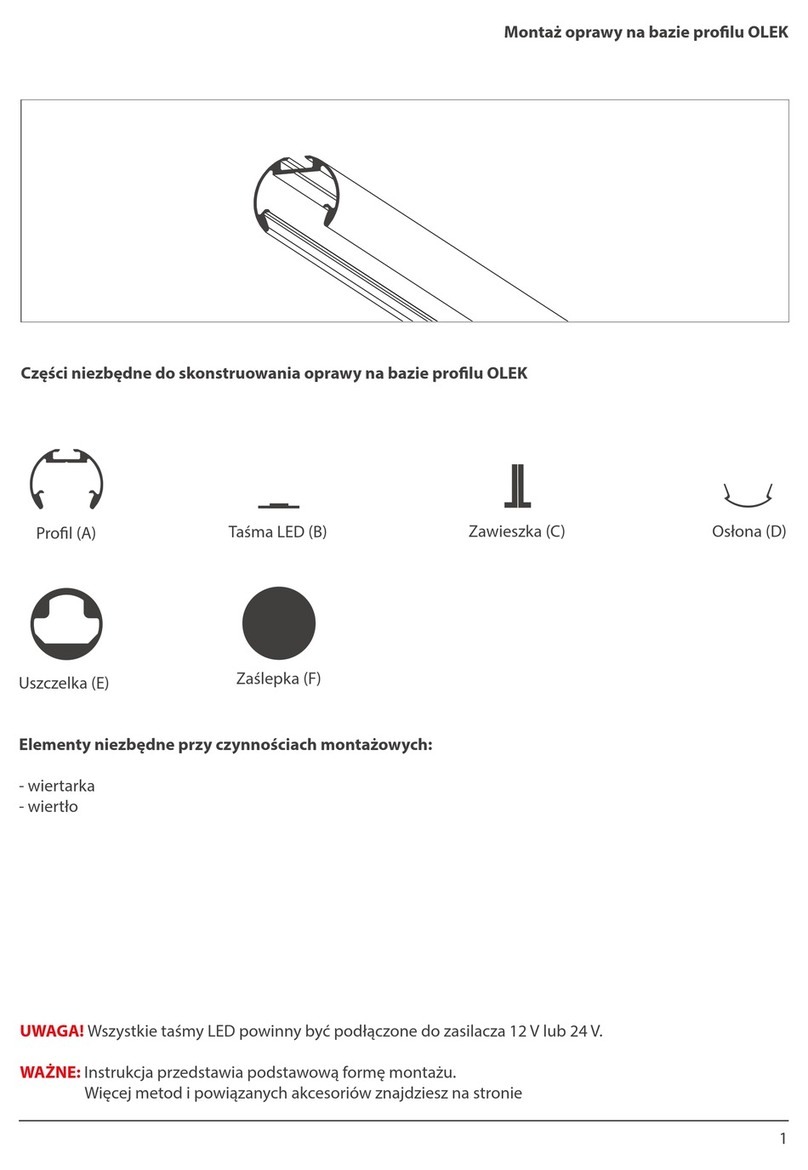
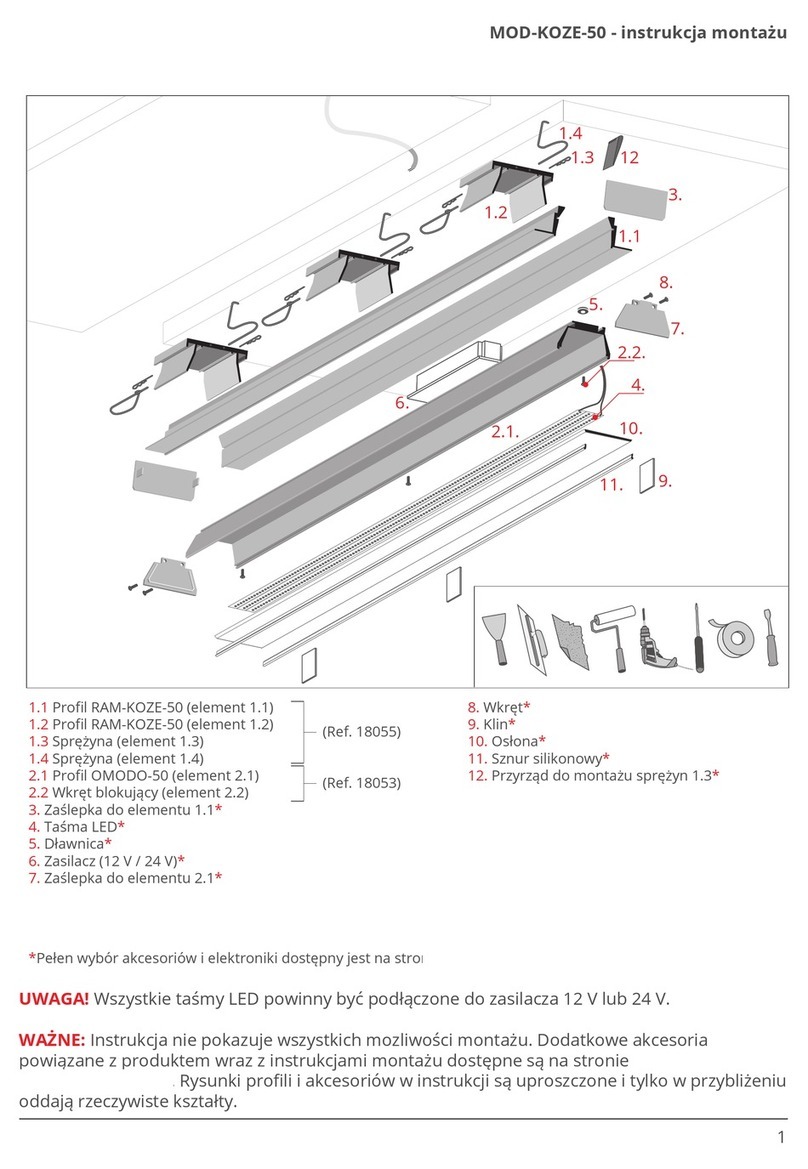
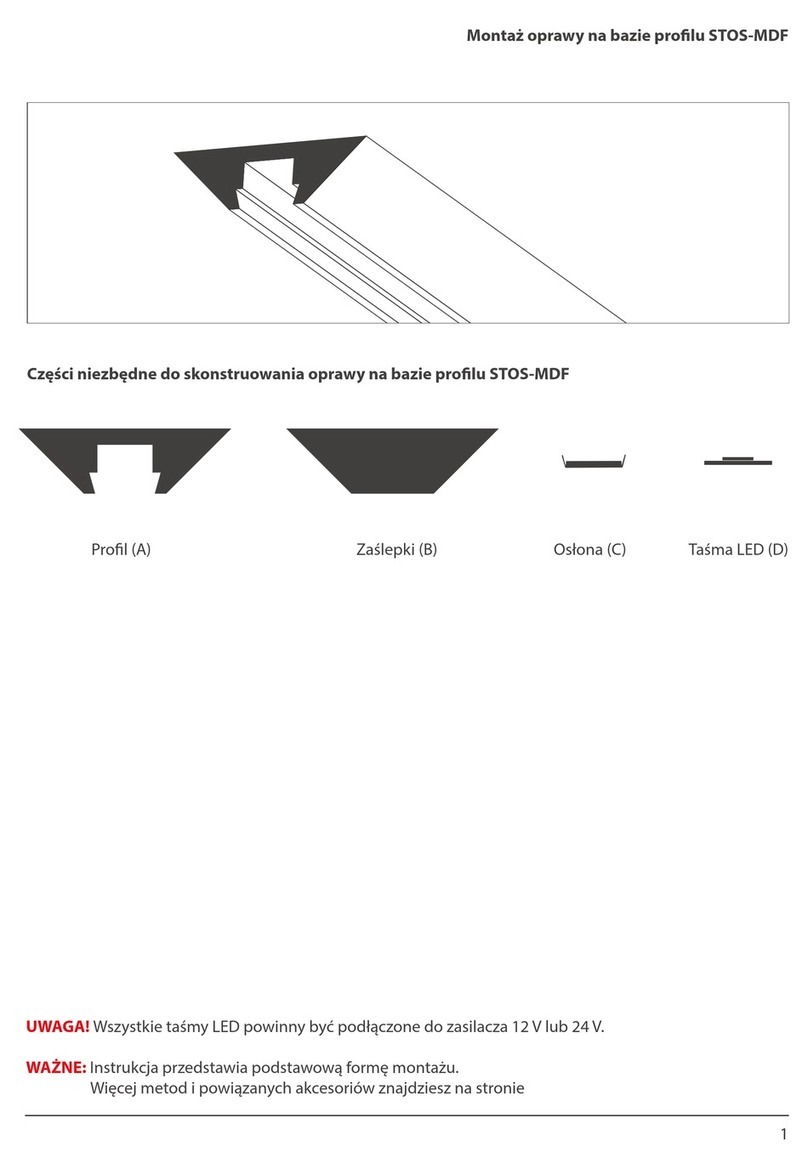
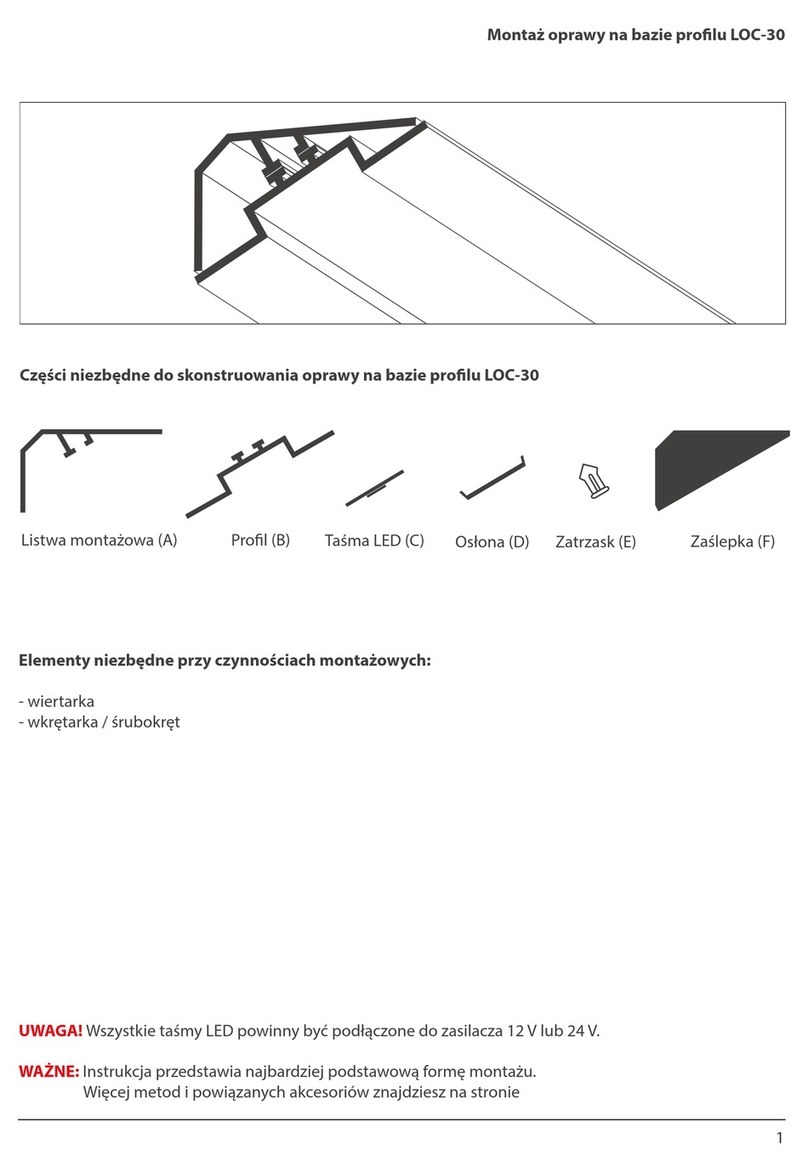
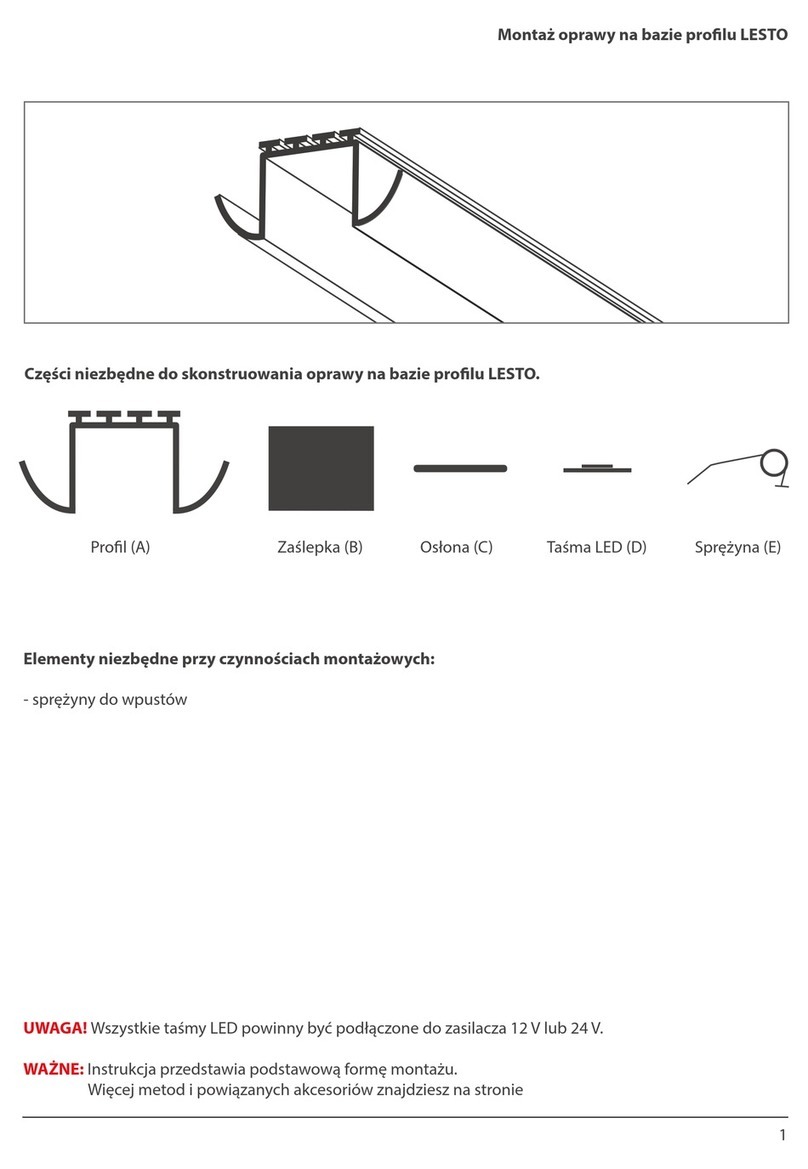
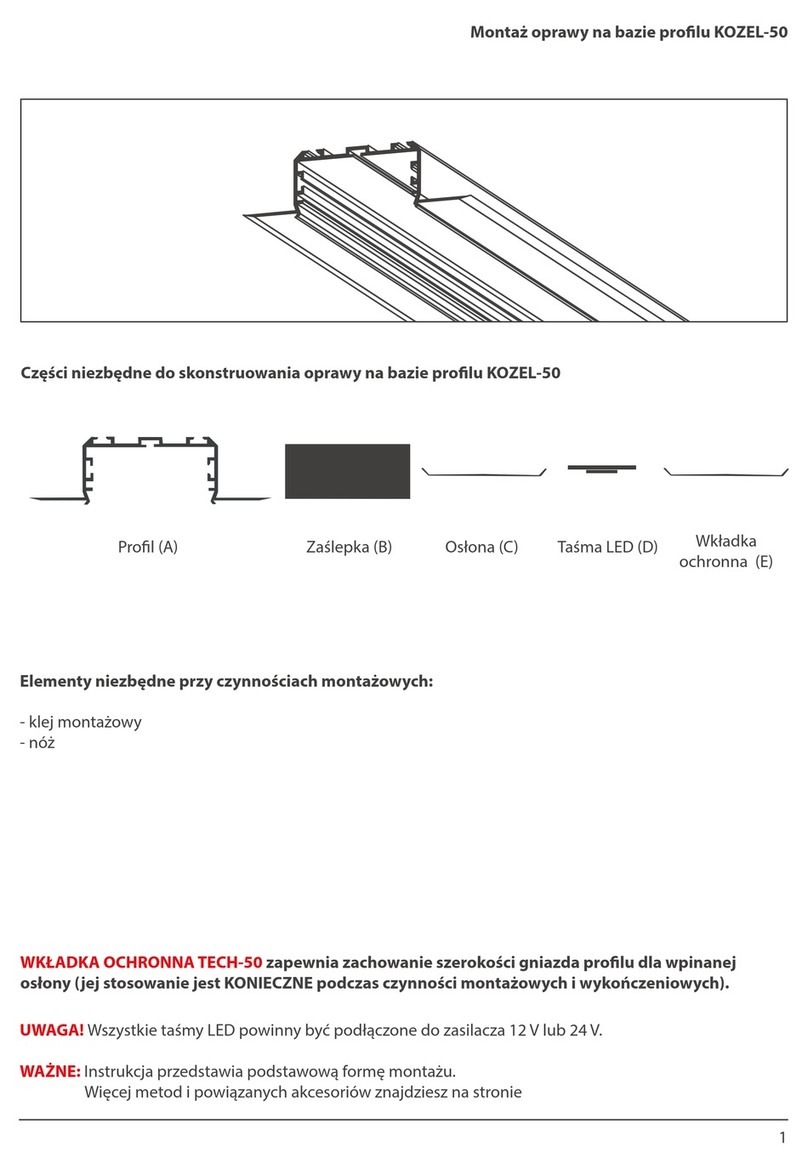
Części niezbędne do skonstruowania oprawy na bazie profilu LOKOM
Elementy niezbędne przy czynnościach montażowych:
- wiertarka
- wkrętarka/śrubokręt
UWAGA! Wszystkie taśmy LED powinny być podłączone do zasilacza 12 V lub 24 V.
WAŻNE: Instrukcja przedstawia podstawową formę montażu.
Więcej metod i powiązanych akcesoriów znajdziesz na stronie klusdesign.pl
Zaślepka (B) Zaślepka techniczna (D)
Profil (A)
Taśma LED (E) Osłona (F) Zatrzask (G)
Montaż oprawy na bazie profilu LOKOM
Listwa montażowa (C)

B
C
2
www.KlusDesign.pl
Montaż oprawy na bazie profilu LOKOM
1.Wykonaj otwory w profilu (A) i listwie technicznej (C) na przewód zasilający.
3. Załóż zatrzask (G) do profilu (A).
5. Podłącz zasilanie i umieść profil (A) w listwie montażowej (C).
4.Wklej taśmę LED (E), umieść osłonę (F), załóż zaślepkę (B).
2. Załóż zaślepkę (D) na listwe montażową (C), a następnie zamontuj profil
na miejsce i wkręć wkręty.
F
B
A
E
C
A
A
G
C
A
Powered by TCPDF (www.tcpdf.org)

1
Parts needed to mount the LOKOM extrusion
Tools needed for mounting:
- drill
- screwdriver
End cap (B) Technical end cap (D)
Extrusion (A)
LED strip (E) Cover (F) Clip (G)
LOKOM mounting instructions
Mounting strip (C)
www.KlusDesign.eu
WARNING! All LED strips should be connected to a 12 V or 24 V power supply.
IMPORTANT: The mounting instructions present the basic form of assembly.
More methods and related accessories can be found at www.KlusDesign.eu

B
C
2
LOKOM mounting instructions
1. Drill holes in the extrusion (A) and mounting strip (C) for the power cable.
3. Insert the clips (G) into the extrusion (A).
5. Connect power and mount the extrusion (A) in the mounting strip (C).
4. Mount the LED strip (E), insert the cover (F), insert the end cap (B).
2. Insert the end cap (D) into the mounting strip (C), and tghen mount the
strip with screws.
F
B
A
E
C
A
A
G
C
A
www.KlusDesign.eu
Powered by TCPDF (www.tcpdf.org)

05-502 Piaseczno - Kamionka, ul. Świerkowa 6, Poland / zamowienia@klus.com.pl / tel. +48 22 757 40 51; +48 22757 53 38
Uprzejmie informujemy o zastrzeżeniu sobie prawa do zmian asortymentowych i modyfikacji produktów.
We reserve the right to change and modify our products.
www.KlusDesign.eu
3
5
2
1
4
2
Oprawa / Fixture
LOKOM
Podstawowe elementy oprawy / Basic fixture components
24005
17011 17022 17032 17042 00413 17006 17007 00415HS 22 HS 22 LIGER 22 MUN 22 G-L G-L G-K G-K
24103
1. prol LOKOM / LOKOM prole
2. zaślepka / end cap
3. osłonka / cover
4. pasek LED (nie w komplecie) / LED strip (not included)
5. prol TEKNIK / TEKNIK prole
24002
LOKOM LOKOM MET TEKNIK

05-502 Piaseczno - Kamionka, ul. Świerkowa 6, Poland / zamowienia@klus.com.pl / tel. +48 22 757 40 51; +48 22757 53 38
Uprzejmie informujemy o zastrzeżeniu sobie prawa do zmian asortymentowych i modyfikacji produktów.
We reserve the right to change and modify our products.
www.KlusDesign.eu
Schemat zasilania / Wiring diagram
UWAGA:
- Pasków LED nie należy przesadnie zaginać.
- Podczas naklejania pasków należy unikać wybrzuszeń.
- Powierzchnia powinna być gładka, bez ostrych krawędzi. Przed naklejeniem paska LED powierzchnię należy odpowiednio oczyścić.
NOTE:
- LED Strips should not be excessively bend.
- When laying LED strips to surface avoid ripples.
- The surface should be smooth, without sharp edges. Before applying the LED strip surface should be clean.
Montaż pasków LED / Installation of LED strips
opcje łączenia przewodów
fixture cable options
230 V AC
12V or 24V
Oprawa / Fixture
LOKOM

05-502 Piaseczno - Kamionka, ul. Świerkowa 6, Poland / zamowienia@klus.com.pl / tel. +48 22 757 40 51; +48 22757 53 38
Uprzejmie informujemy o zastrzeżeniu sobie prawa do zmian asortymentowych i modyfikacji produktów.
We reserve the right to change and modify our products.
www.KlusDesign.eu
Instrukcja montażu / Mounting Instruction
230 V AC
12 V or 24V
1.
2.
3.
Montaż profilu z użyciem struktury sufitu /
Mounting the profile with the support
structure of the ceiling
do źródła zasilania /
for power supply
płyta gipsowo-kartonowa / drywall
0.625” (15.87mm)
zaślepka TEKNIK /
TEKNIK end cap
24003
Montaż opraw LOKOM i TEKNIK do karton gipsu przy pomocy oprawy montażowej TEKNIK /
Mounting LOKOM and TEKNIKextrusions to drywall with the use of the TEKNIK mounting extrusion

05-502 Piaseczno - Kamionka, ul. Świerkowa 6, Poland / zamowienia@klus.com.pl / tel. +48 22 757 40 51; +48 22757 53 38
Uprzejmie informujemy o zastrzeżeniu sobie prawa do zmian asortymentowych i modyfikacji produktów.
We reserve the right to change and modify our products.
www.KlusDesign.eu
Instrukcja montażu / Mounting Instruction
5.
4.
a. przed malowaniem należy zabezpieczyć profil np. polistyrenem /
before painting, protect the profile for ex. with polystyrene
b. wycztść krawędzie profilu papierem ściernym /
clean edge of profile with sandpaper
a.
b.
zatrzask TEKNIK/
TEKNIK clip
6.
widok z góry/
view from above
*opcje łączenia przewodów/
fixture cable options

05-502 Piaseczno - Kamionka, ul. Świerkowa 6, Poland / zamowienia@klus.com.pl / tel. +48 22 757 40 51; +48 22757 53 38
Uprzejmie informujemy o zastrzeżeniu sobie prawa do zmian asortymentowych i modyfikacji produktów.
We reserve the right to change and modify our products.
www.KlusDesign.eu
Deklaracja zgodności
Niniejszy produkt spełnia wymagania następujących Dyrektyw Unii Europejskiej:
- Dyrektywa RoHS (2011/65/EU)
Producent zaleca, czyszczenie miękką, wilgotną szmatką.
Nie ponosimy odpowiedzialności za szkody powstałe wskutek nieprawidłowego montażu.
Zastrzegamy sobie prawo do zmian w konstrukcji produktu.
Declaration of conformity
The product meet the requirements of the following directives of the European Union:
- Restriction of Hazardous Substances RoHS (2011/65/EU)
Use a damp cloth, never a strong cleaning agent.
We shall assume no liability for damages resulting from wrong installation.
We reserve the right to make changes in the product design.

Uprzejmie informujemy o zastrzeżeniu sobie prawa do zmian asortymentowych i modyfikacji produktów.
We reserve the right to change and modify our products.
3
5
2
1
4
2
Oprawa / Fixture
LOKOM
Podstawowe elementy oprawy / Basic fixture components
24005
17011 17022 17032 17042 00413 17006 17007 00415HS 22 HS 22 LIGER 22 MUN 22 G-L G-L G-K G-K
24103
1. prol LOKOM / LOKOM prole
2. zaślepka / end cap
3. osłonka / cover
4. pasek LED (nie w komplecie) / LED strip (not included)
5. prol TEKNIK / TEKNIK prole
24002
LOKOM LOKOM MET TEKNIK

Uprzejmie informujemy o zastrzeżeniu sobie prawa do zmian asortymentowych i modyfikacji produktów.
We reserve the right to change and modify our products.
Schemat zasilania / Wiring diagram
UWAGA:
- Pasków LED nie należy przesadnie zaginać.
- Podczas naklejania pasków należy unikać wybrzuszeń.
- Powierzchnia powinna być gładka, bez ostrych krawędzi. Przed naklejeniem paska LED powierzchnię należy odpowiednio oczyścić.
NOTE:
- LED Strips should not be excessively bend.
- When laying LED strips to surface avoid ripples.
- The surface should be smooth, without sharp edges. Before applying the LED strip surface should be clean.
Montaż pasków LED / Installation of LED strips
opcje łączenia przewodów
fixture cable options
230 V AC
12V or 24V
Oprawa / Fixture
LOKOM

Uprzejmie informujemy o zastrzeżeniu sobie prawa do zmian asortymentowych i modyfikacji produktów.
We reserve the right to change and modify our products.
Instrukcja montażu / Mounting Instruction
230 V AC
12 V or 24V
1.
2.
3.
Montaż profilu z użyciem struktury sufitu /
Mounting the profile with the support
structure of the ceiling
do źródła zasilania /
for power supply
płyta gipsowo-kartonowa / drywall
0.625” (15.87mm)
zaślepka TEKNIK /
TEKNIK end cap
24003
Montaż opraw LOKOM i TEKNIK do karton gipsu przy pomocy oprawy montażowej TEKNIK /
Mounting LOKOM and TEKNIKextrusions to drywall with the use of the TEKNIK mounting extrusion

Uprzejmie informujemy o zastrzeżeniu sobie prawa do zmian asortymentowych i modyfikacji produktów.
We reserve the right to change and modify our products.
Instrukcja montażu / Mounting Instruction
5.
4.
a. przed malowaniem należy zabezpieczyć profil np. polistyrenem /
before painting, protect the profile for ex. with polystyrene
b. wycztść krawędzie profilu papierem ściernym /
clean edge of profile with sandpaper
a.
b.
zatrzask TEKNIK/
TEKNIK clip
6.
widok z góry/
view from above
*opcje łączenia przewodów/
fixture cable options

Uprzejmie informujemy o zastrzeżeniu sobie prawa do zmian asortymentowych i modyfikacji produktów.
We reserve the right to change and modify our products.
Deklaracja zgodności
Niniejszy produkt spełnia wymagania następujących Dyrektyw Unii Europejskiej:
- Dyrektywa RoHS (2011/65/EU)
Producent zaleca, czyszczenie miękką, wilgotną szmatką.
Nie ponosimy odpowiedzialności za szkody powstałe wskutek nieprawidłowego montażu.
Zastrzegamy sobie prawo do zmian w konstrukcji produktu.
Declaration of conformity
The product meet the requirements of the following directives of the European Union:
- Restriction of Hazardous Substances RoHS (2011/65/EU)
Use a damp cloth, never a strong cleaning agent.
We shall assume no liability for damages resulting from wrong installation.
We reserve the right to make changes in the product design.
Powered by TCPDF (www.tcpdf.org)
This manual suits for next models
1
Table of contents
Languages:
Other Klus Light Fixture manuals
Popular Light Fixture manuals by other brands

PR Lighting
PR Lighting XR330 BWS user manual

LDPI
LDPI LEXF Installation, operation and maintenance instructions

Lightolier
Lightolier 40600H1 Instructions for installation

festilight
festilight 61453-B9 instruction sheet

Maximum
Maximum 037-2432-4 instruction manual

Fanimation
Fanimation SF120 instruction sheet