manuals.online logo
Brands
  1. Home
  2. •
  3. Brands
  4. •
  5. Knape&Vogt
  6. •
  7. Indoor Furnishing
  8. •
  9. Knape&Vogt 5700 User manual

Knape&Vogt 5700 User manual

Ergonomics
OL2041/0308
83
800.253.1561
www.kv.com
KV Pack Availability Code
Stock Item
Special Order
5700/5710 Keyboard Trays
Number 5700
5710
Mounting Brackets Mount In Outboard Position Under Work Surface For Application Widths
24"or Greater, and In The Inboard Position For Widths Less Than 24"
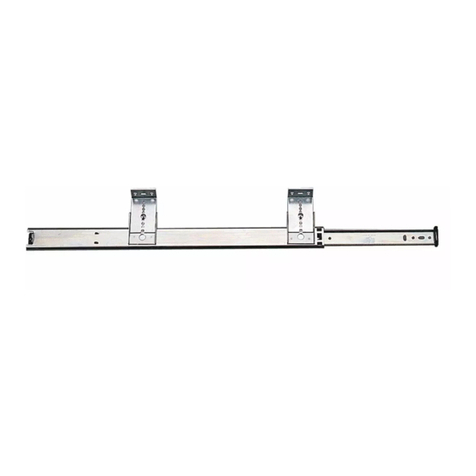
Action Precision Steel Ball Bearing Slide Assembly
Size 21-3/4" x 18" Tray Size
Load Rating 75-Pound Class (BHMA, KCMA, and BIFMA Applications)
Height 5700 Adjustable - 7 Positions From 2-11/32" To 3-11/16"
5710 Adjustable - 7 Positions From 2-19/32" To 4-1/4"
Clearance Fits 24" Wide Knee Space Under Desk or Other Work Surface
Finish Black (BLK)
Features
• Integral, adjustable wrist rest
• Adjustabledropheight
• Frictionlatchinopenposition
•Mousetrayopenstoeitherleftor right side
5700
5710
5700
5710
Mouse Tray opens to
either left or right side.
5700 Keyboard Tray
21 3/4"
8 1/2"
21 3/4"
Screw
Approx. 3/16"
Front Edge of Surface
2.38
3.25 Max.
Overall Width
*
21.75
*
Excluding Screw Heads
20.5
Brackets Inward
23.88
Overall Width
22.75
Brackets Outward
Front Edge of Surface
9.5
Mounting Template
1. Align with edge of surface.
2. Tape in place.
3. Drill pilot hole in either inward or
outward position, as desired.
Rear of Keyboard
Front Edge of Surface Front Edge of SurfaceFront of Keyboard
3) Keep rear (side-to-side) slot empty
for later adjustment if needed.
2) Then install screw in center (front-to-rear) slot.
1) Install screw in front (side-to-side) slot first.
Carton should contain the Keyboard Tray Subassembly and a Hardware Kit consisting of:
4 – #8 x 1/4" self tapping screws 4 – Adjustable mounting brackets with
7-position slots.
8 – #8 x 5/8" mounting screws
Keyboard Tray Assembly, Mounting and
Installation Instructions
Step 1. Keyboard Preparation (Optional).
It is recommended, but is not req u ir e d,
to disassemble the slides from the tray
for easier installation. This is easily done
by first depressing the plastic lever as
shown in Fig ure 1 and then pulling the
slide members apart. Repeat for other
sl i de .
Step 2. Determine Mounting Direction.
Me a s u r e mounting location to deter-
mine if the mounting brackets should
face inwards or outwards. If width is
less than 24 inches the brackets mu s t
face inward. If the mounting location is
24 inches or great e r, the brackets may
face either dire c ti o n .
Step 3. Determine Drop Height.
A. Measure the maximum height of
the keyboard that you will be
using. Compare keyboard height
with the adjustment heights in
Chart A to determine at which
height position the mounting
brackets need to be installed.
B. Alternatively, you may use Chart B
and Figure2to determine what
height is desired to allow a knee
clearance or chair clearance,
underneath the keyboard after
installation.
Step 4. Assemble Brackets.
Attach mounting brackets to the slide
cabinet member, in the direction (step
1) and position (step 2 a or b), using
the #8 x 1/4" self tapping screws pro-
vided in hardware kit.
Step 5. Surface Preparation.
Depending on whether the bracket
direction is inward or outward…
A. …Use the dimensions provided
on this sheet to layout the hole
locations on the surface before
drilling…
B. …Or tape this sheet in the desired
position and use it as a template,
drilling holes through the target
locations.
Drill 4 pilot holes, for #8 x 5/8" scre w s ,
into the underside of the surf a c e .
Step 6. Mounting.
Attach the slide cabinet members to
the underside of the surface, using
#8 x 5/8" screws provided in the hard-
w a re kit. For now, only put screws in
the front side-to-side slotted holes.
Step 7. Installation.
With the slides mounted, first pull the
ball bearings to the front end. Then
insert the keyboard tray subassembly
into the slides and push tray com-
pletely to closed position as shown in
Figure 4. (It is normal to encounter
some resistant force when inserting
the tray and closing it for the first
time, as the ball bearings must skid
into place the last 25% of the travel.)
Step 8. Adjustment.
Open and close the keyboard slowly.
Check that nothing is binding and that
the tray latches in the open position.
(The latch is to hold the tray station-
a r y during typing. To close the tray,
just push.)
Ca r efully loosen screws in surface
and adjust slides as needed. Ti g h t e n
s c rew s securely and add additional
s c rew s through the center fro n t - t o -
rear slotted holes to lock the tray in
its final position.
Step 9. Operation.
The keyboard tray is now ready for
use. Place your keyboard on the tray
and adjust the palm rest to your
de si red position, as shown in F i g u re5.
Figure 2.
Figure 1.
Chart AMax. Keyboard Height (inches)
Position 1 3.60
Position 2 3.38
Position 3 3.15
Position 4 2.93
Position 5 2.70
Position 6 2.48
Position 7 2.25
Chart B Height Loss Under Surface (inches)
Position 1 3.78
Position 2 3.56
Position 3 3.33
Position 4 3.11
Position 5 2.88
Position 6 2.66
Position 7 2.43
Desk Top
Floor
Desired
Clearance
Height From
Floor To
Underneath
Surface
Height Loss
19"
Align And
Insert Tray Pull
Forward
Figure 3.
Align And
Insert Tray Pull
Forward
Figure 4.
2
1345
Figure 5.
Gently squeeze palm rest
and adjust height as desired.
Move palm rest to notch
that provides the most
comfortable position.
5700 300721/595

This manual suits for next models

1

Other Knape&Vogt Indoor Furnishing manuals

Knape&Vogt MUB-11-R-FN User manual

Knape&Vogt

Knape&Vogt MUB-11-R-FN User manual

Knape&Vogt APPLIANCE LIFT User manual

Knape&Vogt

Knape&Vogt APPLIANCE LIFT User manual

Knape&Vogt KIDNEY-SHAPED LAZY SUSAN DRAWER SYSTEM User manual

Knape&Vogt

Knape&Vogt KIDNEY-SHAPED LAZY SUSAN DRAWER SYSTEM User manual

Knape&Vogt TSC15-1-35 User manual

Knape&Vogt

Knape&Vogt TSC15-1-35 User manual

Knape&Vogt Simply Put SP-MUBSC-11-FN User manual

Knape&Vogt

Knape&Vogt Simply Put SP-MUBSC-11-FN User manual

Knape&Vogt TO1710 User manual

Knape&Vogt

Knape&Vogt TO1710 User manual

Knape&Vogt FR28STM User manual

Knape&Vogt

Knape&Vogt FR28STM User manual

Knape&Vogt 8150 User manual

Knape&Vogt

Knape&Vogt 8150 User manual

Knape&Vogt Shelf-Made 0140-24BK User manual

Knape&Vogt

Knape&Vogt Shelf-Made 0140-24BK User manual

Knape&Vogt MUV 22 User manual

Knape&Vogt

Knape&Vogt MUV 22 User manual

Knape&Vogt BBCT-L-15 User manual

Knape&Vogt

Knape&Vogt BBCT-L-15 User manual

Knape&Vogt Smart Slide Full Fit Power User manual

Knape&Vogt

Knape&Vogt Smart Slide Full Fit Power User manual

Knape&Vogt SDG-1088 User manual

Knape&Vogt

Knape&Vogt SDG-1088 User manual

Knape&Vogt COS 15 User manual

Knape&Vogt

Knape&Vogt COS 15 User manual

Knape&Vogt STACKKIT-R-BLK User manual

Knape&Vogt

Knape&Vogt STACKKIT-R-BLK User manual

Knape&Vogt LAZY SUSAN User manual

Knape&Vogt

Knape&Vogt LAZY SUSAN User manual

Knape&Vogt PDMTM12-1-35 User manual

Knape&Vogt

Knape&Vogt PDMTM12-1-35 User manual

Knape&Vogt TOP & BOTTOM MOUNTING WIRE FULL ROUND LAZY... User manual

Knape&Vogt

Knape&Vogt TOP & BOTTOM MOUNTING WIRE FULL ROUND LAZY... User manual

Knape&Vogt 8805 User manual

Knape&Vogt

Knape&Vogt 8805 User manual

Knape&Vogt WUSC12-1-35PT User manual

Knape&Vogt

Knape&Vogt WUSC12-1-35PT User manual

Knape&Vogt Door Mount Polymer Lazy Susan User manual

Knape&Vogt

Knape&Vogt Door Mount Polymer Lazy Susan User manual

Knape&Vogt Side-Mount Pantry Roll-Out User manual

Knape&Vogt

Knape&Vogt Side-Mount Pantry Roll-Out User manual

Knape&Vogt Closet Culture 0300-KITA-2CN User manual

Knape&Vogt

Knape&Vogt Closet Culture 0300-KITA-2CN User manual

Knape&Vogt Shelf-Mate 244-BK User manual

Knape&Vogt

Knape&Vogt Shelf-Mate 244-BK User manual

Popular Indoor Furnishing manuals by other brands

Classen S60_PI Assembly and installation instructions

Classen

Classen S60_PI Assembly and installation instructions

Prodigg V-803100 quick start guide

Prodigg

Prodigg V-803100 quick start guide

Birlea CORONA 2 DOOR 5 DRW SIDEBOARD Assembly instructions

Birlea

Birlea CORONA 2 DOOR 5 DRW SIDEBOARD Assembly instructions

OSP Home Furnishings JULIETTE JUL789V-WH Assembly instructions

OSP Home Furnishings

OSP Home Furnishings JULIETTE JUL789V-WH Assembly instructions

Essential Home 0-08612933-5 owner's manual

Essential Home

Essential Home 0-08612933-5 owner's manual

AFi FR-PDA-STO Assembly instructions

AFi

AFi FR-PDA-STO Assembly instructions

Martha Stewart CALIFORNIA CLOSETS installation manual

Martha Stewart

Martha Stewart CALIFORNIA CLOSETS installation manual

Kvik U841,090 manual

Kvik

Kvik U841,090 manual

Twin-Star International 36BV34004 manual

Twin-Star International

Twin-Star International 36BV34004 manual

Dorel Asia DA94490-SF Instruction booklet

Dorel Asia

Dorel Asia DA94490-SF Instruction booklet

Manutti Zendo Sense instruction manual

Manutti

Manutti Zendo Sense instruction manual

Julian Bowen Limited SAN106 Assembly instructions

Julian Bowen Limited

Julian Bowen Limited SAN106 Assembly instructions

Kettler CHAIR 2566 Assembly instructions

Kettler

Kettler CHAIR 2566 Assembly instructions

Forte RVSB01 Assembling Instruction

Forte

Forte RVSB01 Assembling Instruction

Easylife 2803 instruction manual

Easylife

Easylife 2803 instruction manual

Balt 34419R 34450 Assembly instructions

Balt

Balt 34419R 34450 Assembly instructions

ROOMS TO GO 76411215 Assembly instructions

ROOMS TO GO

ROOMS TO GO 76411215 Assembly instructions

Coaster 461080 Assembly instructions

Coaster

Coaster 461080 Assembly instructions

manuals.online logo
manuals.online logoBrands
  • About & Mission
  • Contact us
  • Privacy Policy
  • Terms and Conditions

Copyright 2025 Manuals.Online. All Rights Reserved.