manuals.online logo
Brands
  1. Home
  2. •
  3. Brands
  4. •
  5. KNOBLOCH
  6. •
  7. Outdoor Furnishing
  8. •
  9. KNOBLOCH KNOBOX User manual

KNOBLOCH KNOBOX User manual

38841-005
MONTAGEANLEITUNG / MOUNTING INSTRUCTIONS
Paketbriefkasten KNOBOX
Parcel mailbox KNOBOX
MONTAGE / MOUNTING
Zur einfacheren Darstellung sind die Türen des Paketkastens nicht abgebildet.
For simplicity of presentation, the doors of the parcel box are not shown.
ALLGEMEINE HINWEISE / GENERAL INFORMATION
Bitte überprüfen Sie die Lieferung vor Beginn der Montage auf Vollständigkeit und einwandfreien Zustand. Bitte beachten Sie: Die Wahl
von geeignetem Montagezubehör für die Befestigung des Sockels mit dem Fundament ist vom Untergrund abhängig und ist nicht Teil des
Lieferumfangs. Fragen Sie bei Bedarf in einem Baumarkt Ihrer Wahl nach geeignetem Befestigungsmaterial speziell für Ihre Bausituation. Die
Paketkasten-Variante mit Funktionskasten ist mit Sicherheitsschrauben ausgestattet, welche nur mit dem Spezialbit Resis-TX 20 gelöst werden
können. / Upon receipt of the delivery and before installation start the contents of the consignment must be checked for any deficiency, transport
damage or any other visible defects. Please note: mounting accessories to attach the base to a foundation are not part of the delivery contents as
dierent foundations require dierent fittings. If in doubt please ask for advice in the DIY market of your choice. The parcel box version with function
box is equipped with safety screws which can only be loosened with the special bit Resis-TX.
WAS SIE ZUR MONTAGE NOCH BENÖTIGEN / TOOLS REQUIRED FOR MOUNTING
Maul- oder Ringschlüssel
Größe 10 / Wrench or ring
spanner size 10
TIPP! Türen selbst ganz einfach ausrichten! / HINT! Align doors yourself very easily!
Durch den Transport und bei der Montage können sich die Briefkastentüren geringfügig verschieben. Bei Bedarf sind diese ganz einfach durch das
Lösen der Muttern an den Scharnieren, das Ausrichten der Tür und anschließendes Festziehen der Muttern wieder in den korrekten Ausgangs-
zustand zu bringen. / During transport and installation, mailbox doors may move slightly. If necessary, these can be easily restored to their correct
initial position by simply loosening the nuts on the hinges, aligning the door and then tightening the nuts.
1
Lochbild (Angaben in mm)/hole pattern (figures in mm)
Bereiten Sie gemäß der benötigten Maße das
Fundament für den Paketkasten vor. Achten
Sie darauf, dass der Austritt der Netzzuleitung
aus dem Sockel mittig liegt, sodass diese
problemlos durch die Önung des Sockels
geführt werden kann. / Prepare the foundation
for the parcel box according to the required
dimensions, position and fix the base on the
foundation. Make sure that the exit of the pow-
er cord from the base is centered so that it can
be easily fed through the opening of the base.
250
min. 600
400
240
min. 569
369
ø 14
Fundament /
Foundation
Sockel /
Base
400
min. 750
550
240
min. 569
369
ø 14
Fundament /
Foundation
Sockel /
Base
XL-Ausführung / XL version
Vorbereitung des Fundaments / foundation preparation
Paketkästen mit Funktionskasten:
Spezialbit Resis-TX 20
Special Resis-TX bit 20
Für die Befestigung des Sockels auf dem
Fundament benötigen Sie — abhängig vom
gewählten Befestigungsmaterial — weiteres
Werkzeug wie bspw. eine Bohrmaschine. /
Depending on the selected fastening material,
you will need additional tools such as a drill for
fastening the base to the foundation.
Modell-, Programm- und technische Änderungen sowie Irrtümer vorbehalten. Alle Inhalte sind urheberrechtlich geschützt.
Model, program and technical changes are subject to change. All contents are protected by copyright.
Max Knobloch Nachf. GmbH, Hermann-Otto-Schmidt-Straße 4, 04720 Döbeln / Germany
Telefon: +49 3431 6064-200 | Fax: +49 3431 6064-209 | E-Mail: [email protected]om
www.max-knobloch.com |fb.com/knobloch1869
Paketkästen mit Funktionskasten:
Zum Abschluss wird die Elektrik durch
entsprechend qualifiziertes Fachperso-
nal angeschlossen. Hierfür müssen die
Sicherheitsschrauben des Funktions-
kastens mit dem Spezialbit Resis-TX 20
gelöst werden. Danach ziehen Sie die
Netzzuleitung mit Hilfe des Fädeldrahts
durch das Leerrohr in den Funktions-
kasten. / Finally, the electrical system
is connected by appropriately qualified
personnel. For this purpose, the safety
screws of the function box must be
opened with the special Resis-TX bit.
Next pull the power supply line through
the cable conduit into the function box
using the thread wire.
5
Setzen Sie den Paketkasten auf den be-
festigten Sockel und verschrauben Sie
den Kastenboden mit den in Schritt 2
entfernten Schrauben. Nicht vergessen:
Führen Sie das Kabel-Leerrohr wieder
durch die Seitenönung des befestigten
Sockels und befestigen Sie die aus dem
Fundament herausragende Netzzu-
leitung am Fädeldraht./ Reattach the
parcel box to its base using the screws
undone in step 2. Don‘t forget: Guide
the cable conduit back through the side
opening of the fixed base and attach the
power supply line protruding from the
foundation to the threading wire.
6
4
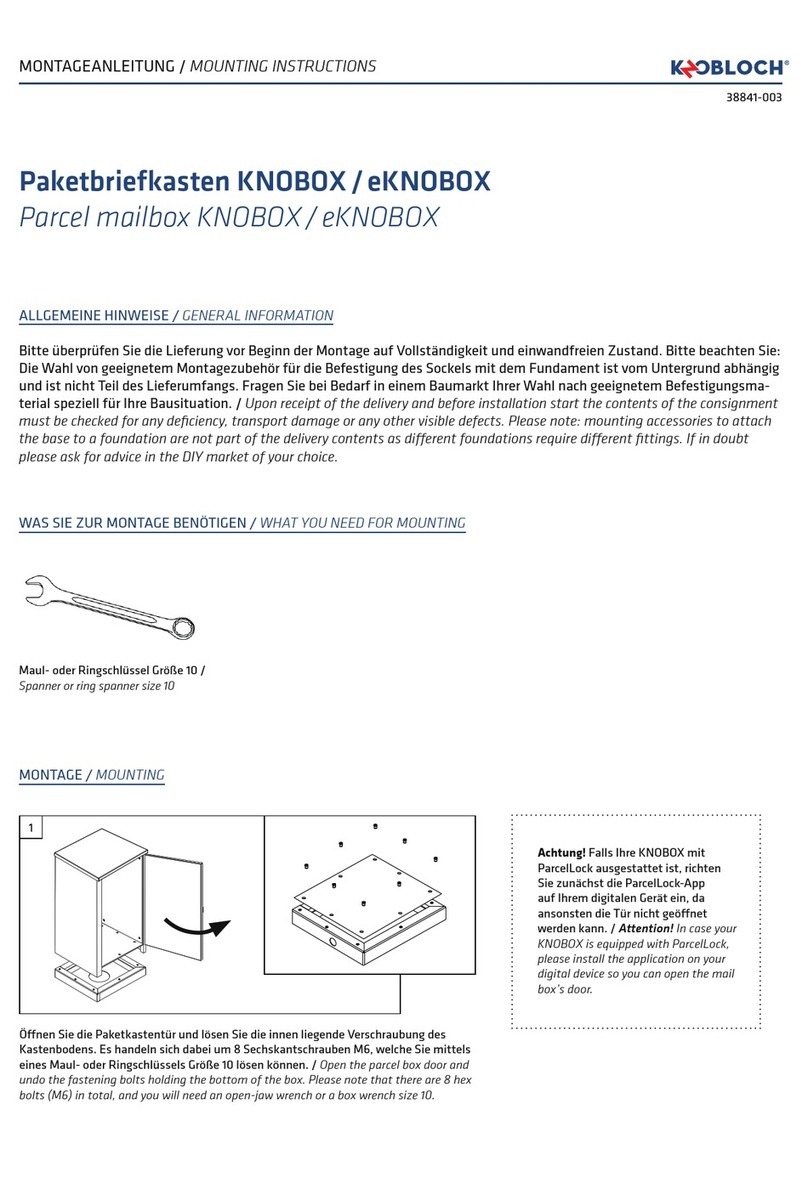
Önen Sie die Paketkastentür und lösen Sie die sechs innen liegen-
den Schrauben am Kastenboden mit einem Maul- oder Ringschlüssel
Größe 10. Bewahren Sie die gelösten Schrauben auf und heben Sie
den Paketkasten vorsichtig vom Sockel. / Open the parcel box door
and loosen the six screws on the inside of the box base using a wrench
size 10. Keep the loosened screws and carefully lift the parcel box from
the base.
2
Paketkästen mit Funktionskasten: Für eine exakte Positionierung
des Sockels ist es notwendig, das Kabel-Leerrohr durch die Seitenö-
nung aus dem Sockel zu nehmen. ACHTUNG! Ziehen Sie NICHT am
Fädeldraht, der durch das Kabel-Leerrohr verläuft. Dieses wird für die
Verkabelung der Technik durch den Elektriker benötigt. / To faciliate
the exact positioning of the base, please remove the cable conduit
from the base through the side opening. ATTENTION! DO NOT pull the
wire that runs through it. This wire is needed by the electrician to pull
in the cable.
3
Positionieren und befestigen Sie den Sockel auf dem
vorbereiteten Fundament. Bitte beachten Sie: Die Wahl
von geeignetem Montagezubehör für die Befestigung des
Sockels mit dem Fundament ist vom Untergrund abhän-
gig und ist nicht Teil des Lieferumfangs. Fragen Sie bei
Bedarf in einem Baumarkt Ihrer Wahl nach geeignetem
Befestigungsmaterial speziell für Ihre Bausituation./
Move the base to the desired mounting position and
attach it to the foundation. Please note: mounting ac-
cessories to attach the base to a foundation are not part
of the delivery contents as dierent foundations require
dierent fittings. If in doubt please ask for advice in the
DIY market of your choice.
Sockel befestigen / fix base Elektroinstallation
Electrical installation
Paketkasten demontieren / Demount parcel box Achtung: Kabel-Leerrohr / Attention: cable conduit
Paketkasten montieren
Mount parcel box
Fundament
Foundation
Sockel
Base

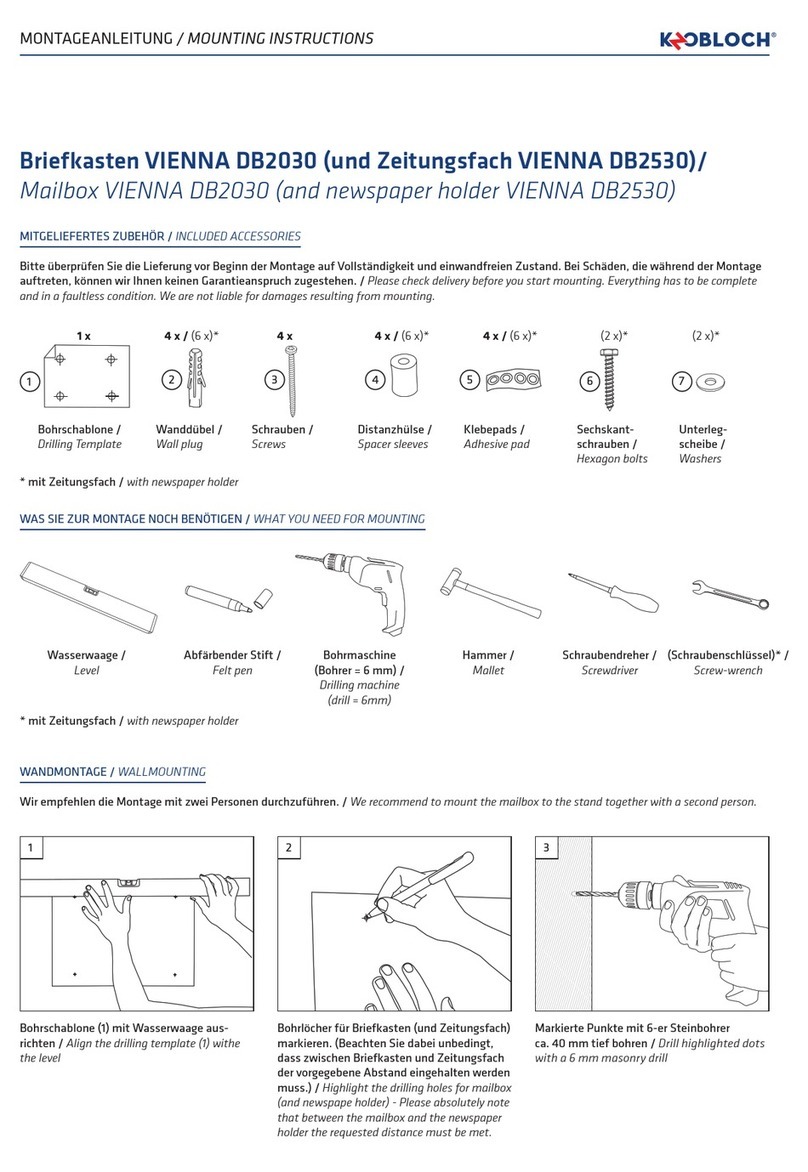
Other KNOBLOCH Outdoor Furnishing manuals

KNOBLOCH KNOBOX User manual

KNOBLOCH

KNOBLOCH KNOBOX User manual

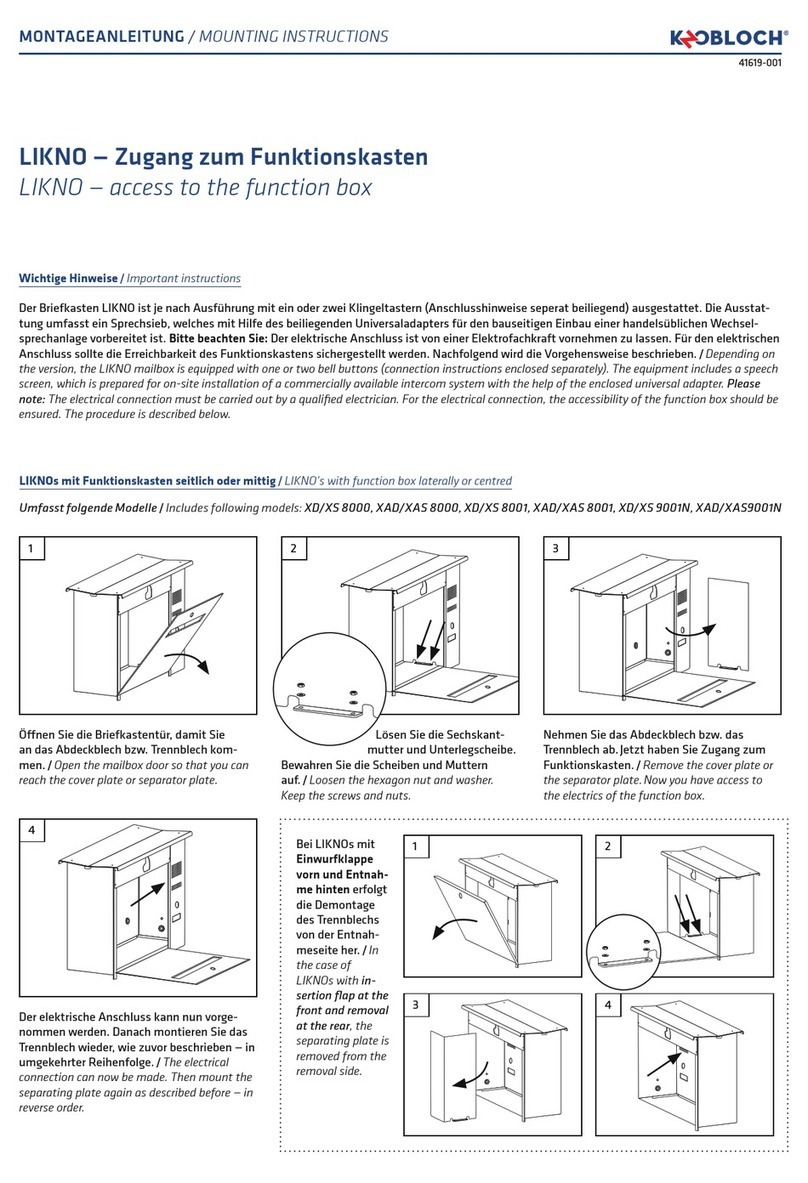
KNOBLOCH LIKNO Series User manual

KNOBLOCH

KNOBLOCH LIKNO Series User manual

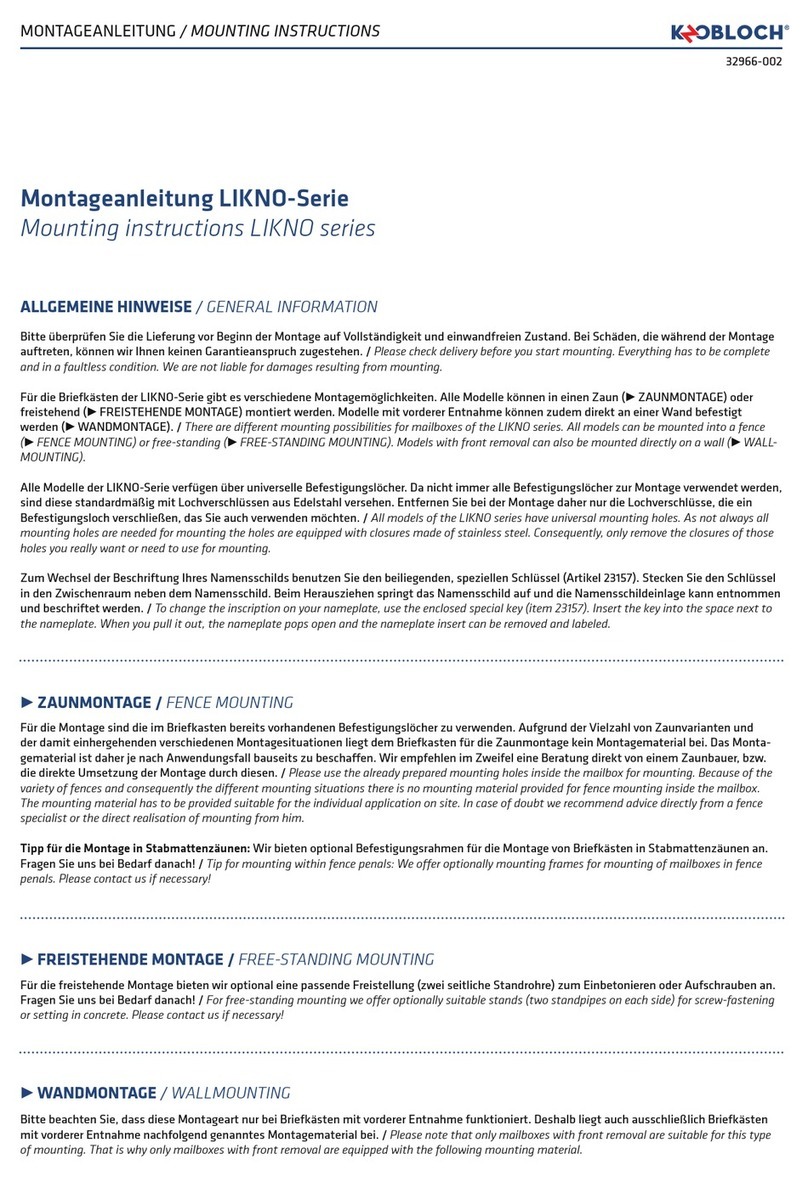
KNOBLOCH LIKNO User manual

KNOBLOCH

KNOBLOCH LIKNO User manual

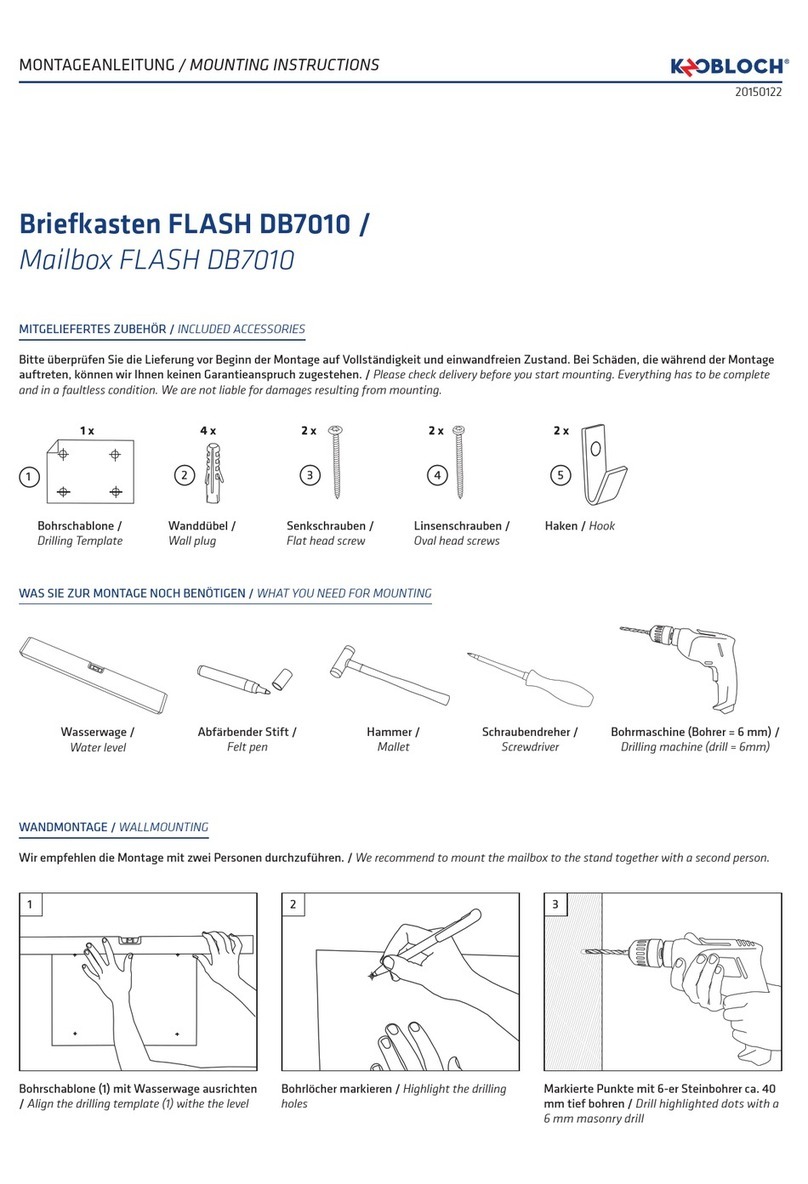
KNOBLOCH FLASH DB7010 User manual

KNOBLOCH

KNOBLOCH FLASH DB7010 User manual

KNOBLOCH VIENNA DB2030 User manual

KNOBLOCH

KNOBLOCH VIENNA DB2030 User manual

Popular Outdoor Furnishing manuals by other brands

Coolaroo FAIRHAVEN Assembly guide

Coolaroo

Coolaroo FAIRHAVEN Assembly guide

RioOutdoors 6P-DH installation instructions

RioOutdoors

RioOutdoors 6P-DH installation instructions

Alice's Garden VASTO 8 WKGCUBE8 manual

Alice's Garden

Alice's Garden VASTO 8 WKGCUBE8 manual

Tramontina LEBLON 92256 ASSEMBLY AND GENERAL INSTRUCTIONS

Tramontina

Tramontina LEBLON 92256 ASSEMBLY AND GENERAL INSTRUCTIONS

Hanover FNTDN5PCG-SU manual

Hanover

Hanover FNTDN5PCG-SU manual

highwood Sequoia Professional CM-BENSQ61-BKE Assembly guide

highwood

highwood Sequoia Professional CM-BENSQ61-BKE Assembly guide

Belleze 014-HG-20067 owner's manual

Belleze

Belleze 014-HG-20067 owner's manual

heute wohnen 78468 quick start guide

heute wohnen

heute wohnen 78468 quick start guide

Avalon L-GZ816PST instruction manual

Avalon

Avalon L-GZ816PST instruction manual

NewAge Products Rhodes 91114 installation guide

NewAge Products

NewAge Products Rhodes 91114 installation guide

Leroy Merlin FIRA 3276007277647 Assemby - Use - Maintenance Manual

Leroy Merlin

Leroy Merlin FIRA 3276007277647 Assemby - Use - Maintenance Manual

Leigh Country Char-Log Aspen Series manual

Leigh Country

Leigh Country Char-Log Aspen Series manual

Courtyard L-GZ238PST-11F-NEW manual

Courtyard

Courtyard L-GZ238PST-11F-NEW manual

Zest 4 Leisure Ashton BBQ Shelter Assembly instructions

Zest 4 Leisure

Zest 4 Leisure Ashton BBQ Shelter Assembly instructions

FLORABEST 106600 Instructions for use

FLORABEST

FLORABEST 106600 Instructions for use

KidKraft 00106 Assembly instructions

KidKraft

KidKraft 00106 Assembly instructions

Nice Planter Corten Trough T4 quick start guide

Nice Planter

Nice Planter Corten Trough T4 quick start guide

sweeek. CALIGARI W007 manual

sweeek.

sweeek. CALIGARI W007 manual

manuals.online logo
manuals.online logoBrands
  • About & Mission
  • Contact us
  • Privacy Policy
  • Terms and Conditions

Copyright 2025 Manuals.Online. All Rights Reserved.