manuals.online logo
Brands
  1. Home
  2. •
  3. Brands
  4. •
  5. Kodak
  6. •
  7. Printer
  8. •
  9. Kodak Diconix 180si User manual

Kodak Diconix 180si User manual

Other Kodak Printer manuals

Kodak VERSAMARK DS5110 User manual

Kodak

Kodak VERSAMARK DS5110 User manual

Kodak 8660 - COLOR CONNECTOR GUIDE User manual

Kodak

Kodak 8660 - COLOR CONNECTOR GUIDE User manual

Kodak DryView 8900 User manual

Kodak

Kodak DryView 8900 User manual

Kodak 1400 User manual

Kodak

Kodak 1400 User manual

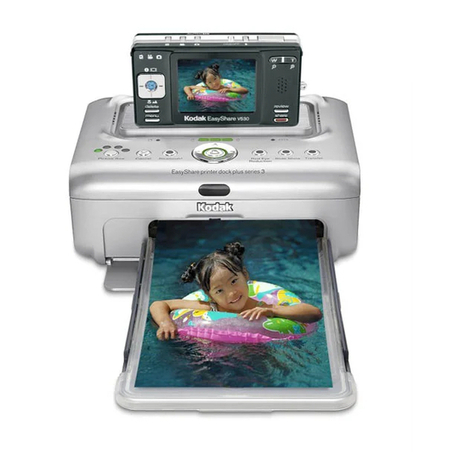
Kodak G610 - EasyShare Printer Dock Photo User manual

Kodak

Kodak G610 - EasyShare Printer Dock Photo User manual

Kodak PROFESSIONAL LED II 20R User manual

Kodak

Kodak PROFESSIONAL LED II 20R User manual

Kodak verite 55 plus Service manual

Kodak

Kodak verite 55 plus Service manual

Kodak NexPress Installation guide

Kodak

Kodak NexPress Installation guide

Kodak D4000 User manual

Kodak

Kodak D4000 User manual

Kodak RP 30 Manual

Kodak

Kodak RP 30 Manual

Kodak Photo Printer 6850 User manual

Kodak

Kodak Photo Printer 6850 User manual

Kodak Diconix 150 Parallel User manual

Kodak

Kodak Diconix 150 Parallel User manual

Kodak Verite JF120UB Series Instruction Manual

Kodak

Kodak Verite JF120UB Series Instruction Manual

Kodak 3000 DV Plus User manual

Kodak

Kodak 3000 DV Plus User manual

Kodak NexPress 2500 Installation guide

Kodak

Kodak NexPress 2500 Installation guide

Kodak XLS 8600 PS User manual

Kodak

Kodak XLS 8600 PS User manual

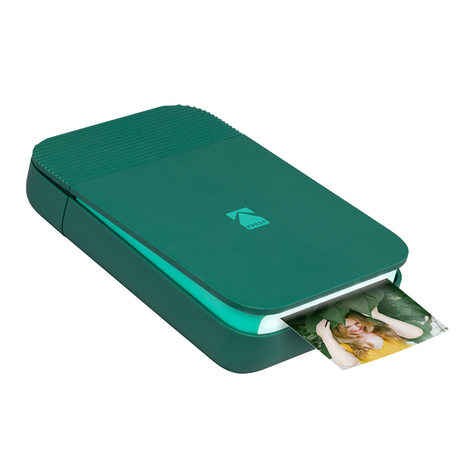
Kodak Smile User manual

Kodak

Kodak Smile User manual

Kodak 8650R THERMAL PRINTER Manual

Kodak

Kodak 8650R THERMAL PRINTER Manual

Kodak 8670 PS Configuration guide

Kodak

Kodak 8670 PS Configuration guide

Kodak 6805 User manual

Kodak

Kodak 6805 User manual

Kodak 6900 User manual

Kodak

Kodak 6900 User manual

Kodak EASYSHARE EASYSHARE ONE User manual

Kodak

Kodak EASYSHARE EASYSHARE ONE User manual

Kodak Prosper S10 Manual

Kodak

Kodak Prosper S10 Manual

Kodak EasyShare 350 User manual

Kodak

Kodak EasyShare 350 User manual

Popular Printer manuals by other brands

Evolis Elypso user guide

Evolis

Evolis Elypso user guide

Lexmark 522n - C Color Laser Printer Service manual

Lexmark

Lexmark 522n - C Color Laser Printer Service manual

Panduit COUGAR LS9Q Operator's manual

Panduit

Panduit COUGAR LS9Q Operator's manual

Olivetti PG L2140 Operation guide

Olivetti

Olivetti PG L2140 Operation guide

Samsung SL-M2820DW user manual

Samsung

Samsung SL-M2820DW user manual

Kyocera FS-9530DN specification

Kyocera

Kyocera FS-9530DN specification

Canon LASER SHOT LBP-1210 Specifications

Canon

Canon LASER SHOT LBP-1210 Specifications

Canon PIXMA PRO-1 Series Getting started

Canon

Canon PIXMA PRO-1 Series Getting started

Canon LBP113w Getting started

Canon

Canon LBP113w Getting started

Lexmark Infoprint 1332 user manual

Lexmark

Lexmark Infoprint 1332 user manual

Epson M1120 user guide

Epson

Epson M1120 user guide

TransAct POSJET 1500 Spare parts

TransAct

TransAct POSJET 1500 Spare parts

Telpar MTP-1500 user manual

Telpar

Telpar MTP-1500 user manual

Star DP8340 SERIES user manual

Star

Star DP8340 SERIES user manual

MGI JETVARNISH 3DS user manual

MGI

MGI JETVARNISH 3DS user manual

Kyocera TASKalfa PA4500ci Operation guide

Kyocera

Kyocera TASKalfa PA4500ci Operation guide

Emaar EP-360 user manual

Emaar

Emaar EP-360 user manual

Fujitsu DL7400 user manual

Fujitsu

Fujitsu DL7400 user manual

manuals.online logo
manuals.online logoBrands
  • About & Mission
  • Contact us
  • Privacy Policy
  • Terms and Conditions

Copyright 2025 Manuals.Online. All Rights Reserved.

OSE Kodak Diconix 180si
Print method . . . . . . . . . . . Drop on demand, thermal ink jet
Power. . . . . . . . . . . . . . . . . Battery or AC
Print speed . . . . . . . . . . . . 180 cps
Resolution . . . . . . . . . . . . . 192 x 192
Fonts . . . . . . . . . . . . . . . . . Prestige 10, Prestige 12, Helvetica,
Gothic
Paper handling . . . . . . . . . 8 1/2 wide cut sheet and continuous
forms, transparencies (for ink jet
printers)
Print width. . . . . . . . . . . . . 7.1 inches (180 mm)
Interfaces. . . . . . . . . . . . . . CENTRONICS parallel, RS-232A serial
Emulations . . . . . . . . . . . . Epson FX, IBM Proprinter
Control Panel
Power light - Indicates power on.
Add Paper light - Indicates out of paper.
On Line light - Indicates online condition.
Draft light - Indicates draft quality font selected. Off indicates LQ font
selected.
Font lights - Indicate the font selection.
Power switch - Slide to the right to apply power to the printer, left for
off.
On Line/Setup key - Toggles the printer between online and offline
condition. If held on power up , puts the printer in setup mode.
LF/FF/Test key - Offline, press once to move forward one line. Hold
to advance to top-of-form. Hold in conjunction with Font key to
reverse paper 1/48 inch. If held on power up, puts the printer in
self-test mode.
Font/Recharge key - Press repeatedly to progress through the font
selections (draft followed by LQ) as indicted by the Font lights. If held
on power up, puts the printer in battery recharge mode.
Self-test
Printer performs a self-test at each power up. Power light and On
Line light on (not flashing) indicates test is complete.
To print a self-test page, press and hold the LF/FF key while
powering on the printer.
Printer Configuration
1. Turn power off and load one sheet of paper. It may be preferable
to use continuous paper for multiple changes to set-up.
2. Press the On Line key while turning on printer power. Continue to
hold On Line key for two seconds. Printer will print current
settings and a graphic control panel image and a line of
numbers. The print head will position under "Exit".
3. On Line key will move carriage left, LF/FF key will move carriage
right to position the print head under the desired option. Font key
will select an option. Bold items indicate current settings.
Error Codes
Power and Add Paper light on - Paper out
Power light flashing - Battery low.
Add Paper light flashing - Carriage error. Check for obstructions.
On Line light flashing - Serial interface error. Check that set-up
matches host.
Power and Font lights flashing - Battery is charging.
Common Problems and Fixes
Carriage moves, but printer does not print
1. Check print head installation. Prime print head.
2. Lock carriage latch.
3. Clean carriage connection.
4. Replace print head cartridge.
Poor print quality - Same as above.
Print head leaves blot of ink - Install new blotter pad.
Misc. erratic performance - Check AC adapter and AC adapter
connection.
Replacing Fuse
1. Turn power off, remove batteries, disconnect interface cable, and
disconnect AC adapter.
2. Remove paper. Remove paper cover and turn printer on its face.
3. Remove two screws in base of printer.
4. Turn printer back to its top side and gently lift the upper case. Lift
until top half of case disconnects from bottom half at the back
hinges. Do not disconnect cable attaching top half of case to
bottom half.
5. Do not touch the circuit board to avoid static damage. Preferably,
use a fuse puller to remove the fuse.
6. Snap new fuse into place. Reverse above.
KO-1
Kodak Diconix 180si OSE
Cover Removal
See "Replacing Fuse".
Batteries
Use five high quality nickel-cadmium, rechargeable, C-size, rated at
1.2 volts.
To install:
1. Lift and lock the movable metal arm that holds paper in place.
2. Rotate the platen to gain access to the battery access door.
3. Open the access door and insert batteries according to the label
inside of the platen.
4. Battery installation is verified if the power light goes on, with the
AC adapter disconnected.
Note: The batteries must be charged for the light to go on.
Recharging batteries
1. Power light flashes when batteries are low. Two pages may be
printed after the Power light begins to flash.
2. With power off, connect AC adapter. Turn on power while pressing
the Font key.
3. Complete recharging takes approximately ten hours. The Font
lights will act as indicators of completion or charging process.
One font light blinking indicates 25% charged, two lights blinking
indicates 50%, etc.
4. When all Font lights are on and not blinking, charging process is
complete.
Printing while charging
1. Print may be accomplished in the charge mode, but charging will
stop during the printing process.
2. To print during charging, press On Line key, insert paper and
proceed.
3. The printer will automatically return to charging after printing is
complete.
Note: Recharging will not resume automatically if power is
interrupted during charging process.
Critical Adjustments
Aligning Chassis
Follow procedure if: carriage stalls or slows in mid print travel (Add
Paper light may flash); carriage has resistance to movement when
moved manually; or, print is distorted near middle of print.
1. Turn power off, remove paper, disconnect interface cable, and
disconnect AC adapter.
2. Place printer on a flat surface and support printer on two pencils,
one at each end of printer. (Printer is like a suspension bridge,
supported at each end by the pencils.)
3. Open cover and move carriage to left end of travel.
4. Press firmly at center of printer floor, just forward of the paper bail.
Field Replaceable Units
DESCRIPTION OEM P/N
Fuse (5 mm x 20 mm) 5MF 2A 250V KOD 812 5429
Note: Be sure to print a configuration list before swapping the
printer.
IBM P/N. . . . . . . . . . . . . . . . . . . . . . . . . . . . . . . . 93F5808
IBM machine type. . . . . . . . . . . . . . . . . . . . . . . 1514-K03
Tech Support 800-877-7764
© Copyright International Business Machines Corporation August 1995.
All rights reserved. IBM/TSS Internal use only