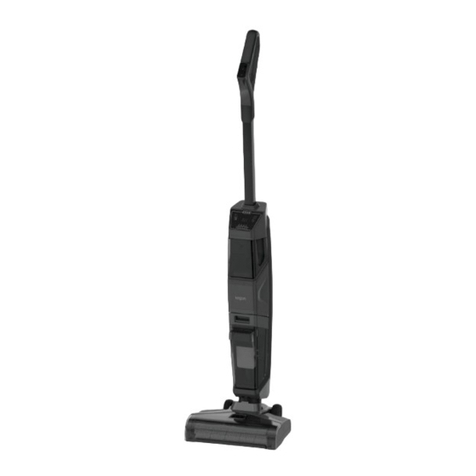
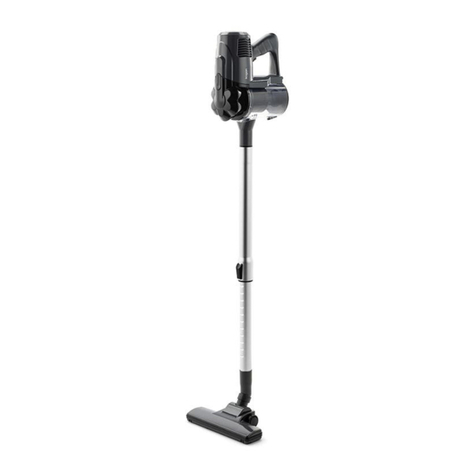
Kogan KAVACSTK18VA User manual


Table of Contents
Important Safeguards.................................................................................................................................................. 2
Additional Caution for Blower............................................................................................................................. 2
Parts.................................................................................................................................................................................... 3
Installing Charger Base................................................................................................................................................ 4
Charging the Battery.................................................................................................................................................... 4
Important Note for Charging............................................................................................................................... 5
Indi ation Lights....................................................................................................................................................... 5
Basi Installation............................................................................................................................................................ 5
Va uum Cleaner....................................................................................................................................................... 5
Blower.......................................................................................................................................................................... 6
Operation Instru tions................................................................................................................................................. 6
A essories...................................................................................................................................................................... 7
Crevi e set a essories.......................................................................................................................................... 7
Hose set a essories............................................................................................................................................... 7
Cleaning and Maintenan e......................................................................................................................................... 8
Filter and Filter Covers........................................................................................................................................... 8
Dust Bin....................................................................................................................................................................... 9
Floor Brush................................................................................................................................................................. 9
Removing the Batteries............................................................................................................................................. 10
1

Important Safeguards
Read through the instru tions arefully before using the applian e for the first time. Safeguard
them for future referen e.
•This applian e has been designed for domesti use only. It must only be used in
a ordan e with these instru tions. Kogan. om will not be held responsible for any
damage aused by improper or misuse of the applian e.
•Conne t the adaptor only to the voltage stated on the hara teristi s plate.
•Never leave the va uum leaner unattended while it is running.
•This applian e an be used by hildren aged from 8 years and above and persons with
redu ed physi al, sensory or mental apabilities or la k of experien e and knowledge if
they have been given supervision or instru tion on erning use of the applian e in a safe
way and understand the hazards involved. Children shall not play with the applian e.
Cleaning and user maintenan e shall not be made by hildren without supervision.
•Do not attempt to harge the applian e at temperatures below 0ºC or above 40ºC.
•Do not dismantle the va uum leaner while the motor is still operating.
•Never use the va uum without the filter.
•Always keep the openings lear and prevent dust or dirt from blo king the air passage.
•Never va uum up toxi materials, solvents, a ids or flammable liquids.
•Never use the va uum leaner to su k up anything that may be still burning su h as
igarette butts or ash/ inders.
•Never va uum up solid, sharp or pier ing obje ts that may damage the filter.
•Do not use wet hands when handling the va uum.
•Do not tug on the adaptor’s able in order to unplug it.
•Do not expose the va uum leaner to outdoor weather onditions, moisture or heat.
•Do not leave the applian e lose to heat sour es su h as ovens, heaters and radiators nor
allow the ord to ome into onta t with hot surfa es.
•DO NOT IMMERSE THE MOTOR HOUSING, CABLE OR TRANSFORMER IN WATER OR
ANY OTHER LIQUIDS.
•Do not take the batteries out of their ompartment.
•Do not swit h the applian e on if it an be dete ted that it is not operating orre tly or if
it has suffered any type of damage.
•Any type of repair work other than that stated in “Cleaning & Maintenan e” must be done
by a Kogan. om servi e te hni ian or an authorised repair enter.
•This produ t in ludes re hargeable Li-ion batteries. Do not in inerate batteries as they
will explode.
•Do not disassemble, short ir uit, heat, drop or strike the batteries, use in other
equipment or harge in an adaptor not supplied with this produ t be ause all of these
onditions ould ause the battery ells to leak. If any liquid gets into the eyes, do not
rub eyes, immediately flush them with lean water ontinuously for a minimum of 15
minutes. Seek medi al attention immediately.
Additional Caution for Blower
•Avoid using the Blower near ro ks, gravel, stones and similar materials whi h an
be ome dangerous proje tiles.
•Keep hildren, bystanders and animals outside a (5m) radius surrounding the area of
operation.
•If you are approa hed while operating the Blower, stop the power.
•Do not point the Handheld Blower nozzle in the dire tion of people or pets.
•Use the Handheld Blower only in daylight or adequate artifi ial lighting.
2
Parts
A Nozzle M Charger
B Tilting release button N Hose
C Rotate release button Crevice condenser
D Nozzle lock P Crevice
E Blower nozzle Q Brush
F Charge indicator R Extendible crevice
G N/ FF button S Floor nozzle
H Dust bin T Carpet/Fabric brush
I Dust bin release lever U Long hose
J Filter cover V Additional holder
K Battery pack W Floor brush
L Charger base
3

Installing Charger Base
This harger base is designed to be wall mounted.
Note: are should be taken to ensure that there are no dangerous obje ts hidden beneath the
wall surfa e (e.g. ele tri al wires, pipe, et .)
1. Insert the ja k of adaptor (M) into the so ket of harger base (L). (Fig.1)
2. Install the harger base to the wall within rea h of an ele tri al outlet.
3. Use a 5mm drill for drilling holes for the plasti an hors.
4. Insert an hors and s rew the harger base (L) onto the wall. (Fig.2)
Fig 1. Fig 2.
Charging the Battery
This va uum leaner is supplied in a low harge ondition. It should be harged for 6 hours prior
to initial use.
Note: Re harge your applian e after storing for a long time.
Charge the applian e when the Charging indi ator (F) is flashing red during operation. Only
harge the va uum leaner with the harger (M) and harging base (L) supplied.
1. Insert the small plug into the harging base (L), and you an let the harging base (L)
stand on a table or fix it on a wall, and then inset the harger into the wall so ket
2. Pla e the va uum leaner onto the harging base (L). (Fig.3) or insert the ja k of the
adaptor (M) into the so ket of unit. (Fig.4)
3. The harging light turns red to indi ate that the applian e is harging.
4. The harging light turns blue to indi ate that the applian e is fully harged.
Fig. 3 Fig. 4
4

Important Note for Charging
When using your hand va ontinuously with built-in battery pa k, the batteries in your battery
pa k will be ome hot. You should let a hot battery pa k ool down for approximately 30
minutes before attempting to re harge.
Indication Lights
During Operation:
Full Battery – Blue (running)
Battery Below 20% Capa ity – Blue with flashing (warning)
Low Battery – Red with flashing (Auto ut off)
During Charging:
Charging – Red
Fully Charged – Blue
Basic Installation
This is a multi-fun tion applian e supplied with full set of a essories. With different a essories,
it will be ome a Va uum leaner, a Blower or a Power brush leaner.
Vacuum Cleaner
Insert the long hose (U) and floor brush (W) into the main unit to be ome a sti k va uum
leaner. (Fig.5).
Fig. 5
Insert the Nozzle unit into the main unit to be ome a handheld va uum leaner. (Fig.6) Rotate
the Blower nozzle (E) opening ba kward before use.
Fig. 6
5

This nozzle unit an tilt and rotate in different angles to let you more omfortable and easier to
finish the leaning jobs.
1. This nozzle has 9 different tilting positions. Simply press the tilting release button(B)
and pull the nozzle up and down. (Fig.7).
Fig. 7
2. This nozzle an rotate 360 degree. Pull the rotate release button (C) and rotate the
nozzle. (Fig.8).
Fig. 8
3. Combine these two features, the nozzle an point to almost any dire tion. In front of it, it
is very useful when the va uum leaner is used on the floor or on the table.
4. To deta h the nozzle, press the Nozzle lo k (D) and pull it out.
Blower
Insert the Crevi e (P) into the main unit Blower nozzle (E) to be ome a Blower. The Blower
nozzle an rotate 360 degree so that you an turn it in suitable angle for blowing. (Fig.9)
Fig. 9
6

peration Instructions
1. Choose what feature you will use and fit the appropriate tools into the main unit.
2. To swit h on the applian e, press the On/Off button (G) on e. To stop, press the On/
Off button on e again (Fig.10).
3. If used as power brush va uum leaner, when turn on the unit, the roller brush in the
power brush will rotate.
Note: This produ t is for dry pi k-up only.
Fig. 10
Accessories
This Va uum leaner omes equipped with a full set of a essories, ea h designed for different
leaning jobs.
Crevice set accessories
This set of a essories in ludes: Crevi e (P), Brush (Q), Crevi e ondenser (O).
Simply insert the Crevi e (P) into the inlet of the nozzle. The Brush (Q) and Crevi e ondenser
(O) an be inserted on the Crevi e (P) end. (Fig.11)
Fig. 11
7

Hose set accessories
This set of a essories in ludes: Hose (N), Extendible revi e (R), Floor nozzle (S), Car-
pet/Fabri brush (T)
1. Insert the hose (with flat adaptor side) into the nozzle.
2. Insert the extendible revi e or floor nozzle into the hose round end. (Fig.12)
3. Atta h the arpet/fabri brush (T) on the floor nozzle for leaning arpet or fabri
surfa e.
Fig. 12
The hose (N) and extendible revi e (R) an be used for Blower. (Fig.13)
Fig. 13
Cleaning and Maintenance
Filter and Filter Covers
Clean the filter over (J) and both filters (V&W) after ea h use:
1. Open the filter over(J) by turning anti- lo kwise.(Fig.14)
2. Empty the ontents out of the dust ontainer.
3. Remove the outer filter (a) by turning in anti- lo kwise. (Fig.15) Pull the inner HEA filter
(b) out.(Fig.16)
4. Clean both filters with a soft brush. If it is very dirty, it an be washed in soapy water,
make sure to rinse it well and leave it to dry ompletely before refitting it.
5. Clean the ontainer down with a damp loth. Never use abrasive leaning agents.
6. NEVER USE THE VACUUM CLEANER WITHOUT THE FILTER.
7. Reassemble the va uum leaner. Fit the inner HEPA filter ba k the ontainer firmly into
8

position and then turning the outer filter lo kwise until li k into position.
8. Close the ontainer door by turning lo kwise until lo k into position.
9. Repla e the filter when the airflow of the va uum leaner be ome very weak even when
the filter was washed and the dust ontainer was empty.
10. Spare parts an be obtained from authorised te hni al servi e entres.
Fig. 14 Fig. 15 Fig.16
Dust Bin
Clean the dust bin (H) after ea h use:
1. Remove the dust bin (H) by pressing the dust bin release button (I) on both side and pull
the dust bin out.(Fig.17)
2. Empty the ontents out of the dust bin by pressing the dust bin over ( ) down. (Fig.18)
3. To repla e the dust bin, pla e it ba k onto the applian e and lo k into pla e.
Fig. 17 Fig. 18
Floor Brush
Carry out maintenan e if any waste threads or hair gets tangled in the brush.
Slowly rotate the brush manually and remove any foreign obje ts
tangled around the brush.
9
Remove waste

Method when the rotating brush cannot be manually rotated
1. Uns rew the left hand side, then lift and
dislodge the brush over.
2. Lift the left side of the rotating brush up,
then remove the belt pulley from the belt.
3. Take out the rotating brush and then
remove the blo kage.
4. Reinstall the rotating brush again.
Che k that the brush over is se urely
fixed and that the brush rotates
properly again.
Removing the Batteries
To prote t the environment, never put this produ t in household rubbish at the end of its useful
life. This applian e ontains Li-ion batteries that must be taken out of the applian e for
re y ling.
Do the following to remove the batteries:
1. Deta hed all a essories onne ted with va uum leaner.
2. Remove all the s rews in the va uum leaner unit.
3. Remove one side of the housing.
4. Remove all s rews in the battery box.
5. Cut all the wires onne ted to the battery.
6. Deposit the batteries in the spe ial battery olle tion ontainers provided by your lo al
authorities.
If you have any issues, questions or concerns regarding the use of this product, please contact
the Kogan customer support team.
10
Belt
Remove waste
Other Kogan Vacuum Cleaner manuals

Kogan
Kogan KA14CYCVACA User manual

Kogan
Kogan KAPRSTVC22A User manual

Kogan
Kogan SmarterHome LX10 User manual

Kogan
Kogan SmarterHome G50 User manual

Kogan
Kogan SMARTERHOME LX12 User manual

Kogan
Kogan KAVACSTV06A User manual

Kogan
Kogan SMARTERHOME G30 User manual

Kogan
Kogan KAVACSTC11A User manual

Kogan
Kogan C7 Series User manual

Kogan
Kogan KAURVAC900A User manual

Kogan
Kogan KGNVCTBVAA User manual

Kogan
Kogan SMARTERHOME G20 User manual

Kogan
Kogan KAVACRBG50A User manual

Kogan
Kogan KAHHCOVAWCA User manual

Kogan
Kogan PREMIUM 15-IN-1 User manual

Kogan
Kogan SMARTERHOME KAVACACL10A User manual

Kogan
Kogan KA22BLDSVCA User manual

Kogan
Kogan MX6 User manual

Kogan
Kogan MX11 PRO User manual

Kogan
Kogan V10 User manual