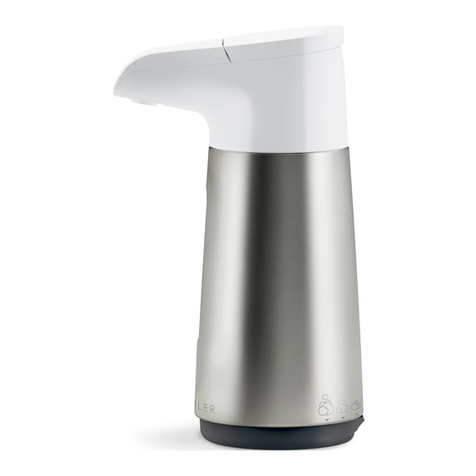
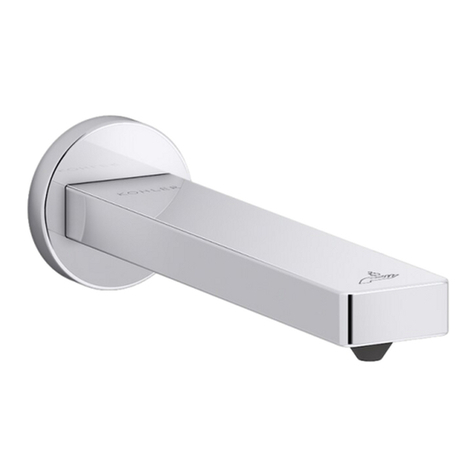
Kohler K-25419T-CP User manual

TOUCHLESS SOAP DISPENSER
自动感应皂液器
K-25419T-CP/(DC直流)/ K-25420T-CP/(AC交流)
1434860-T01-A
2020
2020
DC 6V
7±1cm
1 - 10CPS (mPa.s)
适用皂液黏度
1 ℃ - 55 ℃环境温度
1.6L皂瓶容量
按钮调距调节方式
4档可调出液量
红外触发激光,自动感应
132.8x47.5x80.2mm 132.8x47.5x80.2mm
DC 6V
7±1cm
1 - 10CPS (mPa.s)
1 ℃- 55 ℃
Voltage
Sensing distance
Applicable viscosity
of soap solution
Ambient temperature
Ambient temperature
1.6 L
Press button to adjust the distance
4-level adjustable
capacity
Regulating mode
Soap volume
dispensed
Activated by an infrared sensor. The
machine operates automatically.
∅47.5
4
18.3
(103.3)
(80.2)
(132.8)

1434860-T01-A
BEFORE YOU BEGIN 安装前的注意事项
WARNING: When using electrical products, basic
precautions should always be followed, including
the following:
IMPORTANT! Your product may appear different than
illustrated. The installation procedure is the same.
Consult the speciication
sheet for rough-in dimensions for your model requirements.
Follow all local plumbing and electrical codes.
CAUTION: Risk of product damage. Only use foaming
hand soap with viscosity between 1 CPS and 20 CPS.
Gel soaps and foaming hand soaps not within the CPS
range will damage the soap dispenser and void the warranty.
注意:产品损坏风险。仅可使用粘度在1 CPS至20 CPS之间
的起泡洗手液。超出该粘度范围的凝胶皂和起泡洗手皂会损
坏皂液器,并失去保修资格。
请遵守所有当地的管道工程和电气法规。
重要!您所购产品可能与插图不一致,但安装步骤是相同的。
您所购型号产品的安装尺寸要求,请参见规格表。
DANGER: Risk of electric shock. Connect only to a
circuit protected by a Ground-Fault
Circuit-Interrupter (GFCI)*.
警告:使用电气产品时,必须始终采取下列基本预防
措施:
危险:有触电危险。只能连接至有接地故障电路断路
器(GFCI)*保护的电路。
WARNING: Risk of electric shock. Disconnect the
power before servicing. 危险:有触电危险。维修前需断开电源。
WARNING: Risk of injury or property damage.
Read all instructions thoroughly before beginning
installation.
警告:有受伤或财产损失的危险。开始安装之前,请
充分阅读所有说明。
CAUTION: Risk of product damage.This product
contains sensitive electronic components. Do not
store open containers of chemical or cleaning
products near this product. Cleaning rags or sponges
must be rinsed with fresh water before storage.
注意:产品损坏风险。本产品包含敏感电子组件。请
勿在本产品附近存放盛有化学或清洁产品的开口容器。
储存前必须将抹布或海绵用清水冲洗干净。
CAUTION: Risk of product damage.Only use
foaming hand soap with viscosity between 1 CPS
and 20 CPS. Gel soaps and foaming hand soaps not
within the CPS range will damage the soap dispenser
and void the warranty.
注意:产品损坏风险。仅可使用粘度在1 CPS至20 CPS
之间的起泡洗手液。超出该粘度范围的凝胶皂和起泡洗
手皂会损坏皂液器,并失去保修资格。
Tools and Materials 工具与材料
1-1/4” Hole Bit
1-1 / 4"钻头 Silicone Sealant
硅胶
1/4" (6mm)
Plus: 另需:
Wood Brace Materials 木撑材料
木工工具
Wood Screws 木螺钉
PVC Tubing
Wood Working Tool
Electrical Tape
PVC管
电工胶带
Hacksaw 钢锯

1434860-T01-A
2P母线接头
2P公线接头
AC电源
2P母线
接头
2P公线
接头
2P male
connector
4P male connector
4P female connector
2P female
connector
Soap pipe
2P female
connector
2P male
connector
AC power
Air pipe
Сontrol box
Soap Reservoir
4P公线接头
4P母线接头
进气管
进皂管
控制盒
皂液盒
AC(交流) DC(直流)
DC(直流)电池盒
2P母线接头
2P公线接头
2P female
connector
2P male
connector
2P母线接头
2P公线接头
2P male
connector
2P female
connector
DC battery box
4P male
connector
4P female
connector
4P公线接头
4P母线接头
Air pipe
进气管
Soap pipe
进皂管
Сontrol box
控制盒
Soap Reservoir
皂液盒
103.3
80.2
132.8
龙头体
感应器
Sensor
Faucet
103.3
80.2
132.8
龙头体
感应器
Sensor
Faucet

1434860-T01-A
Roughing-in 预埋
Install the Spout
安装龙头
- A 1" (25 mm) minimum to 1-1/4" (32 mm) maximum
diameter mounting hole is required.
- Determine the mounting-hole location.
- NOTE: The mounting hardware provided is for a
standard deck thickness of 1/4” (6 mm) minimum to
2” (51 mm) maximum. For a deep rough-in installation
where deck thickness is 2” (51 mm) minimum to 4-1/2”
(114 mm) maximum, order the deep rough-in kit from
kohler.com/serviceparts.
- 需要一个直径为1" (25 mm)至1-1/4" (32 mm)的安装孔。
- 确定安装孔的位置。确定安装孔的位置。
- 注意:随机提供的安装零件可用于厚度为
1/4" (6 mm)~ 2" (51 mm)的标准台面。
当台面厚度为2" (51 mm)~ 4-1/2" (114 mm)且需要进行较深
的安装时,可订购加长安装工具包。
洗手台面
最小
地面
最小
127
127
最小
最大
最小
感应器
导管
龙头
橡胶垫片
螺杆
金属垫圈
螺母
Counter Top

- A 2-1/2" (64 mm) minimum distance is required between
the inished wall and the center of the spout.
- 墙壁与龙头底座中心的最小距离应为2-1/2" (64 mm)。
- A 1" (25 mm) to minimum to 1-1/2″(38 mm) maximum
distance is required between the sink edge and the center
of the spout.
- 洗手池边缘与龙头底座中心的最小距离应为
1" (25 mm) ~ 1-1/2″ (38 mm)。
- Drill a hole through the mounting surface according to the
surface manufacturer’s instructions.
- 按照台面制造商的说明在台面上进行钻孔。
- Insert the spout with tubes and wires through the
mounting hole.
- 将配有导管和导线的龙头插入安装孔。
- From under the sink, slide the rubber gasket and metal
washer onto the stud.
- 从洗手池底部将橡胶垫片和金属垫圈安在螺柱上。
- If desired, add silicone sealant to the underside of the
escutcheon as needed. Wipe away any excess sealant.
- 必要时,可在底座下侧施加硅胶。将多余的硅胶擦干净。
- Thread the nut onto the stud and wrench-tighten to secure
the spout to the mounting surface.
- 将螺母拧到螺柱上并用扳手拧紧,从而将龙头固定到台面上。
1434860-T01-A
Install the Control Box 安装控制盒
- Mark the location of the mounting holes. 标记安装孔的位置。
- Attach the control box to the wall as shown. 如图所示将控制盒放置在墙壁上。
- Secure with the four screws provided. 使用随机提供的四个螺钉进行固定。
5

1434860-T01-A
Install the DC Power Unit 安装直流电源装置
电源线控制
盒
电源线电池
盒
肋条
- Unthread the screws from the battery box to remove the
battery box cover.
- 拧下电池盒上的螺丝,卸下电池盒盖。
- NOTE: Do not mix used and new batteries. - 注意:请勿混用新旧电池。
- Insert four D batteries (provided). Reinstall the battery
box cover and secure with the screws.
- 放入四节一号电池(需另购)。重新安装电池盒盖并用螺丝
固定。
- Align the grooves on the battery box with the ribs on the
side of the control box.
- 将电池盒上的凹槽与控制盒侧面的肋条对准。
- Mark the location of the mounting holes. - 标记安装孔的位置。
- NOTE: The provided wall anchors are for concrete wall
installation. Use the appropriate wall anchors depending
on your wall material.
- 注意:随机提供的膨胀螺丝适用于混凝土墙壁的安装。根据您的墙
壁材料选择合适的膨胀螺丝。
- Drill the holes per the anchor manufacturers instructions.
If using the provided wall anchors, drill 1/4” (6 mm) pilot
holes.
- 根据锚固件制造商的说明进行钻孔。如果采用随机提供的膨胀螺丝,
需要钻取1/4" (6 mm)的导向孔。
- Slide the battery box onto the ribs on the side of the
control box. Secure with the screws.
- 将电池盒滑到控制盒侧面的肋条上。使用螺丝固定。
6

1434860-T01-A
塑料管
塑料管 连接器
电源连接器
皂泵出口
气泵出口
感应器
组件电
缆组件电缆 电源连接器
感应器组件连接器
- IMPORTANT! Verify that the cables are not pinched
when connecting to the control box.
- 重要!确保连接至控制盒电缆没有被夹住。
- IMPORTANT! The area in front of the sensor must be
free of objects during the 2 minute learning cycle or the
soap dispenser may not function properly.
- 重要!在2分钟的学习循环内,感应器前方区域不得有任何物
体,否则皂液器可能无法正常工作。
- Connect the sensor cable from the spout to the sensor
cable from the control box.
- 将龙头的感应器电缆与控制盒的感应器电缆相连接。
- Connect the LED cable from the spout to the LED cable
from the control box.
- 将龙头的LED电缆与控制盒的LED电缆相连接。
- Connect the power supply connector from the battery
box to the power supply connector from the control box.
- 将电池盒的电源连接器与控制盒的电源连接器相连接。
- Allow 2 minutes for the sensor to cycle through the
automatic sensing distance.
- 等待2分钟,让感应器在自动感应距离内循环。
- NOTE: Once the power supply cords are connected
the base of the soap dispenser will lash red twice every
six seconds. This is normal and is a signal that there is
no soap in the reservoir. After the soap is illed and primed
the lashing will stop.
- 注意:连接电源线后,皂液器的底座每六秒钟闪烁两次红光。
这属于正常现象,说明皂液瓶中没有皂液。装满皂液并起动后,
灯光闪烁停止。
- Secure any extra wire under the counter. - 将多余的电线固定在洗手台下面。
Connect the Control Box Wires 连接控制盒电线
7

Install the Power 连接电源
Connect the Tubes
Soap Pump Connections
连接导管
皂液泵的连接
1434860-T01-A 8
- NOTE: The plastic tubes are interchangable.
Either tube can be connected to the soap
or air pump outlet.
注意:塑料管是可互换的。任何一根导管均可
连接至皂液或气泵出口。
- Press the plastic tube onto the soap pump
outlet on the control box until the tube stops.
- 将塑料管按压到控制盒上的皂液泵出口上,
直至导管中断。
- Verify that the tube is secure.
- 确保导管固定牢固。
Air Pump Connections
气泵的连接
- Press the remaining plastic tube onto the
air pump outlet on the control box until the
tube stops.
- 将剩余的塑料管按压到控制盒上的气泵出
口上,直至导管到底。
- Verify that the tube is secure.
- 确保导管固定牢固。
DC(直流)AC(交流)
Air Pump Outlet
气泵出口
Soap Pump Outlet
皂泵出口
Plastic Tube
塑料管
Plastic Tube
塑料管
77.9
58.2
96.3
Ø28.6
122.2
DC(直流)电池盒
2P母线接头
2P公线接头
77.9
58.2
96.3
Ø28.6
122.2
2P母线接头
2P公线接头
AC电源
2P母线
接头
2P公线
接头
龙头体
感应探头
Inductive
probe
Faucet 龙头体
Faucet
2P male
connector
4P male connector
4P female connector
2P female
connector
2P male
connector
2P female
connector 2P母线接头
2P公线接头
2P male
connector
2P female
connector
Soap pipe
2P female
connector
2P male
connector
AC power
Air pipe
Сontrol box
Soap outlet box
DC battery box
感应探头
Inductive
probe
4P公线接头
4P母线接头
4P male
connector
4P female
connector
4P公线接头
4P母线接头
进气管
Air pipe
进气管
进皂管 Soap pipe
进皂管
控制盒
Сontrol box
控制盒
给皂瓶
Soap outlet box
给皂瓶

Fill the Soap Reservoir 注满皂液瓶
Prepare the Soap Dispenser 准备皂液器
1434860-T01-A 9
- IMPORTANT! Rinse the empty soap reservoir with clean
warm water before first use.
- 重要! 首次使用前,请用干净的温水冲洗空的皂液盒。
- IMPORTANT! Use only foaming hand soap. Foaming hand
soap must not contain any suspended particles. Do not use
liquid hand soap. Using improper soap may void the
products warranty.
- 重要! 只能使用泡沫洗手液。 泡沫洗手液中不得含有任何悬浮
颗粒。请勿使用液体洗手液。 使用不当的皂液可能会失去产品保
修资格。
- Fill the soap reservoir with Kohler foaming hand soap to
the “Max Fill” line. Do not overfill the soap reservoir.
- 向皂液盒中注入泡沫洗手液直至达到“最大填充”线。 请勿将皂液
盒充注得过满。
- Insert the dispensing tube from the control unit into the
soap reservoir.
- 将从控制装置引出的皂液管插入皂液盒。
- Press the soap reservoir into place until an audible
click is heard.
- 将皂液盒按压到位,直至听到咔哒一声。
- Press the priming button in the
control unit until the soap
streams from the spout
nozzle – approximately
10 seconds.
- 按压控制装置中的手动出皂按钮直至皂液从喷嘴流出,大约需要
10秒钟。
Soap Reservoir
(Refillable)
皂液盒(可重复重装)
Dispensing Tube
皂液管
Check Valve
止回阀
Priming Button
手动出皂按钮
Sensor Range
Button
感应距离按钮

Set the Volume of Soap Dispensed 设置出液量
1434860-T01-A
- NOTE: The dispensor comes equipped with a 1600 ml
reservoir, and the soap counter is set to the 1600 ml
position.
- 注意:皂液器配有1600ml的皂液盒,皂液计数器设置在1600ml的
位置上。
- IMPORTANT! Four options are available to control the
amount of dispensed soap. The desired option is set by
toggling the volume switches to an up or down position.
- 重要! 有四个选项可用于控制出液量。可通过将容量开关切
换至上或下的位置来设置所需的选项。
- Lift the rubber cover to access the control switches. - 提起橡胶盖以操作控制开关。
- Set the position of the two volume switches for the
desired volume of soap dispensed. Refer to the
settings shown above.
- 通过设置两个容量开关的位置来获得所需的出液量。请参考上
文所示的设置。
- Verify that the soap counter switch is set to the correct
position for your reservoir size.
- 确保已根据皂液盒的尺寸将皂液计数器开关设置到正确的位置。
- Refer to the chart below for the number of dispenses
available based on the volume setting .
-皂液盒可选出液次数设置,请参阅下表。
- Reinstall the rubber cover.
- Refer to the chart below for the approximate number of
dispenses available based on the volume setting .
- 重新安装橡胶盖。
- 皂液盒的大约出液次数设置,请参阅下表。
A
0.8 ml
Cover
盖子 1600 ml
Soap
Counter
皂液计数器
Volume
Switches
容量开关
Up
上
Down
下
B
1.2 ml
C
1.6 ml 2.0 ml
Setting Soap Volume
Dispensed
Soap Count
(1600 ml)
A 0.8 ml 1800
B 1.2 ml 1200
C 1.6 ml 900
D 2.0 ml 720
设置 出液量 出液次数
(1600ml)
A 0.8 ml 1800
B 1.2 ml 1200
C 1.6 ml 900
D 2.0 ml 720
10
D(默认)

Set the Sensor Range
Spout LED Indicators
设置感应距离
龙头LED指示灯
Flashing BLUE 闪烁蓝光
1434860-T01-A 11
- NOTE: The default sensor distance is 2-3/4"
(70 mm) +/- 3/8" (10 mm).
注意:默认感应距离为70 mm± 10 mm。
- NOTE: The sensor range is 1” (25 mm) – 4” (102 mm). 注意:感应距离为1" (25 mm) ‒ 4" (102 mm)。
- Press and hold the sensor range button for 2 seconds
until the sensor flashes red.
按下感应距离按钮并持续2秒钟,直至感应器闪烁红光。
- Hold an object at the desired distance in front of the sensor. 将物体放在感应器前的目标距离处。
The base of the soap dispenser will lash BLUE every 6
seconds when the voltage is lower than 4.8 volts. The
soap dispenser will continue to dispense soap.
当电压低于4.8V时,皂液器的底座每6秒闪烁一次蓝光,
皂液器将继续排出皂液。
The base of the soap dispenser will lash (twice) BLUE
every 6 seconds when the voltage is lower than 4.5 volts.
The soap dispenser will not work. Replace the batteries.
当电压低于4.5V时,皂液器的底座每6秒闪烁一次(闪两下)蓝光,
皂液器不工作,需更换电池。
Flashing RED 闪烁红光
The base of the soap dispenser will lash RED every 6
seconds when the soap is running low. The soap
dispenser will continue to dispense soap.
当皂液余量较低时,皂液器的底座每6秒闪烁一次红光,
皂液器将继续排出皂液。
The base of the soap dispenser will lash (twice) RED
every 6 seconds when the soap is out. The soap
dispenser will not dispense soap. Reill the soap
reservoir and re-prime the dispenser.
当皂液用尽时,皂液器的底座每6秒闪烁一次(闪两下)红色,
皂液器不出皂液,重新装满皂液盒并重新手动出皂一次起动
皂液器。
Priming
Button
手动出皂按钮
Sensor Range
Button
感应距离按钮
Spout LED Indicators
龙头LED指示灯
Spout
龙头
Sensor
Flash
感应器闪烁

1434860-T01-A
故障现象 判断分析 解决方法
皂液器底座的
红色LED灯每
六秒闪烁一次
皂液余量较低(起
动后用完了一个
循环的70%)
用皂液重新装满皂液
盒,并起动皂液器
皂液器底座的
红色LED灯每
六秒闪烁两次
皂液用尽或极少
(起动后用完了一
个循环的90%)
用皂液重新装满皂液
盒,并起动皂液器
皂液器底座的
蓝色LED灯每
六秒闪烁一次
电池电量不足
(低于4.8V)
更换电池并起动皂
液器
皂液器底座的
蓝色LED灯每
六秒闪烁两次
电池没电
(低于4.5V)
更换电池并起动皂
液器
不出皂液
感应窗脏了 用干净、干燥的软
布擦拭感应窗
出液量很小或
没有
喷嘴堵塞 拆下喷嘴和发泡
组件, 用温水清洗
止回阀堵塞 从皂液管上卸下止回
阀,用温水清洗
导管(皂液和
空气)已断开
将导管重新连接
至控制盒
感应器电缆已
断开 重新连接感应器电缆
没有电源或连接
错误 检查电源连接
重新装满后未起
动皂液泵 起动泵
皂液管/止回阀
堵塞
用温水清洁皂液管/
止回阀
只有气泡排出
皂液泵出口堵塞 拆下皂液泵管,用温
水清洗皂液泵的出口
皂液泵泄漏 订购并安装新的皂
液泵
气泵已断开 检查气泵连接,将导
管重新连接至控制盒
气泵/导管堵塞 拆下气泵管,用温水
清洗气泵的出口
气泵不工作 订购并安装新的气泵
皂液泵无法正常
工作
订购并安装新的皂
液泵
没有泡沫排
出,只有洗手
液排出
皂液泵出口堵塞 拆下皂液泵管,用温
水清洗皂液泵的出口
感应距离内存在
物体
将物体移出感应
距离,等待20秒,
然后再启动皂液器
Symptoms Probable Cause Recommended Action
A red LED light
flashes at the
base of the soap
dispenser once
every 6 seconds
The soap is
running low (70%
of cycle used
after priming)
Refill the soap reservoir
and prime the soap
dispenserwith soap
A red LED light
flashes at the
base of the soap
dispenser twice
every 6 seconds
The soap is out
or very low (90%
ofcycle used
after priming)
Refill the soap reservoir
with soap and prime the
soap dispenser
A blue LED light
flashes at the
base of the soap
dispenser once
every 6 seconds
The battery is
running low
(lower than 4.8
volts)
Replace the batteries and
prime the soap dispenser
A blue LED light
flashes at the
base of the soap
dispenser twice
every 6 seconds
The battery is
out of power
(lower than 4.5
volts)
Replace the batteries and
prime the soap dispenser
No soap
dispenses
The volume of
soap dispensed
is small or
nonexistant
The sensor lens
is dirty
Wipe the sensor lens with
a clean, dry, soft cloth
The sensor cable
is disconnected
Reconnect the sensor
cable
The tube (soap
and air) is
disconnected
Reconnect the tube to the
control box
No power supply
or wrong
connection
Check the power supply
connection
The soap pump
is not primed
after refilling
Prime the pump
The dispensing
tube/check valve
is blocked
Clean the dispensing
tube/check valve
with warm water
The dispensing
tube/check valve
is blocked
Clean the dispensing
tube/check valve
with warm water
The nozzle is
clogged
Remove the soap nozzle
and foaming assembly.
Clean with warm water
Only air bubbles
are dispensing
The soap pump
outlet is clogged
Remove the soap pump
tubing
No foam is
dispensing. Only
liquid soap is
dispensing
The air pump is
disconnected
Check the air pump
connection and reconnect
the tube to the control box
The air pump/
tube is clogged
Remove the air pump
tubing. Clean the air
pump outlet with
warm water
The air pump is
not working
Order and install a new
air pump
The soap pump
is leaking
Order and install a new
soap pump
The check valve
is clogged
Remove the check valve
from dispensing tube.
Clean with warm water
The soap pump
is not working
correctly
Order and install a new
soap pump
12

1434860-T01-A
CARE AND CLEANING 保养与清洁
- Remove and clean the nozzle foaming assembly with
warm water.
- 卸下喷嘴发泡组件并用温水清洗。
- Remove and clean the check valve from the dispensing
tube in the soap reservoir with warm water.
- 卸下皂液盒中皂液管上的止回阀,并使用温水进行清洗。
- Fill the soap reservoir with minimal amount of clean
warm water.
- 用最少量的干净温水充注皂液盒。
- Re-attach the soap reservoir to the control box. Press
the system prime button. Hold the button down until all
of the water has been lushed down until all of the water
has been lushed
- 将皂液盒重新安装到控制盒上。按下系统起动按钮。按住按钮,直
至系统被完全冲洗一遍。
- Refill the soap reservoir with soap. Press the system
prime button. Hold down the button until any residual
water is pushed through the pump and soap is dispensed.
- 将皂液盒注满皂液。按下系统起动按钮。按住按钮,直至将残留的
水推入泵中并排出皂液为止。
Do not use any abrasive or harsh cleaners to clean
the faucets.
请勿使用任何擦洗剂或刺激性的清洁剂来清洁水龙头。
For best results, keep the following in mind when caring
for your KOHLER product:
为了达到最佳效果,请您在保养科勒产品时牢记以下几点:
Always test your cleaning solution on an inconspicuous
area before applying to the entire surface. Visit Kohler.
com/clean for Kohler faucet cleaner products.
在将清洁溶液用于整个表面之前,先在不明显的区域进行测试。
访问Kohler.com/clean获取科勒水龙头清洁剂产品的信息。
Wipe surfaces clean and rinse completely with water
immediately after applying cleaner. Rinse and dry any
overspray that lands on nearby surfaces.
使用清洁剂后立即擦拭表面并用清水彻底冲洗。清洗并擦干落在
附近表面上的所有过量喷涂物。
Upon cleaning other areas of the restroom be sure the
sensor lenses are protected from other cleaning
chemicals/solvents to prevent potential damages to the
sensor and/or electronics.
清洁洗手间的其他区域时,确保感应器镜片不会受到其他清洁化
学品、溶剂的侵蚀,避免给感应器和/或电子设备造成潜在损坏。
Do not allow cleaners to soak on surfaces. 请勿使清洁剂在表面上积聚。
It is recommended to lush the system with warm water
every 2 to 3 months.
建议每2至3个月用温水冲洗一次系统。
Use a soft, dampened sponge or cloth. Never use an
abrasive material such as a brush or scouring pad to
clean surfaces.
使用柔软的湿海绵或抹布。切勿使用刷子或百洁布等粗糙材料来
清洁表面。
13
This manual suits for next models
1
Table of contents
Other Kohler Dispenser manuals