manuals.online logo
Brands
  1. Home
  2. •
  3. Brands
  4. •
  5. Kohler
  6. •
  7. Plumbing Product
  8. •
  9. Kohler Elate 13963X-4 User manual

Kohler Elate 13963X-4 User manual

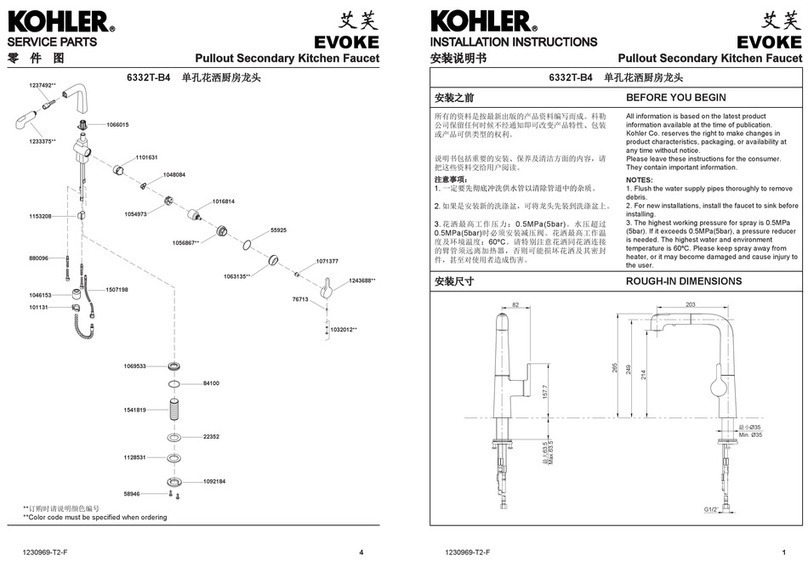
BEFORE YOU BEGIN
All information is based on the latest product
information available at the time of publication.
Kohler Co. reserves the right to make changes in
product characteristics, packaging, or availability at
any time without notice.
Please leave these instructions for the consumer.
They contain important information.
NOTE:
1. Flush the water supply pipes thoroughly to remove
debris.
2. For new installations, assemble the faucet to sink
before installing.
3. The highest working pressure for spray is 0.5MPa
(5 bar). If it exceeds 0.5MPa(5 bar), a pressure
reducer is needed. The highest water and
environment temperature is 60ºC. Please keep spray
away from heater, or it may become damaged and
cause injury to the user.
1150924-X2-C 1
13963X-4 
INSTALLATION INSTRUCTIONS
ขอแนะนําการติดตั้ง
LATE
1150924-X2-C 4
Pull Out Kitchen Faucet

 STANDARD APPLICABLE

Special model meets or exceeds the following at date
of manufacture: TIS
ROUGH-IN DIMENSIONS

กอกผสมอางลางจานชนิดหัวฝกบัว รุน อีเลท















Dimensions are approximate.
Unit: mm
 LIMITED WARRANTY
Kohler (Thailand) Public Company Limited warrants to the original products,
which are purchased from authorized distributors and dealers within
Kingdom of Thailand only, to be free of defects in material and workmanship.
Within the below mentioned periods from the date of purchase, Kohler
(Thailand) Public Company Limited will at its election, repair, replace or
make appropriate adjustment where company’s inspection disclose
any such defect occurring in normal usage and maintenance but is not
responsible for labor charges, removal charges, installation, or other
incidental or consequential costs. In no event shall the liability of Kohler
(Thailand) Public Company Limited exceed the purchase price of the
product.
This warranty applies only to Kohler Faucets installed in Thailand.
• Ceramic Valve(leak/drip)
- Lifetime Limited Warranty* for residential use
- and Five (5) Years for commercial use
• Finish Five(5) Years
• Fitting Five(5) Years
• Automatic faucet One(1) Year
• Hygiene spray(leak/drip Five(5) Years for selected models
from hygiene spray body)
only
• Shower
Five(5) Years
• Bathroom accessories Five(5) Years
This limited warranty DOES NOT COVER the defect or damage caused
by accident, natural disasters such as fire, flood, or earthquake, misuse
or abuse of products. Improper care and cleaning will avoid the warranty.
Consumers are responsible for the cost of service parts and service fee
for such cases.
To ensure continuous product quality and performance, as well as product
durability and lifetime, without any damage to the product, consumers
should purchase and use only genuine service parts and after-sales
services from Kohler (Thailand) Public Company Limited or company’s
authorized service centers, distributors, or dealers only.
*KOHLER® Faucet Lifetime Limited Warranty
Kohler (Thailand) warrants its faucets manufactured after January 1, 1997,
to be leak and drip free during normal residential use for as long as the
original consumer purchaser owns his or her home. If the faucet should
leak or drip during normal use, Kohler (Thailand) will, free of charge;
replace
the new cartridge necessary to put the faucet in good working
condition.
Kohler (Thailand) also warrants all other aspects of the faucet or accessories
(“Faucet”)**to be free of defects in material and workmanship during
normal residential use for as long as the original consumer purchaser
owns his or her home. If a defect is found in normal residential use,
Kohler (Thailand) will, at its election, repair, provide a replacement part or
product, or make appropriate adjustment. Damage to a product caused
by accident, misuse, or abuse is not covered by this warranty. Improper
care and cleaning will also void the warranty.
Proof of purchase (original sales receipt) must be provided to Kohler
(Thailand) with all warranty claims. Kohler (Thailand) is not responsible for
labor charges, installation, or other incidental or consequential costs. In no
event shall the liability of Kohler (Thailand) exceed the purchase price of
the Faucet.
Important: Never use cleaners containing abrasive cleansers, ammonia,
bleach, acids, waxes, alcohol, solvents or other products not recommended
for chrome. This will void the warranty.
To obtain warranty service, please contact your dealers or contact the
KOHLER (Thailand) Call Center, together with proof of purchase at;
Call Center
KOHLER (Thailand) Public Company Limited
16th Floor, Jasmine City Building
2 Soi Sukhumvit 23, Sukhumvit Road,
Wattana, Bangkok 10110
Tel: 02204-6222 Fax: 0-2204-6224
Email: [email protected]
COPYRIGHT ©2016 BY KOHLER (THAILAND) PUBLIC COMPANY
LIMITED
2.5º
83
182
1700
800
228
Ø36~Ø42
258
304
G1/2˝
616
Max 80 /
1150924-X2-C 2
How To Install The Faucet
Slide the escutcheon kit(1) into the
groove on the bottom of the body(2).
Insert the hoses and mounting studs(3)
into the mounting hole of the sink.
Let the bottom of the body against the
deck.
From underside of the sink, fit the
mounting bracket(4) on the mounting
studs. Position the faucet so that the
spray hose(5) is on the left, the spray
hose and two hoses(6) are symmetrical.
Tighten two nuts(8) with wrench(7) to
the mounting studs so that they can
secure faucet to sink.
Attach the hoses to water supplies.
Connect the hose with “COLD” label
connects to the cold water and
connects the other hose to the hot
water.
Put the weight(10) and clip(11) onto the
hose(5). Adjust the weight so that the
distance is right from the bottom of the
faucet to the weight. Insert the hose(5)
into the connector(9).
1150924-X2-C 3
INSTALLATION INSTALLATION CHECKOUT
Ensure that all coupling nuts are tight.
Ensure that the lever handle is in the off
position. Turn on the main water supply
and drain, and check for leaks. Repair as
needed.
Remove the spray(12). Run hot and cold
water about a minute to remove any
debris. Remove any debris from the filter
washer and aerator of the spray. Shut off
the faucet. Reinstall the spray.
How To Use Spray
Open the handle, if you want to use the
spray by hand, take the spray and pull
out the hose.
Press the button(A) as shown for the
water close. Press the button(B), (C) as
shown for two different forms of water
flow, as figure(a), (b) shown.
NOTE: Please pull it gently and do not
draw out the spray hose too long, or you
may damage the hose and connector.
A
B
12
C
ab
การติดตั�ง
วิธีติดตั�งก๊อกนํ�า
CARE AND CLEANING
การดูแลรักษาและทําความสะอาด
ทดสอบการติดตั�ง
HANDLE OPERATION
Lift the handle gently. Turn clockwise
for cold water, turn counter-clockwise
for hot water.



















การใช้งานก้านโยก
การใช้งานหัวฉีดชําระ







ข้อสังเกต:















• 
 
•  
 
• 
• 
 
• 
 
For best results, keep the following in mind when
caring for your product:
•Always test your cleaning solution on an
inconspicuous area before applying to the entire
surface.
•Wipe surfaces clean and rinse completely with
water immediately after applying cleaner. Rinse and
dry any overspray that lands on nearby surfaces.
•Do not allow cleaners to soak on surfaces.
•Use a soft, dampened sponge or cloth. Never use
an abrasive material such as a brush or scouring
pad to clean surfaces.
•The ideal cleaning technique is to rinse thoroughly
and blot dry any water from the surface after each
use.
6
3
2
1
4
7
8
5
10
11
9
1106464
Bearing
วยีลกเกัลส
1229188**
Spary
ะรําชดีฉวัห
1103431
Insert
ปลอก
1102621
Snap Ring
แหวนรอง
1106466
Escutcheon
ฐานรอง
1106107
Mounting Bracket
แหวนรองา้มกอืกเปูร
1128042
Nut
นอต
1036389
O-ring
งิรอโ
1104495
Connector Kit
อ่ตอ้ขดุช
29296
O-ring
งิรอโ
1229484
Valve Body Kit
ว์ลาวกอบะรกดุช
70012
O-ring
งิรอโ
1106461
Sleeve
ปลอก
38676
O-ring
งิรอโ
1232536
Valve
ว์ลาว
1106462**
Nut
นอต
1132368**
Bonnet
ฝาครอบ
38676
O-ring
งิรอโ
56283
Screw
นอต
1243690**
Handle
กยโนา้กดิบอืม
1111585
Nut Driver
ตอนนัขจแะรป
101131
Clip
ปิลค
1105827**
Spout
หัวก๊อกนํ�า
1153263
Mounting Kit
อุปกรณ์ยึดก๊อกนํ�า
880096
Hose
สายนํ�าดี
1046153
Brass Weight
ตุ้มนํ�าหนัก
1153137**
Hose Kit
สายนํ�าดี
SERVICE PARTS
อุปกรณประกอบและอะไหล
1150924-X2-C 5
e-mail: [email protected]
Call Center: +(66) 2204 6222
LATE
Pull Out Kitchen Faucet
กอกผสมอางลางจานชนิดฟวฝกบัว รุน อีเลท
13963X-4 
**Color code must be specified when ordering.

NOTE: For all Asia pacific regions (excluding China) add SP (SPxxxxxxx-**) in front of the part number when ordering.
 ระบุ SP เพิ่มในรหัส SPxxxxxxx-** เมื่อสั่งซื้อผลิตภัณฑ์ในประเทศกลุ่มเอเชียแปซิฟิค (ยกเว้นประเทศจีน)

Other Kohler Plumbing Product manuals

Kohler 1093479-2-B Assembly instructions

Kohler

Kohler 1093479-2-B Assembly instructions

Kohler K-8499 Assembly instructions

Kohler

Kohler K-8499 Assembly instructions

Kohler Sunstruck K-1967-GHW User manual

Kohler

Kohler Sunstruck K-1967-GHW User manual

Kohler 7098M Operation manual

Kohler

Kohler 7098M Operation manual

Kohler K-7303 User manual

Kohler

Kohler K-7303 User manual

Kohler Finial K-20012T-CP User manual

Kohler

Kohler Finial K-20012T-CP User manual

Kohler 16316-4FP User manual

Kohler

Kohler 16316-4FP User manual

Kohler K-8220 User manual

Kohler

Kohler K-8220 User manual

Kohler K-10430 Assembly instructions

Kohler

Kohler K-10430 Assembly instructions

Kohler K-3607 Assembly instructions

Kohler

Kohler K-3607 Assembly instructions

Kohler BodySpa K-1030 User manual

Kohler

Kohler BodySpa K-1030 User manual

Kohler K-13453 Operating manual

Kohler

Kohler K-13453 Operating manual

Kohler Margaux 16228A User manual

Kohler

Kohler Margaux 16228A User manual

Kohler Sterling 446124 User manual

Kohler

Kohler Sterling 446124 User manual

Kohler KARAT K-23883 User manual

Kohler

Kohler KARAT K-23883 User manual

Kohler K-6502 User manual

Kohler

Kohler K-6502 User manual

Kohler K-14675X User manual

Kohler

Kohler K-14675X User manual

Kohler Centerset K-15240 Assembly instructions

Kohler

Kohler Centerset K-15240 Assembly instructions

Kohler K-15171 Assembly instructions

Kohler

Kohler K-15171 Assembly instructions

Kohler K-14402 Assembly instructions

Kohler

Kohler K-14402 Assembly instructions

Kohler 16366 User manual

Kohler

Kohler 16366 User manual

Kohler K-6448 Assembly instructions

Kohler

Kohler K-6448 Assembly instructions

Kohler K-4107X User manual

Kohler

Kohler K-4107X User manual

Kohler K-1112 Assembly instructions

Kohler

Kohler K-1112 Assembly instructions

Popular Plumbing Product manuals by other brands

Kessel 67940 Instructions for installation, operation and maintenance

Kessel

Kessel 67940 Instructions for installation, operation and maintenance

Bradley SN2013/AST4 Installation

Bradley

Bradley SN2013/AST4 Installation

KWC A 115 Installation and service instructions

KWC

KWC A 115 Installation and service instructions

KWC ONO 10.151.023.000 Installation and service instructions

KWC

KWC ONO 10.151.023.000 Installation and service instructions

Hans Grohe Finoris 230 76060 Series Instructions for use and assembly

Hans Grohe

Hans Grohe Finoris 230 76060 Series Instructions for use and assembly

Bradley S19-315BF Installation

Bradley

Bradley S19-315BF Installation

PEERLESS PTT14019 installation instructions

PEERLESS

PEERLESS PTT14019 installation instructions

Spectrum Brands Pfister Kenzo R89-5DFK Quick installation guide

Spectrum Brands

Spectrum Brands Pfister Kenzo R89-5DFK Quick installation guide

Laufen LIS TWI H894663 quick start guide

Laufen

Laufen LIS TWI H894663 quick start guide

JG LowFit Castellated Panel 16mm installation manual

JG

JG LowFit Castellated Panel 16mm installation manual

Hans Grohe Metris 31088 1 Series Installation/User Instructions/Warranty

Hans Grohe

Hans Grohe Metris 31088 1 Series Installation/User Instructions/Warranty

Graff Cameo E-1752-LM69N Instructions for assembly and use

Graff

Graff Cameo E-1752-LM69N Instructions for assembly and use

Hans Grohe RSK 8310344 HG 01820180 Instructions for use/assembly instructions

Hans Grohe

Hans Grohe RSK 8310344 HG 01820180 Instructions for use/assembly instructions

Axor Starck Organic 12010003 Instructions for use/assembly instructions

Axor

Axor Starck Organic 12010003 Instructions for use/assembly instructions

DURAVIT XViu XV 7046 installation instructions

DURAVIT

DURAVIT XViu XV 7046 installation instructions

Bristan Pisa PS2 BAS C Installation instructions & user guide

Bristan

Bristan Pisa PS2 BAS C Installation instructions & user guide

Starsauna Oy Magnum Original 6,6kW Operating and installation instructions

Starsauna Oy

Starsauna Oy Magnum Original 6,6kW Operating and installation instructions

Hewi 950.12.205 Cleaning and Care Instructions

Hewi

Hewi 950.12.205 Cleaning and Care Instructions

manuals.online logo
manuals.online logoBrands
  • About & Mission
  • Contact us
  • Privacy Policy
  • Terms and Conditions

Copyright 2025 Manuals.Online. All Rights Reserved.