©2018 Kohler Co.
1207474-X2-F
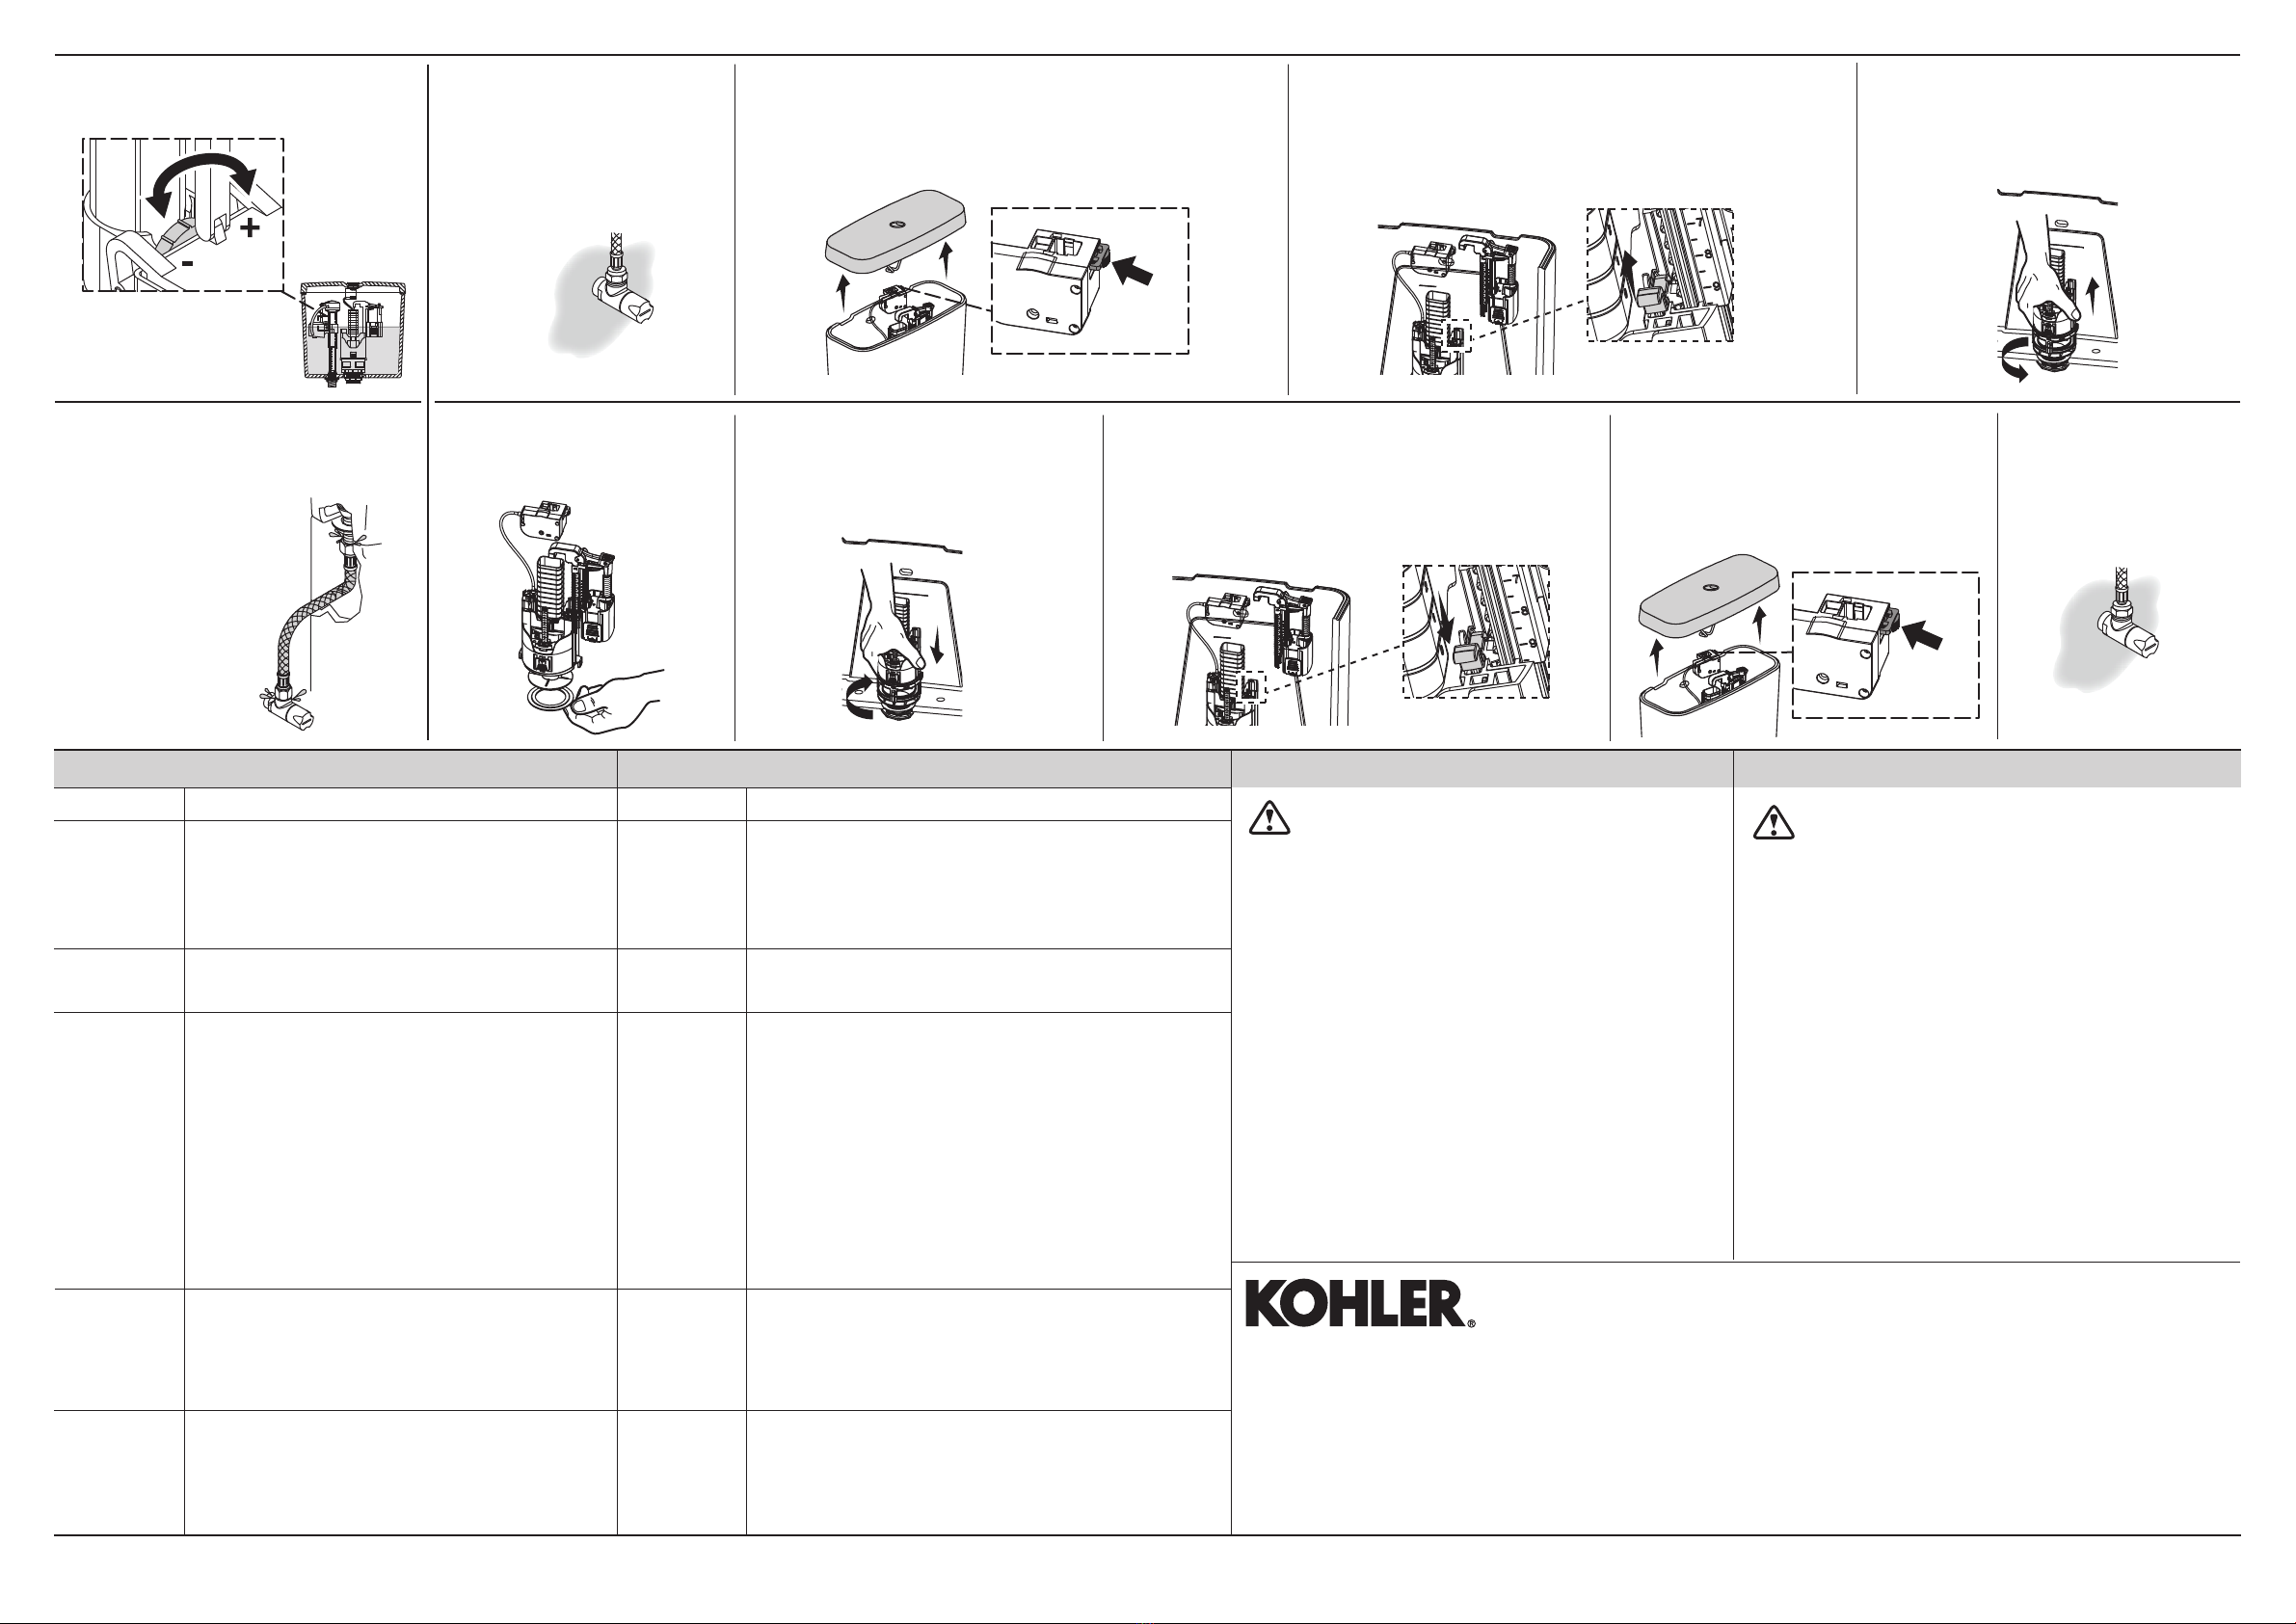
Flush several times and check for
leaks. Do not overtighten!
17
อยาขันแนนจนเกินไป!
Adjust the water level.
16
Shut off the water supply.
1
Lift the tank cover up. Press the locked buon to remove
the push buon from buon base.
2
กดคาง
Press hold
Note the float valve position and mark the float valve height.
Lift the lock up. Remove the float valve.
3
Turn the flush valve counterclockwise
and pull up.
4
Remove and replace the seal.
5 Place the flush valve in the position.
Turn the flush valve clockwise.
6
Install the float valve in the position. Ensure that
the float valve height is in the marked position.
Aach the lock.
7
Press the lock buon to the connect the
push buon. Aach the tank cover.
8
9Turn on the water
supply.
กดคาง
Press hold
เปลี่ยนซีลยาง
Replace the Seal
For best results, keep the following in mind when caring for
your product:
• Carefully read the cleaner product label to ensure
the cleaner is safe for use on the material.
• Always test your cleaning solution on an inconspicuous
area before applying to the entire surface.
• Wipe surfaces clean and rinse completely with water
immediately after cleaner application. Rinse and dry any
overspray that lands on nearby surfaces.
• Do not allow cleaners to sit or soak on the surface.
• Use a soft, dampened sponge or cloth. Never use an
abrasive material such as a brush or scouring pad to clean
surfaces.
• Be careful not to leave staining materials in contact with the
surface for extended periods of time.
• The ideal cleaning technique is to rinse thoroughly and blot
dry any water from the surface after each use.
WARNING: Risk of property or product damage. Do not
use in-tank cleaners in your toilet. Products containing
chlorine (calcium hypochlorite) can seriously damage
fiings in the tank. This damage can cause leakage and
property damage.
Troubleshooting Care and Cleaning การดูแลรักษาและการทําความสะอาด
Symptoms Recommended Action
1. Poor flush. A. Adjust the tank water level to match the waterline.
B. Fully open the water supply shut-off valve.
C.
Clear obstructions from the trapway, jet, or bowl rim
holes.
D Clear obstructions from the waste line.
2. No flush. A. Make sure the push buon rods are in place.
Adjust as needed.
4. Long tank
fill cycle.
A. Fully open the water supply shut-off valve.
B. Check the flexible supply line (if applicable) for
a kink. Remove the kink.
C. Clean the valve inlet, valve head, or supply line.
Flush lines.
5. Noisy tank
fill cycle.
A. Partially close the water supply shut-off valve if
the water pressure to the toilet is too high. Check
the toilet performance following any such adjustment.
B. Remove dirt or obstructions from the valve
head. Flush the lines.
3. The fill
valve turns
on/off by
itself or
it
runs,
allowing
water to
enter the
tank.
A. Check the position of flush valve cable, flush valve
cable must not overlap the valve float sinks.
B. Check the position of flush valve cable, flush valve
cable must not obstructive the phase of overflow
tube.
C. Clean or replace the flush valve seal if it is worn,
dirty, or misaligned with the valve seat or flush
valve seat is damaged.
D.
Clean the fill valve seal of debris or replace the seal
assembly.
E. Replace the fill valve if the valve float sinks.
F. Adjust the tank water level if it is too high.
Asia Customer Service Centre
No. 158, Jiang Chang San Road, Zhabei District, Shanghai, PRC Post Code 200436.
Tel: +(86) 21 2606 2572
KOHLER (THAILAND) PUBLIC COMPANY LIMITED
16th FL. Jasmine City Bldg., 2 Soi Sukhumvit 23, Sukhumvit Road, Wattana, Bangkok 10110 Thailand
Call Center Tel. +(66) 2204 6222
ชั้น 16 อาคารจัสมิน วิตี้, 2 ซอยสุขุมวิท 23 ถนนสุขุมวิท แขวงคลองเตยเหนือ เขตวัตนา กรุงเทพฯ10110
ลูกคาสัมพันธ โทร.0 2204 6222
ปญหาที่พบ วิธีการแกไข
ขอแนะนําการแกไขปญหาเบื้องตน
•
•
•
•
•
•
•


