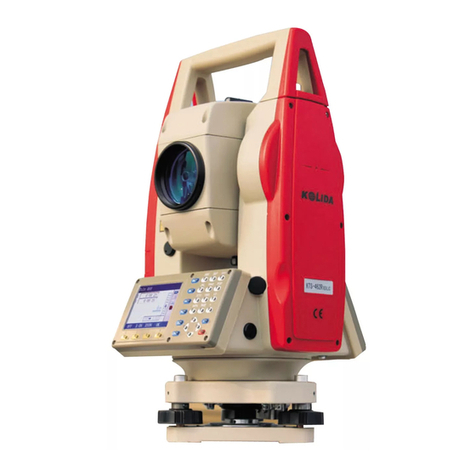
Kolida KTS-442UT Series User manual

1
CONTENTS
FOREWORD
1.Features………………………………………………………..…………………………………………..6
2.Precautions……………………………………………...………………………………………………......7
3.Nomenclature……………………………………………………………………………………………... 9
4.Keyfunctions……………………………..…………………………………………………………….....11
5.Characterentry……….…………….………………………………………………………………….......14
6.Displaysymbol………...………………………………………………………………………………......15
7. Mode Configuration……………………………………………………………………………………....15
PART1 PREPARATION FOR MEASUREMENT……………………………….………19
1. Unpackingandstoreof the instrument ……………………………………………………………….…..19
2. Setting the instrument up…………………………………………………………………………….…....19
3.Batterydismounting,information, recharging……………………………………………………………..21
4. Reflectorprisms….…………………………………………………………………………………...….22
5. Mounting and dismounting the instrument from tribrach……………………………………………….….22
6.Eyepieceadjustmentandobjectsetting………………………………………………………………...….23
7.Poweron/offandpreparationformeasurement…………………………………………………….….......24
7.1Poweron/off…………………………………………………………………………………………….24
7.2VerticalAngleTiltCorrection………………………………………………………………………....….24
7.3 Display Illumination………………………………………………………………………………….….26
7.4 Setting the Instrument Options…………………………………………………………………………....26
7.5 Setting Instrument Constant………………………………………………………………………………29
7.6 Setting LCD Contrast……………………………………………………………………………..…...…30
7.7 Setting Date and Time…………………………………………………………………………..………...31
7.8Explanations…………………………………………………………………………………………....32
PART2 BASIC MEASUREMENTS …………………………………………………..…….33
8.ANGLEMEASUREMENT………………………………………………………………………...33
8.1MeasuringtheHorizontalAngleBetweenTwoPoints(HorizontalAngle0)………………………….…33
8.1.1ExampleMeasuringtheHorizontalAnglebetweenTwoPoints…..…………………………………….34
8.2 Setting the Horizontal Circle to a Required Value …………………………………………………………35
8.2.1 Use HSET function to set a required direction value ……………………………………………………35
8.2.2UseHOLDto setarequireddirectionvalue……………………………………………………………..35
8.3HorizontalAngleDisplaySelection(Right/Left)…………………………………………………….….36
8.4HorizontalAngleRepetition……………………………………………………………………………...37
8.5Slopein %……………………………………………………………………………………………...39
9.DISTANCE MEASUREMENT………………………………………………………………….…39
9.1SettingsforDistanceMeasurement………………………………………………………………...….. ..40
9.2 Laserdirectionandlaserplummet………………………………………………………………….……42

2
9.3 Distance and Angle Measurement…………………………………………………………………….…..43
9.4ReviewofMeasuredData…………………………………………………………………………….....44
9.5OutputDatatoaComputer…………………………………………………………………………….....45
10.COORDINATEMEASUREMENT……………………………………………………………....47
10.1 Entering Instrument Station Data……………………………………………………………………..…49
10.1.1 Reading in Registered Coordinate Data………………………………………………………………..50
10.2AzimuthAngleSetting………………………………………………………………………………….50
10.2.1SetbacksightpointbyAngle…………………………………………………………………………..51
10.2.2 Set backsight point by coordinate………………………………………………………………….…..51
10.3CoordinateMeasurement……………………………………………………………………………….52
PART3ADVANCEDMEASUREMENT………………………………………………...55
11. SETTING-OUTMEASUREMENT………………………………………………………………55
11.1DistanceSetting-OutMeasurement………………………………………………..………….…………56
11.2REMSetting-OutMeasurement………………………………………………………………………..59
11.3CoordinatesSetting-OutMeasurement……………………………………………………..……………61
11.4DistanceMeasurementParametersSetting…………………………………………………….………..63
12.OFFSETMEASUREMENT………………………………………………………………………65
12.1Single-DistanceOffsetMeasurement……………………………………………………………….…..66
12.2AngleOffsetMeasurement……………………………………………………………………….……68
12.3Two-DistanceOffsetMeasurement………………………………………………………………..…….71
13.MISSING LINE MEASUREMENT…………………………………….………………………..73
13.1MeasuringtheDistancebetweenMultipleTargets……………………………………………………...74
13.1.1 Measuringthedistancebetweenmultipletargets………………………………………………………74
13.1.2Slopeinbetween2points……………………………………………………………………………..75
13.2ChangingtheStartingPoint……………………………………………………………………….……76
14.REM MEASUREMENT……………………………………………………………………….…..77
15.RESECTION MEASUREMENT…………………………………………………………….…..79
15.1Re-Observing……………………………………………………………………….………………….82
15.2AddKnownPoints……………………………………………………………………………………...82
16.AREACALCULATION…………………………………………………………………………...83
17.SETTINGOUTLINE…………………………………………………………………….……… 86
17.1Definingbaseline…….……………………………………………………….………………………..87
17.2set-outline(point)……………………………………………………………...………………………89
17.3Setingoutline(line)…………………………………………………………………………….……..90
18.POINTPROJECTION…………………………………………………………………………....92
18.1Definingbaseline……………………………………… ……………… …………… …………..........92
18.2Pointprojection……………………………………………………………………………….….…….93
19. ROADDESIGNANDSETTING-OUT……………………… …… …… ……… …… ……………...95

3
19.1.1DefineHorizontalAlignment(Maximumdataquantity:30)………………………………………...….95
19.1.2EditAlignment……………………………………………………………………………….……...100
19.1.3DefineVerticalCurve(Maximum30data)………… ……………………………… …………….…102
19.1.4EditVerticalCurve……………………………………………………………………………….…103
19.1.5InportHorizontalAlignment…………………………………………………………………………105
19.1.6ImportVerticalcurve……………………………………………………………………………..…106
19.1.7ReceivingHorizontalAlignmentData………………………………………………………..…….. .107
19.1.8ReceivingVerticalCurveData………… …… ………… … ………………… ……………… …...109
19.1.9DeletingHorizontalalignmentData……… … ……… ………………… ……… ………………...110
19.1.10DeletingVerticalCurve……………………………………………………………………………110
19.2RoadSetting-out………………………………………………………………………………………111
19.2.1SetStationPoint……………………………………………………………………………….…….112
19.2.2SettingBacksightPoint……………………………………………………………………………...113
19.2.3SettingOut…………………………………………………………………………………….…….116
19.2.4SlopeSetout………………..……………………………………………………………………….120
19A.SETTING-OUTARC…………………………………………………… ……… …… …………….122
PART4 DATARECORDING ………………………………………………………………...126
20SETTINGINMEMORYMODE……………………………………………………………...….127
20.1JOBSelection……………………………………………………………………………………..….127
20.1.1CurrentJOB Selection…………………………………………………………………………..…...127
20.1.2CheckMemoryStatus……………………………………………….……………………..……..….128
20.1.3Createnewworkingjob…………………………………………………………………...…….…..129
20.1.4Changethejobname…………………………………………………………………………..……130
20.1.5DelectJob………………………………………………………………………………………..….131
20.1.6CoordinateSelection…………………………………………………………………………..……132
20.1.7JobExport…………………………………………………………………………………..……….132
20.1.8CoordinateImport……………………………………………………………………........................134
20.1.9Commsoutput………………………………………………………………………………..……...135
20.1.10Commsinput………………………………………………………………………………..……..136
20.1.11Transfercoorddatatojob…………………………………………………………………….…….137
20.2ImportKnownPointData…………………………………….……………………………..….……. 138
20.2.1.InputknownPointCoordinate……………………………………………………………….……...138
20.2.2KnownCoordinateDataImport………………………………………………………….………….139
20.2.3KnownCoordinateDataExport…………………………………………………………….….……140
20.2.4Enteringcoordinatedatafromancomputer……….…………………………………….……….….140
20.2.5Sendingknownpointdatatocomputer…………………………………………………….………..141
20.2.6ClearingCoordinateDatafromMemory………………………………………………….…………142

4
20.3InputCodes…………………………………………………………………………………..……….142
20.3.1Code import………………………………………………………………………………….……...143
20.3.2Receivecode……………………………………………………………………………..…….…....143
20.3.3Allclear……………………………………………………………………………………………144
20.4Udiskmode………………………………………………………………………………………….144
20.5Initialization…………………………………………………………………………………….…….146
20.6AllFiles ……….……………………………………………………………………….…….……….147
20.7SettingforGridFactor…………………………………………………………………………………148
21. DATARECORDING IN RECORD MODE………………………………………………...….149
21.1Recording InstrumentStationData………………………………………………………………...…...149
21.2Recordingbacksightdata…………………………………………………………………………..…..151
21.2.1SetbacksightpointbyAngle……………………………………………………………….………...151
21.2.2Setbacksightpointbycoordinate………………………………………………………….……...….152
21.3RecordingAngleMeasurementData………………………………………………………..………….152
21.4RecordingDistanceMeasurementData…………………………………………………………….….154
21.5RecordingCoordinatesData…………………………………………………………………….….…156
21.6 Recording distance and coordinate data………………………………………………………………..157
21.7RecordingNotes………………………………………………………………………………….…..158
21.8ReviewingJOBData……………………………………………………………………………….…159
PART5 MEASUREMENTOPTIONS SELECTION……………………………...161
22.KEYFUNCTIONALLOCATION……………………………………………………………….161
22.1AllocationandRegistration……………………………………………………………………………162
22.1.1Allocatingfunctions………………………………………………………………………….………163
22.1.2Registeringanallocation…………………………………………………………………………….165
22.2RecallinganAllocation………………………………………………………………………………..166
23. INSTRUMENTPARAMETERSSETTING………………………………………………...….166
23.1ChangingInstrumentParameters…………………………………………………………………..…...166
PART6 CHECKINGANDADJUSTMENT……………………………………………...170
24.1 Plate Vial……………………………………………………………………………………….……...170
24.2CircularLevel………………………………………………………………………………….……...170
24.3InclinationofReticle………………………………………………………………………………….171
24.4PerpendicularityofCollimationLinetoHorizontalAxis(2c)……………………….. …………………171
24.5VerticalIndexDifferenceCompensation……………………………………………………………….173
24.6AdjustmentofVerticalIndexDifference(iangle)andVerticalAngle0Datum…………………………173
24.7Theadjustmentofhorizontalaxiserrorcorrection………………………………………………………175
24.8OpticalPlummet……………………………………………………………………………………...175
24.9InstrumentConstant(K)……………………………………………………………………………176

5
24.10ParallelBetweenCollimationlineandEmittingPhotoelectricAxis……………………………………177
24.11ReflectorlessEDM………………………………………………………………………………178
24.12TribrachLevelingScrew……………………………………………………………………………..178
24.13RelatedPartsforReflector……………………………………………………………………………178
25.SPECIFICATION ..................................................................................................................................................179
26.ERROR DISPLAYS………………………………………………………………………………..181
27.ACCESSORIES…………………………………………………………………………….…….. ..182
APPENDIXABIDIRECTIONALCOMMUNICATION…………………………….183
1.1OutputtingCommands………………………………………………………………………….….182
1.2EnteringCommand………………………………………………………………………………....190
1.3SetCommand……………………………………………………………………………………….192
APPENDIX-BCALCULATE ROADALIGNMENT……………………………….…193
1.1 ROAD ALIGNMENT ELEMENTS………………………………………………………………..…193
1.2 CALCULATIONOFROADALIGNMENTELEMENTS………………..…………………….….…195

6
FOREWORD
Thank youforpurchasingKOLIDATotalStation KTS-442UTseries!
Thismanualisapplicablefor KOLIDATotalStationKTS-442UTseries!
KTS-442UTseriesTotalStation isequippedwithvisiblelaserreflector lessdistancemeter.
Pleasereadthe manual bookcarefullybeforeoperatingthe instruments.
1.FEATURES
1. CompleteFunction
KOLIDAKTS-442UTserieshas complete surveying program, the functions of data record and parameter setting,
issuitableforprofessionalandconstructionsurvey.
2. USDPenDrive
With the advantages of large memory storage, rapid transmission data system, removable and secure functions,
various surveying data could be easily saved in the USB Pen Drive and moved into computer through the port of
lap top computer. Please do not move out the USD Pen Drive when operating the data stored in it, otherwise the
surveying data canbe damaged.1MB spaceinUSDPenDrive maycontains 15,000data.
3.Powerful MemoryManagement
Verylargememoryand theenhancedfilemanagementsystemcanhelpyoueasilyrealizethefunctionof
addition,deletion,modification,andtransmissionofthedata.
4.AbsoluteEncodingCircle
With absolute encoding system, measurement can be started immediatley after booting up the instrument. No
azimuth informationis ever losteven insudden powerbreak.
5.ReflectorlessDistanceMeasurement
The reflectorless function of KTS-442UT enables you to carry out long-distance and high-accuracy measurement
directly towards various objects of different materials and colors (like wall of building, telegraph pole, wire, cliff,
mountain,clay, woodenstake, etc.) It’s the best solution tomeasure thehard-reachorunreachableobject.
6.AbundantSurveyingPrograms
KTS-442UTnotonlyhasthebasicsurveyingmodes(angle,distance,coordinatemeasurement)butalsoequipped
withspecialsurveyingprograms,forexample,REM,Offset,MLM,Staking-out,RoadDesign,PointProjection,
Setoutline,etc, tomeetthedemandofprofessionalsurvey.

7
2.PRECAUTIONS
1.Never place instrument directly on the ground,as sand or dust may cause damage to the screw holes or the
centeringscrewonthebaseplate.
2. Before carry on the measurment, we need to have an overall check with the inrsrument, such as: battery,
parameters, andinitial settings.
3. When working in a sun-baked (rainy or wet) day, please use the surveying umbrella to avoid damage. Besides,
donot aimthetelescopeat thesunwithoutafilter.
4.Whentheinstrumentisnotinuse,putitinthecaseandkeep theinstrumentfromshock,dustandhumidity.
5. If there is great difference between the temperature in working area and that in store place, leave the instrument
in thecasetillitisusedtothetemperatureofoutsideworkingarea
6.Cleanitssurfacewithawoolenclothafterusing.Iftheinstrumentgetswet,dryitimmediately.
7. Turn the power off before removing the battery, otherwise it maycause damage to internal circuit. When place
KTS into its case, firstlyremove the battery and place it in the case in accordance with its layout plan. Make sure
thattheinsideofthecarryingcaseandKTSaredrybeforeclosingthecase.
8.Noused for alongtime, seperate the batteryfrom the instrument and store themrespectively.Thebatteryshould
bechargedonce amonth.
9.Cleanexposed opticalpartswithdegreasedcottonorlenstissueonly!
10. Duringtransporting, theinstrument should beplaced initscarrying case. It will be bettertoplace some cushion
aroundthecaseto keeptheinstrumentfromthe damageofshock.
11. If there is something wrong on the instrument, please do not disassemble the instrument unless you are a
professionaltechnician
12.NeveraimthelaserbeamofKTS-442UTSeriesTotalStationathumaneyes.
SAFETYGUIDE
InteriorEDM(VisibleLaser)
Warning:
ThetotalstationisequippedwithanEDMof a laser grade of3R/Ⅲa, whichcould be recognized bythe following
labels:
On the vertical tangent screw, there is a label shows “CLASS III LASER PRODUCT”. A similar label is on the
oppositeside.
Thisproduct isclassifiedasClass3Rlaserproduct,which iscoordinated withthefollowing standards.
IEC60825-1:2001“SAFETY OF THE LASER PRODUCT”.
Class 3R/Ⅲa laser product: It is harmful to observe laser beam continuously. User should avoid sighting the laser
attheeyes.Itcanreach 5timestheemittinglimitofClass2/IIwith awavelengthof400nm-700nm.
Warning:
Continuouslylooking straightat thelaserbeamis harmful.

8
Prevention:
Do not stare at the laser beam, or point the laser beam to others’ eyes. Reflected laser beam is a valid
measurementtothe instrument.
Warning:
When the laser beam is shooting at prism, mirror, metal surface or window, the reflector laser beam is also
harmfultoeyes.
Prevention:
Do not stare at the locations with laser reflection. When the reflectorless function is enabled for EDM, do not
starebesidethelaserbeamorprism. Collimatingtheprismvia thetelescopeunitisrequested only.
Warning:
IncorrectapplicationofClass3Rlaserequipmentisverydangerous.
Prevention:
To avoid being hurt, you must pay particular attention to the precaution measures and keep it under control
within the distance ofpossibledangeraccordingto standard IEC60825-1:2001.
ThefollowingexplainthekeysectionsoftheStandard:
Laser instrument of Class 3R is applicable outdoors and in construction field (measurement, defining lines,
leveling).
a) Only those persons who are trained with related course and authenticated are allowed to install, adjust, and
operatethiskindoflaserinstrument.
b)Relevantlaserwarningsymbolsshouldbeeasilyidentifiedwithintheoperatingrange.
c)Preventanyperson tolookstraightatoruseopticalinstrument toobservethelaser beam.
d) To prevent the harm caused by laser, block the laser beam at the end of the working route. When the laser beam
exceeds the limit area (harmful distance*) and when there are motivating persons, stopping the laser beam is a
must.
e)Theopticalpathof the laser should be sethigher orlower than the lineof sight.
f) When the laser instrument is not in use, take care of it properly. The person who is not authenticated is not
allowedtouse.
g) Prevent the laser beam from irradiating plane mirror, metal surface, window, etc., especially beware of the
surfaceofplanemirrorandconcavemirror.
* Harmful distance means the maximum distance between the start point and the point which the laser is
weakened to a degree that doesn’t harm people.
* The harmful distance of built-in laser unit is 1000m(3300ft). When the operation is beyond this range and laser
beamisweakenedtoClass1R,directstaringatlaserbeamis less harmful.

9
3.NOMENCLATURE
Collimator
Objective Lens
PlateLevel
Screen
USBPort
AdjustmentScrew
forCircularLevel

10
Eyepiece
BatteryLock
TelescopeGrip
Battery
VerticalTangentScrew
TriggerKey
HorizontalTangentScrew
Tribrach
CircularLevel
LevellingScrew

11
4.KEYFUNCTIONS
The KTS-442UThas a 28-keys keyboard. The keyboard has a power switch key, an illumination key, 4 soft
keys, 10 operatingkeys and 12 alphanumeric keys.
·PowerON :Press POWER. PowerOFF :Press POWER for 3seconds
·Press keytoturnONorOFFbacklight.
·SoftKey
The functions of soft keys are showed on the bottom of the display window of KTS-442UTselect these functions
byusingF1toF4keys, press FNC keytoviewotherfunctionsinanotherpage.
Forexample, thefollowingshowstheinitialsettingofthesoftkeysdisplayedin MEASmode
Page1 :
Name
Function
HD (SDorVD)
Startdistancemeasurement
SHV
Select distance measurementcategory(change between SD, HD,VD)
HSET
Setthehorizontalangletoarequiredvalue
EDM
Distance measurement parametersetting
Page2 :
Name
Function
0SET
0 Setofhorizontalangle
CRD
Startcoordinatemeasurement
S-O
Startsetting-outmeasurement
REC
Recordobserveddata
Power
ESC
Enter
Space
Backspace
Shift
Function
Backlight

12
Page3 :
Name
Function
MLM
Startmissinglinemeasurement
RESEC
Startresectionmeasurement
MENU
Displaymenumode
HT
Settheheightofinstrumentandthetarget
OperatingKeys:
Name
Function
ESC
Cancelpreviousoperationand returntopreviousscreenormode.
FNC
1.Changepage.2. Enabletarget-heightinputtinginstaking-out,missingline,and
remotemeasurement.
SFT
TurnSHIFTmodeONor OFF (switchnumber inputand alphabet input)
BS
Deleteablankleft
SP
1. Hotkeytomodifythedistancemeasurementparameter.
2. SpacebarinIME(InputMethod Editor)
▲
Movecursor/selectoptionsup
viewthepreviousdataindatalist
▼
Movecursor/selectoptionsdown
viewthenext dataindatalist
Movecursortotheleft/Selectanotheroptions
viewtheprevious pagein datalist
Movecursortotheleft/Selectanotheroptions
viewthenext pageindatalist
ENT
Confirmtoentryorsavedataonthatlineandmovethecursortothenextline
AlphanumerickeyswithshiftmodeOFF :
Name
Function
STU GHI
1 ~9
Alphanetinput(enterthealphanetonthetopofkey)
1 ~9
1) Numericalinput2)
2) Selecting menuitem
.
1) Inputdecimalpoint: .(in numberinputmode)
2) Inputsymbol: \ #(in alphabet inputmode)
3) Input ° ′ ″ (in angle input screen)
+/-
1) Inputminussymbol: -
2) Inputsymbol: * / +
3) Enterthelaserguidanceinterface (None-Inputmode)

13
·HotKey
1. SPkey:EDMSettings
When youarenotinputtingnumbers oralphabets,press SP key,ashortcutscreen will be showed. Press ▲▼ key
to move the cursor,press ◀▶ keyto switch the setting. Press ENT to save the settings, press ESC to quit to upper
menu.
LaserPointer :OFF ←→
PlummetBrightness :2 ←→
CrosshairIllumination:0 ←→
PrismConstant :-30 mm
Mode:Fine”s”
Reflector: Prism
Laser Pointer ON/ OFF
0isoff,1-4choosebrightness
0isoff,1-4chososebrightness
Only works under PrismMode
Choose fromsingle/3times/Rept./Tracking
ChoosefromPrism/Non-Prism/Sheet
Note:
1) When you press SP to enter the above menu, laser plummetwill be ON. Press ESC to quit, laser Plummet will
beOFF.
2. SFT + ·:CompensatorON/OFF
When you are not inputting numbers or alphabets, press SFT key, then press ·, compensator screen will be
showed.
Meas.PC -30
PPM 0
3
ZA 92°36′25″
HAR 120°30′10″
P1
SD SHV HSET EDM
Tilt sensor [XYON]
OFF X-ON XYON DIGIT
3. SFT + +/- : LaserPointerandLaserPlummet
F1:TurnonLaserPointer F2:Turnoff
↑ and ↓: change the brightness of Laser Plummet point
·TriggerKey
Underanymeasurementscreen,you can press triggerkeytoperforma distance/coordinatemeasurement.

14
5.CHARACTERENTRY
Jobnames,datanumbers,codes,etcareenteredtoKTS-442UTusinglettersoffthealphabetandnumerals.
Changebetweenalphabetic andnumerical entrybypressing SFT key.An Sis displayed onthe right side of the
screenwheninalphabetentrymode.
Alphabet entry mode ←SFT→ Numeral entrymode
Entryinalphabetandnumeralmodeisperformedasfollows:(Eg :CharacterentryJOBM2)
Procedure
Operation
Display
⑴Enter Alpha-numeric input mode,
each key stands for three alphabets
andone number.
Pressthekey,thefirstalphabetwill
beshownonthecursorposition.
Pressthekeybyfourtimes,the
numberwillbeshown.
Alpha
Key
+
Mem. CharacterEntry
Code:JOB
S
OK
⑵Press SFT to enter numeral input
mode.
SFT
Mem. CharacteEntry
Code:JOBM2
OK
⑶When theentry is finished, press ENT.
Theoriginal screenisrestored.
Mem. Character
Code:JOBM2
Saving
OK
Trigger Key,toperformafast measurement
withoutmoving youreyesawayfromeyepiece

15
6. DISPLAYSYMBOLS
Somesymbolsareusedin MEAS mode.Theirmeaningsarepresentedbelow.
Symbol
Meaning
PC
Prismconstant
PPM
Atmosphericcorrection
ZA
Zenithangle(Zenith0°)
VA
Verticalangle(horizontal0°/horizontal0°±90°)
%
Slopein%
S
Slopedistance
H
Horizontaldistance
V
Heightdifference
HAR
Horizontalangleright
HAL
Horizontalangleleft
HAh
Horizontal anglehold
Tilt anglecompensationON
7.MODE CONFIGURATION
KTS-442UToperates in a series of modes depending on your measurement need. This section explains
therelationshipbetweenthedifferentmodesandpresentstablesofthemenusforeachmode.
·ModeDiagram
StatusDisplay
Measuring Mode
MemoryMode
SettingMode

16
1.Quick guide
(Measurement)
(Record)
REC.
ESC
ESC MEAS (Menumode)
(StateScreen)
Menu
ESC
Mem. CNFG
(Memory) (Config)
2.MenuTable :
7.Note JOB01 ↑
8、查阅数据
↓
Memory(2)
测量. PC -30
PPM 0
S 111.3742 m 3
ZA 92°36′25″
HAR 120°30′10″P3
MLM RESE HENU HT
P
1
斜距 切换 置角
参数
测量. PC -30
PPM 0
S 111.3742 m 3
ZA 92°36′25″
HAR 120°30′10″P2
0SET CRD S-O REC
P
1
斜距 切换 置角
参数
Meas. PC -30
PPM 0
S 111.3742m 3
ZA 92°36′25″
HAR 120°30′10″ P1
SD SHV HSET EDM
P
1
斜距 切换 置角
参数
2021-01-25 10:00:48
Model:KTS-442UT
No. :S129260
Version:20201210
Job :A:\ JOB01. JOB
Meas Mem. CNFG
1. Stationdata JOB01 ↑
2. Backsightdata
3.Angledata
4. Distancedata
5. Coord.data
6. Dist.and.Coord.data ↓
Menu(2) ↑
6、后方交会
7、角度复测
8、面积计算
9、道路设计与放样
↓
Menu(1)
1. Coordinate
2. Set-out
3. Offset-measurement
4. Missingline
5.Remotemeasurement
↓
1.Observationcondition
2.Instrumentparameters
3.Dateandtime
4. Communication para.
5.Unitsetting
6.Keyfunction
Memory(1)
1.Workingjob
2.Knowndata
3.Code
4.Roaddesign
5.Format

17
(1)MEASmodemenu
Name
Function
SD (HDorVD)
Distancemeasurement
SHV
Select distance mode (Select between slope distance, horizontal distance, height
difference)
0SET
Sethorizontal angleto0
HSET
Setknownhorizontalangle
R/L
Selecthorizontalangleright/Left
REP
Horizontalanglerepetitionmeasurement
HOLD
HorizontalangleHold/Release
ZA/%
SwitchbetweenZenithangle/slopein %
HT
Setthe instrument height andtargetheight
REC
Datarecording
REM
REMmeasurement
MLM
MLMmeasurement
RCL
Displayfinalmeasurementdata
VIEW
Displayobservationdatafor the selectedJOB
EDM
Setting EDM (atmospheric correction and target, distance measurement mode
setting )
COORD
Coordinatesmeasurement
S-O
Setting-out measurement
OFFSET
Offsetmeasurement
MENU
Tomenumode
RESEC
Resectionmeasurement
D-OUT
Outputmeasurementresulttoexternalequipment
F/M
Switchbetweenmeters/feet
AREA
Areacalculation
ROAD
DesignandSetoutroad
PROJ
PointProjection
LINE
LineSetout
(2) RECModeMenu
Name
Function
Stndata
Occupiedstationdatarecording
Backsightdata
Recordbacksightbearingangleandcoordinatedata
Angledata
Anglemeasurementdatarecording

18
Distdata
Distancemeasurementdatarecording
Coorddata
Coordinatesmeasurementdatarecording
Dist.and Coord.
Recorddistanceandcoordinatedata
Note
Notedatarecording
View
Reviewjobdata
(3) MemoryMode
Name
Function
JOB
JOBselectionandmanagement
Knowndata
Knowndatainputandmanagement
Code
Codeinputandmanagement
Defineroads
Designofroad date
Udiskmode
connectPC
Initialize
Restorefactorysetting
Allfile
managementandeditingofdocument
Gridfactor
Gridfactor

19
PART 1PREPARATIONFOR MEASUREMENT
1. UNPACKINGANDSTOREOFINSTRUMENT
· Unpackingofinstrument
Placethe caselightlywith thecoverupward,and unlockthecase,takeouttheinstrument.
·StoreofInstrument
Cover the telescope well, place the instrument into the case with the vertical clamp screw and circular level
upward(Objectivelenstoward tribrach),tighten the verticalclampscrewandlockthecase.
2. SETTINGTHEINSTRUMENTUP
Place the instrument on the tripod. Level and center the instrument precisely to ensure the best performance.
Use the specialcenterpoint.
OperationReferto“Leveling andCenteringtheInstrument”
1.Settingupthe tripod
①Makesurethelegsarespacesatequalintervalsandtheheadisapproximatelylevel.
②Setthetripod sothe centerofthehead is directlyover the surveying point.
③Step onthe tripodshoesto makesure thetripod isfirmlyfixed on the ground.
2.Installing theinstrumentonthe tripod
①Placetheinstrumentcarefullyonthetripodhead
②Supporting the instrument with one hand, tighten the centering screw to fix it to the screwon the base
plateofthe instrument.
3.Roughlylevelingtheinstrumentbythecircularlevel
①Turn the leveling screw A and B to move the bubble in the circular level, in which case the bubble is
located on a line perpendicular to a line running through the centers of the two leveling screw being
adjusted.
①Turn the leveling screw A and B to move the bubble in the circular level, in which case the bubble is
located on a line perpendicular to a line running through the centers of the two leveling screw being
adjusted.

20
4.Levelingbytheplatelevel
①Rotate the instrument horizontally by loosening the Horizontal Clamp Screw and place the plate level
parallel with the line connecting leveling screw Aand B, and then bring the bubble to the center of the
platelevelbyturning theleveling screwsAand B.
②Rotatethe instrument90º(100g) arounditsvertical axisand turn theremainingleveling screworleveling
Cto centerthebubbleoncemore.
③Repeat the procedures ①② for each 90º(100g) rotation of the instrument and check whether the
bubbleiscorrectlycenteredin alldirections.
5.Centeringbyusingtheopticalplummet
1)Settripod
Lift tripod to suitable height, ensure equal length of three legs, spread and make tripodhead parallel to theground,
andplace it right abovethe measurement station point.Prop uptripod on the groundand fixone leg.
2)Install instrument and collimate the point
Set instrument carefully on tripod, tighten the central connecting screw and adjust optical plummet to make the
reticle distinctly. Hold the other two unfixed legs with both hands and adjust position of these two legs through
observation of optical plummet. As it approximately aims at the station point, make all three legs fixed on the
ground.Adjust three leg screwsof the instrument to make opticalplummet collimate preciselyto the station point
3)Use circular vial toroughlylevel theinstrument
Adjustlength of three legs oftripod, make the circular vial bubbleof the instrument in the middle.
Table of contents
Other Kolida Measuring Instrument manuals

Kolida
Kolida KTS440 R Series User manual

Kolida
Kolida K1 Pro User manual

Kolida
Kolida KTS440 Series User manual

Kolida
Kolida K20s User manual

Kolida
Kolida KL-15 User manual

Kolida
Kolida Total Station KTS-462R10L User manual
Kolida
Kolida KL-03 User manual

Kolida
Kolida K3 IMU User manual

Kolida
Kolida DL-200 User manual

Kolida
Kolida KTS-470 R Series User manual