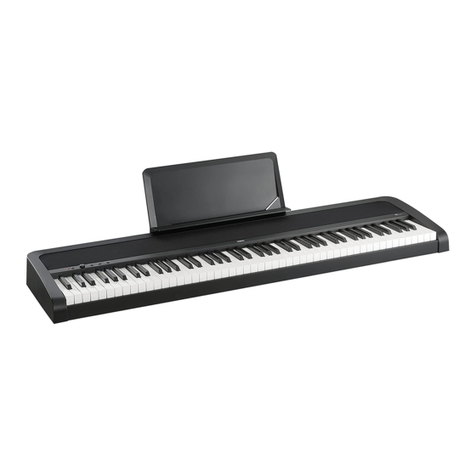
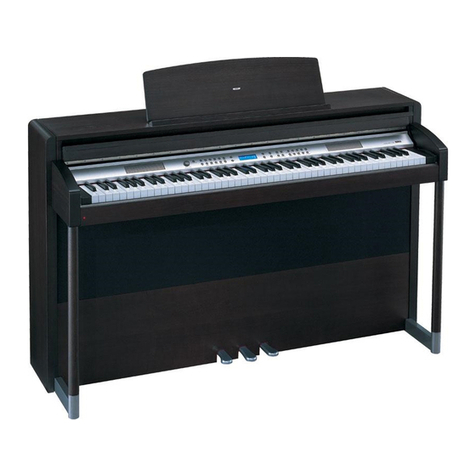
Korg C1 User manual

取扱説明書
Owner’s Manual
Manuel d’utilisation
Bedienungsanleitung
Manual de usuario
EFGSJ 3
Thank you for purchasing the Korg C1/C1 Air digital piano.
Merci d’avoir choisi la piano numérique C1/C1 Air de Korg.
Vielen Dank, dass Sie sich für einen C1/C1 Air
digtal-Klavier von Korg entschieden haben.
Gracias por comprar el Korg C1/C1 Air Piano digital.
このたびは、コルグデジタル・ピアノC1/C1Air を
お買い上げいただきまして、まことにありがとうございます。

2
Precautions
Location
Using the unit in the following locations can result in a malfunc-
tion.
• Indirectsunlight
• Locationsofextremetemperatureorhumidity
• Excessivelydustyordirtylocations
• Locationsofexcessivevibration
• Closetomagneticelds
Power supply
PleaseconnectthedesignatedACadaptertoanACoutletofthe
correctvoltage.DonotconnectittoanACoutletofvoltageother
thanthatforwhichyourunitisintended.
Interference with other electrical devices
Radios and televisions placed nearby may experience reception
interference.Operatethisunitatasuitabledistancefromradios
andtelevisions.
Handling
Toavoidbreakage,donotapplyexcessiveforcetotheswitchesor
controls.
Care
Iftheexteriorbecomesdirty,wipeitwithaclean,drycloth.Donot
useliquidcleanerssuchasbenzeneorthinner,orcleaningcom-
poundsorammablepolishes.
Keep this manual
Afterreadingthismanual,pleasekeepitforlaterreference.
Keeping foreign matter out of your equipment
Neversetanycontainerwithliquidinitnearthisequipment.If
liquidgetsintotheequipment,itcouldcauseabreakdown,re,
orelectricalshock.
Becarefulnottoletmetalobjectsgetintotheequipment.Ifsome-
thingdoesslipintotheequipment,unplugtheACadapterfrom
thewalloutlet.ThencontactyournearestKorgdealerorthestore
wheretheequipmentwaspurchased.
THE FCC REGULATION WARNING (for USA)
NOTE: This equipment has been tested and found to comply
withthelimitsforaClassBdigitaldevice,pursuanttoPart15of
theFCCRules.Theselimitsaredesignedtoprovidereasonable
protectionagainstharmfulinterferenceinaresidentialinstal-
lation. This equipment generates, uses, and can radiate radio
frequencyenergyand,ifnotinstalledandusedinaccordance
withtheinstructions,maycauseharmfulinterferencetoradio
communications.However,thereisnoguaranteethatinterfer-
encewillnotoccurinaparticularinstallation.Ifthisequipment
doescauseharmfulinterferencetoradioortelevisionreception,
whichcanbedeterminedbyturningtheequipmentoandon,
theuserisencouragedtotrytocorrecttheinterferencebyoneor
moreofthefollowingmeasures:
• Reorientorrelocatethereceivingantenna.
•
Increasetheseparationbetweentheequipmentandreceiver.
• Connecttheequipmentintoanoutletonacircuitdierentfromthat
towhichthereceiverisconnected.
• Consultthedealeroranexperiencedradio/TVtechnicianforhelp.
Ifitems suchascablesare includedwiththisequipment,you
mustusethoseincludeditems.
Unauthorizedchangesormodicationtothissystemcanvoid
theuser’sauthoritytooperatethisequipment.
Thistransmiermustnotbeco-locatedoroperatedinconjunc-
tionwithanyotherantennaortransmier.
ThisdevicecomplieswithPart15oftheFCCRules.Operation
issubjecttothefollowingtwoconditions:(1)Thisdevicemay
notcauseharmfulinterference,and(2)thisdevicemustaccept
anyinterferencereceived,includinginterferencethatmaycause
undesiredoperation.
CANICES-3B/NMB-3B
ThisequipmentcomplieswithFCCradiationexposurelimitsset
forthforanuncontrolledenvironmentandmeetstheFCCradio
frequency(RF)ExposureGuidelines.Thisequipmenthasvery
lowlevelsofRFenergythatitdeemedtocomplywithoutmaxi-
mumpermissiveexposureevaluation(MPE).
This device complies with Industry Canada licence - exempt
RSSstandard(s).Operationissubjecttothefollowingtwocon-
ditions:(1)thisdevicemaynotcauseinterference,and(2)this
devicemustacceptanyinterference,includinginterferencethat
maycauseundesiredoperationofthedevice.
ThisequipmentcomplieswithICradiationexposurelimitsset
forthforanuncontrolledenvironmentandmeetsRSS-102ofthe
ICradio fre quency (RF) Exposure rules. This equipment has
verylowlevelsofRFenergythatitdeemedtocomplywithout
maximumpermissiveexposureevaluation(MPE).
European Union Directives Conformance Statement
KorgInc. hereby declares thatthe product meetsthe
requirementsofDirective1999/5/EC.
You can view the Declaration of Conformity (DoC)
toDirective1999/5/ECin theOwner’sManual ofthis
productpostedontheKorgwebsite(www.korg.com).
Notice regarding disposal (EU only)
When this “crossed-out wheeled bin” symbol is dis-
playedontheproduct,owner’smanual,baery,orbat-
terypackage,itsigniesthatwhenyouwishtodisposeof
thisproduct,manual,packageorbaeryyoumustdoso
in an approved manner. Do not discard this product,
manual,packageorbaeryalongwithordinaryhouse-
holdwaste.Disposinginthecorrectmannerwillpreventharm
to human health and potential damage to the environment.
Sincethecorrectmethodofdisposalwilldependontheappli-
cablelawsandregulationsinyourlocality,pleasecontactyour
local administrative body for details. If the baery contains
heavymetalsinexcessoftheregulatedamount,achemicalsym-
bolisdisplayedbelowthe“crossed-outwheeledbin”symbolon
thebaeryorbaerypackage.
IMPORTANT NOTICE TO CONSUMERS
Thisproducthasbeenmanufacturedaccordingtostrictspeci-
cations and voltage requirements that are applicable in the
countryinwhichitisintendedthatthisproductshouldbeused.
If you have purchased this product via the internet, through
mailorder,and/orviaatelephonesale,youmustverifythatthis
productisintendedtobeusedinthecountryinwhichyoure-
side.
WARNING:Useofthisproductinanycountryotherthanthat
forwhichitisintendedcouldbedangerousandcouldinvalidate
themanufacturer’sordistributor’swarranty.
Pleasealsoretainyourreceiptasproofofpurchaseotherwise
your product may be disqualied from themanufacturer’sor
distributor’swarranty.
* BluetoothisaregisteredtrademarkofBluetoothSIG,Inc.
* Allproductnamesandcompanynamesarethetrademarksorregis-
teredtrademarksoftheirrespectiveowners.
3
Table of Contents
Precautions ----------------------------------------------- 2
Parts and their functions ----------------------------- 4
Preparing to Play---------------------------------------- 5
Before You Begin ---------------------------------------------------- 5
ListeningtotheDemos -------------------------------------------- 6
Playing the C1/C1 Air----------------------------------- 7
Playingasinglesound(SingleMode)-------------------------- 7
Usingpedals---------------------------------------------------------- 8
Eects------------------------------------------------------------------- 8
Touchseings -------------------------------------------------------- 9
Transpose-------------------------------------------------------------- 9
The metronome ------------------------------------------------------ 9
Performance Modes-----------------------------------10
Playingtwosoundsatthesametime(LayerMode)-------10
Performingwithanotherperson
(Partnermode) ------------------------------------------------------10
Recording/playing back a performance---------11
RecordingaPerformance-----------------------------------------11
AddingtoaRecording --------------------------------------------11
PlayingBackaRecordedPerformance------------------------11
DeletingaRecordedPerformance -----------------------------12
Other functions-----------------------------------------12
FunctionMode ------------------------------------------------------12
Reseingtheparameters -----------------------------------------13
MIDI -------------------------------------------------------------------14
UsingasaBluetoothSpeaker(C1Aironly)------------------15
Appendix-------------------------------------------------16
Troubleshooting ----------------------------------------------------16
Specications --------------------------------------------------------16
Assembling the Stand --------------------------------17
Cautionduringassembly-----------------------------------------17
Other cautions-------------------------------------------------------17
Assemblyprocedure-----------------------------------------------17
Checkfollowingassembly ---------------------------------------18
MIDI implementation chart------------------------ 87

4
11. Sound buons: This buon is used to select from 30
sounds(10 × 3 banks).Twobuonscan be pressed to
playtwosoundssimultaneously(Layermode).
12. DISPLAY buon, LEDs:Thisbuonis used to select
the content of the multidisplay. The illuminated LED
indicatesthecurrentcontent.
13. D i s p l a y : The LEDdisplayshowsvariousinformation
aswellastheselectedseingforthemetronomeand
FunctionModeparameter.
14. +, - buons: Usethesebuonstospecifyaseing,value
or song.
15. METRONOME buon: Use this buon to start/stop
the metronome. While the metronome is being used,
thebuonislit.Inaddition,holddownthebuonto
entertheMetronomeseingsmode,wherevariousmet-
ronomeseingscanbespecied(seepage9).
16. Recorder buons: Usethesebuonstorecord( ),play
back/pause( )andstop( )performancesaswellas
to select the part to be recorded/played back (PART1
andPART2).
17. MIDI (IN, OUT) jacks: These jacks allow the C1/C1
AirtointeractwithotherMIDIequippeddevices—key-
boards,drummachines,synthesizers,etc.
OUT:Sends MIDI data OUT of the C1/C1 Air to the
MIDIINoftheotherdevice.
IN:ReceivesMIDIdatabeingsentfromtheMIDIOut
oftheotherdevice.
18. LINE OUT jack: Thisstereominiphonejackisthemain
audiooutputjack.Usingthisjack,theoutputoftheC1/
C1Aircanbeconnectedtotheinputofanexternalam-
plier, powered speaker, audio interface or recorder,
etc.TheVOLUMEknobcontrolstheoutputvolume.
19. Headphone ( ) jacks (front of connector box): Two ste-
reo mini headphonejacks are located underneath the
keyboard to the left-hand side. Plugging headphones
intoeitherofthesejackswillmutetheinternalspeakers.
20. Speaker connector: The cord from the speaker box
plugsintothisconnector(see“AssemblingtheStand”
onpage17).
21. DC 24V jack: ConnecttheincludedACadapterhere.
22. Pedal connector: Thecordfromthepedalunitsplugs
intothisconnector(see“AssemblingtheStand”onpage
17).
Parts and their functions
OUT -MIDI- IN LINEOUT12
11 1376 98 14 161512
10
435
1 2
2220 21
17 1918
Connecter box
(rear)
Control panel
1. Power buon: Press thisbuonto turn ontheC1/C1
Air.Atthesame time,thedisplayandsoundbuons
lightup.ToturnotheC1/C1Air,holddownthisbut-
tonforabout1second.TheC1/C1Airwillturnowhen
thepowerbuonisreleased.
When the C1/C1 Airis turnedo,all parameters
normally return to their factory default seings.
However,theC1/C1Aircanbesettosavethepa-
rameterseings(Referto“Saveparameterseings”
onpage13).
Auto Power O
TheC1/C1Aircanbesettoautomaticallyturnoaftera
setperiodoftimehaspassedwithnokeysbeingplayed
orwithnosongsbeingplayedback. To change this time
interval,ortodisablethisfeaturereferto“Autopower
o”onpage13
2. VOLUME knob: Thisknobadjuststhevolumeforthe
speakers,theLINEOUTjackandtheheadphonejacks.
3. PIANO SONG buons: ThisbuonisusedtoenterPi-
anosongmode.Inthatcase,thebuonlightsup.Simul-
taneously pressing this buon and the TRANSPOSE
buonenterstheSounddemosongmode.
4. TRANSPOSE buon: This buon is used to adjust
transposition.Whiletransposing,thebuonlightsup.
Simultaneously pressing this buon and the PIANO
SONGbuonenterstheSounddemosongmode.
5. FUNCTION buon: This buon is used to enter the
Function mode, where pitch, temperament and other
seingscanbespecied.Holddownthebuontoen-
tertheMIDIfunctionmode,whereMIDIseingscan
bespecied.ThebuonlightsupwhentheC1/C1Air
enterstheFunctionmodeandblinkswhenitentersthe
MIDIfunctionmode.
6. TOUCH buon: This buon lets you select the key-
boardsensitivity.
7. BRILLIANCE buon: Thisbuonisusedtoadjustthe
brightnessofthetone.
8. REVERB buon: Thisbuonisusedtoturnon/othe
reverb,whichaddsambiencetothesound.Whenthis
eectison,thebuonwillbelitup.
9. CHORUS buon: Thisbuonisusedtoturnon/othe
chorus,whichaddsrichness to the sound.Whenthis
eectison,thebuonwillbelitup.
10. BANK buon, LEDs: Thisbuonisusedtoselectthe
desiredsoundbank.TheLEDforthebankthat’scur-
rentlyselectedwilllightup.

5
Closing the key cover
1. Unfold the front edge of the key cover, and gently be-
gin to lower it.
2. When the key cover begins to close on its own, release it.
Thekeycoverwillcontinuetosoftlycloseonitsown,
fromaboutmid-waydown.
Donotforciblypullthekeycoverorapplystrongpres-
surewhilethekeycoverisclosing.Doingsowilldam-
age the unit.
Be careful not to pinch your ngers or hands when
closingoropeningthekeycover.
Thetemperatureandhumiditywillaecthowfastthe
keycoverautomaticallycloses.
Thekeycovermaymakeafaintclickingsoundwhen
asitslowlycloses.Thisisnormal.
Using the music stand
Thekeycoverservesasaconvenientmusicstand.
Whenplacingopenedmusic,donotapplystrongpres-
sureontothekeycover.
Headphone Eect
Theeect(Stereosoundoptimizer)thatgivespresenceto
thesound when the headphones are usedcan be turned
onoro(Referto“Stereosoundoptimizer”onpage13).
Preparing to Play
Before You Begin
Assembling the C1/C1 Air Piano
TheC1/C1Airincludesthekeyboardunit,thestandand
anti-tippingbrackets,pedalunit,andspeakersystem.Fol-
lowtheinstructionfoundonpage17andfullyassemble
yourC1/C1Airbeforeproceeding.
Connecting the Power
to AC outlet
AC adapterPower cord for the AC adapter
DC plug Cord hook
Connector box
FullyinsertthepowercordintotheACadapter,theninsert
theDCplugintoDC24Vjackontheconnectorbox.Next,
connectthepowercordtoanACoutlet.
Pass the AC adapter cord through the cord hook to
preventtheDCplug from accidentally beingdiscon-
nected.Whenyouunhookthecord,don’tpullonthe
cordwithforce.
UseonlytheACadapterprovidedwithyourC1/C1Air.
Usingadierentadaptermaycause malfunctionsor
other issues.
Besuretoplugthepowercordintoanoutletoftheap-
propriatevoltage.
Operating the Key Cover
Opening the key cover
1. Using both hands, gently lift the key cover to begin
to open it.
2. Fold down the front edge of the key cover.

6
TheplaybackofaSoundDemoSongcannotbepaused.
Listening to a Piano Song
AswiththeSoundDemoSongs,youcanplayalongonthe
keyboardwhileanyofthePianoSongsplay.Asyouplay
along, you can change the tempo, slowing the playback
downtopracticeaparticulartrickypart.Inaddition,the
right-handandleft-handpartscanbemutedindividually,
tofocuson learning one partas the C1/C1 Airplaysthe
other.
1. Press the PIANO SONG buon.
ThePIANOSONGbuonlightsupandthenumberfor
thepianosong(001)appearsinthedisplay.
3
1,54
4
2
PlaybackofthePianoSongbegins.
Whenplaybackoftherstpianosongisnished,play-
backcontinuessequentiallywithsecond,third,etc.
When playbackofthefortieth piano songis nished,
playbackbeginsagainwiththerstpianosong.
2. Use the Play/Pause buon to toggle between playback
(buon lit) and pause (buon blinks).
3. Press the Stop buon to end playback and return to
the beginning of the song.
4. Press the DISPLAY buon, and then, after the SONG
LED is lit, press the + or – buon beside the display to
select a song.
5. Press the PIANO SONG buon again to exit playback
of Piano Songs.
DuringplaybackofaPianoSong,youcanplayusing
thekeyboard;however,thesoundremainssettoGer-
manGrandPianoandcannotbechanged.
Changing the tempo
Press the DISPLAY buon, and then, after the TEMPO
LED is lit, press the + or – buon to change the tempo.
WithPianoSongs,thetempoisdisplayedasapercentage
oftheoriginaltempo.Theseingrangeis–50%to+50%of
the original.
Theseingcontinuestochangewhilethebuonisheld
down.
Torestorethetempototheoriginalseing,simultane-
ouslypressthe+and–buons.
Eachsongissavedwithitsowntempo,soselectinga
dierentsongwillautomaticallychangethetempoto
the one saved with that song, even if the tempo was
changedfortheprevioussong.Inaddition,theoriginal
tempowillberestoredwhentheC1/C1Airisturnedo.
Practicing a performance
WithPianoSongs,thelefthandisusuallyassignedtoPart
1andtherighthandtoPart2.
Bymutingoneoftheparts,theC1/C1Airwillplayonlyone
oftheparts—orhands—andyoucanplaythemutedpart.
Thepartyouplayisuptoyou.
1. To mute the left-hand part, press the PART1 buon;
the buon blinks in green. To mute the right-hand
part, press the PART2 buon; the buon blinks in
green.
Listening to the Demos
BuiltintotheC1/C1Airare50preprogrammedsongs.Of
these,10areSoundDemoSongsthathighlightthequality
ofvariousinternalsounds.Theother40arefamiliarPiano
Songsandetudes.
Duringplaybackofasounddemosong,theseingsfor
eects(reverbandchorus)cannotbechanged.
Listening to a Sound Demo Song
1. Simultaneously press the PIANO SONG buon and
the TRANSPOSE buon.
ThePIANOSONGbuonblinks,andthesoundbuons
litsequentially.Inaddition,thenumberforthesound
demosong(d01)appearsinthedisplay.
1,412
2
3
Afterabout3seconds,thePIANO1buonblinks,the
Play/Pausebuonlightsup,andplaybackoftheSound
DemoSongbegins.
When playback of Sound DemoSong d01is nished,
the remaining Sound Demo Songs will play back se-
quentially.Whenplaybackofd10isnished,playback
beginsagainwithd01.Atthistime,thesoundbuonfor
thesongbeingplayedbackblinks.
2. When the sound buons are blinking sequentially,
press the sound buon for the demo song that you
want to hear.
Ifadierentsoundbuonispressed,evenwhileasongis
beingplayed,playbackofthecorrespondingdemosong
willbeginafterafewseconds.Inaddition,asongcanbe
selectedbypressingthe+or-buonbesidethedisplay.
3. Press the Stop buon to end playback, and press the
Play/Pause buon to return to the beginning of the song.
While the song is stopped, the PIANO SONG buon
blinks,andthesoundbuonslightupsequentially.
4. Press the PIANO SONG buon again to exit playback
of Sound Demo Songs.
Sound Demo Song List
No. Sound Song title Composer
d01 GermanGrandPiano PreludeOp.23No2 S.Rachmanino
d02 JapaneseGrand
Piano
Pavanepourune
Infantedéfunte M.Ravel
d03 StageElectricPiano JamSession NaokiNishi
d04 DigitalElectric
Piano2 InMemory MichaelGeisel
d05 Harpsichord1 LaJoyeuse J. P. Rameau
d06 Vibraphone/
AcousticGuitar JazzinSpain KORGoriginal
d07 JazzOrgan1 Improvisation MichaelGeisel
d08 PipeOrgan1/
PositiveOrgan
PreludeandFugue
inCMajor,BWV553 J.S.Bach
d09 Strings ScoringInterlude MichaelGeisel
d10 Bass&Cym/Piano ThereGoesPetey Russell Ferrante
Duringplaybackofasounddemosong,youcanplay
using the keyboard; however, the sound cannot be
changedbyusingthesoundbuons.
The tempo cannot be changed during playback of a
SoundDemoSong.Inaddition,themetronomecannot
beused.

7
Playing the C1/C1 Air
Playing a single sound (Single Mode)
You can select a sound from the thirty sounds supplied
withtheinstrument(10soundsx3banks).
1. Press the sound buon for the sound that you want
to play.
Theselectedbuonwilllightup.
2. Press the BANK buon to select one of the three
sounds.
Each press of the BANK buon switches the bank
in the order 1, 2, 3, 1, ..., and the corresponding
LED to theright of the BANK buon will light up.
For example, to select the Honky-Tonk Piano sound,
pressthePIANO2buon,afterwhichitsbuonlights
up.Then,presstheBANKbuontwicetoselectbank3
(Honky-TonkPiano);theLEDbelowandtotherightof
theBANKbuonwilllightup.
Inaddition,thebankselectedforasoundbuonremains
thesame,evenifadierentsoundbuonis pressed.
21
Each time the C1/C1 Air is turned on, the sound in
bank1isselectedforallsoundbuons.
PlayingtheC1/C1Airwhileusingasinglesoundsuchas
anacousticpianoisreferredtoastheSingleMode.TheC1/
C1AircanalsobeplayedinLayerModeorPartnerMode,
whicharecharacteristicofdigitalpianos.
For details on the various modes, refer to “Performance
Modes”onpage10.
Button Bank Sound #
PIANO1 1GermanGrandPiano 4
2JazzPiano 2
3ClassicPiano 4
PIANO2 1JapaneseGrandPiano 4
2PopPiano 2
3Honky-TonkPiano 2
E.PIANO1 1StageElectricPiano 1
2BrightElectricPiano 2
3ElectricGrandPiano 1
E.PIANO2 1DigitalElectricPiano1 2
2DigitalElectricPiano2 2
360’sElectricPiano 1
HAR PSI/CLAV 1Harpsichord1 2
2Harpsichord2 2
3Clav 2
VIBES/
GUITAR
1Vibraphone 1
2Marimba 1
3AcousticGuitar 2
ORGAN1 1JazzOrgan1 2
2JazzOrgan2 2
3JazzOrgan3 2
2. Play along with the playback of the song.
3. To unmute a part that has been muted, press the but-
ton that is blinking.
Thebuonlightsupingreen.
Themutinglevelcanbeadjusted.Referto“FunctionMode”
onpage12.
Piano Song List
No. Song title Composer
001 “Prelude1”TheWell-TemperedClavier,Book1 J.S.Bach
002 InventionNo.1 J.S.Bach
003 Jesu,JoyofMan'sDesiring J.S.Bach
004 SonataNo.15K.5451stmov. W.A.Mozart
005 “TurkishMarch”SonataK.331 W.A.Mozart
006 FürElise L.v.Beethoven
007 PianoSonateOp.13-2 L.v.Beethoven
008 AMaiden'sPrayer T.Badarzewska
009 “L'arabesque”Op.100-2 F. Burgmüller
010 “Lastyrienne”Op.100-14 F. Burgmüller
011 “Lachevaleresque”Op.100-25 F. Burgmüller
012 SpringSongOp.62-6 F.Mendelssohn
013 “Träumerei”Op.15-7 R.Schumann
014 Heidenroslein G.Lange
015 SpinningSong A.Ellmenreich
016 Dolly'sDreamingandAwakening T. Oesten
017 Lalleauxcheveuxdelin C.Debussy
018 ArabesqueNo.1 C.Debussy
019 “Prelude”SuiteBergamasque C.Debussy
020 Cakewalk C.Debussy
021 Clairedelune C.Debussy
022 WalNo.6Db-majorOp.64-1 F.Chopin
023 WalNo.7E-minorOp.64-2 F.Chopin
024 NocturneOp.9-2 F.Chopin
025 MazurkaOp.7-1 F.Chopin
026 Fantaisie-ImpromptuOp.66 F.Chopin
027 EtudeOp.10-3 F.Chopin
028 EtudeOp.10-5 F.Chopin
029 “Promenade”Tableauxd'uneexposition M.P.Moussorgsky
030 GymnopédieNo.1 E.Satie
031 JeTeVeux E.Satie
032 Salutd'Amour E.Elgar
033 FröhlicherLandmann R.Schumann
034 KinderszenenOp.15-1VonfremdenLändern
undMenschen
R.Schumann
035 MomentsMusicauxOp.94-3 F.P.Schubert
036 PianoSonateOp.27-2-1 L.v.Beethoven
037 AnitrasTanzOp.46No.3 E.H.Grieg
038 Blumenlied(FlowerSong) G.Lange
039 Tango(España) I.Albéniz
040 LiebesträumeNr.3 F.Liszt

8
Eects
Brilliance
Thiseectchangesthebrightnessofthetone.
The seing can be changed by holding down the BRIL-
LIANCE buon and pressing the + or – buon beside the
display.
The seing appears in the display with 003 producing a
brightersoundand001producingalessbrightsound.
Brilliancecannotbeturnedo.
Thesameseingisappliedtoallsoundsandremains
applieduntiltheC1/C1Airisturnedo.Whenthein-
strumentisturnedon,thedefaultseing002isselected.
Byperformingthe“Saveparameterseings”(seepage
13)operationbeforeturnedo,thenewseingsspec-
iedforeachsoundcanbesavedasthedefaultseings.
Reverb
Thiseectaddsambienceanddepthtothesound,produc-
ingthesenseofperforminginaconcerthall.
Each press of the REVERB buon turns the reverb on
(buon lights up) or o (buon turns o).
To change this seing, hold down the REVERB buon
and press the + or – buon beside the display.
The seing appears in the display with 003 producing a
deepreverbeectand001producingalightreverbeect.
Asafactorydefault,theon/oseingforthiseectas
wellasthiseect’sseingaresavedwitheachsound.
Byperformingthe“Saveparameterseings”(seepage
13) operation before the sound is switched, the new
seingsspeciedforeachsoundcanbesavedasthe
defaultseings.
Chorus
Chorus adds modulation to the sound, producing an ex-
pansivelyrichsound.
Each press of the CHORUS buon turns the Chorus eect
on (buon lights up) or o (buon turns o).
To change this seing, hold down the CHORUS buon
and press the + or – buon beside the display.
The seing appears in the display with 003 producing a
deepchoruseectand001producingalightchoruseect.
Asafactorydefault,theon/oseing forthiseectas
wellasthiseect’sseingaresavedwitheachsound.
Byperformingthe“Saveparameterseings”(seepage
13) operation before the sound is switched, the new
seingsspeciedforeachsoundcanbesavedasthe
defaultseings.
ORGAN2 1 PipeOrgan1 2
2PipeOrgan2 2
3PositiveOrgan 2
STRINGS 1 Strings 2
2CinemaStrings 2
3Choir 2
BASS&
PIANO
1A.Bass/Piano 4
2E.Bass/E.Piano 2
3Bass&Cym/Piano 4
The# columnshowsthenumberofoscillators,orvoices,
usedtocreateasinglenoteforthatsound.(referto“About
maximumpolyphony”onpage16.)
Using pedals
Soft pedal Damper pedal
Sostenuto pedal
TheC1/C1Airincludesallthreeofthepedalsfoundona
grandpiano.Usingthepedalscanaddexpression,control,
andsophisticationtoanyperformance.
Soft pedal (left)
The Soft pedal slightly reduces the volume and softens
thetone.Accuratehalf-pedalingallowsyoutocontrolthe
depthoftheeectbyhowfardownthepedalispressed.
(“half-pedaling”).
Sostenuto pedal (center)
This pedal provides a similar eect as the Damper ped-
al—allowing notes to continue to sound after the key is
released—but the eect only applies to thenotes already
beinghelddownwhentheSostenutopedalispressed.New
notes played after the Sostenuto pedal has been pressed
will not sustain.
Damper pedal (right)
As mentioned above, the Damper pedal allows notes to
continuetosoundafterthekeyhasbeenreleased,adding
arich,resonantdecay.Youcanalsoaddthedamperreso-
nancetotheGermanGrandPiano,ClassicPiano(bank1
and3ofPIANO1)andtheJapaneseGrandPiano(bank2of
PIANO2)tone.Accuratehalf-pedalingallowsyoutocon-
trolthedepthoftheeectbyhowfardownthepedalis
pressed.(“half-pedaling”).

9
The metronome
TheC1/C1Airisequippedwithametronome,whichcanbe
changedtoabellsound,whichisconvenientforpracticing.
Turning on/o the metronome
1. Press the METRONOME buon.
The buon lights up, and the
metronome starts.
2. To stop the metronome, press the METRONOME buon
again.
Thebuonturnso.
Specifying the tempo
Regardless of whether the
metronome is turned on or
o, press the DISPLAY but-
ton,andthen,aftertheTEMPOLEDislit,pressthe+or
–buontochangethetempo.
Theseingrangeis𝅘𝅥=40–240.
Toreturntothedefaultseing(120),simultaneouslypress
the+and–buons.
ThetempocanalsobespeciedintheMetronomeSet-
tingsMode.
Specifying the Time Signature, Volume, Accent
Sound, Tempo and Sound
1. Hold down the METRONOME buon until the Met-
ronome Seings Mode is entered.
TheMETRONOMEbuonblinks.
2. Press the appropriate buon shown below to select a
parameter and display its seing in the display, and
then press the + or – buon to change the seing.
Torestorethedefaultseing,simultaneouslypressthe
+and–buons.
Hold down
the Metronome Settings Mode Time Signature
Volume
Sound
TempoAccent Sound
Setting
(Button)
Setting Range
Default
setting
AccentSound
( )
oFF(
noaccentsound
),
on1(emphasizedsoundfortheaccentbeat),
on2(
bellsoundfortheaccentbeat
)
o
Tempo( ) 40–240(sameastemposeing) 120
Sound( ) 1(acoustic),2(electronic) 1
TimeSignature
(PART1)
02(2/4),03(3/4),04(4/4),06(6/4) 04
Volume
(PART2)
01–13 10
3. After changing the seing, press the METRONOME
buon to exit the Metronome Seings Mode.
WhentheMetronomeSeingsModeisexited,theMET-
RONOMEbuonreturnstoitslightingstatus(litornot
lit)beforetheMetronomeSeingsModewasentered.
Byperformingthe“Saveparameterseings”(seepage
13) operation before the C1/C1 Air is turned o, the
seingsspeciedforthesound,accentsoundandvol-
umebeforetheC1/C1Airwasturnedocanbesaved
asthedefaultseings.
Touch settings
Thekeyboardsensitivity,ortouch,canbeprogrammed.
To change the seing, hold down the TOUCH buon and
press the + or – buon beside the display.
02
01
03
05
Loud
Loudness
Quiet
Quiet Loud
Playing strength
04
Display Touch sensitivity
001 Light.Loudnotescanbeproducedevenbyplay-
inglightly.
002 Normal.Normalpianotouch.
003 Heavy.Loudnotescanbeproducedonlybyplay-
ingveryhard.
004 Stable. Sensitivity variations are reduced, and a
relativelystablesoundisproduced.
005 Steady.Steadynotesareproduced,likewithanor-
gan,regardlessoftheforceusedtopressthekey.
Whentheinstrumentisturnedon,thetouchseingis
resetto002(Normal).
Theseingsareappliedtoallsounds.
Transpose
Insomecases,asongmaybewrieninadicultkey(e.g.,
many black keys), or you may wish to shift the pitch to
match anotherinstrument or vocalist. In such cases,you
cantranspose(shiftthepitch)sothatyoucanuseaneasier
ngering,orusethesamefamiliarngeringtoplayatadif-
ferentpitch.ThisiscalledtheTransposefunction.
For example if you transpose upward by one semitone,
playingthenotesshownatthelowerleftwillproducethe
pitchesshownattheright.
While holding down the TRANSPOSE buon, press the
keyboard key (F#6–F7) for the desired transposition.
IfakeyboardkeyotherthanC7ispressed,theTRANSPOSE
buonlightsuptoindicatethatthekeyboardistransposed.
Thepitchoftheentirekeyboard istransposedaccording
tothepitchofthepressedkeyboardkeyinrelationtoC7.
To return to the original pitches, hold down the TRANS-
POSE buon and press the C7 key.
TheTRANSPOSEbuonturnso,andtranspositioniscanceled.
C4 C7 F7
F6
key Effect
F
#
6 - B6 6–1semitonesbelow
C7 Standardpitch
C
#
7 - F7 1–5semitoneshigher
Whentheinstrumentisturnedon,thetransposingis
reset.

10
Entering Partner Mode
With the C1/C1 Air turned o, hold down the BANK but-
ton, and then press the Power buon. When a dot appears
in the lower-right corner of the display, release the BANK
buon.
WhentheC1/C1AirisinPartnerMode,adotappearsinthe
lower-rightcornerofthedisplay.
ThePIANO1soundisusedforboththeleftandrightsides
ofthekeyboard.
The right side of the keyboard, from E4 to C8, produces
soundstwooctaveslowerinpitch(E2–C6).
The left side of the keyboard, from A0 to E♭4, produces
soundstwooctaveshigherinpitch(A2–E♭6).
Changing the sound for both sides
Pressasoundbuon.Bothsideswillchangetothesame
sound.
Selecting sounds for the left and right sides
Simultaneouslypressthetwosoundbuonsforthesounds
tobeused.Thetwopressedsoundbuonslightup.
Sound for left side of keyboard
Sound for right side of keyboard
Theleftmostoruppermostselectedsoundbuonisfor
theleftsideofthekeyboard,andtheother(rightmost
orlowermost)oneisfortherightsideofthekeyboard.
Forexample,ifthesoundfromtheE.PIAN1buonisto
beappliedtotheleftsideandthesoundfromtheOR-
GAN1buonistobeappliedtotherightside,holddown
theE.PIAN1buon,andthenpresstheORGAN1buon.
Previously,eachSoundBuonshouldhavebeenused
intheSingleModetoselectthecorrectsound.
Damper Pedal Assignments
In the Partner Mode,the Soft pedalactsas a damper
pedal for the left side of the keyboard; the Damper
pedalactsasthedamperpedalfortherightsideofthe
keyboard.
TheSostenutopedalhasnofunctioninPartnerMode.
The volume balance of the sounds for the left and right
sides can be adjusted with “Volume balance for Layer Mode
(or Partner Mode)” in “Function Mode” on page 12.
Exiting Partner Mode
Turn o the C1/C1 Air to exit Partner Mode.
When only the Power buon is pressed to turn on the C1/
C1 Air, it will be in the normal mode (Single Mode).
InPartnerMode,ademosongcannotbeplayedback
andausersongcannotberecordedorplayedback.In
addition,noFunctionModeseingsotherthanthevol-
umebalanceforPartnerModeandnoMIDIfunction
modeseingscanbespecied.
Partner mode indication
A0 E
4E4 C8
Pitches
A2 to E6 for the player
on the left side
Pitches E2 to C6 for the player
on the right side
Performance Modes
Playing two sounds at the same time (Layer
Mode)
Youcanplaytwosoundsatthesametimeonthekeyboard.
ThisiscalledtheLayerMode.
1. While holding down the buon of a sound to be lay-
ered, press another sound buon.
Thetwoselectedsoundbuonslightup.
Inordertousesoundsindierentbanks,rstselectthe
banksintheSinglemodeforthesoundbuonstobe
pressed.
For example, to play by layering the German Grand
PianoandJazzOrgan2sounds,selectbank1(German
GrandPiano)forthePIANO1buonandbank2(Jazz
Organ2)fortheORGAN1buon,andthenpressboth
buonssimultaneously.
To adjust the volume balance of the two sounds, press
the FUNCTION buon, then the HARPSI/CLAV but-
ton, and then press the + or – buon to adjust the set-
ting. After selecting the seing, press the FUNCTION
buon again.
(Referto“LayerModeseings”belowand “Function
Mode”onpage12.)
2. To return to Single Mode, press any single Sound But-
ton.
WhenselectingLayerMode,thetotalnumberofvoices
thatcanplayatthesametimeisreduced,depending
onthetotalnumberofoscillatorsusedpervoicebythe
selectedsounds.(referto“Aboutmaximumpolypho-
ny”onpage16.)
SoundsaccessedbythesameSoundBuoncannotbe
layered.For example,German GrandPiano andJazz
Piano are both accessed via the PIANO1 buon and
thuscannotbelayered.
Layer Mode settings
InLayerMode,thevolumebalancebetweensoundscanbe
adjusted,theoctaveforeachsoundcanbeshifted,andthe
damperpedalcanbeenabledordisabledforeachsound.
(referto“FunctionMode”onpage12.)
The leftmost or uppermost selected sound buon is
layer1,andtheother(rightmostorlowermost)oneis
layer2(seethediagramatthebelow).
Layer 1
Layer 2
Forexample,ifE.PIANO1andORGAN1areselected,
E.PIANO1islayer1andORGAN1islayer2.
Performing with another person
(Partner mode)
Twopeoplecanplayinthesamerangewiththekeyboarddi-
videdinhalfbetweenthem.ThisiscalledthePartnermode.

11
Recording/playing back a
performance
TherecorderoftheC1/C1Airallowsyoutoeasilyrecordand
playbackkeyboardperformances.Thisiscalledausersong.
Thereisoneusersong,hastwoparts.Youcanseparately
recordtheright-andleft-handpartsofasong,thenplay
backthetwopartsatthesametime.
Ifyourecordtoapartwheredatahasalreadybeenrecorded,
thepreviousperformancedatawillbedeletedandoverwrit-
tenwiththenewdata.Therefore,beforerecordingtoapart,
besureitdoesnotcontainanydatathatyouwishtosave.
Inaddition,youcancheckeachpartaccordingtothelight-
ingstatusofitsbuon.
Part button Status
Not lit Norecordeddata
Litingreen Playingbackrecordeddata
Blinksingreen Recordeddata,muted
Litinred Recording
Blinksinred Recordingstandby
UserSongscanbesaveduntilthedatastoragespaceofthe
C1/C1Airisfull.
Recording a Performance
IftheC1/C1AiristurnedobeforetheLEDforthere-
cordedpartlightsupingreen,therecordedsongdata
andstoredseingsmaybecorrupted.
1. Press a sound buon to select the song to be recorded.
1
3
4,5
2
2. Press the Record buon.
TheRecordbuonlightsup.
3.
Press the buon for the part to be recorded until the
buon blinks in red.
4. Recording starts when you start playing the key-
board.
ThePlay/Pausebuonandthecorrespondingpartbut-
tonlightup.
Recordingcanalsobestartedbypressingdownonany
ofthethreepedalsorbypressingasoundbuon.
Starting recording with a count-o
Insteadofplayingthekeyboard,press thePlay/Pause
buon to receive a two-measure count-o before re-
cordingstarts.
5. To stop recording, press the Stop or Play/Pause buon.
Whenrecordingisnished,theRecordbuongoesdark
(notlit),andtheperformancedataisautomaticallysaved.
<Recording Tips>
• Changesmadetothesoundwhilerecordingaresaved.
• Changesmadetothetempowhilerecordingaresaved.
(Ifthetempocannotbechanged,enablethetemposet-
tingduringplayback.)
• Thetimesignaturecannotbechangedwhilerecording.
• Amaximumof999measurescanbesaved.Whenthe
numberofsavedmeasuresexceeds900,theRecordbut-
tonbeginsblinking.When999measuresaresaved,re-
cordingstopsautomatically.
• Whentheremainingspaceforrecordingislessthan1%,
theRecordbuonbeginsblinking.Whennospacere-
mains,recordingstopsautomatically.
Theamountofspaceremainingfor recordingcan be
checkedandapartcanbedeletedfromtherecording.
Referto“FunctionMode”onpage12.
Adding to a Recording
Recording Over a Recorded Part
Example:Recordinganadditiontoapreviouslyrecorded
Part1
Punch-in recording
1. Press the Play/Pause buon to start playback.
2. Press the Record buon.
TheC1/C1Airentersrecordingstandbymode,andthe
Recordbuonlightsup.
3. Press the PART1 buon until it blinks in red.
4. Start playing the keyboard when reaching the point
where the recording is to be added.
The original recording is overwrien from the point
wherethekeyboardisplayed.
Recording from a paused point
1. Press the Play/Pause buon to start playback.
2. Press the Play/Pause buon when reaching the point
where the recording is to be added.
3. Press the Record buon.
TheC1/C1Airentersrecordingstandbymode,andthe
Recordbuonlightsup.
4. Press the PART1 buon until it blinks in red.
5. Press the Play/Pause buon or start playing the key-
board to start recording.
The original recording is overwrien from the point
whererecordingstarted.
Recording an Additional Part
Example:RecordingPart2forapreviouslyrecordedPart1
1. Press the Record buon.
TheC1/C1Airentersrecordingstandbymode,andthe
Recordbuonlightsup.
2. Press the PART2 buon until it blinks in red.
3. Press the PART1 buon until it displays the desired
lighting status.
For recording whilePart 1 is playedback, the PART1
buonshouldlightupingreen.
ForrecordingwhilePart1ismuted,thePART1buon
shouldblinkingreen.
4. Press the Play/Pause buon or start playing the key-
board to start recording.
Playing Back a Recorded Performance
Playing Back
1. Press the Play/Pause buon to start playing back the
performance.
ThePlay/Pausebuonlightsup.
AperformancecannotbeplayedbackwhiletheC1/

12
Other functions
Function Mode
Thepitchaswellastemperamentseingsetc.canbespeci-
edfromtheFunctionMode.Forthefunctionsthatcanbe
set,refertothe“Listoffunctions”below.
InPartnerMode,noseingsotherthanthevolumebal-
anceforPartnerModecanbespecied.
Adjusting Parameter Settings in the Function Mode
1. Press the FUNCTION buon.
The FUNCTION buon and the PIANO1 buon will
light.
2. Press the appropriate buon shown below to select a
parameter.
Thepressedbuonlightsup,andthecurrentseingap-
pearsinthedisplay.
Save parameter
settings
Auto power off
Octave of
layer mode
Pedal of
layer mode
Delete part of User Song
Pitch
Volume balance
of layer mode
Minimum remaining space for recording
Part volume
Temperament
Stereo sound optimizer
3. Press the + or – buon to select a seing.
Torestorethedefaultseing,simultaneouslypressthe+
and–buons.
Theproceduresforcheckingtheamountofrecord-
ing space remaining, for changing a layer octave
andforsavingparameterseingsdierslightly.
4. To exit Function Mode, press the FUNCTION buon.
TheFUNCTIONbuongoesdark.
Allseingsareappliedtoallsounds.
The seing for the auto power o function is saved
whenitischanged.
Normally,whentheC1/C1Airisturnedo,allparam-
etersreturntotheirfactorydefaultseings.However,
byperformingthe“Saveparameterseings”(seepage
13) operation before the C1/C1 Air is turned o, the
seingsspeciedforthepitchandpartvolumebalance
beforetheC1/C1Airwasturnedocanbesavedasthe
defaultseings.
Functions for Piano Song Mode
InPianoSongMode,theFUNCTIONbuoncanbeusedto
specifythemutinglevelforeachpartofaPianoSong.The
speciedmutinglevelisthesameforbothPart1andPart2.
1. Press the FUNCTION buon; the current muting lev-
el appears in the display.
TheFUNCTIONbuonlightsup.
2. Press the + or – buon to select a seing.
Whenmutedwithaseingof0,therewillbenosound,
andwithaseingof12,thesoundwillbeatfullvol-
ume.
Torestorethedefaultseing(0),simultaneouslypress
the+and–buons.
3. After specifying the desired seing, press the FUNC-
TION buon.
TheFUNCTIONbuongoesdark.
C1AirisinPianoSongMode,SoundDemoSong
ModeorFunctionMode.
2. Press the Play/Pause buon during playback to pause
it.
ThePlay/Pausebuonblinks.
3. To resume playback from the point where it was
paused, press the Play/Pause buon again.
ThePlay/Pausebuonlightsup.
Returning to the Beginning of the Song
1. Press the Stop buon during playback to stop playing
back the performance.
2. Press the Play/Pause buon to start playing back the
song from the beginning.
Skipping to a Specic Measure
1. While the song is playing, stopped or paused, press
the DISPLAY buon; the MEASURE LED in the dis-
play lights up.
Thecurrentmeasureappearsinthedisplay.
2. Press the + or – buon to move to a specic measure.
If playback was stopped, it will be paused (the Play/
Pausebuonblinks)aftermovingtothespecicmea-
sure.PressingthePlay/Pausebuonwillstartplayback
fromthatpoint.
Toquicklyreturntotherstmeasure(001),simultane-
ouslypressthe+and–buons.
Changing the Playback Tempo
Press the DISPLAY buon, and then, after the TEMPO
LED is lit, press the + or – buon to change the tempo.
The seing continues to change while the buon is held
down.
Torestorethetempototheoriginalseing,simultaneously
pressthe+and–buons.
Playing the Right- and Left-hand Parts Separately
AswithPianoSongs,onepartcanbemutedwhiletheother
isplayedback.Referto“Practicingaperformance”onpage
6.
Deleting a Recorded Performance
Eachpartofarecordedperformancecanbedeleted.
1. Press the FUNCTION buon, then the ORGAN2 but-
ton.
2. Press the + or – buon to select the part to be deleted,
and then press the Play/Pause buon to delete the
part.
3. After the part is deleted, press the FUNCTION buon
again.
(Referto“FunctionMode”onpage12“andthe“List
offunctions”onpage13“.)

13
List of functions
Button Function
Setting Display
Description [default setting]
PIANO1 Pitch 27.5...52.5
427.5..440.0...452.5Hz[440.0]
InordertoadapttheC1/C1Airpitchtothatof
anotherinstrument,youcanadjustthepitchin
stepsof0.5Hz.
PIANO2 Temperament*1 00...02
Equal...Werckmeistertemperament
[00:Equal]
Select from three temperaments, including the
Equal temperament, Kirnberger temperaments
andanWerckmeistertemperament.
E.PIANO1 Volumebalanceforparts -12...00...12
Only2layer...Both...Only1layer[00]
Specify the volume balance for parts during
playbackofaPianoSong.
E.PIANO2 Minimumremainingspace
forrecording
100...000
Remainingspaceof100%...0%
HARPSI/
CLAV
Volume balance of layer
mode(orpartnermode)
1–9...9–1
1–9(
Layer1min.
)...9–9(
Bothmax.
)...
9–1(
Layer2min.
)[9–9]
Adjust the volume balance between the sounds
forlayer1(orleftside)andlayer2(orrightside).
VIBES/
GUITAR
Octaveoflayermode(L1,L2)
*2
-01,00,01
±1Octave[00]
Specifythesoundrangeforlayer1andlayer2.
ORGAN1 Pedaloflayermode o–_,_–o,o–o
Only1,Only2,Bothlayers[o–o]
Selectthelayer(orrightsideandleftside)that
thedampereectisappliedto.
ORGAN2 DeletepartofUserSong P1,P2
Part1,Part2 :
Afterselectingapart,pressPlay/
Pause( )buontoperformoperation.
DeletetheselectedpartofaUserSong.
STRINGS Stereosoundoptimizer*3 oFF,on
On,O[on]
Turnon/otheeectthatgivespresencetothe
soundwhentheheadphonesareused.
BASS&
PIANO
Autopowero oFF,on
Disable,30min
[on]
Record
(
) Saveparameterseings*4
—
PressRecord( )buontoperformopera-
tion.
Save the values and seings for parameters in
theFunctionMode.
Additional Functions and Descriptions
*1: Temperament
Temperament types
Display Temperament
00 Equal temperament (default setting): Spacing
allsemitonesatequalpitchintervals,thistem-
peramentisthemostwidelyused.
01 Werckmeister: TheWerckmeister
III
scale was
createdinthelaterBaroqueperiodtoallow
relativelyfreetransposition.
02 Kirnberger: TheKirnberger
III
scaleisused
mainlyfortuningharpsichords.
About stretched tuning
In order to produce the most natural resonance, piano
soundsusea“stretchedtuning”thatmakesthenotesofthe
lower range slightly aer than equal temperament, and
theupperrangeslightlysharper.Thisishowanacoustic
pianoisnormallytunedbyprofessionaltuners.
*2: Octave of layer mode (L1, L2)
Setting procedure
1. Press the + or – buon beside the display to select a
layer.
L1appearsforlayer1,andL2appearsforlayer2.
2. Press the Play/Pause buon.
Theoctaveseing(00)appearsinthedisplay.
3. Press the + or – buon beside the display to select an
octave seing.
Torestorethedefaultseing,simultaneouslypressthe+
and–buons.
To select the octave for the other layer, press the VIBES/
GUITARbuontoselectthelayer.
IfthesoundisintheSinglemode,–––appearsinthe
display,andaseingcannotbespecied.
*3: Stereo sound optimizer
Thisgivespresencetothesoundthatisreproduced,asif
playinganacousticpiano,evenwhenheadphonesareused.
When headphones are plugged into the headphone jack,
enabledeectsareappliedtoallsounds.Theeectswillbe
appliedtotheoutputfromtheLINEOUTjack.
*4: Save parameter settings
ThisoperationwillsavetheparameterseingsinFunction
Mode(pitchandvolumebalanceforparts),themetronome
seings(accentsound,soundandvolume)andthesound
seings(reverb,chorusandbrilliance)speciedwhenthe
Record( )buonwaspressed.
TheRecordbuonlightsupwhiletheseingsarebeing
saved;donotturnotheC1/C1Airuntilthebuongoes
dark(notlit).
Resetting the parameters
To return all parameters to their factory default seings,
holddownthePlay/PausebuonandpressthePowerbut-
tonuntil“8.8.8.”appearsinthedisplay.
TheUserSongswillnotbeerased.ToeraseaUserSong,
performthe“Deletepartofselectedsong”operation.

14
List of MIDI functions
Button Function
Setting Display
Description [default setting]
PIANO1 MIDIChannnel*1 C01...C16
1...16[C01]
SpecifythetransmissionchannelforMIDIdata.
PIANO2 LocalOn/O on,oFF
Enabling(turnon)/disabling(turno)the
C1/C1Airsoundsource[on]
Disable(turno)inordertopreventechoback.
E.PIANO1 PCFilter*2 on,oFF
Enabling/disablingprogramchangetrans-
mission/receptionltering[oFF:transmis-
sion/reception]
If an incompatible program change number is
received,theC1/C1Airsoundisnotchanged.
E.PIANO2 CCFilter on,oFF
Enabling/disablingcontrolchangetransmission/re-
ceptionltering[oFF:transmission/reception]
HARPSI/
CLAV
Dumprecordedsongs*3 ddd
Sending/receivingrecordedsongdata
VIBES/
GUITAR
Multi-timbralOn/O
on,oFF
Operatingasa16-partmulti-timbralsound
module[on:operating]
*1: MIDI channnel
InLayerMode,thisseingwillbethetransmissionchan-
nelforlayer1,andthetransmissionchannelforlayer2will
automaticallybesettothefollowingchannel.
For example, if MIDI channel C07 is selected for layer 1,
MIDIchannelC08willautomaticallybespeciedforlayer
2.IfMIDIchannelC16isselectedforlayer1,MIDIchannel
C01willbespeciedforlayer2.
*2: Table of sounds and corresponding program change
numbers.
CC0:BankSelect(MSB)forallsoundsissetto121.
Button Bank CC32 PC Sound
PIANO1 1 0 0 GermanGrandPiano
2 0 1 JazzPiano
3 2 0 ClassicPiano
PIANO2 1 1 0 JapaneseGrandPiano
2 1 1 PopPiano
3 0 3 Honky-TonkPiano
E.PIANO1 1 0 4 StageElectricPiano
2 1 4 BrightElectricPiano
3 0 2 ElectricGrandPiano
E.PIANO2 1 0 5 DigitalElectricPiano1
2 1 5 DigitalElectricPiano2
3 2 4 60’sElectricPiano
HARPSI/
CLAV
1 0 6Harpsichord1
2 1 6Harpsichord2
3 0 7Clav
VIBES/
GUITAR
1 0 11 Vibraphone
2 0 12 Marimba
3 0 24 AcousticGuitar
MIDI
What can you do with MIDI?
ThankstoMIDI,youcanusetheC1/C1Airtocontrolother
instruments, use other instruments to control the C1/C1
Air,anduseasequencertocreatecomplexmusicalpieces.
WhenyouusetheC1/C1Airkeyboardorpedal,orselect
asound,thenotes,pedalactivationandchangeinsound
aretransmiedtoanotherinstrument,orarerecordedby
a sequencer.
Connections
Commercially available MIDI cables are used to transfer
MIDIdata.ConnectthesecablesfromtheMIDIjacksofthe
C1/C1AirtotheMIDIjacksoftheexternalMIDIdevicethat
youwant to exchange datawith. There are twotypes of
MIDIjack.
MIDI IN jack
ThisjackreceivesMIDImessages.
TheMIDIINjackletsyouplaytheC1/C1Air’ssoundsfrom
anexternalMIDIdevice(e.g.,MIDIkeyboardorsequencer).
UseaMIDIcabletoconnecttheC1/C1Air’sMIDIINjackto
yourexternalMIDIdevice’sMIDIOUTjack.
MIDI OUT jack
ThisjacktransmitsMIDImessages.
TheMIDIOUTjackletsyoucontrolanexternalMIDIde-
viceusingtheMIDImessagestransmiedfromtheC1/C1
Air.UseaMIDIcabletoconnecttheC1/C1Air’sMIDIOUT
jacktoyourexternalMIDIdevice’sMIDIINjack.
MIDI function mode
WhentheC1/C1Airisturnedon,theMIDIparametersare
settotransmissionchannel1,allreceptionchannels(1–16),
Local On and Multi-Timbral On. These seings can be
changedfromtheMIDIfunctionmode.
Setting procedure for parameters in the MIDI function mode
1. Hold down the FUNCTION buon (for at least 3 sec-
onds).
TheFUNCTIONbuonblinksandthePIANO1buon
lightsup.
2. Press the appropriate buon shown below to select a
parameter.
Thepressedbuonlightsup,andthecurrentseingap-
pearsinthedisplay.
Multi-timbral
On/Off
MIDI channel
Dump recorded songs
CC Filter
PC Filter
Local On/Off
3. Press the + or – buon to select a seing.
4. To exit Function Mode, press the FUNCTION buon.
TheFUNCTIONbuongoesdark.
AllMIDIseingsareappliedtoallsounds.
Normally,whentheC1/C1Airisturnedo,allparam-
etersreturntotheirfactorydefaultseings.

15
TheautopowerofunctionoftheC1Airwillnotoper-
ate during playback of a device connected via Blue-
toothaudio.
Multipledevicescannotbeconnectedatthesametime.
Connecting a New Device (Pairing)
Whenanewdeviceisconnected,“pairing”(mutuallyreg-
isteringconnectioninformation)mustbeperformed.
Theinformationforuptoeightpaireddevicescanbe
stored.Whenaninthdeviceispaired,theinformation
foranexistingdeviceisdeletedsothatthenewinfor-
mationcanbestored.
Evenifpairingfailed,theinformationforthatdevice
maybestoredontheC1Air.Iftheinformationforeight
deviceshasalreadybeenstored,theinformationforan
existingdeviceisdeleted.
Inordertoreconnecttothedevicewhoseinformation
wasdeleted,deletetheC1Air’sinformationfromthat
device,andthenperformpairingagain.
1. When the C1 Air is turned on, it enters the pairing
standby mode.
Pairingisenabledforonly1minuteafter“120”appears
inthedisplaywhentheC1Airisturnedon.
2. Turn on the Bluetooth function for the device to be
connected to, and then select “KORG C1Air” in the
list of the seings screen that appeared.
When a message appears, requesting permission for
pairing,allowpairing.
Whenapasskeyisrequested,enter“0000”.
TipThepasskeymayalsobecalledaPINcode,pass-
word,etc.
3. If pairing is successful, the connected device enters
a connection-ready mode and displays a connection
with “KORG C1Air”.
Sincethedisplaysdierdependingonthedevice,referto
themanualofyourdevice.
Reconnecting to a paired device
• If the Bluetooth function for the device to be connect-
ed to was turned o when the C1 Air was turned on
TurnontheBluetoothfunctionforthedevicetobecon-
nectedto.
• If the Bluetooth function for the device to be connect-
ed to was turned on when the C1 Air was turned on
TurnotheBluetoothfunctionforthedevicetobecon-
nectedto,andthenturnitonagain,orselect“KORG
C1Air”inthelistofpaireddevices.
Ifaconnectioncannotbeestablishedagain,turnothe
Bluetoothfunctionforthedevice,andthenturniton
again.Ifaconnectionstillcannotbeestablished,cancel
pairingordeletetheinformationfromthedevice,and
thentryperformingtheoperationdescribedabovein
“ConnectingaNewDevice(Pairing)”.
Cutting the Connection
Perform the operation by using the Bluetooth seings
screenontheconnecteddevice.
If the C1Air is turnedo while itis connected toa
device,itmaybedicultfortheconnectiontobere-
establishedthenexttime.
ORGAN1 1 0 16 JazzOrgan1
2 1 16 JazzOrgan2
3 0 17 JazzOrgan3
ORGAN2 1 0 19 PipeOrgan1
2 1 19 PipeOrgan2
3 2 19 PositiveOrgan
STRINGS 1 0 48 Strings
2 0 50 CinemaStrings
3 0 52 Choir
BASS&
PIANO
1 0 32 A.Bass/Piano
2 0 33 E.Bass/E.Piano
3 1 32 Bass&Cym/Piano
*3: Dump recorded songs
Recordedsongscanbesavedtoacomputerorsongssaved
tothecomputercanbeimportedontotheC1/C1Air.
Inordertodumprecordedsongs,MIDIdatalersoft-
ware (KORG MIDI Data Filer, available from www.
korg.com)aswellasaseparatelysoldUSB-MIDIinter-
facearerequired.
Pressthebuon;“ddd”appearsinthedisplay,andtheC1/
C1Airenterssend/receivestandbymode.
Sending
PressthePlay/Pausebuontobegindumping.
Whilesending,thePlay/Pausebuonblinksinred,and
“___”appearsinthedisplay.
Whensendingisnished,thePlay/Pause buongoes
dark(notlit),and“ddd”appearsinthedisplay.
Receiving
Whensendingbeginsfromthecomputer,allrecorded
songdataontheC1/C1Airiserased.
Whilesending,thePlay/Pausebuonblinksinred,and
“___”appearsinthedisplay.
Whensendingisnished,thePlay/Pause buongoes
dark(notlit),and“ddd”appearsinthedisplay.
Tocancelsending/receiving,presstheFUNCTIONbut-
tontoexitMIDIseingmode,orselectadierentMIDI
parameter. However, if receiving is cancelled after it
hasalreadybegun,allrecordedsongdataontheC1/C1
Airwillhavebeenerased.
Recording to the Recorder
WhentherecorderoftheC1/C1Airisinrecordingstandby
mode,recordingcanbestartedwithMIDImessagessent
fromanexternalMIDIkeyboard,etc.
• TheperformanceisrecordedonlywhenLocalOisset.
• WhenPart1isinrecordingorrecordingstandbymode:
Theperformanceisrecordedwhenaneventwiththe
speciedMIDIchannelandachannelof+1isreceived.
• WhenPart2isinrecordingorrecordingstandbymode:
Theperformanceisrecordedwhenaneventwithchan-
nelsof+2and+3thespeciedMIDIchannelisreceived.
Using as a Bluetooth Speaker (C1 Air only)
Ifacomputer,tablet,smartphone,audioplayer,etc.,com-
patiblewithBluetoothaudioisconnected,theC1Aircan
beusedasaBluetoothspeaker.
Adjustthevolumeontheoutputfromthedeviceconnected
viaBluetoothaudio. ItcannotbeadjustedwiththeVOL-
UMEknobontheC1Air.

16
120notes.Soundsusingtwooscillators,suchastheBank
2soundofthePIANO2buon,ortheBank1and2sounds
ofthe E.PIANO2buon,havea maximum polyphonyof
60notes.
120÷Numberofsoundoscillators=Maximumpolyphony
Keep the maximum polyphony in mind and carefully
choosesoundswhenusingLayerModetoplaytwosounds
simultaneouslyorwhenusingthedamperpedal.
Specications
Keyboard RH3(Realweightedhammeraction3)
88keys(A0–C8)
Touch Curves Fiveavailable
Pitch Control Transpose,Mastertuning
Temperament Threetypes
Sound Generation
StereoPCMSystem
Polyphony 120notes(max)
Sounds 30sounds(10x3banks)
Eects Brilliance,Reverb,Chorus(3levelseach)
Recorder Twoparts,maximum14,000notes
(approximately100KB)
Demo Songs 50
(SoundDemoSong×10,PianoSong×40)
Metronome
Tempo,TimeSignature,Accent,soundandVolum
controls
Pedal
Damper*,Sostenuto,Soft*(*half-pedalingsupported)
Connections
LINEOUT,Headphones×2,MIDI(IN,OUT),PEDAL,
SPEAKER
Controls
Power,VOLUME,PIANOSONG,TRANSPOSE,
FUNCTION,TOUCH,BRILLIANCE,REVERB,
CHORUS,BANK,Sound×10,DISPLAY,+,–,
METRONOME,Play/Pause( ),Stop( ),Record( ),
PART1,PART2
Wireless method:
Bluetooth(A2DPSink)(C1Aironly)
Speakers 10cm×2
Amplication 25W×2
Power supply DC24V
( )
Power consumption 18W
Dimensions (W × D × H)
1346×347×770mm/52.99×13.66×30.31inches
1346×347×926mm/52.99×13.66×36.46inches
(withthekeycoveropened)
Weight 35kg/77.16lbs.(includingStand)
Included Items
ACadapter,Powercord,StandwithSpeakerBox&
Pedalunit.
•Specicationsandappearancearesubjecttochange
withoutnoticeforimprovement.
Appendix
Troubleshooting
If any of the following problems should occur, carefully
examinetheinstrumenttoseeifyoucandiscernwhatthe
troublemaybe,andtryresolvingitbyfollowingthesug-
gestions below. If the instrument still does not function
properly,pleasecontactyourdealer.
The instrument will not turn on
• CheckthattheACadapteriscorrectlyconnectedtothe
pianoandtheoutlet.
• Makesurethatthepowercordisfullypluggedintothe
ACadapter.
No sound
• Isthecablefromthespeakerboxconnectedsecurelyto
thespeakerconnectorontheC1/C1Air?
• Besurethatthevolumeissettoanadequatelevel,and
notsettotheMINvalue.
• Make surethattheMIDILocalfunction isnotseton
OFF (seepage14).Ifitis,setittoON(orturnthein-
strumentoandthenonagain).
• Checktoseethatnothingisconnectedtotheheadphone
jacks;anyconnectiontoeitherofthesejackswillmute
theinternalspeakers.
Notes are interrupted or sound generation is heavy
Themaximumpolyphonymayhavebeenexceeded;
see“Aboutmaximumpolyphony.”
The sound has changed.
Eects such as reverb and chorus are saved with each
sound.
Theeectseingsthatareapplieddierdependingonthe
orderthatsoundsareselectedinLayerModeorthesounds
selectedforaUserSong;therefore,dierentnuancesmay
be heard even with the same combination of sounds. Be
carefulwhenselectingsounds.
The pitch or tone of the piano sounds wrong in some key
regions
The C1/C1 Air’s piano sounds replicate the sound of an
actual piano asfaithfullyas possible.Thismeans thatin
some regions of the keyboard, you may feel that certain
overtonesseemstronger,aectingthepitchortone.Thisis
not a malfunction.
Your external MIDI device does not respond to MIDI data
sent from the C1/C1 Air.
• MakesurethatallMIDIcablesarecorrectlyconnected.
• MakesurethattheC1/C1AiristransmiingMIDIdata
onthesamechannelthattheMIDIdeviceisreceiving
on.
About maximum polyphony
Ifthenumberofnotesbeingplayedsimultaneouslyexceeds
themaximumpolyphony,somenoteswillbelostsincethe
C1/C1Airisequippedwithamechanismthatstopstherst
notebeingplayedtogiveprioritytonotesplayedwithkeys
pressedlater.SomeC1/C1Airsounds,althoughtheymay
be a single sound, are generated by two or more oscilla-
tors(onenoteofasound-generatingcircuit).Soundsusing
justoneoscillator,suchasthebank1and2soundsofthe
VIBES/GUITAR buon, have a maximum polyphony of

17
3. Insert the pedal unit into the pedal board, and then fas-
ten it by pressing a push rivet into the hole (above the
cutout) at the rear of the pedal board.
Afterpressingitintothere,liftthepedalboardtocheck
thatthepedalsdonotdrop.Thepedalmauntingpinwill
preventthepedalunitfromfallingout.Therefore,itcannot
befullyfastenedtothepedalboard.
4. Using four screws (M4), temporarily fasten the pedal
board (with the pedal unit aached) to the brackets at
the boom of the inside of the left and right side panels.
*Totemporarilytightenthescrewsistotightenthemleav-
ing aclearanceofabout2mm.
Side panel (right)
Side panel (left)
Screws
(M4)
Screws (M4)
5. Lift up the speaker box so that the brackets (A) on the
left and right side panels pass through the dents in the
speaker box. When the brackets (A) are fully hidden
within the speaker box, push the speaker box forward so
the rear of the speaker box is nearly ush with the edges
of the side panels. Then, the speaker box can be released.
Becarefulnottopinchyourngers.
Locking
tab
Front
Push
Front of pedal board
Rear
Push rivet
Rear of pedal board
Assembling the Stand
Warning
● At least one other person must help you assem-
ble the stand.
Caution during assembly
• Makesurethatyouhavethecorrectpartinthecorrectori-
entation,andperformtheassemblyintheordergiven.
Other cautions
• Loosened screws
Thescrewsmayloosenastimepassesafterassembly.You
shouldperiodicallycheckwhetheranyscrewshavebecome
loose.Ifyoufeelthatthestandvibratesexcessively,itispos-
siblethatscrewshavecomeloose.Ifso,re-tightenthem.
• When moving the digital piano to another location
Tomovetheassembledstand,removetheACadaptercord
fromthestand,closethekeycover,andthenmoveitslowly
withatleasttwopeoplekeepingitaslevelaspossible.
• Disassembly
Ifyouneedtodisassemblethestand,dosobyreversingthe
stepsoftheassemblyprocedure.Afterdisassembly,keepthe
screwsandotherpartsinasafeplacesothattheyarenotlost.
Assembly procedure
You’llneedaPhillips(+)screwdriver.
1. Make sure that all of the following parts are available.
Anti-tipping Bracket
(left)
Anti-tipping Bracket
(right)
Pedal unit Pedal board
Speaker box
Side panel (right)
Side panel (left)
Pedal cord
Screws
(M6)
x 2 pcs.
Screws (M4)
x 12 pcs.
Push rivet x 1 pc.
Cord holder
x 1 pc.
Stabilizing felt x 4 pcs.
2. Connect the aached pedal cord, observing the correct
orientation, to the connector on the reverse side of the
pedal unit, and then engage it with a slot in the pedal
unit.
The pedal cord can be aached to or detached from the
connectorwithitslockingtabhelddown.

18
Reverse
Screws (M4)
Screws
(M4) Cord
holder
Reverse
Anti-tipping
Bracket
Stabilizing felt
Stabilizing felt
If you are concerned about
instability at the installation
location after assembly,
attach the felt to stabilize
the digital piano.
11. Connect the pedal cord and the speaker cord to the con-
nectors on the rear of the C1/C1 Air’s connector box.
Whenconnectingthepedalcordandthespeakercord,ob-
servethecorrectorientationsoftheconnectors.
Thepedalcordorthespeakercordcanbedetachedfrom
theconnectorwithitslockingtabhelddown.
Cord
holder
Speaker cord
Pedal cord
Locking tab
12. Use the cord holder to hold the pedal cord.
Aftersecuringthecordwiththecordholder,ensurethat
excesspressureisnotappliedtotheconnectors.
13. Connect the dedicated cord to the AC adapter. Then, plug
the AC adapter into the DC 24V connector, and wrap the
cord around the cord hook of the piano. For details, refer
to “Connecting the Power” on page 5.
14. Place the C1/C1 Air where you intend to use it. Makesure
to place it in a safe location where the oor is atand
stable.
When seing the digital piano in place, make sure
thatthestanddoesnotrestontheACadaptercableor
pedalcable.
For greater safety, be sure to aach the anti-tipping
bracketstotherearoftheleftandrightsidepanels.
Check following assembly
□ Are any parts left over?
If any parts are left over, carefully review the assembly
proceduretoseewherethosepartsshouldhavebeenused.
□ Makesurethatallscrewsaretight.
□ Dependingontheconditionoftheoorattheinstallation
location, the digital piano may shake back and forth. In
thatcase,aachoneortwopiecesofstabilizingfelttothe
boomoftheanti-tippingbracketsinordertoreducethe
shaking(seethediagramforstep10).
Speaker cord
Dent
Bracket (A)
6. Align the bracket holes in the left and right side panels
with the holes in the speaker box, and then secure them
with the four screws (M4) so the gaps on the left and
right sides are equal.
Screws (M4)
Screws
(M4)
7. Firmly tighten the speaker box screws temporarily tight-
ened in step 4.
Make any vertical and horizontal adjustmentsnecessary
sothattheleftandrightsidepanelsarepositionedequally.
8. Ensure that the stand has no gaps and is not tilted, and
that all the screws are tightened rmly.
Thiscompletestheassemblyofthestand.
9. Place the C1/C1 Air on the stand, make any vertical and
horizontal adjustments, and then fasten them to each
other from the boom, using two screws (M6)
PositiontheC1/C1Airsothatitextendsabout1mmfrom
therearofthestand.
Screws
(M6) Screws
(M6)
10. Make sure to aach the anti-tipping brackets be-
hind both side panels. And the anti-tipping bracket
fastened to the left of the code holder at this time.
Aachtheanti-tippingbrackets,starting with theround
holeattheboom.
Joints betweenthesidepanelsand the aached anti-tip-
pingbracketsshouldbeeven(withnoleveldierenceleft).

19
Précautions
Emplacement
L’utilisationdecetinstrumentdanslesendroitssuivantspeuten
entraînerlemauvaisfonctionnement.
• Enpleinsoleil
• Endroitstrèschaudsoutrèshumides
• Endroitssalesoufortpoussiéreux
• Endroitssoumisàdefortesvibrations
• Aproximitédechampsmagnétiques
Alimentation
Branchezl’adaptateur secteur mentionnéà une prise secteur de
tensionappropriée.Evitezdebrancherl’adaptateuràuneprisede
courantdont la tension necorrespond pas à celle pour laquelle
l’appareilestconçu.
Interférences avec d’autres appareils électriques
Lespostesderadioetdetélévisionsituésàproximitépeuventpar
conséquentsourird’interférencesàlaréception.Veuillezdèslors
fairefonctionnercetappareilàunedistanceraisonnabledepostes
deradioetdetélévision.
Maniement
Pouréviterdelesendommager,manipulezlescommandesetles
boutonsdecetinstrumentavecsoin.
Entretien
Lorsquel’instrumentsesalit,neoyez-leavecunchionpropreet
sec.Nevousservezpasd’agentsdeneoyageliquidestelsquedu
benzèneoududiluant,voiredesproduitsinammables.
Conservez ce manuel
Après avoir lu ce manuel, veuillez le conserver soigneusement
pourtouteréférenceultérieure.
Evitez toute intrusion d’objets ou de liquide
Neplacezjamaisderécipientcontenantduliquideprèsdel’ins-
trument.Sileliquideserenverseoucoule,ilrisquedeprovoquer
desdommages,uncourt-circuitouuneélectrocution.
Veillezànepaslaissertomberdesobjetsmétalliquesdansleboî-
tier(trombones,parex.).Sicelaseproduit,débranchezl’alimen-
tationdelaprisedecourantetcontactezvotrerevendeurkorgle
plusprocheoulasurfaceoùvousavezachetél’instrument.
LeprésentappareilestconformeauxCNRd’IndustrieCanada
applicablesauxappareilsradioexemptsdelicence.L’exploita-
tionestautoriséeauxdeuxconditionssuivantes:(1)l’appareil
nedoitpasproduiredebrouillage,et(2)l’utilisateurdel’ap-
pareildoitacceptertoutbrouillageradioélectriquesubi,même
silebrouillageestsusceptibled’encompromerelefonction-
nement.
Cet équipement est conforme aux limites d’exposition aux
rayonnementsénoncéespourunenvironnementnoncontrôlé
et respecte les règles d’exposition aux fréquences radioélec-
triques(RF)CNR-102del’IC.Cetéquipementémetuneénergie
RFtrèsfaiblequiestconsidéréeconformesansévaluationde
l’expositionmaximaleautorisée.
Déclaration de conformité aux directives de
l’Union européenne
KorgInc. déclare par la présenteque le produitest
conformeauxexigencesdeladirective1999/5/CE.
VouspouvezconsulterlaDéclarationdeconformité
(DoC)àladirective1999/5/CEdanslemoded’emploi
deceproduit,disponiblesurlesiteInternetdeKorg
(www.korg.com).
Note concernant les dispositions (Seulement EU)
Quand un symbole avec une poubelle barrée d’une
croixapparaitsurleproduit,lemoded’emploi,lespiles
oulepackdepiles,celasigniequeceproduit,manuel
oupilesdoitêtredéposéchezunreprésentantcompé-
tent,etnonpasdansunepoubelleoutouteautredéchet-
terieconventionnelle.Disposerdeceemanière,depré-
venir les dommages pour la santé humaine et les
dommages potentiels pour l’environnement. La bonne mé-
thode d’élimination dépendra des lois et règlements appli-
cablesdansvotrelocalité,s’ilvousplaît,contactezvotreorga-
nismeadministratifpourplusdedétails.Silapilecontientdes
métaux lourds au-delà du seuil réglementé, un symbole
chimiqueestachéendessousdusymboledelapoubellebar-
réed’unecroixsurlapileoulepackdepiles.
REMARQUE IMPORTANTE POUR LES CLIENTS
Ceproduitaétéfabriquésuivantdesspécicationssévèreset
desbesoinsentensionapplicablesdanslepaysoùceproduit
doitêtreutilisé.Sivousavezachetéceproduitvial’internet,
parventeparcorrespondanceou/etventepartéléphone,vous
devezvérierqueceproduitestbienutilisabledanslepaysoù
vousrésidez.
ATTENTION: L’utilisationde ce produit dans un paysautre
que celuipourlequel ila étéconçu peut être dangereuse et
annuleralagarantiedufabricantoududistributeur.Conser-
vezbienvotrerécépisséquiestlapreuvedevotreachat,faute
dequoivotreproduitnerisquedeneplusêtrecouvertparla
garantiedufabricantoududistributeur.
* BluetoothestunemarquedéposéedeBluetoothSIG,Inc.
* Tous les noms de produits et de sociétés sont des marques
commercialesoudéposéesdeleurdétenteurrespectif.

20
Table des matières
Précautions --------------------------------------------- 19
Parties et leurs fonctions --------------------------- 21
Préparer l’instrument--------------------------------22
Avanttoutechose--------------------------------------------------22
Écoutedesmorceauxdedémonstration---------------------23
Jouer sur le C1/C1 Air---------------------------------24
Joueruntimbre(modeSingle) --------------------------------- 24
Utilisationdepédales --------------------------------------------25
Eets ------------------------------------------------------------------25
Réglagedutoucher------------------------------------------------ 26
FonctionTranspose ----------------------------------------------- 26
Lemétronome ------------------------------------------------------ 26
Modes de jeu -------------------------------------------27
Jouerdeuxtimbresàlafois(modeLayer)-------------------27
Joueràdeux(modePartner) ------------------------------------ 27
Enregistrer/lire votre jeu ---------------------------28
Enregistrervotrejeu----------------------------------------------28
Ajouterdesdonnéesàunenregistrement ------------------28
Lireunepartieenregistrée-------------------------------------- 29
Supprimeruneinterprétationenregistrée ------------------ 29
Autres fonctions---------------------------------------29
Modedefonctions(Function) ---------------------------------- 29
Initialiserlesparamètres ----------------------------------------30
MIDI ------------------------------------------------------------------ 31
Utiliser l’instrument comme
haut-parleurBluetooth(uniquementpourleC1Air) ---- 32
Appendice-----------------------------------------------33
Problèmesetsolutions -------------------------------------------33
Spécications -------------------------------------------------------33
Montage du pied--------------------------------------34
Prudencedurantlemontage------------------------------------34
Autresprécautions------------------------------------------------34
Procéduredemontage -------------------------------------------34
Àvérieraprèslemontage -------------------------------------35
Tableau d’implémentation MIDI ----------------- 87
This manual suits for next models
1
Table of contents
Languages:
Other Korg Musical Instrument manuals

Korg
Korg Kronos X User manual

Korg
Korg Ci-9600 User manual

Korg
Korg SGPROX User manual

Korg
Korg Stage Vintage SV-1 User manual

Korg
Korg M3 User manual

Korg
Korg MICROPIANO User manual

Korg
Korg T1 User manual

Korg
Korg Grandstage 88 User manual

Korg
Korg CONCERT C-550 User manual

Korg
Korg PA4X Use and care manual