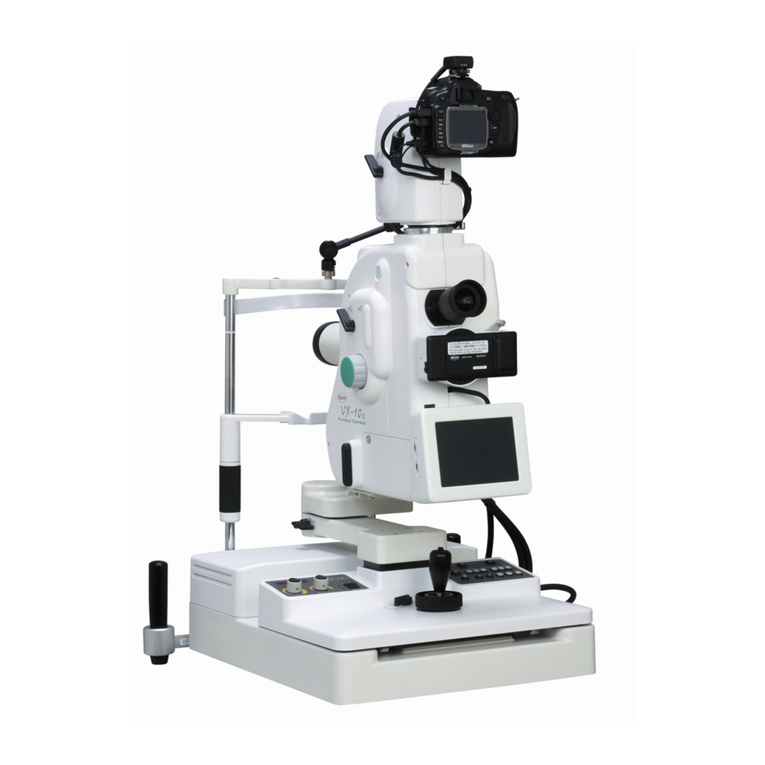
Kowa Nonmyd 8S User manual

Non-mydriatic Retinal Camera
KOWA
KOWA nonmyd 8s US/EU
INSTRUCTION MANUAL


I
Congratulations on your purchase of the KOWA nonmyd 8s. The KOWA nonmyd 8s is a non-mydriatic retinal camera
for retinal photography. This manual provides a description of the operating procedures of the KOWA nonmyd 8s and
important precautions to be observed during its use.
Please read this manual carefully to assure that the instrument can demonstrate its full capabilities and work safely.
After you have nished reading, keep this manual in an easily accessible location near the instrument for future reference.
Operational Considerations for Safety
This manual describes important precautions to be observed when you use the instrument to assure that the instrument is
used safely without causing any damage to the human body or property of the purchaser and other persons.
The following designations and pictorial symbols should be fully comprehended before reading the manual.
Meanings of Designations
*Warning Improper operation may result in serious injury*1 or death.
*Caution Improper operation may result in bodily injury*2 or property damage.*3.
*1 Serious injury means vision loss, an injury, high- or low-temperature burn, electric shock, fracture, or
poisoning that causes a subsequent complication or requires hospitalization or long-term outpatient
treatment.
*2 Bodily injury means an injury, burn, electric shock and so forth that will not necessitate
hospitalization or long-term outpatient treatment.
*3 Property damage means extensive damage to a house and/or household goods as well as a
domestic animal and pet.
Meanings of Symbol
/Graphical indication of any warning and caution.
What is warned is explicitly and pictorially indicated by a picture or its associated message on or
near a pictorial symbol.
-Graphical indication of prohibited operation (prohibitive item).
What is prohibited is explicitly and pictorially indicated by a picture or its associated message on or
near a pictorial symbol.
0Graphical indication of any mandatory action (obligatory item).
What must always be done is explicitly and pictorially indicated by a picture or its associated mes-
sage on or near a pictorial symbol.
Disclaimer
KOWA is not responsible for:
• Any damage caused by re, earthquake, third party’s action, any other accident or user’s intentional or unin-
tentional error, abuse or use under abnormal conditions.
• Any damage resulting from use of the product or its malfunction (e.g. operating loss, shutdown, change/loss
of stored data and so forth).
• Any damage resulting from disregarding what is described in the manual.
• Any damage resulting from malfunction caused by a combination of connected devices.
Introduction

II
Warning
Prohibitory
Do not place a container or cup containing liquid near the instrument. Spilled liquid entering the
instrument may cause electrical shock. If liquid should enter into the instrument, turn OFF the
power switch immediately, unplug the instrument from the power outlet, and then contact Kowa
or your Kowa dealer for inspection.
Do not plug in or unplug the power plug while your hands are wet, as this may result in eleclic
shock. When unplugging the power plug, hold it rmly at the plug area. Do not pull directly on
the power supply cable, as this may damage or expose the cable's internal wiring, resulting in
risk of re or electric shock.
Do not load the power outlet or cable in excess of its rated capacity. If the main power supply
cable should share a power outlet with other devices and the rated capacity is exceeded, may
occur re or electrical shock.
Do not install the instrument in a place where it is difcult or impossible to unplug its power
supply cable. Otherwise, it may cause a re or electrical shock.
Do not insert any metal object into an air vent or opening of the instrument. It may cause in-
strument malfunctioning, re or electrical shock.
Disassembly prohibited
Do not disassemble, modify or repair the instrument yourself. It may cause a re, electrical
shock, instrument malfunctioning or bodily injury. Refer all servicing to Kowa or your Kowa
dealer. The product assembled by yourself will not be covered under warranty nor any other
service.
Obligatory
Only use the power supply cable supplied with the instrument. Otherwise, it may cause a re
or instrument malfunction.
If the power supply cable becomes damaged (if internal wiring is exposed, etc.), immediately
unplug the instrument from the power outlet. Continued use poses risk of re or electric shock.
Make sure to insert the power plug into the power outlet completely and securely. A loosely
connected electrical plug may cause a re or electric shock.
Do not damage, modify, or rest heavy object on the power supply cable. Damage to the
power supply cable may result in the exposure of live wires, re, or electric shock.
Regularly remove dust off the power plug. Dust accumulated on the power plug may absorb
moisture, which may result in isolation failure and cause re.
Make sure that the instrument is properly grounded to prevent bodily injuriy. Connect the
power plug into the three-wire grounding type outlet with ground wire. Failing to properly
ground the instrument may cause electric shock.
Use a designated fuse only. Using an undesignated fuse may cause a re or instrument
malfunction.
Unplug
If any abnormal smell, sound, overheating or smoke should be detected, make sure to turn
OFF the instrument immediately and then unplug the instrument from the power outlet. Con-
tinued use of the instrument may cause a re or instrument malfunction. Contact Kowa or your
Kowa dealer for inspection immediately.
Warning
High-Voltage
When replacing the ash lamp, make sure the power is turned OFF and then un-
plugged from the power outlet. Otherwise, there may occur electrical shock.
When replacing the huse, make sure to turn OFF the power switch and then
unplug the instrument from the power outlet. Replacing the huse without un-
plugging the instrument may cause electrical shock or burn.
This instrument is equipped with a storage capacitor for photography light.
Replacing the flash lamp while this capacitor is still not yet fully discharged
causes a danger of an electrical shock. Check that the discharge indicator LED
is turned OFF before replacing the ash lamp.

III
Caution
Prohibitory
Do not pull on the power supply cable when unplugging the instrument from the power outlet.
Doing so may damage the cable and cause a re or electric shock. Make sure to hold the pow-
er plug when unplugging the instrument.
Do not install the instrument on an unstable location such as on a shaky base or a tilting sur-
face. Otherwise, the instrument may drop or fall over causing a bodily injury.
Caution
High-
temperature
Do not replace the ash lamp immediately after turning the OFF the main power.
You could be burned by the lamp heated to a high temperature. Wait for more
than 10 minutes to cool the lamp down before replacing.
Do not touch the ash lamp bulb with your bare hand. Otherwise, ash intensity and lamp lon-
gevity may be reduced.
Do not increase the observation illumination light intensity more than required. Otherwise, the
eye may be injured.
Do not increase the ash intensity more than required. Otherwise, the patient may experience
pain and his or her eye may be injured.
The air vent must not be obstructed. Obstructing the air vent may increase the internal tem-
perature resulting in malfunctioning of the instrument or a re.
When operating this instrument, keep your ngers off the gap between the optical component
and the power supply or the chin rest support and the forehead rest support, or the gap under-
neath the chin rest. Otherwise, the ngers may be pinched and injured. Instruct the patient not
to place his or her ngers on the instrument.
Do not wipe the outer surface of the instrument with solvents such as benzene, or ether. Doing
so may cause discoloration or degradation.
Obligatory
The power supply must be provided for the sole use of this instrument. Sharing the same pow-
er supply with other external devices may cause instrument malfunction.
When moving the chin rest up or down to adjust the height of the examined eye, carefully op-
erate the instrument while checking the position of the patient’s head. A patient with a smaller
head may have his or her head caught between the components.
Make sure that the instrument are not in contact with the patient's eye or the nose when in op-
eration. Otherwise, the ptient may likely be injured.
Handle fuses with care. Otherwise, glass components may be damaged causing bodily injury.
AA
A
A
A
A
B
C
A
A
A
D
D
Caution
A: Keep your finger off the locations shown with an arrow “A” when operating the
instrument. Otherwise, the ngers may be pinched and injured.
Instruct the patient not to place his or her ngers on the instrument.
B: Take good care so that the patient’s eye, nose or face does not come in contact with
the locations shown with an arrow “B” when operating the instrument.
C: When moving up or down the chin rest to adjust the height of the patient’s eyes, carefully
manipulate the instrument while checking the position of the patients’ head.
A patient with the smaller head may get his or her head caught between the components.
D: The air vent must not be obstructed. Obstructing the air vent may increase the
internal temperature resulting in malfunction of the instrument or a re.
D: Do not insert any metal object into an air vent or opening of the instrument.
It may cause electrical shock and malfunctioning of the instrument.
Keep your nger off the spaces shown with an arrow. Otherwise, you may be injured.

IV
Meanings of Symbols
Symbol for “Type B applied part”.
Symbol for “Power ON”.
Symbol for “Power OFF”.
Symbol for “Follow instruction for use”.
Symbol for “Caution”.
Symbol for “Warning High-voltage”.
Symbol for “Caution High-temperature”.
Symbol for “MANUFACTURER”.
Symbol for “AUTHORISED
REPRESENTATIVE IN THE
EUROPEAN COMMUNITY”.

V
1. Operating environment
1) Instrument should be operated only by qualied and trained personnel.
2) Handle the instrument with care, and do not apply strong shock to the instrument.
3) Avoid high temperature and humidity, direct sunlight, and dust when installing and storing the instrument. Strictly
observe the following environmental conditions.
Operating Transporting and storing
Environmental temperature 10 to 35 °C -10 to +55 °C
Relative humidity 30 to 90% 10 to 95%
Atmospheric pressure 800 to 1060 hPa 700 to 1060 hPa
4) Avoid condensation when using, transporting or storing the instrument.
5) Do not connect a digital camera other than that supplied with this instrument. Using another camera may adversely
affect the safety or performance of this instrument.
6) Install the instrument in a room where the lighting is 5 lux or less, which make letters on this manual barely readable.
2. Precautions for electric system
1) When the instrument has not been used for a long period of time, inspect the items below.
Make sure the objective lens is free from soils.
Make sure the intensity of the lamps can be adjusted appropriately.
2) Install the system in a location where there is little risk of the plug being pulled out while operating. If the plug should
be pulled out accidentally, be sure to turn OFF the main power before plugging the instrument back in.
3) Kowa is not liable for malfunctions and/or damages resulting from maintenance and/or repairs performed by the
third party other than an agent authorized by Kowa.
4) Kowa is not liable for malfunctions and/or damages resulting from maintenance and/or repairs using parts other than
repair parts specied by Kowa.
5) The input voltage should always be maintained within ± 10% of the rated voltage.
6) Do not turn ON the ash lamp and adjust ash intensity at the same time.
7) Wait approx. 15 seconds to stabilize the power unit after turning the power ON before using the switches on the
operation panel.
8) Do not turn the main power ON and OFF in succession. Allow an interval of at least 10 seconds before turning the
main power ON and OFF.
9) Be sure to turn OFF the main power before connecting an external device.
10) Do not touch the patient and connectors at the same time as it may adversely affect the safety.
11) Using alcohol, disinfect the parts accessible by the patient.
12) The power supply must be provided for the sole use of this instrument.
3. Precautions when using a digital camera or this instrument
1) Carefully handle the objective lens as soiled or scratched parts of an objective lens may be imaged as white spots.
2) Always cover this instrument and the digital camera when not in use.
3) Do not apply strong shock or force to the objective lens.
4) Set a dial or knob with clicking positions to its designated position. The dislocated diopter compensation knob may
result in a photograph with a missing part or underexposure.
5) Securely install the digital camera. The digital camera installed insecurely may cause distortion of an image or
misalignment of focus.
The digital camera installed insecurely may fall off and become unusable.
6) Never disassemble or adjust this instrument or the digital camera by yourself as it uses precision parts which
requires special tool for doing so.
4. Disposal precautions
When disposing, this instrument and/or its consumables is categorized as industrial waste; therefore, the disposal must
be handled by a licensed industrial waste disposal contractor.
5. Replacement of the Aluminum Electrolytic Capacitor
The aluminum electrolytic capacitor for the ash lamp, which is used in the power supply section of this instrument,
is a component requiring regular replacements. The useful life of this type of components may be signicantly reduced
depending on the frequency and conditions in which this instrument is used. If the capacitor is used beyond its useful life,
its electrolytic solution may leak or drain, which can result in abnormal odor, smoke, bursting sound, and other failures.
The design life of the capacitor is 50,000 ashes when used in an ambient temperature of 25°C. This is, however, only
a guideline, and the capacitor may need to be replaced earlier depending on the usage environment. In order to ensure
safe and stable operation of this instrument, early replacement of the aluminum electrolytic capacitor is recommended.
Replacement of components requiring regular replacement, such as aluminum electrolytic capacitor, is supported as a
paid service. For more information about replacement of such components, please contact Kowa or your Kowa dealer.
Operating Precautions

VI
1. Only qualied personnel should operate this instrument.
2. The following items shall be considered when installing the instrument.
1) Install at a location away from water or accidental splashing.
2) Install at a location which will not be adversely affected by atmospheric pressure, temperature, humidity, ventilation,
sunlight, dust, air containing salt, sulfur and other substances, and the like.
3) Take care to guard against tilt, vibration and strong impacts, for instance, during transportation.
4) Instrument must not be installed at locations where chemicals are stored or gasses are generated.
5) Be careful with the radio frequencies, voltages and allowable amperes (power consumption) of the power supply.
6) Properly connect ground wires.
3. The following items shall be considered before using the instrument.
1) Make sure that instrument activates properly after checking switch contact, polarity, dial setting and so forth.
2) Make sure that the instrument is properly grounded.
3) Make sure that all cables are properly connected and secured.
4) Use of other instruments and appliances on the same power circuit is liable to cause errors and incorrect ash
output resulting in incorrect diagnosis or hazards.
5) External circuits and connectors that may come in direct contact with the patient must be checked frequently for
signs of wear.
4. The following items shall be considered when using the instrument.
1) Be sure to minimize the time and quantity required for diagnosis and treatment.
2) Always assure that the instrument and patient are in good condition.
3) When an abnormality is found on the instrument, take proper measures, for instance, to stop the operation of the
instrument while assuring the patient’s safety.
4) Do not allow the patient to touch any of the instrument controls.
5. The following items shall be considered after using the instrument.
1) Turn OFF the instrument after setting control switches, dials and so forth to their initial status following with a
specied procedure.
2) Do not pull cables for removal because an excessive force is exerted on them.
3) The following shall be considered regarding storage location.
• Store at a location away from water or accidental splashing.
• Store at a location which will not be adversely affected by atmospheric pressure, temperature, humidity,
ventilation, sunlight, dust, air containing salt, sulfur and other substances, and the like.
• Take care to guard against tilt, vibration and strong impacts, for instance, during transportation.
• Instrument must not be stored at locations where chemicals are stored or gasses are generated.
4) Clean and rearrange accessories, cables, and the like.
5) The instrument must be cleaned prior to use so that there will be no problem when using it again.
6. In case of a problem or malfunction, stop the operation and contact Kowa or your Kowa dealer for repair.
7. Instrument shall not be modied.
8. Maintenance
1) Periodically check the instrument and its components for any abnormality.
2) When using the instrument that has not been used for a while, it must be checked beforehand to assure that it is in
normal condition and operates safely.
9. Be careful of the possibility that incorrect operation may be caused by strong electromagnetic waves.
This instrument is examined based on IEC 60601-1-2 (EN 60601-1-2).
The purpose of this standard is to keep safety against the dangerous obstacle in typical medical facilities.
When this instrument is inuenced by other instrument, or when it affects other instrument or when there is such fear,
please devise to move this instrument and other apparatus or to make the distance between those instruments.
Moreover, if there is an unknown point, please consult our company, or an agency beforehand.
Operational Considerations for a Hospital Grade
Electrical Instrument (Safety and Accident Prevention)

VII
1. Electrical devices which constitute the KOWA nonmyd 8s system
This instrument constitutes a medical electric system by connecting with the following optional accessories or products.
- Numeric key pad (option)
In order to select internal xation target in Mosaic, it is used connecting with USB connector of the KOWA nonmyd 8s.
- Personal computer
It is used in order to acquire the images taken by the KOWA nonmyd 8s. The application software was authorized
by KOWA (e.g. VK-2) should be installed on the PC.
LCD monitor or other peripheral equipment connected to the PC.
Numeric key pad can be installed in patient environment (within a radius of 1.5m around a patient).
When you install other electrical devices in patient environment, please use the below-mentioned “Multi-tap with Isolation
Transformer”. Do not touch the connector part of the instrument in the KOWA nonmyd 8s system and the patient
simultaneously.
2. Precautions for use of an electrical system
1) All components of this medical electrical system may be installed within a limited patient environment when all
components are installed in accordance with the installation instructions using “Multi-tap with Isolation Transformer”,
which is one of the system components.
2) As a prerequisite for installing to this system, other components (a PC, printer, video capture printer, video monitor,
or other devices) which do not comply with IEC 60601-1 (EN 60601-1) must be powered from “Multi-tap with
Isolation Transformer”. The electric power to these components supplied from an electric source other than “Multi-tap
with Isolation Transformer” (e.g., power outlets) may cause increased touch current or potential difference between
protective grounds resulting in the injury to the patient or operator. Use “Multi-tap with Isolation Transformer” only
for supplying the power to the components other than this instrument. And do not use “Multi-tap with Isolation
Transformer” in this system for supplying the power to any components other than this system.
3) Any medical electrical equipment that is connected to this system to compose a medical system must comply with
IEC 60601-1 (EN 60601-1).
4) Any non-medical electrical equipment that is connected to this system to compose a medical system must comply
with safety standards of IEC or ISO provisions applicable to such a non-medical electrical equipment.
5) Do not use any additional multi-tap or extension power supply cable other than those Kowa specied to this system.
6) Power supply to this system or “Multi-tap with Isolation Transformer” must be provided individually. (Do not route the
power supply through other multi-tap to the system or “Multi-tap with Isolation Transformer”.)
7) The power supply cable for electrical equipment that composes a medical system must have durability that meets
IEC 60245/IEC 60227 or higher standards.
8) Assure that the power supply is turned OFF when connecting other device to the system.
9) Do not turn ON the power supply until all devices are completely connected.
10) Do not place or install the devices and the system components on the unstable or inclined table.
3. Precautions for use of “Multi-tap with Isolation Transformer”
1) “Multi-tap with Isolation Transformer” should use the one equipped with the rated output more than power
consumption of equipment to connect.
2) Do not place “Multi-tap with Isolation Transformer” directly on the oor. Water droplets during room cleaning may
enter the multi-tap resulting in the component failure.
3) The power supply cable to “Multi-tap with Isolation Transformer” must be connected to a power receptacle with a
protective ground terminal equipotential to the protective ground of this instrument.
4) When using a “Multi-tap with Isolation Transformer” receptacle with a protective ground terminal, read the
instructions for use attached to the receptacle to familiarize yourself with the correct use before use.
4. Daily maintenance and cleaning
1) System components
• Wipe the outer surface with a firmly squeezed dampened soft cloth. Use mild detergent to remove excessive
soils. Do not use chemicals or solvents such as thinner or benzene. (As the LCD monitor screen cover easily gets
scratched, lightly wipe it with soft cloth such as gauze.)
• Refer to the instruction for use provided with each device for details of device maintenance and cleaning.
2) Power supply cables, connecting cables, and connectors
• Visually inspect that all cables have no aw or damage.
• Visually verify that earth leads of all components and protective ground terminals are securely connected.
• Disconnect the power supply cables from the power supply receptacles when you do not use the system for a long
period of time.
3) Others
• When you change the components of this system, and connection after installing the system, you must build a
secure system according to the notes currently written here.
• When you add a PC to the system for an archiving purpose, captured images are stored in the HDD of the PC. Back
up the data stored in the HDD regularly since HDDs may have a mechanical or electrical failure.
Precautions: Use of Medical Electrical Systems

VIII
l Combinations of medical electrical equipment and non- medical electrical equipment
IEC 60601-1 Annex I “ME system aspects” describes the summary of situations that could occur when different
combinations of equipment are used in various medical environments. The brief overview of IEC 60601-1 Annex I is
shown below.
Situation No.
Medically used room
Non-
medically
used room
Examples of
possible causes
for exceeding
LEAKAGE
CURRENT limits
Practical means of
compliance
Apply 16.5 in all
situations
Inside the
PATIENT
ENVIRONMENT
Outside the
PATIENT
ENVIRONMENT
1
1a
Items A and B
are ME EQUIP-
MENT
A
IEC
60601
B
IEC
60601
Mains
Plug
Mains
Plug
Multiplied APPLIED
PARTS of the same
type can cause
the total PATIENT
LEAKAGE CUR-
RENT to exceed
limits See Note 1.
- Verify total PA-
TIENT LEAK-
AGE CURRENT
1b
Items A and B
are ME EQUIP-
MENT powered
via a MULTI-
PLE SOCKET-
OUTLET
A
IEC
60601
B
IEC
60601
MULTIPLE
SOCKET-OUTLET
Earth conductor
of the MULTIPLE
SOCKET-OUTLET
is broken See also
1a.
- Additional
PROTECTIVE
EARTH CON-
NECTION (for A
or B) or,
- Separating trans-
former
1c
Item A is ME
EQUIPMENT
and B is
Non-ME
EQUIPMENT
A
IEC
60601
B
IEC
XXXXX
Mains
Plug
Mains
Plug Due to high TOUCH
CURRENT of B
- Additional
PROTECTIVE
EARTH CON-
NECTION (for B)
or,
- Separating trans-
former (for B)
1d
Item A is ME
EQUIPMENT
and B is
non- ME
EQUIPMENT
powered via
a MULTIPLE
SOCKET-
OUTLET
A
IEC
60601
B
IEC
XXXXX
MULTIPLE
SOCKET-OUTLET
The earth conductor
of the MULTIPLE
SOCKET-OUTLET
is broken or, Due to
high TOUCH CUR-
RENT of B
- Additional
PROTECTIVE
EARTH CON-
NECTION (for A
or B) or,
- Separating trans-
former
Precautions: Use of Medical Electrical Systems

IX
Precautions: Use of Medical Electrical Systems
Situation No.
Medically used room
Non-
medically
used room
Examples of
possible causes
for exceeding
LEAKAGE
CURRENT limits
Practical means of
compliance
Apply 16.5 in all
situations
Inside the
PATIENT
ENVIRON-
MENT
Outside the
PATIENT
ENVIRONMENT
2
2a Items A and
B are ME
EQUIPMENT
No causes of ex-
ceeding LEAKAGE
CURRENT
- No further mea-
sures are neces-
sary
2b Items A and
Item B are
ME EQUIP-
MENT pow-
ered via a
MULTIPLE
SOCKET-
OUTLET
Earth conductor
of the MULTIPLE
SOCKET-OUTLET
is broken
- Additional
PROTECTIVE
EARTH CON-
NECTION (for A
or B) or,
- Separating trans-
former
2c Item A is ME
EQUIPMENT
and Item B
is non-ME
EQUIPMENT
Due to high
TOUCH CUR-
RENT of B See
rationale for 16.5.
- Do not use metal
connector hous-
ing or,
- SEPARATION
DEVICE
2d Item A is ME
EQUIPMENT
and item B
is non-ME
EQUIPMENT
powered via
a MULTIPLE
SOCKET-
OUTLET
The earth conduc-
tor of the MUL-
TIPLE SOCKET-
OUTLET is broken
- Additional
PROTECTIVE
EARTH CON-
NECTION (for A
or B) or,
- Separating trans-
former
3
3a Items A and
B are ME
EQUIPMENT
No causes of ex-
ceeding LEAKAGE
CURRENT
- No further mea-
sures are neces-
sary
3b Item A is ME
EQUIPMENT
and item B
is non-ME
EQUIPMENT
Due to high
TOUCH CUR-
RENT of B See
rationale for 16.5.
- Do not use metal
connector hous-
ing for SIGNAL
INPUT/OUTPUT
PART or,
- SEPARATION
DEVICE
3c Item A is ME
EQUIPMENT
and item
B in is ME
EQUIPMENT
or non-ME
EQUIPMENT
a) Potential differ-
ence between
PROTECTIVE
EARTH CON-
NECTIONS of A
and B
b) Due to high
TOUCH CUR-
RENT of B
See rationale for
16.5.
- Additional
PROTECTIVE
EARTH CON-
NECTION for
(A), or
- SEPARATION
DEVICE, or
- Do not use
metal connector
housing in the
PATIENT ENVI-
RONMENT
NOTE 1. No causes of TOUCH CURRENT or EARTH LEAKAGE CURRENT exceeding limits.
NOTE 2. IEC 60601: MEDICAL ELECTRICAL EQUIPMENT in compliance with IEC 60601.
NOTE 3. IEC xxxxx: Non-medical equipment in compliance with relevant IEC safety standards.
NOTE 4. Separating transformer: see 16.9.2.1.
NOTE 5. If equipment “B” is outside the PATIENT ENVIRONMENT and if equipment “A” is a CLASS II equipment and has accessible
conductive parts connected to the PROTECTIVE EARTH CONNECTON of equipment “B” then additional safety measures
could be necessary, for example: additional protective earth for “B” or separating transformer or SEPARATION DEVICE.
A
IEC 60601
B
IEC 60601
Mains
Plug
Mains
Plug
A
IEC 60601
B
IEC XXXXX
Mains
Plug
Mains
Plug
A
IEC 60601
B
IEC 60601
MULTIPLE SOCKET-OUTLET
A
IEC 60601
B
IEC XXXXX
MULTIPLE SOCKET-OUTLET
A
IEC 60601
B
IEC 60601
Mains
Plug
Mains
Plug
Common protective earth
A
IEC 60601
B
IEC XXXXX
Common protective earth
Mains
Plug
Mains
Plug
A
IEC 60601
B
IEC 60601
B
IEC XXXXX
Mains
Plug
Mains
Plug
Common protective earth Protective earth with
potential difference

X
Electromagnetic Compatibility
This instrument is a medical electrical instrument. Medical electrical instruments require special attention to electromagnetic
compatibility (EMC). The following section describes the EMC and precautions regarding this instrument. When installing or
using this instrument, read the description carefully and follow the directions described.
*The EMC of this instrument was tested based on IEC 60601-1-2 (EN 60601-1-2).
1. Please note that portable- or mobile-type radio frequency communication devices (RF communications instrument)
may adversely affect this instrument resulting in malfunctioning.
2. The electromagnetic compatibility (EMC) of this instrument was tested with the options and accessories shown below.
Since using an option or accessory other than those specied may cause malfunctioning of this instrument due to
interferences of other devices or cause malfunctioning of other device, use only the options or accessories specied
for this instrument.
l 100V power supply cable : KP300VCTF3X1.25SQKS16A, 3 m
l 120V power supply cable : KP321SJT18X3KS31, 3 m
l 230V power supply cable : KP-4819Y KS-31A, 3 m
l PC : CE Marking, and VCCI approved PC
l USB cable (Type A―B) : 3 m
l USB cable (Type A―Mini- B) : 3 m
lNumeric keypad
l External xation target
3. This instrument is not designed to be used adjacent to other instrument or placing one on top of another. Therefore,
do not apply such use. Nevertheless, if such use is inevitable, it is necessary to constantly monitor whether if the
instrument is functioning normally after such use has been adopted.
4. Accessories and options used with this instrument are tested for EMC when combined with the instruments below.
Since using an instrument other than that specied may cause malfunctioning of this instrument due to interferences
of other devices or cause malfunctioning of other devices, do not use any instrument other than specied below.
Option 1: CE Marking, VCCI, and FCC approved PC
5. The functions which shows this instrument in the following table are verified to determine electromagnetic
compatibility (EMC) of this instrument.
Light-emitting functions
Light-emitting function
Flash light intensity switching
Observation light intensity settings
Charge function
Instrument operation functions
Optical component vertical movement
Chin rest vertical movement
Anterior segment/retinal switching
SP mode switching
Internal xation target ON/OFF
External xation target ON/OFF
Anterior segment illumination
Retinal observation light intensity adjustment
W.D. ON/OFF
F.D. ON/OFF
Photography functions Image data output
Imaging conditions output
LCD monitor display functions LCD monitor screen display (OSD)
LCD monitor screen display (through image)

XI
Electromagnetic Compatibility
[Compliance verication and guidance]
Guidance and manufacturer’s declaration - electromagnetic emissions
The KOWA nonmyd 8s is intended for use in the electromagnetic environment specied below.
The customer or the user of the KOWA nonmyd 8s should assure that it is used in such an environment.
Emissions test Compliance Electromagnetic environment - guidance
RF emissions
CISPR 11
EN 55011
Group 1 The KOWA nonmyd 8s uses RF energy only for its internal function. There-
fore, its RF emissions are very low and are not likely to cause any interfer-
ence in nearby electronic instrument.
RF emissions
CISPR 11
EN 55011
Class B The KOWA nonmyd 8s is acceptable in all types of facilities without any limi-
tation to the electrical supply network connected to the KOWA nonmyd 8s.
Harmonic emissions
IEC 61000-3-2
EN 61000-3-2
Class A
Voltage uctuations/
icker emissions
IEC 61000-3-3
EN 61000-3-3
Complies
Guidance and manufacturer’s declaration - electromagnetic immunity
The KOWA nonmyd 8s is intended for use in the electromagnetic environment specied below.
The customer or the user of the KOWA nonmyd 8s should assure that it is used in such an environment.
Immunity test IEC 60601 test level Compliance level Electromagnetic environment - guidance
Electrostatic
discharge (ESD)
IEC 61000-4-2
EN 61000-4-2
±6kV contact
±8kV air
±6kV contact
±8kV air
Floors should be wood, concrete or ceramic tile.
If oors are covered with synthetic material, the
relative humidity should be at least 30%.
Electrical fast
transient/burst
IEC 61000-4-4
EN 61000-4-4
±2kV for power
supply lines
±1kV for
input/output lines
±2kV for power
supply lines
±1kV for
input/output lines
Mains power quality should be that of a typical
commercial or hospital environment.
Surge
IEC 61000-4-5
EN 61000-4-5
±1kV
line (s) to line (s)
±2kV
line (s) to earth
±1kV
line (s) to line (s)
±2kV
line (s) to earth
Mains power quality should be that of a typical
commercial or hospital environment.
Voltage dips, short
interruptions and
voltage variations
on power supply
input lines
IEC 61000-4-11
EN 61000-4-11
<5% UT
(>95% dip in UT)
for 0.5 cycle
40% UT
(60% dip in UT)
for 5 cycles
70% UT
(30% dip in UT)
for 25 cycles
<5% UT
(>95% dip in UT)
for 5 sec
<5% UT
(>95% dip in UT)
for 0.5 cycle
40% UT
(60% dip in UT)
for 5 cycle
70% UT
(30% dip in UT)
for 25 cycle
<5% UT
(>95% dip in UT)
for 5 sec
Mains power quality should be that of a typical
commercial or hospital environment. If the user of
the KOWA nonmyd 8s requires continued opera-
tion during power mains interruptions, it is recom-
mended that the KOWA nonmyd 8s be powered
from an uninterruptible power supply.
Power frequency
(50/60Hz)
magnetic eld
IEC 61000-4-8
EN 61000-4-8
3 A/m 3 A/m Power frequency magnetic fields should be at
levels characteristic of a typical location in a typi-
cal commercial or hospital environment.
NOTE UTis the a.c. mains voltage prior to application of the test level.

XII
Electromagnetic Compatibility
Guidance and manufacturer’s declaration - electromagnetic immunity
The KOWA nonmyd 8s is intended for use in the electromagnetic environment specied below.
The customer or the user of the KOWA nonmyd 8s should assure that it is used in such an environment.
Immunity test IEC 60601 test level Compliance level Electromagnetic environment– guidance
Conducted RF
IEC 61000-4-6
Radiated RF
IEC 61000-4-3
3 Vrms
150 kHz to 80 MHz
3 V/m
80 MHz to 2.5 GHz
3 V
3 V/m
Portable and mobile RF communications instru-
ment should be used no closer to any part of
the KOWA nonmyd 8s, including cables, than
the recommended separation distance calcu-
lated from the equation applicable to the fre-
quency of the transmitter.
Recommended separation distance
d=1.2 P
d=1.2 P 80 MHz to 800 MHz
d=2.3 P 800 MHz to 2.5 GHz
where P is the maximum output power rating
of the transmitter in watts (W) according to the
transmitter manufacturer and d is the recom-
mended separation distance in metres (m).
Field strengths from fixed RF transmitters, as
determined by an electromagnetic site surveya,
should be less than the compliance level in
each frequency rangeb.
Interference may occur in the vicinity of instru-
ment marked with the following symbol:
NOTE 1 At 80MHz and 800MHz, the higher frequency range applies.
NOTE 2 These guidelines may not apply in all situations. Electromagnetic propagation is affected by absorption and reection from
structures, objects and people.
a Field strengths from xed transmitters, such as base stations for radio (cellular/cordless) telephones and land mobile radios,
amateur radio, AM and FM radio broadcast and TV broadcast cannot be predicted theoretically with accuracy. To assess the
electromagnetic environment due to xed RF transmitters, an electromagnetic site survey should be considered. If the measured
eld strength in the location in which the KOWA nonmyd 8s is used exceeds the applicable RF compliance level above, the KOWA
nonmyd 8s should be observed to verify normal operation. If abnormal performance is observed, additional measures may be
necessary, such as reconguring or relocating the KOWA nonmyd 8s.
b Over the frequency range 150kHz to 80MHz, eld strengths should be less than 3 V/m.
Recommended separation distances between portable and mobile RF communications instrument and the KOWA nonmyd 8s
The KOWA nonmyd 8s is intended for use in an electromagnetic environment in which radiated RF disturbances are controlled. The cus-
tomer or the user of the KOWA nonmyd 8s can help prevent electromagnetic interference by maintaining a minimum distance between
portable and mobile RF communications instrument (transmitters) and the KOWA nonmyd 8s as recommended below, according to the
maximum output power of the communications instrument.
Rated maximum output
power of transmitter
W
Separation distance according to frequency of transmitter
m
150 kHz to 80 MHz
d=1.2 P
80 MHz to 800 MHz
d=1.2 P
800 MHz to 2.5 GHz
d=2.3 P
0.01 0.12 0.12 0.23
0.1 0.38 0.38 0.73
1 1.2 1.2 2.3
10 3.8 3.8 7.3
100 12 12 23
For transmitters rated at a maximum output power not listed above, the recommended separation distance d in metres (m) can be esti-
mated using the equation applicable to the frequency of the transmitter, where P is the maximum output power rating of the transmitter
in watts (W) according to the transmitter manufacturer.
NOTE 1 At 80MHz and 800MHz, the separation distance for the higher frequency range applies.
NOTE 2 These guidelines may not apply in all situations. Electromagnetic propagation is affected by absorption and reection from
structures, objects and people.

XIII
Components and Supplies
Main Unit and Accessories
Main unit: 1
Digital camera: 1 Power supply cable, 3 m: 1 USB cable
(Type A―B, 3 m): 1
USB cable
(Type A―Mini-B, 3 m): 1
Blower: 1 SD memory card: 1 Dust cover: 1
Fuses: 2 Chin rest paper: 1 Chin rest paper retaining
pins: 2 Others
・INSTRUCTION MANUAL: 1
・Digital camera setting
manual: 1
Optional Accessories
Numeric keypad: 1 External xation target: 1
K9L-LE57
Disital imaging system (ling software)
VK-2: 1
User’s guide: 1
Installation manual: 1
000
123
456
789
Enter
/Back
Space
Num
Lock
PC (for ling software): 1
OS : Windows 7/8.1/10
HDD : 10GB for ling software
100GB for data storage
CPU : Celeron single core 2GHz
Memory : 2GB
Display : XGA
* Comparable or higher performance required

1
Contents
Introduction ...................................................... I
Meanings of Symbols ....................................IV
Operating Precautions ...................................V
Operational Considerations for a Hospital Grade Electrical
Instrument (Safety and Accident Prevention) ..... VI
Precautions: Use of Medical Electrical Systems .......... VII
Electromagnetic Compatibility ......................X
Components and Supplies .........................XIII
Main Unit and Accessories ............................................. XIII
Optional Accessories ...................................................... XIII
Contents .......................................................... 1
1 Instrument Description .................................. 2
1.1 Intended Use/Indications for use..................................2
1.2 Overview ......................................................................2
1.3 Operator .......................................................................2
1.4 Features .......................................................................2
1.5 Name and Function of Each Part .................................3
2 Preparation...................................................... 9
2.1 Installation ....................................................................9
2.2 Installing External Device (Optional PC) ....................11
2.3 Connecting PC ...........................................................11
3 Saving Captured Images.............................. 12
3.1 Saving Captured Images in PC (optional device)......12
3.2 Saving Captured Images in an SD Memory Card ......12
4 Basic Operation ............................................ 13
4.1 Optical Component Fixing Screw...............................13
4.2
Coarse Motion: Moving the Optical Component for a Long Distance
..13
4.3
Fine Motion: Moving the Optical Component for a Short Distance
.. 13
4.4 Raising and Lowering the Optical Component...........13
4.5 Raising and Lowering the Chin Rest..........................13
5 Preparations for Photography ..................... 14
5.1 Preparing the Instrument............................................14
5.2 Preparations for Patient’s Eye Examination ...............14
6 Operational Procedure in Photography ..... 15
6.1 Basic Photography .....................................................15
6.2 Precautions for Continuous Photography...................21
6.3 Terminating Photography ...........................................21
7 Advanced Photography ............................... 22
7.1 Mosaic Photography...................................................22
7.2 External Fixation Target..............................................26
7.3 Diopter Compensation Range....................................26
8 Troubleshooting ........................................... 27
9 Menu Operation ............................................ 30
9.1 Starting Menu .............................................................30
9.2 Objective Lens Cleaning Lamp ..................................30
9.3 Mosaic Internal Fixation Target Setting
(Switching the Internal Fixation Target in Mosaic Photography)
...30
9.4 Other Setting Menu ....................................................32
10 Maintenance and Inspection ....................... 35
10.1 Regular Maintenance .................................................35
10.2 Daily Inspection ..........................................................35
10.3 Regular Inspection .....................................................36
10.4 Cleaning the Objective Lens ......................................36
10.5 Disinfection.................................................................37
10.6 Outer Cleaning ...........................................................37
10.7 Replacing Flash Lamp................................................37
10.8 Fuse Replacement .....................................................39
10.9 Relling and Replacing Consumables........................39
11 Specications ............................................... 40
12 Technical Information .................................. 41
12.1 Imaging Conditions Output.........................................41

2
1.1 Intended Use/Indications for use
The KOWA nonmyd 8s is intended for use with retinal image capturing without mydriatic.
1.2 Overview
This system is an instrument that enables retinal examination and retinal image capturing using infrared rays without re-
quiring the patients to take any mydriatics.
Also the designated ling software installed in a PC (optional accessory) allows you to save, register or print the captured
images.
1.3 Operator
Persons with specialized knowledge of ophthalmic care and who received introductory education of retinal camera pho-
tography are required to operate this instrument.
Please use this instrument indoors without a bright light which causes miosis of patient pupils.
1.4 Features
1) Field angle available is 45°.
2) Functions that support mosaic photography.
3) A high resolution digital camera is equipped.
4) An intuitive operation panel allows you to diagnose effortlessly.
5) Anterior segment button enables one-touch switching between anterior segment alignment and retinal alignment
screens easily.
1 Instrument Description

3
1.5 Name and Function of Each Part
1 System Description
If you cannot focus by turn-
ing the focusing knob, pull
the diopter compensation
knob to make (-) or (+) com-
pensation until the focus
point is found.
Lamp cover
Remove this cover to replace
a ash lamp.
Mosaic button
Use this button to select ei-
ther mosaic ON or OFF.
Menu buttons
Hold down the center button
more than 2 seconds to ac-
cess the menu mode for vari-
ous settings of the instrument.
You can also switch the inter-
nal xation target position for
the auto setting of the internal
xation target position during
mosaic photography.
LCD monitor
Black-and-white live image
of the anterior segment or
retina appears for you to
use for alignment and fo-
cusing.
Digital camera
Shutter button
Pressing this button turns
the flash on and takes a
photo.
Control lever
Use this lever to move the
optical component. Turning
the control lever moves the
optical component vertical-
ly.
Blue/Brown
selection switch
Use this switch for setting
the intensity suitable for blue
or brown eyes.
Instrument label
Diopter compensation knob

4
1 System Description
Retinal observation light
intensity control knob
Used for adjusting light intensity
during retinal observation.
Flash intensity control knob
Used for adjusting the ash light intensity
when photographing.
Internal xation target
selection button
Switch the internal xation target posi-
tion to posterior, optic disc, and center
of macula by pressing this button to go
through these selections. The button
turns OFF for posterior, illuminates for
optic disc, and flushes for centers of
macula. This button turns OFF during
mosaic photography and the internal x-
ation target selection function becomes
disabled.
Anterior segment button
Pressing this button switches the image shown on the LCD monitor between
anterior segment and retina. The button illuminates when the anterior seg-
ment is selected.
Optical component xing screw
Tighten the screw when you need to x the optical component.
SP button
Used for a small pupil diameter.
Chin rest raising and lowering buttons
Used for raising or lowering the chin rest. The button illuminates normally
and blinks when it is in “SLEEP MODE”.
Flash intensity indicator
Illuminates when the ash intensity control knob is in any
position other than “0” and turns OFF in “0”.
Operation panel

5
Focusing knobs
Used for focusing.
Objective lens
Chin rest
Used for sustaining the pa-
tient’s chin position.
Lamp cover screw
Loosen this screws to re-
move the lamp cover.
Eye level mark
Used for aligning the verti-
cal position of the patient’s
eye with this mark.
Forehead rest
Used for resting the patient’s
forehead against it.
Anterior segment
observation lamp
Infrared LED lamp that illu-
minates when the anterior
segment is observed.
Power supply unit
(See the next page for details)
Air vent
1 System Description
Table of contents
Other Kowa Laboratory Equipment manuals