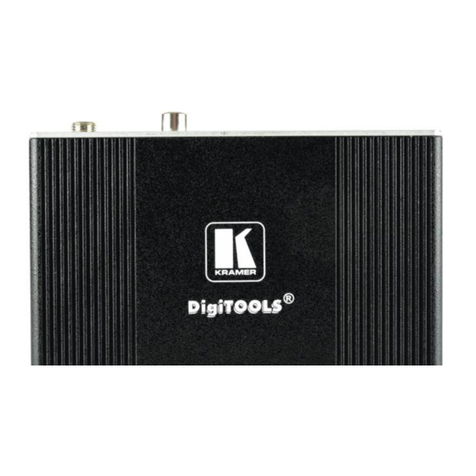
Kramer DS Vision 3000 User manual

USER MANUAL
MODEL:
DS Vision® 3000
CAT 5 Range Extender System
P/N: 2900-300282 Rev 1

DS Vision® 3000 – Contents i
Contents
1Introduction 1
2Getting Started 2
2.1 Achieving the Best Performance 2
2.2 Safety Instructions 3
2.3 Recycling Kramer Products 3
3Overview 4
3.1 System Overview 4
3.2 Transmitter and Broadcaster 5
3.3 Receivers 6
3.4 Receiver DCL 7
3.5 Line Splitter Long 8
3.6 LEDs 8
4Connecting the DS Vision® 3000 9
4.1 Broadcaster/Transmitter Connections 10
4.2 Receiver/Receiver L Connections 10
4.3 Receiver DCL Connections 10
4.4 Connecting CATx Cables 10
4.5 Connecting to the Power Supply 11
4.6 Adjusting the Picture Quality 11
4.7 Note on Serial Extension: 11
5Technical Specifications 12
Figures
UFigure 1: DS Vision 3000 System OverviewU5
UFigure 2: Broadcaster Unit - 8 PortsU6
UFigure 3: Receiver PortsU6
UFigure 4: Receiver DCL Front and Back ConnectionsU7
UFigure 5: Line Splitter LongU8
UFigure 6: Connection DiagramU9

DS Vision® 3000 - Introduction 1
1 Introduction
Welcome to Kramer Electronics! Since 1981, Kramer Electronics has been
providing a world of unique, creative, and affordable solutions to the vast range of
problems that confront video, audio, presentation, and broadcasting professionals
on a daily basis. In recent years, we have redesigned and upgraded most of our
line, making the best even better!
Our 1,000-plus different models now appear in 11 groups that are clearly defined
by function: GROUP 1: Distribution Amplifiers; GROUP 2: Switchers and Routers;
GROUP 3: Control Systems; GROUP 4: Format/Standards Converters; GROUP 5:
Range Extenders and Repeaters; GROUP 6: Specialty AV Products; GROUP 7:
Scan Converters and Scalers; GROUP 8: Cables and Connectors; GROUP 9:
Room Connectivity; GROUP 10: Accessories and Rack Adapters and GROUP 11:
Sierra Products.
Congratulations on purchasing your Kramer DS Vision® 3000, which is ideal for
the following typical applications:
•Digital signage
•Media distribution

2 DS Vision® 3000 - Getting Started
2 Getting Started
We recommend that you:
•Unpack the equipment carefully and save the original box and packaging
materials for possible future shipment
•Review the contents of this user manual
Go to http://www.kramerelectronics.com to check for up-to-date
user manuals, application programs, and to check if firmware
upgrades are available (where appropriate).
2.1 Achieving the Best Performance
To achieve the best performance:
•Use only good quality connection cables (we recommend Kramer high-
performance, high-resolution cables) to avoid interference, deterioration in
signal quality due to poor matching, and elevated noise levels (often
associated with low quality cables)
•Do not secure the cables in tight bundles or roll the slack into tight coils
•Avoid interference from neighboring electrical appliances that may adversely
influence signal quality
•Position your Kramer DS Vision® 3000 away from moisture, excessive
sunlight and dust
•For best performance the spec of the cable should be:
Gauge: 24AWG (should be written on the cable)
Wire: solid wire (should be written on the cable)
•For cable runs over 100m (330ft) the SKEW delay of the cable should be no
more than 20ns per 100m (330ft) (should be written in the spec of the cable)
This equipment is to be used only inside a building. It may only be
connected to other equipment that is installed inside a building.
i
!

DS Vision® 3000 - Getting Started 3
2.2 Safety Instructions
Caution: There are no operator serviceable parts inside the unit
Warning: Use only the Kramer Electronics input power wall
adapter that is provided with the unit
Warning: Disconnect the power and unplug the unit from the wall
before installing
2.3 Recycling Kramer Products
The Waste Electrical and Electronic Equipment (WEEE) Directive 2002/96/EC
aims to reduce the amount of WEEE sent for disposal to landfill or incineration by
requiring it to be collected and recycled. To comply with the WEEE Directive,
Kramer Electronics has made arrangements with the European Advanced
Recycling Network (EARN) and will cover any costs of treatment, recycling and
recovery of waste Kramer Electronics branded equipment on arrival at the EARN
facility. For details of Kramer’s recycling arrangements in your particular country
go to our recycling pages at http://www.kramerelectronics.com/support/recycling/.
!

4 DS Vision® 3000 - Overview
3 Overview
The DS Vision® 3000 family is a range extender system for computer graphics
video signals up to 1080p, stereo audio and bidirectional RS−232. The system can
distribute the input signals over CAT 5 cable to hundreds of displays.
Specifically the DS Vision® 3000 features:
•A maximum resolution of 1080p
•HDTV compatibility
•Single CAT 5 cable connections
•A system range of 600m (3000ft) @720p
•Bidirectional RS-232 control with open protocol for CMS integration
•Remote screen query
•Palm-held video tuning unit
•Group screen on/off command
•Out-of-band operation
•VESA screen mounts
•3 year warranty
3.1 System Overview
Figure 1gives an overview of the system, showing a broadcaster, line splitter long
and different receiver types.

DS Vision® 3000 - Overview 5
Figure 1: DS Vision 3000 System Overview
3.2 Transmitter and Broadcaster
This table defines the models:
Kramer
Model
Kramer Part
Number
Full Description
DSV3K-T
(0VS50005) 50-0000509011 Minicom DS Vision 3000 Transmitter 1-port
DSV3K-B8
(0VS50003) 50-0000489011 Minicom DS Vision 3000 Broadcaster 8-ports
DSV3K-B16
(0VS50004) 50-0000499011 Minicom DS Vision 3000 Broadcaster 16-ports
DSV3K-TU
(0VS50008) 50-0000529011 Minicom DS Vision 3000 Video Tuning unit
DSV3K-LS
(0VS50002) 50-0000479011 Minicom DS Vision 3000 Line splitter long 8-ports
DSV3K-RL
(0VS50001) 50-0000469011 Minicom DS Vision 3000 Receiver Long
DSV3K-RS
(0VS50010) 50-0000539011 Minicom DS Vision 3000 Receiver
DSV3K-RDC
(0VS50006) 50-0000519011 Minicom DS Vision 3000 Receiver Dual cascade
Figure 2illustrates the 8-port broadcaster. The input ports are the same for the
transmitter and 16-port broadcaster, except for the number of system ports. The
transmitter has 1 system port and the 16-port broadcaster has 16 system ports.

6 DS Vision® 3000 - Overview
Figure 2: Broadcaster Unit - 8 Ports
3.3 Receivers
The receivers come in the following models:
•Receiver - P/N 0VS50010. Reaches up to 110m (330ft) from
transmitter/broadcaster
•Receiver L (long) - P/N 0VS50001. Reaches up to 300m (1,000ft) from
transmitter/broadcaster. With a line splitter L can reach up to 600m (2,000ft)
from transmitter/broadcaster.
Note: the maximum cable run from the transmitter/ broadcaster to the line splitter L
must not be longer than 300m (1,000ft).
Figure 3illustrates the receiver and receiver L ports
Note: Both products in Version 3 have the same ports; refer to the part number in order to
make sure the product is a receiver or receiver long.
Figure 3: Receiver Ports

DS Vision® 3000 - Overview 7
3.4 Receiver DCL
The receiver DCL (Dual Cascade Long) P/N 0VS50006 has the following features:
•Connects to 2 monitors with each having separate video, audio and serial
control
•Receiver DCL is cascadable – it has a pass-through port for connecting
more receivers/ receivers L/ receivers DCL/ line splitter L
•Can be up to 300m (1,000ft) from a transmitter/broadcaster
•With a line splitter L, can be up to 600m (2000ft) from a
transmitter/broadcaster
Notes:
•Dual cascade unit tuning feature influences the VIDEO 1 and VIDEO 2
outputs only, not the SYS OUT port.
UFigure 4Uillustrates the receiver DCL ports.
Figure 4: Receiver DCL Front and Back Connections

8 DS Vision® 3000 - Overview
3.5 Line Splitter Long
Add line splitters L(ong) to use for clusters or to increase the number of receivers
in the system. There is an option to cascade line splitters to line splitters. Figure 5
illustrates the line splitter L ports.
Notes: The last cascaded line splitter long must not be more than 300m (1000ft)
from the transmitter or broadcaster.
Figure 5: Line Splitter Long
3.6 LEDs
This table explains the functions of all the LEDs of the units in the system.
Unit LED Function
Transmitter /
Broadcaster Front panel - green Green - power indicator
Yellow – link indication
Receiver /
Receiver L
RJ-45 system port - green
/yellow
Green - power indicator
Yellow – link indication, unit is connected to the
system this LED flashes from time to time
Yellow flashing constantly – Bi-directional
RS-232 communication (only possible with one
receiver /receiver L at a time)
Receiver DCL RJ-45 system port - green
/yellow
Green - power indicator
Yellow flashing – link indication
Line Splitter L Rear panel – RJ-45 system
port - green /yellow
Green - power indicator
Yellow flashing – link indication

DS Vision® 3000 - Connecting the DS Vision® 3000 9
4 Connecting the DS Vision® 3000
Figure 6illustrates a sample configuration and its connections.
Figure 6: Connection Diagram

10 DS Vision® 3000 - Connecting the DS Vision® 3000
4.1 Broadcaster/Transmitter Connections
1. Connect the broadcaster/transmitter Video In port to the computer’s video
card with a video cable.
2. Connect the broadcaster/transmitter Serial In port to the computer’s serial
port with a serial extender cable.
3. Connect the broadcaster/transmitter Audio In port to the computer’s line out
port with a stereo audio cable.
4. To use the Video Service Utility, connect the broadcaster/transmitter control
port and the computer’s serial port with a serial download cable.
5. (Optional) Connect a monitor to the broadcaster/transmitter Video Out port.
4.2 Receiver/Receiver L Connections
1. Connect the screen to the video port.
2. Connect the audio/speakers to the audio port.
Note: if you are connecting the audio out of the receivers to speakers they must have
an internal amplifier. The audio out is a line out extension of the player.
3. Where relevant connect the serial connection to the serial port.
4.3 Receiver DCL Connections
1. Connect one screen to video port 1 and another screen to video port 2.
2. Connect the audio/speakers of the first screen to stereo audio port 1 and
connect the audio/speakers of the second screen to stereo audio port 2.
Ensure that the video and audio ports are connected to the same numbers,
i.e. one screen to video and audio ports 1 and the other screen to video and
audio ports 2.
3. Where relevant connect the serial connection to the serial ports 1 and/or 2.
4.4 Connecting CATx Cables
Connect the CATx cables as follows.

DS Vision® 3000 - Connecting the DS Vision® 3000 11
4.4.1 Connecting the Broadcaster/Transmitter
•Connect CATx cables to the system ports of the broadcaster/transmitter and
the system In ports of receivers/L/DCL or line splitter L.
4.4.2 Connecting/Cascading a Line Splitter Long
•Connect CATx cables to the system out ports of the line splitter long and the
system in ports of receivers/L/DCL or further line splitters Long.
4.4.3 Cascading a Receiver DCL
•Connect a CATx cable to the system out port of the receiver DCL and the
system in port of a receiver/L/DCL or line splitter long.
4.5 Connecting to the Power Supply
•Connect the transmitter/broadcaster and all receiver and line splitter long
units to the power supply using the AC/DC adapters provided with the
products.
Once the system is connected the DS Vision® 3000 system broadcasts to all
remote monitors/speakers.
4.6 Adjusting the Picture Quality
When the broadcasted picture needs adjusting:
•The receiver (version 3)/ receiver L/ receiver DCL/ line splitter long can be
tuned either via the service utility, or by using the optional tuning unit
Note: Where there are cascaded receivers/ receiver DCL/line splitters long you must tune
them from the unit nearest the broadcaster/transmitter onwards.
4.7 Note on Serial Extension:
The serial connection requires two cables: from player to a transmitter or
broadcaster, use a straight serial cable; from receiver to screen, use a cross cable.

12 DS Vision® 3000 - Technical Specifications
5 Technical Specifications
RESOLUTION: Up to 1920x1440 @60Hz (depending on cable length)
I/O VIDEO SIGNALS: Analog red, green, blue, 75Ω 0.7Vpp
SYNC: TTL compatible
HORIZONTAL/VERTICAL SYNC: Positive/negative
SYSTEM CABLE: CAT 5/5e/6/7 UTP/FTP cable, 2x4x24AWG solid wire
MAX. RANGE: 300m (1000ft)
SKEW COMPENSATION: Up to 63nsec
DDC: Complies with VESA DDC−2 specification
RS-232 CONNECTION: Full serial: RXD, TXD, DTR, DSR, RTS, CTS
SERIAL BAUD RATE: Up to 57600
AUDIO: Stereo
Frequency response: 20 Hz to 20 kHz, +/-1 dB.
Signal-to-Noise Ratio (SNR): 80 dBA.
Total Harmonic Distortion and Noise (THD+N):
0.017%.
Stereo crosstalk: -70 dB.
Input impedance: 10kΩ.
Line level output; supports multimedia speakers.
Maximum I/O levels: 3.1Vpp (line level).
SERIAL: Broadcaster / Transmitter – DCE
Receivers - DTE
OPERATING TEMPERATURE: 5°C to 40°C (41°F to 104°F)
STORAGE TEMPERATURE: −40°C to 70°C (−104°F to 158°F)
WARRANTY: 3 years
Specifications are subject to change without notice at http://www.kramerelectronics.com


For the latest information on our products and a list of Kramer distributors,
visit our Web site where updates to this user manual may be found.
We welcome your questions, comments, and feedback.
Web site:
E-mail:
www.kramerelectronics.com
info@kramerel.com
P/N:
2900- 300282
Rev:
1
!
SAFETY WARNING
Disconnect the unit from the power
supply before opening and servicing
This manual suits for next models
8
Table of contents
Other Kramer Extender manuals

Kramer
Kramer VM-3DT User manual

Kramer
Kramer 617T User manual

Kramer
Kramer VA-4X User manual

Kramer
Kramer VM-2DT User manual

Kramer
Kramer TP-400FW User manual

Kramer
Kramer KW-14R User manual

Kramer
Kramer TP-600TR User manual

Kramer
Kramer TP-600TRxr User manual

Kramer
Kramer Tools VP-14xl User manual

Kramer
Kramer VM-3HDT User manual

Kramer
Kramer VP-14 User manual
Kramer
Kramer EXT3-C-XR-TR User manual

Kramer
Kramer PL-18 User manual
Kramer
Kramer PT-2H User manual

Kramer
Kramer K-Able/XL Box User manual
Kramer
Kramer PT-571 User manual

Kramer
Kramer TP-600TRxr User manual
Kramer
Kramer VP-14 User manual

Kramer
Kramer TP-300FW User manual

Kramer
Kramer WP-2UT/R-KIT User manual