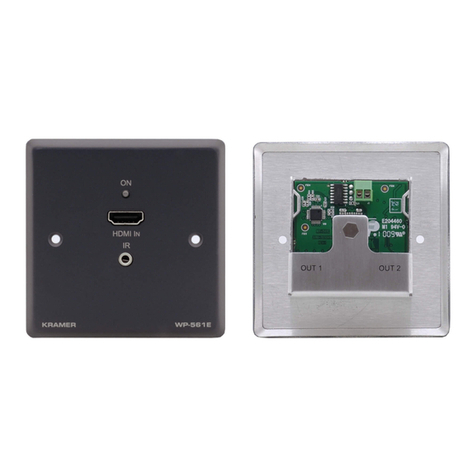
Kramer WP-571 User manual

KRAMER ELECTRONICS LTD.
USER MANUAL
MODELS:
WP-571
HDMI Line Transmitter
WP-572
HDMI Line Receiver
P/N: 2900-300228 Rev 1

WP-571/WP-572 – Contents i
Contents
1Introduction 1
2Getting Started 2
2.1 Achieving the Best Performance 2
3Overview 3
3.1 About HDMI—General Description 3
3.2 About HDCP—General Description 4
3.3 About the Power Connect™ Feature 5
3.4 Using Twisted Pair Cable 5
4Defining the WP-571 and WP-572 6
4.1 Defining the WP-571 6
4.2 Defining the WP-572 8
5Connecting the WP-571 and WP-572 10
5.1 Wiring the TP RJ-45 Connectors 11
6Technical Specifications 12
Figures
Figure 1: WP-571 HDMI Line Transmitter US Front and Rear Panels 6
Figure 2: WP-571 HDMI Line Transmitter EU Front and Rear Panels 7
Figure 3: WP-572 HDMI Line Receiver US Front and Rear Panels 8
Figure 4: WP-572 HDMI Line Receiver EU Front and Rear Panels 9
Figure 5: Connecting the WP-571 and WP-572 10
Figure 6: TP Pinout Wiring 11

WP-571/WP-572 - Introduction 1
1 Introduction
Welcome to Kramer Electronics! Since 1981, Kramer Electronics has been
providing a world of unique, creative, and affordable solutions to the vast range of
problems that confront the video, audio, presentation, and broadcasting
professional on a daily basis. In recent years, we have redesigned and upgraded
most of our line, making the best even better!
Our 1,000-plus different models now appear in 11 groups that are clearly defined
by function: GROUP 1: Distribution Amplifiers; GROUP 2: Switchers and Routers;
GROUP 3: Control Systems; GROUP 4: Format/Standards Converters; GROUP
5: Range Extenders and Repeaters; GROUP 6: Specialty AV Products; GROUP
7: Scan Converters and Scalers; GROUP 8: Cables and Connectors; GROUP 9:
Room Connectivity; GROUP 10: Accessories and Rack Adapters and GROUP 11:
Sierra Products.
Congratulations on purchasing your Kramer WP-571 HDMI Line Transmitter
and/or WP-572 HDMI Line Receiver wall plates which are ideal for the following
typical applications:
•Boardrooms, conference and training rooms
•Presentation systems
•Signal distribution and home theater
The package includes the following items:
•WP-571 HDMI Line Transmitter or WP-572 HDMI Line Receiver
•This User Manual
An up to date copy of this user manual can be downloaded from
http://www.kramerelectronics.com
•Power adapter (12V DC output)

2 WP-571/WP-572 - Getting Started
2 Getting Started
We recommend that you:
•Unpack the equipment carefully and save the original box and packaging
materials for possible future shipment
•Review the contents of this user manual
•Use Kramer high performance, high resolution cables
Go to http://www.kramerelectronics.com to check for up-to-date
user manuals, application programs, and to check if firmware
upgrades are available (where appropriate).
2.1 Achieving the Best Performance
To achieve the best performance:
•Use only good quality connection cables to avoid interference, deterioration
in signal quality due to poor matching, and elevated noise levels (often
associated with low quality cables)
•Do not secure the cables in tight bundles or roll the slack into tight coils
•Avoid interference from neighboring electrical appliances that may adversely
influence signal quality
•Position your Kramer WP-571 HDMI Line Transmitter and WP-572 HDMI
Line Receiver away from moisture, excessive sunlight and dust
i

WP-571/WP-572 - Overview 3
3 Overview
The WP-571 HDMI Line Transmitter and WP-572 HDMI Line Receiver together
constitute an HDMI-to-twisted pair transmitter and receiver system, and can also
be used in conjunction with other compatible DGKat transmitters and receivers
and compatible switchers.
In particular, the WP-571 and WP-572 feature:
•A maximum data rate of 4.95Gbps (up to 1.65Gbps per graphics channel)
•HDTV compatibility
•HDCP compliance
•HDMI Support—HDMI (x.v.Color™, HDMI Uncompressed Audio Channels,
Dolby TrueHD and DTS-HD)
•EDID PassThru that passes EDID/HDCP signals from source to display
•3D pass-through
•System Range—Up to 90m (295ft) at 1080i, or up to 30m (98ft) at 1080p on
shielded BC-DGKat524 cable; 90m (295ft) at 1080i, or up to 70m (230ft) at
1080p on shielded BC-DGKat623 cable; 100m (330ft) at 1080i or up to 90m
(295ft) at 1080p on shielded BC-DGKat7a23 cable
•Power Connect™ that feeds 12V DC over the TP cable from transmitter to
receiver and visa-versa (see Section 5)
•Wall plate size of 1-gang US/EU (the US version includes a removable wall
plate frame)
3.1 About HDMI—General Description
HDMI (High-Definition Multimedia Interface) is an uncompressed all-digital
audio/video interface, widely supported in the entertainment and home cinema
industry. HDMI ensures an all-digital rendering of video without the losses
associated with analog interfaces and their unnecessary digital-to-analog
conversions. It delivers the maximum high-definition image and sound quality in
use today. Note that Kramer Electronics Limited is an HDMI Adopter and an
HDCP Licensee.

4 WP-571/WP-572 - Overview
HDMI, the HDMI logo and High-Definition Multimedia Interface are trademarks or registered
trademarks of HDMI licensing LLC.
In particular, HDMI:
•Provides a simple interface between any audio/video source, such as a set-
top box, DVD player, or A/V receiver and video monitor, such as a digital flat
LCD / plasma television (DTV), over a single lengthy cable
SIMPLICITY - With video and multi-channel audio combined into a single cable, the
cost, complexity, and confusion of multiple cables currently used in A/V systems is
reduced
LENGTHY CABLE - HDMI technology has been designed to use standard copper
cable construction at up to 15m
•Supports standard, enhanced, high-definition video, and multi-channel digital
audio on a single cable
MULTI-CHANNEL DIGITAL AUDIO - HDMI supports multiple audio formats, from
standard stereo to multi-channel surround-sound. HDMI has the capacity to support
Dolby 5.1 audio and high-resolution audio formats
•Transmits all ATSC HDTV standards and supports 8-channel digital audio,
with bandwidth to spare to accommodate future enhancements and
requirements
•Benefits consumers by providing superior, uncompressed digital video
quality via a single cable, and user-friendly connector
HDMI provides the quality and functionality of a digital interface while also supporting
uncompressed video formats in a simple, cost-effective manner
•Is backward-compatible with DVI (Digital Visual Interface)
•Supports two-way communication between the video source (such as a DVD
player) and the digital television, enabling new functionality such as
automatic configuration and one-button play
•Has the capacity to support existing high-definition video formats (720p,
1080i and 1080p @60), standard definition formats such as NTSC or PAL,
as well as 480p and 576p
3.2 About HDCP—General Description
The High-Bandwidth Digital Content Protection (HDCP) standard developed by
Intel, protects digital video and audio signals transmitted over DVI or HDMI
connections between two HDCP-enabled devices to eliminate the reproduction of
copyrighted material. To protect copyright holders (such as movie studios) from
WP-571/WP-572 - Overview 5
having their programs copied and shared, the HDCP standard provides for the
secure and encrypted transmission of digital signals.
3.3 About the Power Connect™ Feature
The Power Connect™ feature here means that only one unit in a system, the
transmitter or receiver, needs to be connected to a power source when the
devices are within 90m (270ft) of each other. The Power Connect™ feature
applies as long as the cable can carry power. The distance does not exceed 90m
on standard TP cable, for longer distances, heavy gauge cable should be used.
TP cable is still suitable for the video/audio transmission, but not for feeding the power at
these distances
If no input is connected to the WP-571, both the transmitter and receiver go into
the power save mode automatically. When an input is connected to the WP-571,
both devices go into the regular power on mode.
Note: When using the WP-571 or WP-572 in conjunction with any of the
VM-114xx series devices, do not connect power to the wall plate. Power is
supplied by the VM-114xx series device via the DGKat cable.
3.4 Using Twisted Pair Cable
Kramer engineers have developed special twisted pair cables to best match our
digital twisted pair products; the Kramer BC-DGKat524 (CAT 5 24 AWG), the
Kramer BC-DGKat623 (CAT 6 23 AWG cable), and the Kramer BC-DGKat7a23
(CAT 7a 23 AWG cable). These specially built cables significantly outperform
regular CAT 5/CAT 6/CAT 7a cables.

6 WP-571/WP-572 - Defining the WP-571 and WP-572
4 Defining the WP-571 and WP-572
4.1 Defining the WP-571
The Kramer WP-571 HDMI Line Transmitter accepts an HDMI signal, encodes it
and transmits it over a TP cable to either the WP-572 or another DGKat
compatible device. The WP-571 is available in the following versions:
•US (see Section 4.1.1)
•EU (see Section 4.1.2)
4.1.1 WP-571 US Version
Figure 1 defines the front and rear panels of the WP-571.
Figure 1: WP-571 HDMI Line Transmitter US Front and Rear Panels
# Feature Function
1 ON LED Indicates the following:
•Lights red when receiving power only
•Lights orange when power and either input or output are attached
•Lights green when both an active input and output are attached
Note: If no input is connected to the transmitter the device goes into the
power save mode automatically (see Section 3.3)
2 HDMI IN Connector Connect to the HDMI source
3 2-pin Terminal Block Connect to the supplied 12V DC power adapter (see Section 3.3)
4 RJ-45 CAT-5
Connector Connect to the DGKat receiver using DGKat cable (see Section 5)

WP-571/WP-572 - Defining the WP-571 and WP-572 7
4.1.2 WP-571 EU Version
The EU version is available in UK and Belgium sizes (see Section 6).
Figure 2 defines the front and rear panels of the WP-571.
Figure 2: WP-571 HDMI Line Transmitter EU Front and Rear Panels
# Feature Function
1 ON LED Indicates the following:
•Lights red when receiving power only
•Lights orange when power and either input or output are attached
•Lights green when both an active input and output are attached
Note: If no input is connected to the transmitter the device goes into
the power save mode automatically (see Section 3.3)
2 HDMI IN Connector Connect to the HDMI source
3 DGKat OUT RJ-45 TP
Connector Connect to the DGKat receiver using DGKat cable (see Section 5)
4 Earth Terminal Optional—connect to the common ground
5 2-pin Power Terminal
Block Connect to the supplied 12V DC power adapter (see Section 3.3)

8 WP-571/WP-572 - Defining the WP-571 and WP-572
4.2 Defining the WP-572
The Kramer WP-572 HDMI Line Receiver accepts an encoded signal over TP
cable from the WP-571 (or any other DGKat compatible transmitter), decodes it
and converts it to an HDMI output.
The WP-572 is available in the following versions:
•US (see Section 4.2.1)
•EU (see Section 4.2.2)
4.2.1 WP-572 US Version
Figure 3 defines the front and rear panels of the WP-572.
Figure 3: WP-572 HDMI Line Receiver US Front and Rear Panels
# Feature Function
1 ON LED Indicates the following:
•Lights red when receiving power only
•Lights orange when power and either input or output are attached
•Lights green when both an active input and output are attached
Note: If no input is connected to the transmitter the device goes into
the power save mode automatically (see Section 3.3)
2 HDMI OUT Connector Connect to the HDMI acceptor
3 2-pin Terminal Block Connect to the supplied 12V DC power adapter (see Section 3.3)
4 RJ-45 CAT-5
Connector Connect to the DGKat transmitter using DGKat cable (see Section 5)

WP-571/WP-572 - Defining the WP-571 and WP-572 9
4.2.2 WP-572 EU Version
The EU version is available in UK and Belgium sizes (see Section 6).
Figure 4 defines the front and rear panels of the WP-572.
Figure 4: WP-572 HDMI Line Receiver EU Front and Rear Panels
# Feature Function
1 ON LED Indicates the following:
•Lights red when receiving power only
•Lights orange when power and either input or output are attached
•Lights green when both an active input and output are attached
Note: If no input is connected to the transmitter the device goes into
the power save mode automatically (see Section 3.3)
2 HDMI OUT Connector Connect to the HDMI acceptor
3 DGKat IN RJ-45 TP
Connector Connect to the DGKat transmitter using DGKat cable (see Section 5)
4 Earth Terminal Optional—connect to the common ground
5 2-pin Power Terminal
Block Connect to the supplied 12V DC power adapter (see Section 3.3)

10 WP-571/WP-572 - Connecting the WP-571 and WP-572
5 Connecting the WP-571 and WP-572
Always switch off the power to any device before connecting it to your
WP-571 or WP-572. After connecting your WP-571 and WP-572,
connect the power to either one or both the WP-571 and WP-572 and
then switch on the power to each device.
Figure 5: Connecting the WP-571 and WP-572
The example in Figure 5 illustrates connection of the US version. Connection of
the EU versions follows the same principle.
!

WP-571/WP-572 - Connecting the WP-571 and WP-572 11
To connect the WP-571 and WP-572 as illustrated in the example in Figure 5:
1. Connect the RJ-45 connector on the rear panel of the WP-571 to the RJ-45
connector on the rear panel of the WP-572. See Section 3.4 for cable
requirements.
2. Connect a power supply to the WP-571 and if necessary, to the WP-572,
(see Section 3.3).
3. Mount the WP-571 and WP-572 in suitable wall boxes.
4. Connect the HDMI source to the HDMI IN connector on the front panel of the
WP-571.
5. Connect the HDMI OUT connector on the front panel of the WP-572 to the
HDMI acceptor.
5.1 Wiring the TP RJ-45 Connectors
Connect/solder the cable shield to the RJ-45 connector shield. Figure 6 defines
the TP pinout using a straight pin-to-pin cable with RJ-45 connectors.
EIA /TIA 568B Figure 6: TP Pinout Wiring
PIN
Wire Color
1 Orange / White
2 Orange
3 Green / White
4 Blue
5 Blue / White
6 Green
7 Brown / White
8 Brown
Pair 1 4 and 5
Pair 2 1 and 2
Pair 3 3 and 6
Pair 4 7 and 8

12 WP-571/WP-572 - Technical Specifications
6 Technical Specifications
WP-571 WP-572
INPUTS: 1 HDMI connector 1 RJ-45 connector
OUTPUTS: 1 RJ-45 connector 1 HDMI connector
BANDWIDTH: Up to 4.95Gbps data rate (1.65Gbps per graphics channel)
COMPLIANCE WITH HDMI
STANDARD: Supports HDMI and HDCP
POWER
CONSUMPTION: US 12V DC, 190mA (single device); 360mA total (when one device
supplies the power to both devices)
UK, BG 12V DC, 150mA (single device); 310mA total (when one device
supplies the power to both devices)
DIMENSIONS: US 3.3cm x 3.6cm x 10.4cm (1.3" x 1.42" x 4.1") W, D, H
UK 8.63cm x 4.5cm x 8.63cm (3.4" x 1.77" x 3.4") W, D, H
BG 8.04cm x 4.5cm x 8.04cm (3.17" x 1.77" x 3.17") W, D, H
WEIGHT: 0.08kg (0.18lbs) approx.
ACCESSORIES: 1 Power supply per device
OPTIONS: Kramer BC-DGKat524 (CAT 5 24 AWG), BC-DGKat623 (CAT 6 23
AWG) and BC-DGKat7a23 (CAT 7a 23 AWG) cables


For the latest information on our products and a list of Kramer distributors,
visit our Web site where updates to this user manual may be found.
We welcome your questions, comments, and feedback.
Web site: www.kramerelectronics.com
E-mail: info@kramerel.com
P/N
2900-300228
Rev
1
!
SAFETY WARNING
Disconnect the unit from the power
supply before opening and servicing
This manual suits for next models
1
Table of contents
Other Kramer Receiver manuals

Kramer
Kramer 713 User manual

Kramer
Kramer 640T User manual

Kramer
Kramer TP-141 User manual

Kramer
Kramer VP-427X2 User manual

Kramer
Kramer WP-28 User manual

Kramer
Kramer TOOLS TP-220HD User manual

Kramer
Kramer PT-110 User manual

Kramer
Kramer TP-590Rxr User manual

Kramer
Kramer DigiTOOLS TP-552 User manual

Kramer
Kramer 616R User manual

Kramer
Kramer VP-427 User manual

Kramer
Kramer TP-200 User manual

Kramer
Kramer 621T User manual

Kramer
Kramer 602T User manual

Kramer
Kramer 602T User manual

Kramer
Kramer VP-427X1 User manual

Kramer
Kramer MegaTOOLS TP-575 User manual

Kramer
Kramer TP-752T User manual

Kramer
Kramer WP-120 User manual

Kramer
Kramer TP-578H User manual