Contents
1Introduction 1
1.1 Applications & Features 2
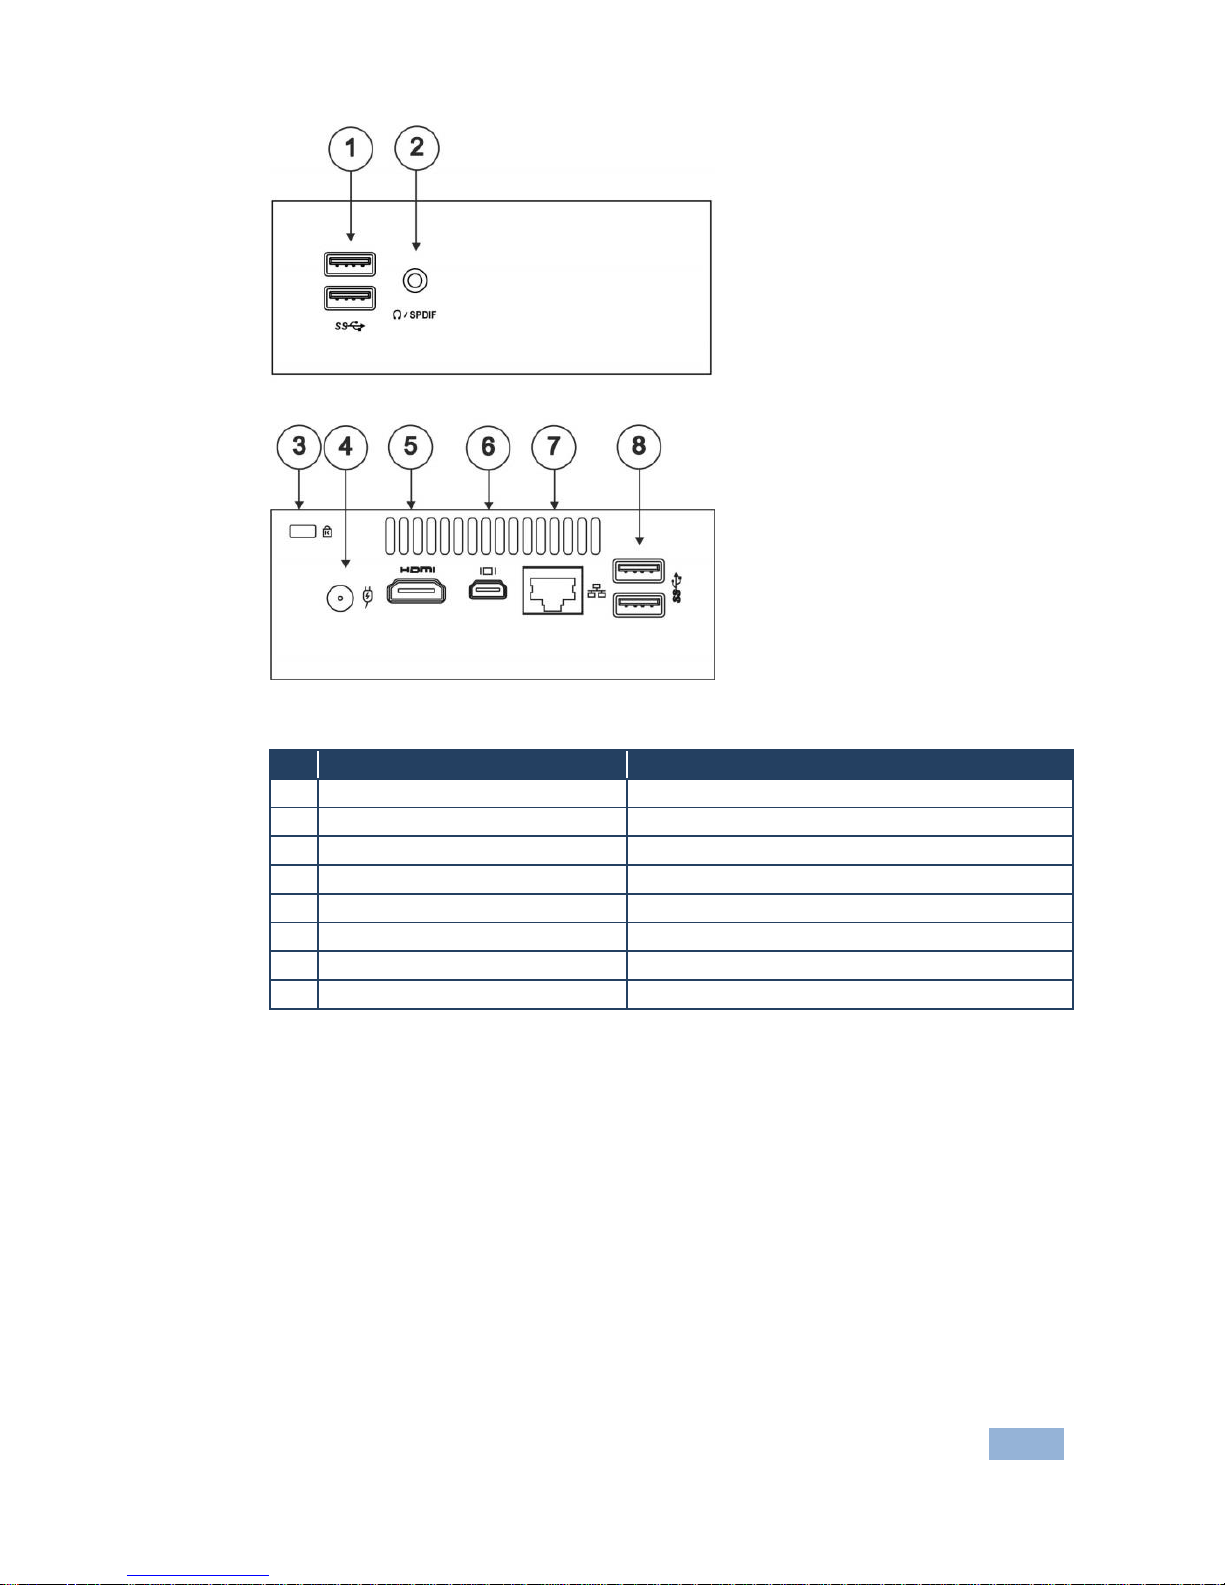
1.2 Controls and Connections 2
2Setting Up 4
2.1 Connecting VIA Connect PRO to a Display 5
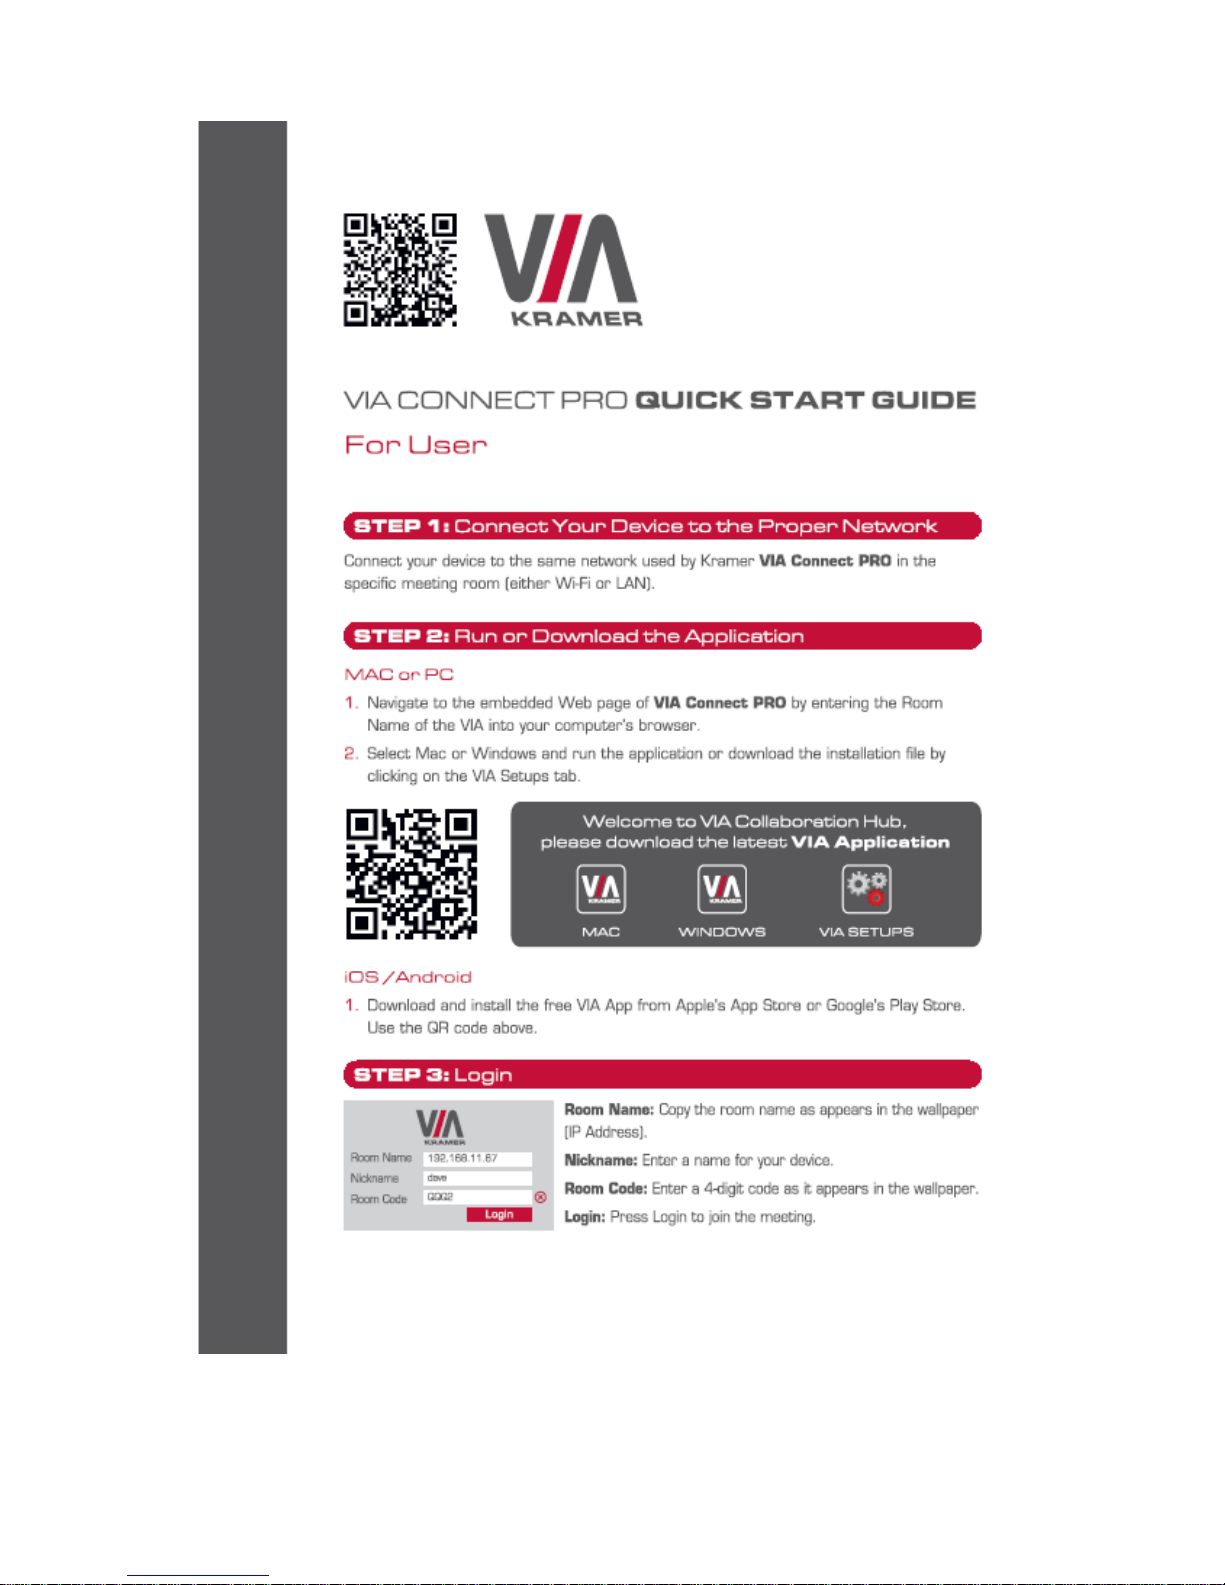
2.2 Downloading and Running VIA Connect PRO Software 6
2.3 Logging In to VIA Connect PRO 7
3VIA Connect PRO Functions and What They Do 8
4Using VIA Connect PRO 11
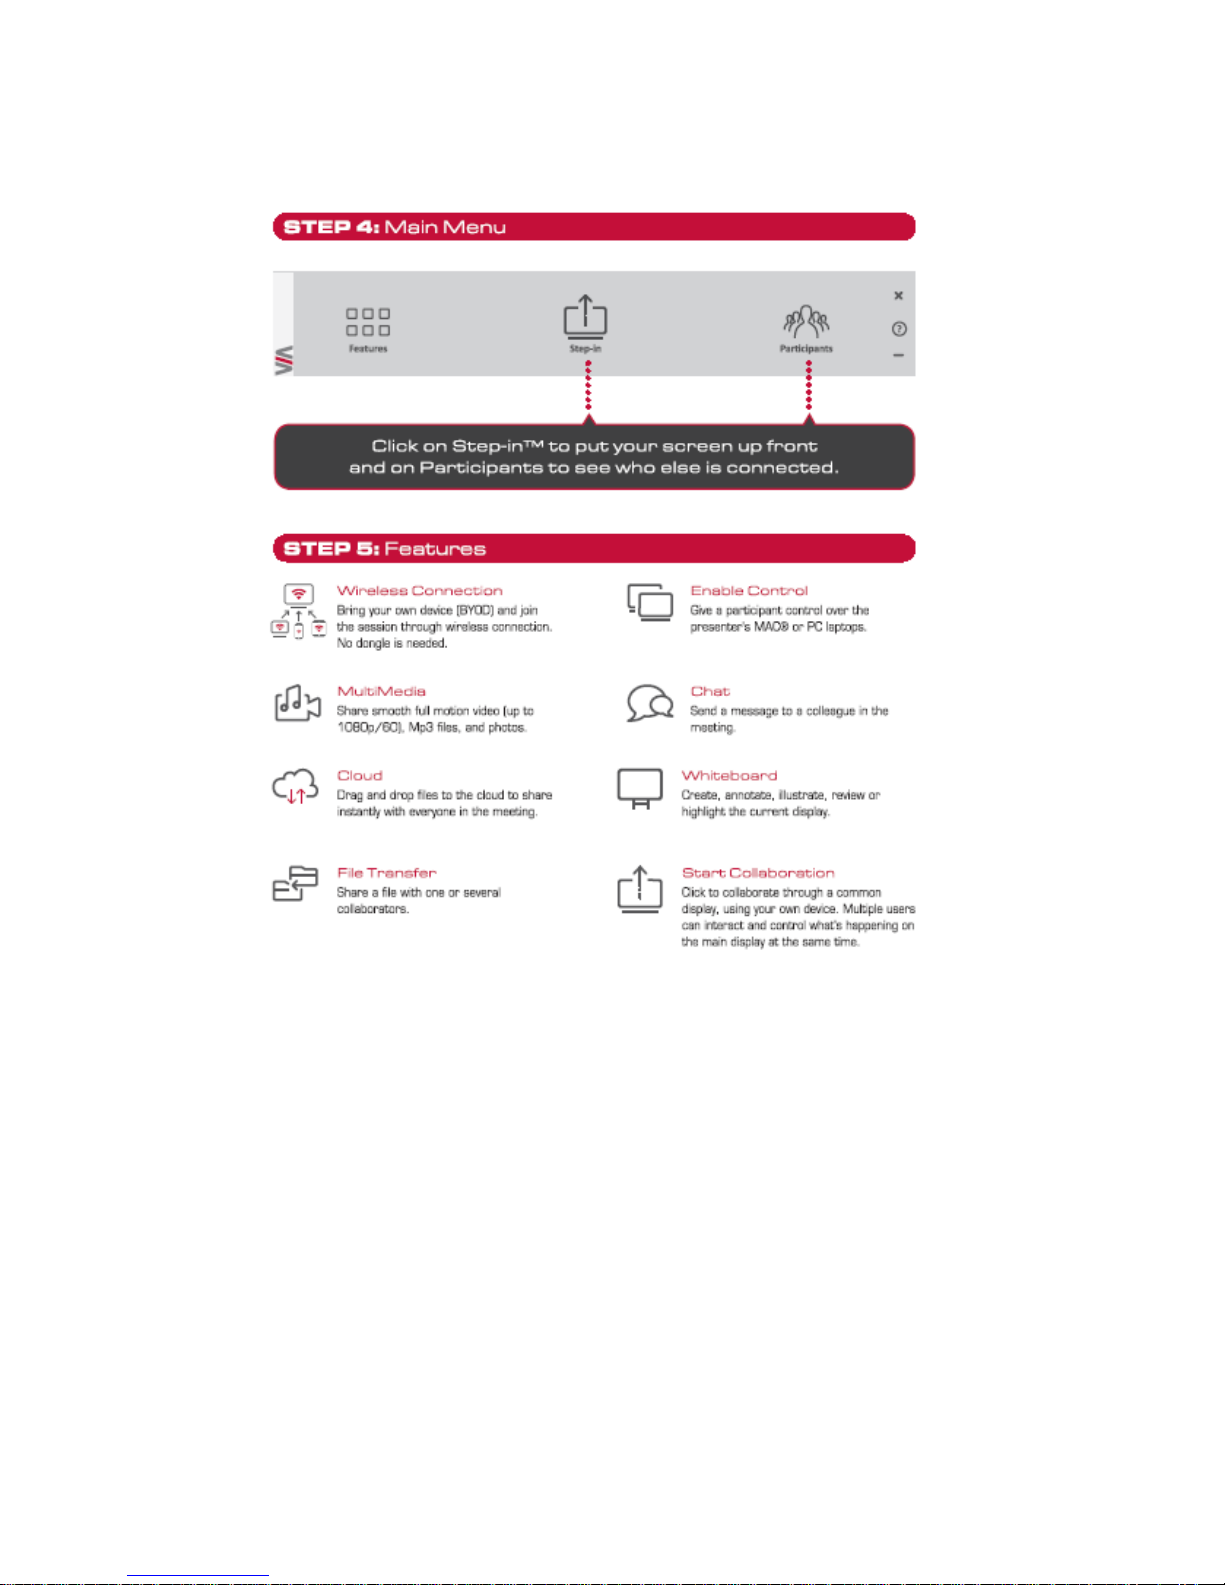
4.1 VIA Connect PRO Main Menu 11
4.2 Enabling Control 12
4.3 Chatting with Participants 13
4.4 Sharing Files 14
4.5 Accessing Cloud Data 16
4.6 Whiteboard Collaboration 17
4.7 VIA Connect PRO Settings Menu 20
4.8 User Experience 29
5Technical Specifications 34
Figures
Figure 1: VIA Connect PRO Collaboration Hub 3
Figure 2: Connecting the VIA Connect PRO Collaboration Hub 5
Figure 3: VIA Connect PRO Admin Screen and Features 8
Figure 4: VIA Connect PRO Main User Screen and Features 9
Figure 5: The Participant List 11
Figure 6: Enable Control 13
Figure 7: Chat Window 14
Figure 8: Admin File Sharing 15
Figure 9: User File Sharing 15
Figure 10: Shared Files on the Cloud 16
Figure 11: Whiteboard Toolbar 18
Figure 12: Settings Screen 20
Figure 13: LAN Settings Screen 21
Figure 14: Room/Name Code Screen 22
Figure 15: Authentication Screen 24
Figure 16: Moderator Mode 25
Figure 17: Login Screen When Moderator Mode is Active 26
Figure 18: Wallpaper Screen 27
Figure 19: Web Browsing Management - Network Settings 28
Figure 20: Web Browsing Management - Wallpaper Settings 28
Figure 21: Web Browsing Management - Configuration Settings 28
Figure 22: Web Browsing Management - Authentication Settings 29
Figure 23: Samsung Galaxy 30
Figure 24: iPad 31
Figure 25: iPhone 32
Figure 26: PC 33