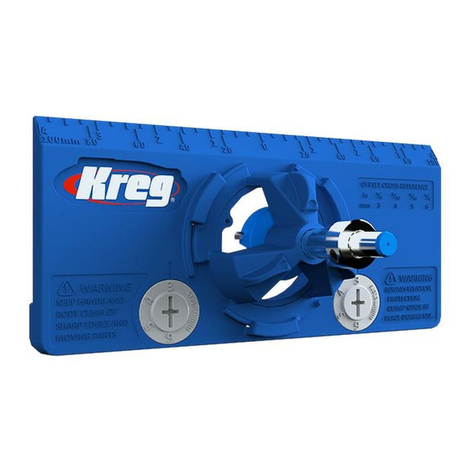
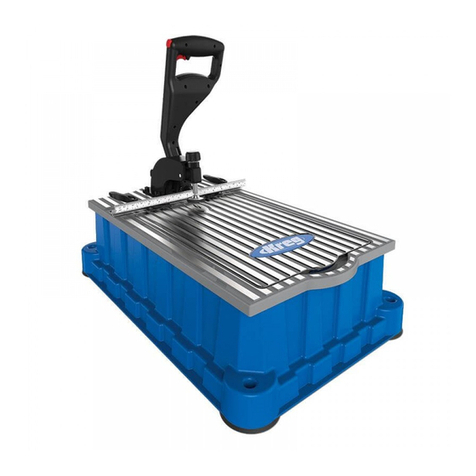
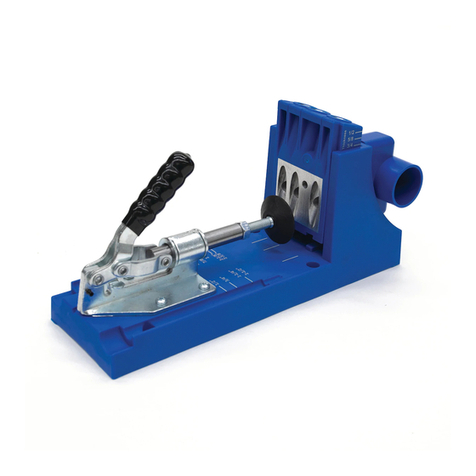
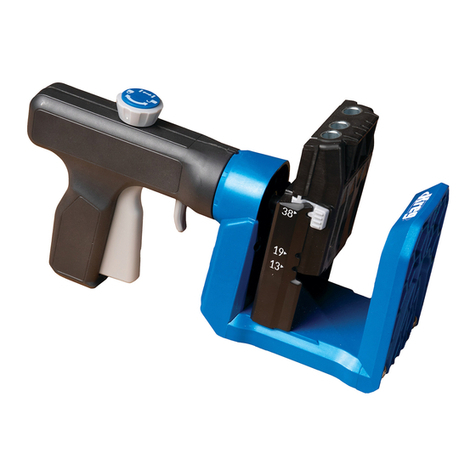
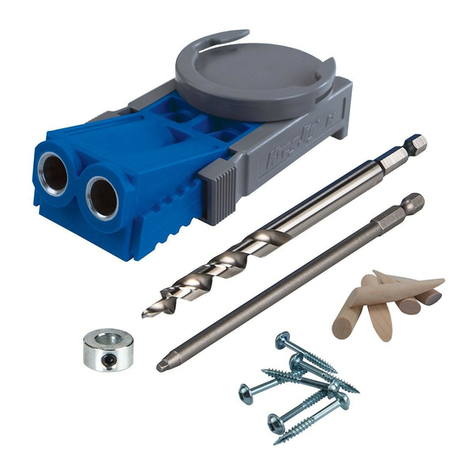
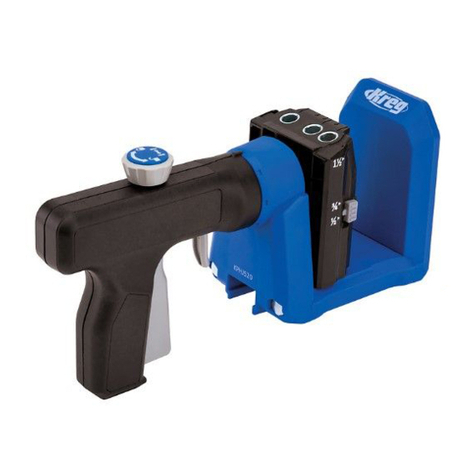
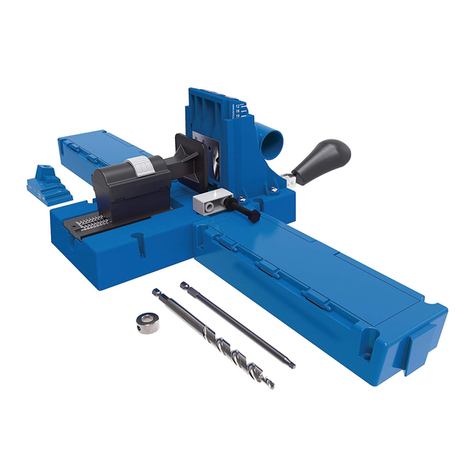
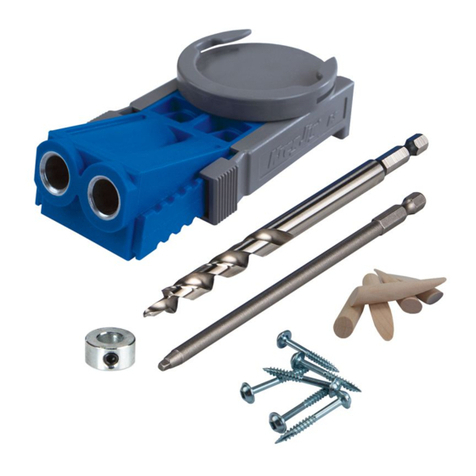
Kreg r3 Operating and maintenance manual

4-
www.kregtool.com
INSTRUCTIONALMANUAL
4-
xxxxx
Item# R3
Version 20061001
Covered by the following US patent
#5,676,500. Other patents pending.
KregJig
®
NK7539
GUIDED’UTILISATION
ART. N° R3
Couvert par le brevet américain
5 676 500. Autres brevets en instance.
MANUALDEINSTRUCCIONES
Artículo N.° R3
Cubierto por la patente de los EE. UU. N.° 5 676 500.
Otras patentes en trámite.
ModèleR3
ModeloR3
ModelR3

4-
www.kregtool.com
1ThankYou!
Thank You for your purchase! Kreg Tool Company is proud to
manufacture top-quality tools and accessories that are surpassed
only by our commitment to customer service. If, after reviewing this
manual you still have a question or concern, please contact us.
You can visit us online for additional resources such as accessories,
project plans, product manuals, and more tips and techniques for
getting the most out of your Kreg Jig®.
4-
Online:www.kregtool.com
Phone:800.447.8638
Email:customerser[email protected]
ForYourSafety
The drill bit is very sharp! Please handle with care.
Always clamp the pocket hole jig and workpiece
securely before drilling Pocket Holes. Never hold the jig
byhand when drilling.
Always allow the drill bit to reach full speed before
plunging into the workpiece.
See The Quick Start Guide On Page 3.
English

4-
www.kregtool.com
2
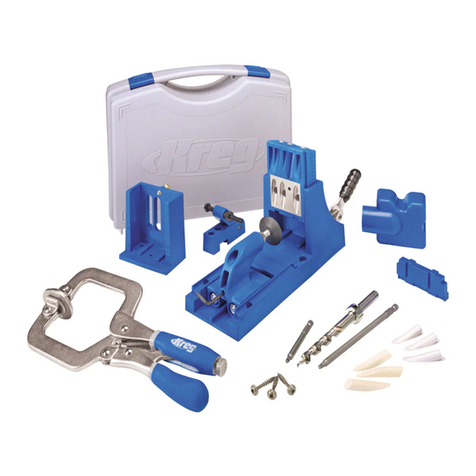
PartsIdentification
Mounting holes
allow you to
screw the jig to
the workpiece
for drilling. The
clamp adapter
snaps into these
holes for use
with the
optional face
clamp.
Clamp adapter can be used with the
optional face clamp (not included) for
clamping the jig in place while drilling.
Set the sliders for the
thickness of the
workpiece you’ll be
drilling as indicated on
the jig body.
The square driver bit
drives our specially-
designed Pocket Hole
screws without slipping.
The step drill bit
makes quick work out
of drilling the guide
hole for the screw and
the Pocket Hole in
one quick operation.
Allen wrench
secures the
depth collar on
the drill bit.
KJD ............................................
Step Drill Bit
D6...............................................
6”- #2 Square Driver Bit
AW18..........................................
Allen Wrench
KJSC..........................................
Depth Collar
Sliders .......................................
Sliders
Clamp Adapter..........................
Clamp Adapter
Jig Body with Drill Guides.......
Jig Body with Drill Guides
PartNumber Description
Use the handy scale molded into the case
to set the depth collar on the drill bit to the
correct position. The numbers indicate the
thickness of the material you’ll be drilling.
Depth collar fits
the drill bit to control
the depth of the
Pocket Hole.
English

4-
www.kregtool.com
1. 2.
Measure the thickness of the material
that you’ll be drilling Pocket Holes into.
Move each slider on your Kreg Jig®so
the number on the slider lines up with the
arrows on the Kreg Jig® body. This number
should correspond to your material
thickness and locates the Pocket Hole in
the proper position on your workpiece.
Next, it is important to set the depth collar
on the drill bit properly. This will make your
Pocket Holes the correct depth for a strong
joint and proper screw penetration. Use the
built-in scale in the Kreg Jig®tool case to set
the depth collar to the thickness of the
material you’re drilling into. Tighten it with
the allen wrench provided.
Set to 3/4”
3QuickStartGuide
QuickStartGuide
UsingPocketScrewJoineryatHome.
Pocket Screw Joinery is useful for all sorts of applications in your home. All you need
is a saw, a portable drill and the Kreg Jig®. It’s easy to get started. Just follow the
simple steps below to get professional results and strong joints in no time at all.
4.3.
Next, securely clamp the Kreg Jig®to your
workpiece. Use the vertical lines on the jig
body to help you align it to drill a Pocket
Hole. The next step is to drill the hole.
You’ll want to drill until the depth collar on
the bit contacts the jig body.
Finally, align the two workpieces and
fasten them with Pocket Screws.
Clamp the pieces together while driving
the screws to eliminate shifting. Use the
square driver bit in your drill and drive
the screws until they seat in the bottom of
the Pocket Holes.
English

4-
www.kregtool.com
4
Details
Settingthethicknessguide-
The gray sliders on the sides of your Kreg Jig®control the
location for the Pocket Hole in relation to the edge of the
material. If your wood measures 3/4” thick, simply depress the
button and move the sliders so that the arrows align with the
3/4 mark. This setting will cause the screw to exit directly on the
center of your 3/4” thick material.
Find the numbers on the gray sliders that represent the
thickness of the workpiece you’ll be drilling. Align each slider
with the arrow and you’re set to go. Securely fasten the jig to
your workpiece, making sure the tabs at the end of the sliders
butt up against the edge of your workpiece as shown at right.
Clamping-
For safety, it’s important to make sure your Kreg Jig®is securely
clamped or fastened to your workpiece before drilling. You can
accomplish this by using a C-clamp or bar clamp that can be
found at most homecenters or hardware stores. It is often help-
ful to clamp your jig directly to the workbench with the bar clamp
while drilling the Pocket Holes as shown in the image at right.
You can also use our dual purpose Face Clamp to clamp the jig
in position (Item# PFC). Our Face Clamp is designed to be used
with the gray clamp adapter that came with this jig. The pad of
this clamp snaps into directly into the clamp adapter and locks
your Kreg Jig®securely in place while drilling. In addition, the
clamp can be used for assembly of the joint to keep everything
flush while you drive the screws.
Settingthedrilldepth-
Now that you’ve got your Kreg Jig®securely fastened to your
workpiece, you need to control the depth of the Pocket Hole you
will drill. This is accomplished by positioning the depth collar
on the drill bit according to the thickness of your material to be
joined. The quickest way to position the depth collar along the
length of the drill bit is to use the scale molded into your
Kreg Jig®case. Like the numbers on the depth sliders on the
jig body, these numbers correspond to the thickness of the
material you’ll be drilling. Just make sure the “step” on the drill
bit is tight against the step in the case, then move the collar to
the appropriate location aligned with the scale and lock it into
place with the allen wrench.
Another way you can set the position of the depth collar is to use
a ruler or tape measure. The chart on the inside of your case lid
shows you the correct tape measure settings. Again, measure
from the step of the bit to the edge of the depth collar as shown.
English
4-
www.kregtool.com
5DetailsContinued
BasicsofaPocketScrewJoint
Strong
Pocket Screw joinery is among the stron-
gest of joints in woodworking. When the
workpieces are cut accurately, the large
head of the screw creates a lot of clamping
force in the bottom of the Pocket, draw-
ing the pieces together for an extremely
tight joint. Of course, it’s important to use
the right screw and one that’s the proper
length. You can read more about our
Pocket Screws on page 7.
What can be easier about joining two pieces
of wood? Unlike biscuits or dowels, with
Pocket Screw joinery, you’re drilling holes
into only one workpiece and driving a screw.
Once you’re set up, it only takes a few
seconds to drill the Pocket Hole and drive
the screw home. No other woodworking joint
takes so little time to produce, yet provides
such a strong joint.
Large pocket hole
diameter provides
clearance for screw head
Pocket Screws are designed
to exert a lot of clamping pressure,
creating a stong, tight joint line
Guide hole for screw shank
We’re often asked, “Should I use glue
for my Pocket Screw joints?” It certainly
doesn’t hurt, but it’s not mandatory. Of
course, whether or not you use glue will
depend on the type of project you’re
building and the stresses it will see
over its lifetime.
FastandEasy
GlueisOptional
Drilling-
The drill bit included in this kit is specially-designed for drilling
Pocket Holes. The narrow tip drills the guide hole for the
Pocket Screw. The larger diameter drills the actual “pocket” to
house the screw and create a flat bottom to allow the screw
to seat securely. The key to drilling clean Pocket Holes it to
use a smooth, continuous motion. Bring your portable drill
up to its highest speed and smoothly plunge the bit into the
steel drill guide. The wood chips and sawdust will automati-
cally be ejected for a nice, clean Pocket Hole. When you use
your Kreg Jig®for the first few times, you may see some blue
plastic chips while drilling. But don’t worry—this is perfectly
normal and won’t affect the life of the Kreg Jig®or the quality
of your Pocket Holes.
Joint line
English

4-
www.kregtool.com
6
PocketScrewUsesAroundYourHome
t
Wobbly table legs or loose table tops are
an easy fix with Pocket Screw joinery. Your
Kreg Jig®is small enough to fit into tight
spots to add extra strength with a Pocket
Screw.
If you’ve got access to your squeaky floor or
stairs from underneath, a Pocket Screw is a
quick, permanent fix. It’ll draw loose boards
tight, eliminating those annoying squeaks.
Buying custom-made cabinets can be
expensive. And stock cabinets don’t always
fit where you need them. Build your own
custom cabinets with Pocket Hole joinery.
It’s easier than you think. Check our web
site for a preview of our cabinetmaking
booklet.
The nice thing about Pocket Hole joinery
is that it’s quick and strong.And you don’t
need to be an experienced craftsman to
build heirloom-quality furniture you can
be proud of. See our web site for lots of
furniture plans.
With our weather-resistant Pocket screws,
you can build those outdoor projects.
Garden benches, planters, decks, and other
projects go together quickly with Pocket
Screw joinery.
•MakeFineFurniture
•OutdoorProjects
•FurnitureRepair
•EliminateFloorandStairSqueaks
•BuildYourOwnCabinets
English

4-
www.kregtool.com
7PocketScrewSelection
Our Pocket Screws are
engineered for strength.
But it’s important to use
the right screw. That’s
why we make our screws
to work with a variety of
materials. We offer them
in the lengths you need for
almost all of your projects.
Pocket Screw Joinery is not really new technology. It was actually invented by the Egyptians. They
clamped two workpieces together and then bored a hole at an angle from one workpiece into the
second workpiece—just like a Pocket Hole. They then inserted a dowel with some glue and cut
it off flush with the surface. The modern Pocket Screw joint grew in popularity with the creation of
the self-tapping screw in the 1980’s. Our self-tapping screws eliminate the need to pre-drill the mat-
ing workpiece.And the self-tapping screw also serves as an “internal” clamp, which eliminates the
need to clamp the joint.And that makes a joint that is as strong or stronger than joints made with
biscuits, dowels, or mortise and tenons.
SCREW
LENGTH
Measure
frombottom
ofheadto
pointof
screw.
*WeatherResistantScrews
Some of our Pocket Screws are
available in a weather-resistant coating.
This coating offers protection from the
elements which means you can use them
for outdoor applications. See our web site
for details.
Pan-Head;
#8 Coarse-Thread,
1” Length.
This is the screw
to join ½” to ½”
softwoods as the
head easily seats
below flush.
SPS-C1
Washer-Head;
#7 Fine-Thread,
1-1/4” Length.
Our second most
popular screw, perfect
for joining ¾” to ¾”
hardwoods.
SML-F125
Washer-Head;
#8 Coarse-Thread,
1-1/4” Length. Our
most popular screw,
perfect for joining ¾”
to ¾” softwoods.
SML-C125
SML-C150
Washer-Head;
#8 Coarse-Thread,
1-1/2” Length.
Coarse thread, longer
length for joining 7/8”
to 1-1/8” thick soft-
woods.
Washer-Head;
#8 Coarse-Thread,
2-1/2” Length.
The ideal screw for
joining 2 x 4’s.
SML-C250
SML-F150
Washer-Head;
#7 Fine-Thread,
1-1/2” Length.
Fine thread, longer
length for joining
7/8” to 1-1/8” thick
hardwoods.
Fine thread screws are the
preferred choice in harder
woods such as Ash, Oak,
Maple, Birch, Walnut, Hickory,
Cherry, and Mahogany.
Coarse thread screws are
the preferred choice in softer
woods such as Pine, Cedar,
Fir, Spruce, Basswood,
Plywood, Melamine and MDF.
OurMostPopularScrews
*See our website for a complete screw selection guide.
English

4-
www.kregtool.com
8
Accessories
The Premium Face Clamp is a handy addition
to your Kreg Jig®. It’s designed to snap into the
clamp adapter. You can also use it without the
Kreg Jig®to hold your workpieces flush when
driving the Pocket Screws. This clamp makes the
process of drilling many Pocket Holes go a lot
faster. You’ll appreciate it’s quick-release
mechanism and adjustable locking handle.
Pocket Screw joints are usually hidden, but from
time to time they appear in a visible location and
you need to conceal them. That’s why we’ve
developed a variety of solid wood Pocket Hole
plugs and plastic caps for laminated surfaces
such as melamine to hide the holes. You can also
make your Pocket Screw joints a design feature
by using a contrasting-colored plug or cap.
-
PremiumFaceClampItem#PFC
PocketHolePlugs
When you’re fastening two pieces at right
angles, clamping them while driving the Pocket
Screws can be tricky. That’s why we’ve designed
this Right Angle Clamp. It’s got a
specially-designed tip that fits snugly into
a drilled Pocket Hole. Its long reach and
fast-acting clamping mechanism makes this
a must-have accessory.
RightAngleClampItem#RAC
Once you realize all the applications for Pocket
Screw Joinery around your home, you’ll
appreciate the usefulness of our Bench Clamp.
A special aluminum plate routed into your
workbench makes an ideal clamping station for
drilling Pocket Holes and fastening workpieces.
The bench clamp features a special “foot” that
locks into the mounting plate. And the clamp
has the same quick-acting, adjustable clamping
mechanism as our other clamps.
BenchClampItem#KBK
English

4-
www.kregtool.com
9PocketHoleIdeas
Get professional results and strong
joints using Pocket Screw oinery for
cabinets and bookcases.
(shown upside down)
Make strong, traditional
face-frame cabinets and built-in storage.
Build your own modern,
European-style cabinets
quickly and easily.
Mitered joints on picture frames go
together fast with Pocket Screw Joinery.
Add decorative edging to shelves
and countertops for a custom look.
(shown upside down)
Build strong decks with invisible
fasteners using Pocket Screw Joinery.
English

4-
www.kregtool.com
10
PocketHoleIdeas
Add table aprons or cabinet toe-kicks
just like a professional. Quiet old, squeaky stairs or
build strong new ones with
Pocket Screw Joinery.
Get tight joints at any angle for custom
cabinets, shelving, or bookcases. Be creative with strong
joinery options.
Traditional table construction is easy and
strong with Pocket Screw Joinery. Gentle curves are no problem with
Pocket Screw Joinery.
English

4-
www.kregtool.com
Give us your feedback!
Feel free to contact us with any questions, comments, concerns, or product
Kreg Tool Company
201 Campus Drive
Huxley, IA 50124
Toll Free: 800-447-8638
Local: 515-597-2234
(fax) 515-597-2354
website: www.kregtool.com
email: [email protected]
ContactInformation
NewsandReviews
Testimonials
PocketHoleTools
PocketHoleMachines
PrecisionMeasuringSystems
KregAccessories
PocketHoleApplications
FAQ’s
ProductManuals
LocalDealerLocator
TradeshowCalendar
RequestaCatalog
www.kregtool.com
Visit
Today!
11
English

4-
www.kregtool.com
12
Notes
English

4-
www.kregtool.com
13 ¡Gracias!
¡Gracias por su compra! En Kreg Tool Company, estamos orgullosos
de fabricar herramientas y accesorios de la más alta calidad,
superados solamente por nuestro compromiso de atención al cliente.
Si tiene dudas o consultas después de leer el manual, contáctenos.
Puede visitarnos en línea para obtener recursos, como accesorios,
planos de proyectos, manuales de productos y más consejos
y técnicas para sacar el mayor provecho de su juego Kreg Jig®.
4-
Enlínea:www.kregtool.com
Teléfono:800-447-8638
Direccióndecorreoelectrónico:
customerser[email protected]
Parasuseguridad
¡La broca es muy filosa! Manipúlela con cuidado.
Antes de realizar los agujeros de ocultación, sujete firmemente
con una prensa la plantilla para agujeros de ocultación.
Nunca sostenga la plantilla con la mano cuando taladre.
Permita siempre que la broca alcance la velocidad máxima
antes de insertarla en la pieza de trabajo.
Vea la Guía rápida de la página 15.
Espanol
~

4-
www.kregtool.com
14
Identificacióndelaspiezas
Los agujeros
de montaje le
permiten atornillar
la plantilla a la
pieza de trabajo
para taladrar.
El adaptador para
la prensa se calza
en estos agujeros
y se utiliza con
la prensa para
marcos opcional.
Puede utilizar el adaptador para la prensa con
la prensa para marcos opcional (no incluida)
a fin de sujetar la plantilla en su lugar con la
prensa mientras taladra.
Coloque los deslizadores
para el espesor de la pieza
de trabajo que perforará
como se indica en el cuerpo
de la plantilla.
La broca para atornillar
de punta cuadrada
coloca nuestros tornillos
especialmente diseñados
para agujeros de ocultación
sin que se suelten.
La broca escalonada
realiza rápidamente el
agujero guía para el
tornillo y el agujero de
ocultación en una sola
operación rápida.
La llave Allen
asegura el collar
de profundidad
en la broca.
KJD ..........................................
Broca escalonada
D6.............................................
Broca para atornillar de punta
cuadrada N.° 2, de 6”
AW18........................................
Llave Allen
KJSC........................................
Collar de profundidad
Deslizadores
.................................
Deslizadores
Adaptador para la prensa
................
Adaptador para la prensa
Cuerpo de la plantilla con
guías de perforación
........................
Cuerpo de la plantilla con
guías de perforación
Númerodepieza Descripción
Utilice la práctica escala grabada en la caja para
colocar el collar de profundidad en la broca en la
posición correcta. Los números indican el espesor
del material que perforará.
El collar de
profundidad se
ajusta a la broca
para controlar la
profundidad del
agujero de ocultación.
Espanol
~

4-
www.kregtool.com
15 Guíarápida
Guíarápida
Utilizacióndelsistemadeunióncontornillosdeocultaciónenelhogar.
El sistema de unión con tornillos de ocultación es útil para varios tipos de aplicaciones en su hogar.
Todo lo que usted necesitará será una sierra, un taladro portátil y el juego Kreg Jig®. Comenzar
es muy sencillo. Sólo siga los pasos sencillos de abajo para obtener resultados profesionales
y uniones resistentes en muy poco tiempo.
1. 2.
4.3.
Mida el espesor del material en el que realizará
agujeros de ocultación. Mueva cada deslizador
de su juego Kreg Jig®de modo que el número
del deslizador quede alineado con las flechas del
cuerpo de la plantilla Kreg Jig®. Este número debe
corresponderse con el espesor del material que
usted va a perforar y ubica el agujero de ocultación
en la posición adecuada, en la pieza de trabajo.
Luego es importante fijar correctamente la profundidad
del collar en la broca. Esto hará que los agujeros de
ocultación tengan la profundidad adecuada para que la
unión sea resistente y los tornillos penetren correctamente.
Utilice la escala incorporada en la caja de herramientas
Kreg Jig®para fijar el collar de profundidad según el
espesor del material que vaya a perforar. Ajústelo con
la llave Allen que se proporciona.
Set to 3/4”
Espanol
~

4-
www.kregtool.com
.
16
Detalles
Fijacióndelaguíadeprofundidad
Los deslizadores grises ubicados a los costados de su plantilla Kreg Jig®
controlan la ubicación del agujero de ocultación en relación con el borde
del material. Si la madera mide 3/4 de pulgada de espesor, simplemente
presione el botón y mueva los deslizadores hasta que las flechas queden
alineadas con la marca de 3/4. Esta configuración hará que el tornillo
quede justo en el centro del material de 3/4 de pulgada.
Encuentre los números en los deslizadores grises que representan el
espesor de la pieza de trabajo que perforará. Alinee cada deslizador
con la flecha y estará listo para empezar. Ajuste bien la plantilla en la
pieza de trabajo, asegurándose de que las pestañas del extremo de los
deslizadores queden a tope con el borde de la pieza de trabajo como
se muestra a la derecha.
Sujeción
Por razones de seguridad, es importante verificar que la plantilla Kreg Jig®
esté bien sujetada o ajustada antes de comenzar a perforar. Esto puede
lograrse utilizando una prensa C o una prensa de barra, que pueden
adquirirse en la mayoría de los centros para el hogar o de las ferreterías.
A menudo, es aconsejable fijar la plantilla directamente en el banco
de trabajo con la prensa de barra mientras se realizan los agujeros
de ocultación como se muestra en la imagen de la derecha.
También puede utilizar nuestra prensa para marcos para sujetar la
plantilla en su posición (artículo N.oPFC). Nuestra prensa para marcos
está diseñada para ser utilizada con el adaptador para prensa gris que
viene incluido en este juego. La superficie de apoyo de esta prensa se
ajusta directamente al adaptador para prensa y se traba en la plantilla
Kreg Jig®en forma segura durante la perforación. Además, la prensa
puede utilizarse para el ensamblaje de las juntas para mantener todo
a ras mientras se colocan los tornillos.
Fijacióndelaprofundidaddeperforación
Una vez que haya ajustado en forma segura la plantilla Kreg Jig®a la
pieza de trabajo será necesario controlar la profundidad del agujero de
ocultación que realizará. Esto se logra ubicando el collar de profundidad
en la broca según el espesor del material que se va a unir. La forma
más rápida de ubicar el collar de profundidad a lo largo de la broca es
utilizar la escala grabada en la caja de herramientas Kreg Jig®. Al igual
que los números de los deslizadores de profundidad del cuerpo de la
plantilla, estos números se corresponden con el espesor del material
que perforará. Sólo asegúrese de que el “escalón” de la broca esté bien
ajustado al escalón de la caja, luego mueva el collar hacia la posición
adecuada que esté alineada con la escala y fíjelo en su lugar con la
llave Allen.
También puede determinar la posición del collar de profundidad utilizando
una regla o una cinta métrica. El cuadro del interior de la tapa de la caja
le muestra la forma correcta de medición con la cinta. Nuevamente, mida
desde el escalón de la broca hasta el borde del collar de profundidad
como se muestra.
Espanol
~

4-
www.kregtool.com
17 Detalles(continuación)
Característicasbásicasdelasjuntascontornillosdeocultación
Resistencia
El sistema de unión con tornillos de ocultación es
una de las uniones más resistentes en carpintería.
Cuando las piezas de trabajo están bien cortadas,
la cabeza grande del tornillo produce una gran
fuerza de sujeción en la parte inferior del agujero
de ocultación y junta las piezas en una unión muy
resistente. Desde luego, es importante utilizar los
tornillos adecuados y con el largo correcto. Puede
leer más acerca de nuestros tornillos de ocultación
en la página 7.
¿Qué método para unir dos pedazos de madera
puede ser más fácil?A diferencia de los óvalos
o las espigas para uniones, el sistema de
unión con tornillos de ocultación sólo requiere
realizar perforaciones en una sola pieza de
trabajo y colocar tornillos. Una vez realizada la
preparación, sólo lleva algunos segundos realizar
el agujero de ocultación y colocar el tornillo.
Ningún otro sistema de unión de carpintería lleva
tan poco tiempo y brinda una unión tan resistente.
A menudo, nos preguntan: “¿Debo utilizar
pegamento para las juntas con tornillos de
ocultación?” Es cierto que no será perjudicial,
pero tampoco es necesario. Por supuesto,
utilizar pegamento o no dependerá del tipo
de proyecto que se esté realizando y de
los esfuerzos a los que ese proyecto será
sometido durante su duración.
Rapidezyfacilidad
Elpegamentoesopcional
Perforación
La broca incluida en este juego está diseñada especialmente para
realizar agujeros de ocultación. La punta angosta realiza el agujero
guía para el tornillo de ocultación. La parte de la broca de mayor
diámetro realiza el “bolsillo” para ocultar el tornillo y crea un fondo
plano para que el tornillo se asiente firmemente. La clave para
realizar agujeros de ocultación parejos es utilizar un movimiento
suave y continuo. Deje que el taladro alcance la velocidad máxima
e introduzca suavemente la broca en la guía de perforación
de acero. Las astillas de madera y el aserrín serán expulsados
automáticamente, lo que dará como resultado un agujero de
ocultación prolijo y liso. Cuando utilice su plantilla Kreg Jig®las
primeras veces, es probable que vea algunos trozos pequeños
de plástico durante la perforación. No se preocupe, esto es
completamente normal y no afectará la duración de la plantilla
Kreg Jig®ni la calidad de sus agujeros de ocultación.
El diámetro grande del
agujero de ocultación
brinda espacio para
la cabeza del tornillo
Los tornillos de ocultación están
diseñados para aplicar mucha
presión de sujeción, lo que crea
una línea de unión ajustada
y resistente
Agujero guía para el vástago
del tornillo
Línea de unión
Espanol
~

4-
www.kregtool.com
18
Aplicacionesdeagujerosdeocultaciónensuhogar
Las patas o las cubiertas flojas de las mesas son
fáciles de reparar con el sistema de unión con
tornillos de ocultación. La plantilla Kreg Jig®es
suficientemente pequeña para caber en lugares
reducidos, a fin de agregar una resistencia extra
con tornillos de ocultación.
Si tiene acceso desde abajo a su piso o escalera
chirriante, un tornillo de ocultación es un arreglo
rápido y permanente. Hará que las tablas se
ajusten y eliminará los chirridos molestos.
Comprar gabinetes hechos a medida puede ser
caro. Y los gabinetes en existencia no siempre
caben donde usted los necesita. Construya sus
propios gabinetes hechos a medida con el sistema
de unión con agujeros de ocultación. Es más
fácil de lo que piensa. Vea nuestro sitio web
para obtener una vista previa de nuestro folleto
de fabricación de gabinetes.
Lo bueno de la unión con agujeros de ocultación
es que es rápida y resistente. Y no es necesario
que usted sea un artesano experimentado para
que pueda fabricar muebles de calidad que
durarán toda la vida y de los cuales estará
orgulloso. En nuestro sitio web encontrará
muchos proyectos de muebles.
Con nuestros tornillos resistentes a la intemperie,
usted podrá realizar proyectos en exteriores.
Bancos para jardín, jardineras, terrazas y otros
proyectos se ensamblan rápidamente con el
sistema de unión con tornillos de ocultación.
•Fabriquemueblesfinos
•Proyectosparaexteriores
•Reparacióndemuebles
•Elimineloschirridosenpisosyenescaleras
•Construyasuspropiosgabinetes
Espanol
~

4-
www.kregtool.com
19 Seleccióndelostornillosdeocultación
Nuestros tornillos de ocultación
están diseñados para ser
resistentes. Pero es importante
utilizar el tornillo adecuado.
Por eso, fabricamos nuestros
tornillos para que puedan
utilizarse con una variedad de
materiales. Tenemos tornillos
disponibles en todos los largos
que usted necesita para casi
cualquiera de sus proyectos.
El sistema de unión con tornillos de ocultación. De hecho, fue inventado por los egipcios. Ellos sujetaban
dos piezas de trabajo y luego realizaban un agujero en ángulo desde una pieza de trabajo hasta la segunda
(al igual que un agujero de ocultación). Luego, insertaban una espiga con pegamento y la cortaban a ras de la
superficie. El sistema moderno de juntas con tornillos de ocultación tuvo gran popularidad con la creación del
tornillo autorroscante en 1980. Nuestros tornillos autorroscantes eliminan la necesidad de perforar previamente
la segunda pieza de trabajo. Y el tornillo autorroscante también sirve como una prensa “interior” que elimina
la necesidad de sujetar la unión. Y esto produce una unión que es tan fuerte como las uniones hechas con
óvalos, espigas o con mortajas y espigas, o más fuerte aún.
LARGODEL
TORNILLO
Midadesdela
parteinferior
hastalapunta
deltornillo.
*Tornillosresistentes
alaintemperie
Algunos de nuestros tornillos de ocultación están
disponibles con un revestimiento impermeable.
Este revestimiento les brinda protección de los
elementos, lo que significa que los puede utilizar
para aplicaciones en exteriores. Vea nuestro sitio
web para conocer los detalles.
Cabeza ovalada:
Rosca gruesa N.° 8,
de 1 pulgada de largo.
Este es el tornillo para
unir maderas blandas
de 1⁄2 pulgada, ya que
la cabeza se asienta
fácilmente debajo del
nivel de la superficie.
SPS-C1
Cabeza de arandela:
Rosca fina N.° 7, de
1-1/4 de pulgada de
largo. Nuestro tornillo
más popular, ideal para
unir maderas duras de
3⁄4 con maderas duras
de 3⁄4 de pulgada.
SML-F125
Cabeza de arandela:
Rosca gruesa N.° 8,
de 1-1/4 de pulgada
de largo. Nuestro tornillo
más popular, ideal para
unir maderas blandas de
3⁄4 con maderas blandas
de 3⁄4 de pulgada.
SML-C125
SML-C150
Cabeza de arandela:
Cabeza de arandela.
Rosca gruesa N.° 8,
de 1-1/2 de pulgada
de largo. Rosca gruesa,
mayor longitud para unir
maderas blandas de 7/8
a 1-1/8 de pulgadas de
espesor.
Cabeza de arandela:
Rosca gruesa N.° 8,
de 2-1/2 de pulgada
de largo. El tornillo
ideal para unir
maderas de
2 x 4 pulgadas.
SML-C250
SML-F150
Cabeza de arandela:
Rosca fina N.° 7, de
1-1/2 de pulgada de
largo. Rosca fina,
mayor longitud para
unir maderas duras
de 7/8 a 1-1/8 de
pulgadas de espesor.
hardwoods.
Los tornillos con rosca fina son la
elección preferida para las maderas
más duras, como fresno, roble, arce,
abedul, nogal, nogal americano,
cerezo y caoba.
Las roscas gruesas son la elección
preferida para las maderas más
blandas, como pino, cedro, abeto,
abeto del norte, tilo americano,
madera contrachapada, melamina
y MDF (fibra de mediana intensidad).
Nuestrostornillosmáspopulares
* Vea nuestro sitio web para obtener una guía completa de selección de tornillos.
Espanol
~
Table of contents
Languages:
Other Kreg Tools manuals

Kreg
Kreg Klamp Plate Service manual

Kreg
Kreg KHI-SLIDE-INT User manual

Kreg
Kreg K3 Operating and maintenance manual

Kreg
Kreg KMA3225 User manual

Kreg
Kreg Adaptive Cutting System Rip Guides User manual

Kreg
Kreg Rip-Cut KMA2675 User manual

Kreg
Kreg KMA4000 User manual

Kreg
Kreg KPHJ230 User manual

Kreg
Kreg Rip-Cut KMA2685 User manual

Kreg
Kreg KPHJ310 User manual