manuals.online logo
Brands
  1. Home
  2. •
  3. Brands
  4. •
  5. Kushlan
  6. •
  7. Mixer
  8. •
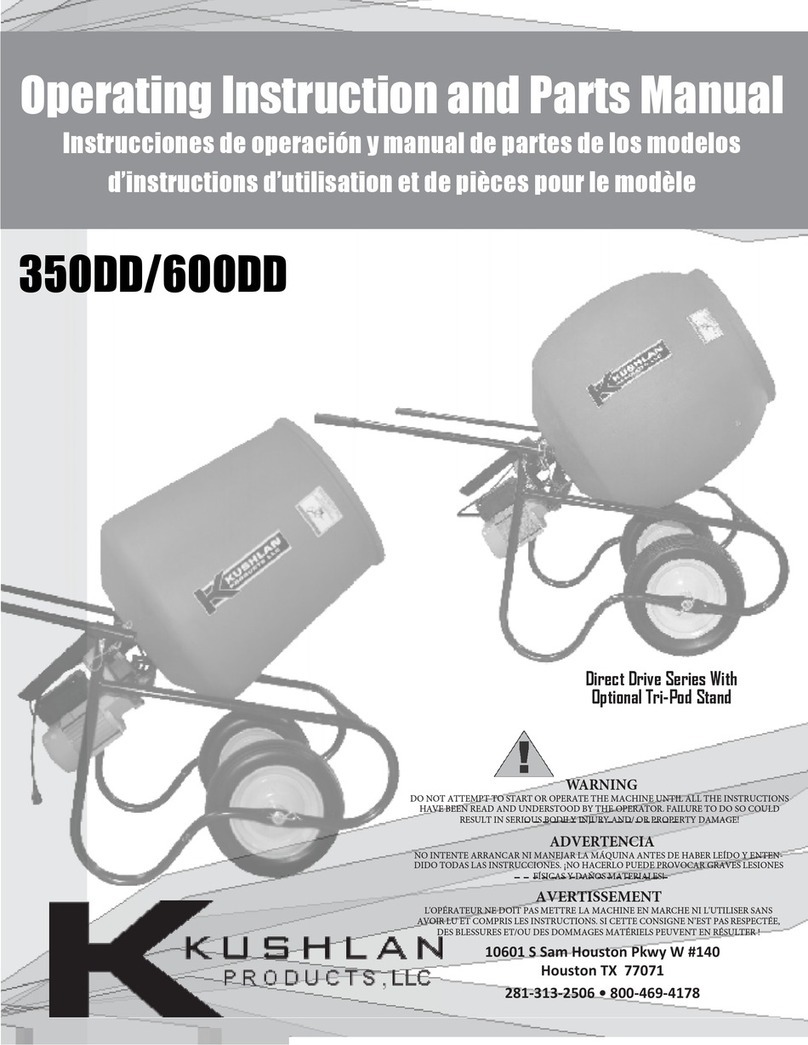
  9. Kushlan 1000DD-WB User manual

Kushlan 1000DD-WB User manual

KushlanProducts,LLC 281-313-2506OR800-469-4178
10601S.SamHoustonParkwayW.STE140 Fax281-313-2509
Houston, TX77071
FEATURES INCLUDE:
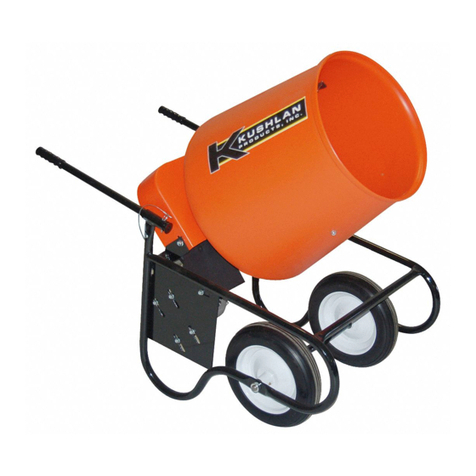
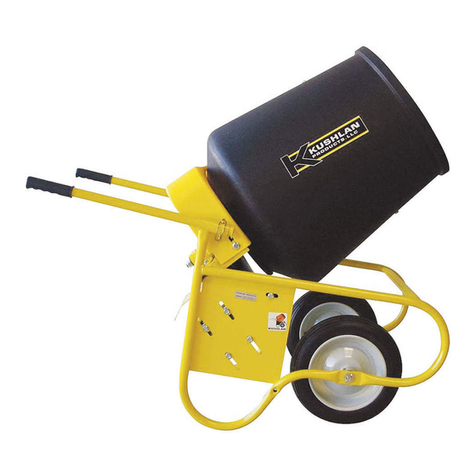
Portable Wheelbarrow Mixer
offered with flat free or pneu-
mac res.
10 cu. . polyethylene drum will
hold up to 600 lbs.
1-1/2 HP Capacitor start, high
torque, direct drive, brushless
electric motor with gear box.
Drum rotaon 28 RPM with gear
box.
Durable 5/16” gauge steel tubing
frame, with removable handles.
Shipping weight 303 lbs.
Assembled: 45L x 36W x 48H
Attention:
is motor is shipped with break-in grease. Before 1st
use, ll with 8 ounces of 75-90W gear lube.
Atención:
Este motor viene con grasa de rodaje. Antes de usar 1,
llene con 8 onzas de lubricante de engranajes de 75-90W.
Attention:
Ce moteur est livré avec de la graisse de rodage. Avant
1ère utilisation, remplir avec 8 onces d'75-90W lubri-ant
engrenage.
SHOULD YOU REQUIRE ANY
SET-UP OR OPERATING ASSISTANCE WITH YOUR PRODUCT,
DO NOT RETURN TO ORIGINAL PLACE OF PURCHASE
2
•Aer referring to the operation manual, if assistance is still needed, please consult our web Site at
www.kushlanproducts.com
• From our web site you may e-mail us directly, If assistance is still required, please call our customer ser-
vice department at 1-800-469-4178
Safety Alert Symbol: is safety alert symbol is used to attract your attention!
• Personal Safety is involved when you see this symbol, Pay extra attention, become alert-be sure to heed it’s
message. Failure to do so may lead to serious personal injury or damage may occur.
• Warnings and safety instruction: If these warnings and safety instructions are not read and carefully followed,
serious personal injury could occur.
WARNINGS
1. Do not use, start, or attempt to operate this machine until all of the instructions have been read and fully under-
stood.
2. Never allow anyone to operate this machine unless the person is well acquainted with these rules of safe opera-
tion.
3. Never operate this machine without all guards in place and rmly attached to the machine.
4. Make certain that the mixing drum is clear of obstructions and stand clear of the machine with out all guards in
place and rmly attached to the machine.
5. When cleaning, lubricating, or adjusting the mixer, disconnect the power plug.
6. Keep all people (except operator) a minimum of ve (5) feet away from the machine during operation.
7. Always make certain that the mixer is connected to a properly grounded electric circuit to protect the operator
from possible electric shock.
8. Do not plug or unplug the motor while standing in or around damp or wet ground.
9. Do not start the motor if the drum is Fully loaded
10. Do not overload the mixer
11. Never attempt to move the mixer while the motor is on.
EN CASO DE QUE REQUIRIERA AYUDA
CON LA INSTALACIÓN O EL MANEJO DE SU PRODUCTO,
• Después de consultar el manual de operación, si sigue necesitando ayuda consulte nuestro sitio Web en
www.kushlanproducts.com.
• Desde nuestro sitio Web puede enviarnos un mensaje directamente. Si siguiera necesitando ayuda, llame a nuestro
departamento de atención al cliente al 1-800-469-4178.
Símbolo de alerta: Este símbolo de alerta se usa para llamar su atención!
• Cuando vea este símbolo sabrá que está implicada su seguridad personal; ponga atención especial, esté alerta y no
olvide seguir su mensaje. No hacerlo puede provocar graves lesiones físicas o daños.
• Advertencias e instrucciones de seguridad: Pueden ocurrir graves lesiones
ADVERTENCIAS
1. No use esta máquina, ni la arranque ni trate de manejarla antes de haber leído y entendido plenamente todas las
instrucciones.
2. Nunca permita que nadie maneje esta máquina si la persona no está bien familiarizada con estas reglas operación
segura.
3. Nunca maneje esta máquina sin las guardas en su lugar y bien jadas en la máquina.
4. Cerciórese de que el tambor de mezclado no tenga obstrucciones, que libre bien la máquina y que todas las guar-
das están en su lugar, bien jadas en la máquina.
5. Cuando limpie, lubrique o ajuste la mezcladora, desconecte la clavija de corriente.
6. Toda la gente (salvo el operador) debe estar por lo menos a 1.5 metros de distancia de la máquina durante su
operación.
7. Cerciórese siempre de que la mezcladora esté conectada a un circuito eléctrico debidamente aterrizado, para
proteger al
operador de un posible choque eléctrico.
8. No enchufe ni desenchufe el motor al estar parado en tierra húmeda o mojada.
9. No arranque el motor si el tambor está totalmente cargado.
10. No sobrecargue la mezcladora.
11. Nunca trate de mover la mezcladora mientras esté encendido el motor.
SAFETYINSTRUCTIONSFor the safety of yourself and others around you, it is extremely important that you observe the follow-
ing notes.
1. Keep hands and clothing away from moving parts at all times.
2. Do not operate this machine under the inuence of alcohol or while taking medication that impairs the senses or
reactions.
3. Make certain that the work area around the machine is clear of debris and obstructions.
4. Keep all unauthorized and untrained people away from the machine at all times.
5. Never let the mixer run unattended even for a brief moment.
6. Turn o the motor when you leave the machine.
7. Only use or operate the mixer on level ground to prevent the mixer from tipping over.
8. Do not abuse the power cord; i.e. Never yank on the cord to disconnect it. Keep the cord away from heat, oil, and
sharp edges.
9. Do not overreach while working with the mixer. Keep proper Footing and balance at all times when loading or
unloading the mixer.
10. Never allow children or inexperienced operators to operate or repair the mixer.
11. Use only factory authorized parts for replacement
12. Keep these operation instructions with the machine at all times
13. Always wear safety glasses and safety shoes when operating and moving equipment
14. Safety decals – replace missing damaged safety decals.
MixerInstructions
A. LUBRICATION: ere are grease ttings on all models. Apply any type of EP grease until grease begins to
come out of the bearings. LUBRICATE ALL FITTINGS BEFORE EACH USE.
B. GEARBOX MOTOR: Mixer shipped with break-in grease in gearbox. Change lubricate/oil every 200 hours.
Use 75W-90 gear oil and ll 8 oz.
C. GENERAL: Check all screws for tightness before each use.
D. CONCRETE MIXING: Do not insert sharp objects into the plastic mixing drum. Doing so will damage the
drum.
E. CLEANING: Do not spray water on or into the motor. orough cleaning of the mixer aer each use is rec-
ommended and will add to the service life.
Instructionspourlemélangeur
A. LUBRIFICATION: Tous les modèles sont munis de graisseurs. Appliquer n'importe quel type de graisse EP.
Appliquer la graisse jusqu'à ce que la graisse ressorte Roulement de roue. LUBRIFIER LES RACCORDS AVANT
CHAQUE UTILISATION
B. MOTEUR BOÎTE DE VITESSES: Mixer livré avec briser la graisse dans le carter. Changer lubrier / huile
toutes les 200 heures. Utilisez synthétiques Mobile 1 LS 75W-90 huile.
C. GÉNÉRALITÉS: Vérier que les vis sont bien serrés avant toute utilisation.
D. MÉLANGE DE BÉTON: Ne pas introduire d'objets tranchants dans le tambour de mélange en plastique. Ne
pas suivre cette consigne risque d’endommager le tambour.
E. NETTOYAGE: Ne pas pulvériser de liquide directement sur ou dans le moteur. Il est recommandé de neoyer
soigneusement le mélangeur après chaque ulisaon pour prolonger sa vie ule.
Item# Part# Description Qty
1 1000DDWB‐01 MachineBoltm12x70 1
2 1000DDWB‐02 OutsideDrumPlatewithStraightBushing 1
3 1000DDWB‐03 PolyethyleneDrum10.0cu.ft.17in.DiameterOpening 1
4 1000DDWB‐04 Insidedrumplate 1
5 1000DDWB‐05 Boltsfordrumplate3/8”‐16x2 12
6 1000DDWB‐06 Steelmixingblades 3
7 1000DDWB‐07 Boltsforblades3/8”‐16x2 6
8 1000DDWB‐08 Nutsforblades3/8‐16 6
9 1000DDWB‐09 Boltsforframem12x50 8
10 1000DDWB‐10 Boltsformotorcover5/16x34 2
11 1000DDWB‐11 Motorcover 1
12 1000DDWB‐12 Rearchannel 1
13 1000DDWB‐13 Wheelbarrowhandles 2
14 1000DDWB‐14 Handlegrips 2
15 1000DDWB‐15 Lockingpinandlanyardforhandles 2
16 1000DDWB‐16 1.5HPGearmotor10Amp110volt 1
17 1000DDWB‐17 Wheelbarrowframeside 2
18 1000DDWB‐18 15in.Polyurethanewheelandhub 2
19 1000DDWB‐19 2.5in.CotterPinforWheels/Axle(setof4) 1set
20 1000DDWB‐20 1in.x29in.WheelAxle 1
21 1000DDWB‐21 1in.SteelWheelWashers(setof4) 1set
22 1000DDWB‐22 Frontsupporttube 1
23 1000DDWB‐23 CompleteDrumWheelGuideAssembly 1
23A 1000DDWB‐A 2.5in.DrumGuideWheel(setof2) 1set
23B 1000DDWB‐B Mountingplate 1
23C 1000DDWB‐C .5in.x4.5inDrumGuideWheelShaft(setof2) 1set
23D 1000DDWB‐D 3/8in.x2in.Grade2mountingbolt 1set
23E 1000DDWB‐E 3/8in.Nuts(setof4) 1set
4
2
4
1
5
8
9
10
7
12
14
13
6
3
17
16
11
15
18
19
23D
23
21
9
20
23A 23E
23E
23B
23C
22
5
Item# Part# Description Qty
1DD‐1000 Gearboxandmotorassembly(110V‐60Hz) 1
2DDMA‐02 Screw(6x25mm) 1
3DDMA‐03 Seal(40mm) 1
4DDMA‐04 Screw(6x50mm) 4
5DDMA‐05 Gearboxcase‐fronthalf 1
6DDMA‐06 Gearboxgasket 1
7DDMA‐07 Pin(8x20mm) 1
8DDMA‐08 Lockingkeyforgearandaxle(8x7x15mm) 1
9DDMA‐09 Gearboxballbearing 1
10 DDMA‐10 Gear(Z79) 1
11 DDMA‐11 Lockingkeyforgearaxle(5x5x12mm) 1
12 DDMA‐12 Pinion(Z9) 1
13 DDMA‐13 Gearboxcase‐backhalf 1
14 DDMA‐14 Motorseal(20mm) 1
15 DDMA‐15 SpacewasherA(30mm) 1
16 DDMA‐16 MotorBearing(6004z) 1
17 DDMA‐17 MotorCasing Several
18 DDMA‐18 Motorrotor 1
19 DDMA‐19 Motorbearing(6003z) 1
20 DDMA‐20 BellHousing 1
21 DDMA‐21 Fan 1
22 DDMA‐22 Screw(4x10mm) 4
23 DDMA‐23 Fancover 1
24 DDMA‐24 Bolt(5x135mm) 4
26 DDMA‐26 On/offswitch 1
27 DDMA‐27 Powercordwithplug 1
28 DDMA‐28 Screw(4x22mm) 1
29 DDMA‐29 ElectricalPanelGasket 1
30 DDMA‐30 Support 1
31 DDMA‐31 Screw(4x15mm) 1
32 DDMA‐32 Condenser/capacitor 1
33 DDMA‐33 Manualresetthermalprotector 1
34 DDMA‐34 Electricalboxassembly 1
35 DDMA‐35 Motorgasket 1
36 DDMA‐36 Gearboxnut(6mm) 10
37 DDMA‐37 Gearboxwasher(6mm) 10
38 DDMA‐38 Gearboxbearing(36205) 1
39 DDMA‐39 SpacewasherB(30mm) 1
40 DDMA‐40 Gear(Z68) 1
41 DDMA‐41 Gearboxbearing(36108) 1
42 DDMA‐42 Lockingpin(6x10mm) 2
43 DDMA‐43 Bolt(6x40mm) 1
45 DDMA‐45 Gearboxwasher(4mm) 1
46 DDMA‐46 Screw(4x6mm) 8
47 DDMA‐47 Gearboxdrive(straight)shaft 1
48 DDMA‐48 Stopring(30mm) 1
51 DDMA-51 Sealed worm gearbox 1
6
7
Step 1‐Remove all the shrink wrap from parts.
Take out all the nuts and bolts from the frame,
keeping them together by size. Take the large sup-
port channel on the leframe side and bolt the
frame side to the large support channel. The lan-
yard and pin are placed to the outside of the frame
.Paso 1 Quite el envoltorio de las partes. Sacar los
tuercas y tornillos del marco, manteniéndolos
juntos por tamaño. Tomar el canal de ayuda
grande en el lado izquierdo del marco y el perno
del lado del marco al canal de ayuda grande. El
cordón y el pin se colocan en el exterior de la
estructura.
Étape 1-enlever toute l’enveloppe de rétrécisse-
ment d’une pare. Rerez tous les écrous et bou-
lons de l’armature, les garder ensemble selon la
taille. Prendre le canal de support grand sur le côté
du cadre gauche et visser le côté du cadre sur le
canal de support grand. La longe et les broches
sont placées à l’extérieur du cadre.
Step 2‐Go to the other side and repeat the
same for the
right side but do not completely ghten
bolts unl later.
Paso 2-ir al otro lado y reper lo mismo
para el lado derecho pero no apriete com-
pletamente los pernos hasta más tarde.
Étape 2‐aller de l’autre côté et répétez la
même chose pour le côté droit, mais ne
serrez pas complètement les boulons
jusqu’au plus tard.
Step 3‐Install spacer bar as shown
using the 3/8” x 2” whiz
lock bolts. Then ghten all bolts on
enre frame.
Paso 3‐instalar espaciador como se
muestra usando el bloqueo 3/8 "x 2"
whiz. Apriete todos los tornillos en
toda la trama.
Etape 3 - installaon de boulons de la
barre d’espacement comme illustré à
l’aide de l’écluse de whiz 3/8 "x 2".
Puis serrer tous les boulons sur l’en-
semble du cadre.
Step 4‐Take the axle pipe and put the
two large washers in
the center of the axle pipe. Put one
wheel on either side of the
washers, leaving the washers in between
the two wheels.
The long part of the wheel hub goes to-
wards the frame.
Paso 4.-tomar el tubo del eje y poner las
dos arandelas grandes en el centro de la
tubería del eje. Poner una rueda a cada
lado de la lavadora, dejando las aran-
delas entre las dos ruedas.
Etape 4 - Prenez le tuyau de l’essieu en meant les deux grandes rondelles dans le centre de la conduite de l’essieu. Mere une
roue de chaque côté des rondelles, laissant les rondelles entre les deux roues.
La pare longue du moyeu de la roue va vers le cadre.
Step 5‐Install large washer and “R” clip
to the outside of the frame.
Paso 5-Instale arandela grande y "R" clip
hacia el exterior del marco.
Étape 5-installaon grande rondelle et le
« R » clip vers l’extérieur du cadre.
Step 6‐Push wheels over against frame
and install inner washer and “R” clip
provided.
Paso 6 Empuje las ruedas delante de
marco e instale la arandela interior y
clip de "R" siempre.
Étape 6-Push roues par rapport à arma-
ture et installez la rondelle intérieure et
clip de « R » fournie.
Step 7‐Take gear motor and remove
the 10 mm nuts from the 4 longer
mounng bolts in the center of the
gear motor. Remove flat washer and
lock washer.
Paso 7 tome motorreductor y rere
las tuercas de 10 mm de los 4 pernos
de montaje más largo en el centro
del motorreductor. Rere la arandela
plana y arandela de seguridad.
Étape 7-Take motoréducteur et re-
rez les écrous de 10 mm les 4 bou-
lons de montage plus longs dans le
centre du motoréducteur. Enlever la
rondelle plate et la rondelle de
blocage.
Step 8‐Tighten the 4 nuts on gear
motor to 10 pounds of torque. Some-
mes they come loose and it is best
to ghten to prevent gear motor from
leaking oil.
Paso 8 - apriete las 4 tuercas motor-
reductor a 10 libras de esfuerzo de
torsión. A veces vienen sueltos y es
mejor apretar para evitar que el mo-
tor del engranaje de fugas aceite.
Étape 8 - Visser les 4 écrous sur moto-
réducteur à 10 livres de couple. Parfois, ils
se détachent et il est préférable de serrer
de façon à empêcher la fuite d’huile moto
-réducteur.
Steps 9 & 10‐Install gear motor, as
shown, first the flat washers, then the
lock washer, then the nut on all 4
studs. Tighten to 10 pounds of torque.
Pasos 9 y 10-instalación del engranaje
del motor, como se muestra, en pri-
mer lugar las arandelas planas, luego
la arandela y la tuerca en todos los 4
ESPARRAGOS. Apriete a 10 libras de
esfuerzo de torsión.
Étapes 9 & 10-Install motoréducteur,
tel qu’indiqué, tout d’abord les ron-
delles plates, puis la rondelle et
l’écrou sur tous les 4 goujons. Serrer
au couple de 10 livres.
Step 11‐Now your frame should look
like the picture shown.
Paso 11-ahora su marco debe verse
como el cuadro demostrado.
Étape 11-maintenant votre image
devrait ressembler à l’image
montrée.
Step 12‐This is a very important
step.Remove drain oil plug and in-
stall gear lube oil. Any brand will work
SEA7590- put in 8 oz.
Paso 12-este es un paso muy im-
portante. Quitar tapón de aceite e
instale el aceite lubricante del engra-
naje. Cualquier marca funciona
SEA7590-ponga en 8 oz.
Étape 12-ceci est une étape très im-
portante. Enlever le bouchon de
vidange huile et installer l’huile de
lubrificaon des engrenages. N’im-
porte quelle marque fonconne
SEA7590-mere en 8 oz.
Step 13‐Install top motor cover as
shown.
Paso 13 - Instale la tapa superior del
motor como se muestra.
Étape 13 - installaon capot moteur
comme indiqué.
Step 14‐Install drum support kit. Use 4-
3/8” x 2” bolts provided. Install upside
down at first.
Paso 14-instalar batería de apoyo. Use 4-
3/8 "x 2" tornillos suministrados. Instalar
boca abajo al principio.
Étape 14-installaon baerie prise en charge.
Ulisez 4-3/8 "x 2" boulons fournis. Installer à
l’envers dans un premier temps.
Step 15‐Turn drum support upright 15
degrees toward the back of the mixer,
or gear motor, as shown in picture.
Paso 15-vuelta tambor soporte vercal 15
grados hacia la parte posterior de la mez-
cladora, o motor del engranaje, como se
muestra en la imagen.
Étape 15-tour tambour charge vercale 15
degrés vers l’arrière de la table de mixage,
ou motoréducteur, comme sur la photo.
Step 16 ‐The drum has already been
put together so all you need to do is
slide the drum bushing onto the sha
of the gear motor, line up hole and in-
stall bolt provided.
Paso 16 - el tambor ya se ha puesto
juntos para que todo lo que necesita
hacer es deslizar el tambor buje sobre
el eje del motorreductor, alinear el ori-
ficio e instale el perno siempre.
Étape 16 - le tambour a été déjà mis en
place afin que tout ce que vous devez faire
est de glisser le tambour bague sur l’arbre
du motoréducteur, perçage et installer le
boulon fourni.
Step 17‐Install handles. Use the pins
provided which are
connected to lanyards.
Paso 17-instalar manijas. Ulice las clavi-
jas siempre que estén conectados a cor-
dones.
Étape 17-Install poignées. Ulisez les
broches fournis qui sont raccordés à
longes.
Step 18‐Your mixer should now look like
above. If it does not, you had beer call
Kushlan Products’ customer service (800-
469-4178)
Paso 18-mezclador debe parecerse ahora
arriba. Si no lo hace, mejor había llame al
servicio al cliente de los productos Kushlan
(800-469-4178)
Étape 18-votre étape doit maintenant res-
sembler ci-dessus. Si il n’est pas le cas, vous
avait mieux appeler service à la clientèle des
produits de Kushlan (800-469-4178)
Kushlan Products
Limited Warranty Policy • Póliza de garantía limitada • Garantie limitée
Kushlan Products makes every eort to assure that its products meet high quality and durability standards and warrants to the original
retail consumer purchaser of our products (you) that each such product be free from defects in materials and workmanship as follows:
ONE(1)YEAR limited warranty on motors. is warranty covers replacement of parts found to be defective in material or workmanship
for a period of 90 days from the date of purchase. is warranty does not apply to typical replacement of parts or assemblies that fail as a
consequence of normal wear and tear, for example bushings, tires, belts, and pinion gears.
is warranty does not apply to defects due, directly or indirectly. to misuse. abuse .negligence or accidents .repairs or alter actions out-
side our facilities or the lack of maintenance .WE LIMIT ALL IMPLIED WARRANTIES TO THE PERIOD SPECIFIED ABOVE FROM
THE DATE OUR PRODUCT WAS PURCHASED AT RETAIL .EXCEPT AS STATED HEREIN. ANY IMPLIED WARRANTIES OF
MERCHANTABILITY AND FITNESS ARE EXCLUDED. SOME STATES DO NOT ALLOW LIMITATIONS ON HOW LONG THE
IMPLED WARRANTY LASTS. SO THE ABOVE LIMITATION MAY NOT APPLY TO YOU. WE SHALL IN NO EVENT BE LIABLE
FOR DEATH, INJURIES TO PERSONES OR PROPERTY OR FOR INCIDENTAL, CONTINGENT, SPECIAL OR CONSEQUENTIAL
DAMAGES ARISING FROM THE USE OF OUR PRODUCTS. SOME STATES DO NOT ALLOW THE EXCLUSION OR LIMITA-
TION OF INCIDENTAL OR CONSEQUENTIAL DAMAGES, SO THE ABOVE LIMITATION OR EXCLUSION MAY NOT APPLY
TO YOU.
To take advantage of this warranty, the product or part must be returned for examination, postage prepaid. To Kushlan Products. Proof of
purchase date and an explanation of the complaint must accompany the merchandise. If our inspection discloses a defect, we will either
repair or replace the product, at our election or we may elect to refund the purchase price if we cannot readily and quickly provide you
with repair or replacement, if you are willing to accept such refund. We will return the repaired product or replacement at our expense,
but if we determine there is no defect, or that the defect resulted from causes not within the scope of our warranty, then you must bear the
cost of storing and returning this product. is warranty gives you specic legal rights, and you may also have other right which vary from
state to state. For service. Contact Kushlan Products 10601 S. Sam Houston Parkway W., Suite 140, Houston, TX 77071 • Phone (281)313-
2506 Fax (281)313-2509
Kushlan Products hace todo lo posible por asegurarse de que sus productos cumplan con altas normas de calidad y durabilidad y le gar-
antiza al comprador original de nuestros productos (usted) que cada producto está libre de defectos en materiales y mano de obra como
sigue:
UN (1) AÑO de garantía limitada en motores. Esta garantía cubre el reemplazo de partes que resulten defectuosas en materiales o mano
de obra durante un plazo de 90 días a partir de la fecha de compra. Esta garantía no se aplica al reemplazo típico de piezas o conjuntos que
fallen a consecuencia del desgaste normal, como cojinetes, llantas, bandas y engranes de piñón.
Esta garantía no se aplica a defectos debidos, directa o indirectamente, al mal uso, maltrato, negligencia o accidentes, a reparaciones o
modicaciones hechas fuera de nuestras instalaciones ni a la falta de mantenimiento. LIMITAMOS TODAS LAS GARANTÍAS IMPLÍCI-
TAS AL PERIODO ESPECIFICADO ANTERIORMENTE A PARTIR DE LA FECHA EN QUE NUESTRO PRODUCTO FUERA COM-
PRADO AL MENUDEO. SALVO QUE SE INDIQUE ESPECÍFICAMENTE. ESTÁ EXCLUIDA TODA GARANTÍA IMPLÍCITA DE
MERCABILIDAD Y ADECUACIÓN. EN ALGUNOS ESTADOS NO SE PERMITEN LIMITACIONES A LA DURACIÓN DE LA GAR-
ANTÍA IMPLÍCITA, POR LO QUE LA LIMITACIÓN ANTERIOR PODRÍA NO APLICARSE A USTED. EN NINGÚN CASO SERE-
MOS RESPONSABLES POR LA MUERTE, LESIONES FÍSICAS O DAÑOS MATERIALES NI POR DAÑOS INCIDENTALES, CON-
TINGENTES, ESPECIALES O CONSECUENTES QUE SURGIERAN POR EL USO DE NUESTROS PRODUCTOS. EN ALGUNOS
ESTADOS NO SE PERMITE LA EXCLUSIÓN O LIMITACIÓN DE DAÑOS INCIDENTALES O CONSECUENTES, POR LO QUE LA
LIMITACIÓN Y LA EXCLUSIÓN ANTERIORES PODRÍAN NO APLICARSE A USTED.
Para aprovechar esta garantía, el producto o la pieza deben ser devueltos para su examen, con franqueo pagado, a Kushlan Products. La
mercancía debe ir acompañado con comprobante de compra y una explicación de la queja. Si nuestra inspección
revela un defecto. Nosotros repararemos o reemplazaremos el producto, a nuestra elección. O bien, podríamos decidir reembolsar el pre-
cio de compra si no pudiéramos ofrecer una reparación o un remplazo prontamente y su el cliente estuviera dispuesto a aceptar dicho
reembolso. Nosotros devolveremos el producto reparado o reemplazado a costa nuestra, pero si determinamos que no hay defecto, o si el
defecto es resultado de causas fuera del alcance de nuestra garantía, entonces el cliente tendría que asumir el costo de almacenar y devolv-
er el producto. Esta garantía concede derechos jurídicos especícos y usted podría tener también otros derechos que varíen de un estado a
otro. Si necesita servicio comuníquese con Kushlan Products 10601 S. Sam Houston Parkway W., Suite 140, Houston, TX 77071 •
Teléfono (281)313-2506 Fax (281)313-2509
Kushlan Products met tout en oeuvre pour assurer que ses produits satisfont aux normes de qualité et de durabilité les plus strictes et
garantit à l’acheteur-consommateur au détail d’origine de nos produits (vous) que chaque produit est exempt de défaut et matériaux et
main-d’oeuvre comme suit :
Garantie limitée de UN (1) AN pour les moteurs. La présente garantie couvre les échanges de pièces déterminées défectueuses en maté-
riaux ou main-d’oeuvre pendant une période de 90 jours à compter de la date d’achat. La présente garantie ne couvre pas l’échange type
de pièces ou de montages devenus défectueux suite à une usure normale comme par exemple, bagues, pneus, courroies et engrenage à
pignons.

Other Kushlan Mixer manuals

Kushlan 1000DD User manual

Kushlan

Kushlan 1000DD User manual

Kushlan Industrial Portable Tripod Mixer Instructions for use

Kushlan

Kushlan Industrial Portable Tripod Mixer Instructions for use

Kushlan 350 Gas Service manual

Kushlan

Kushlan 350 Gas Service manual

Kushlan 350W User manual

Kushlan

Kushlan 350W User manual

Kushlan 350W Quick reference guide

Kushlan

Kushlan 350W Quick reference guide

Kushlan K PRO Service manual

Kushlan

Kushlan K PRO Service manual

Kushlan 600 Series User manual

Kushlan

Kushlan 600 Series User manual

Kushlan Direct Drive Series Service manual

Kushlan

Kushlan Direct Drive Series Service manual

Kushlan 450DD Service manual

Kushlan

Kushlan 450DD Service manual

Popular Mixer manuals by other brands

HappyCook RP02 manual

HappyCook

HappyCook RP02 manual

Metos AR 100 MK 1 Installation and operation manual

Metos

Metos AR 100 MK 1 Installation and operation manual

VITINNI SM30115 instruction manual

VITINNI

VITINNI SM30115 instruction manual

Makita UT001G instruction manual

Makita

Makita UT001G instruction manual

Wharfedale Pro Connect Series Operating manual and user guide

Wharfedale Pro

Wharfedale Pro Connect Series Operating manual and user guide

KitchenAid KG25H0XER5 Instructions and recipes

KitchenAid

KitchenAid KG25H0XER5 Instructions and recipes

Honeywell HON 985B Operating and maintenance instructions

Honeywell

Honeywell HON 985B Operating and maintenance instructions

Rolls MX422 Owner's/operator's manual

Rolls

Rolls MX422 Owner's/operator's manual

Kenwood Chef and Major KM020 series instructions

Kenwood

Kenwood Chef and Major KM020 series instructions

Electrolux Dito 601514 Brochure & specs

Electrolux

Electrolux Dito 601514 Brochure & specs

FONESTAR MX-867RU instruction manual

FONESTAR

FONESTAR MX-867RU instruction manual

KitchenAid 5KSM150PSP Series manual

KitchenAid

KitchenAid 5KSM150PSP Series manual

Anvil MIX7120 Parts Breakdown

Anvil

Anvil MIX7120 Parts Breakdown

Oursson SM3302 instruction manual

Oursson

Oursson SM3302 instruction manual

Farberware SM3481RBR manual

Farberware

Farberware SM3481RBR manual

Fritel CM 2400 manual

Fritel

Fritel CM 2400 manual

Bosch MFQ35 IN Series instruction manual

Bosch

Bosch MFQ35 IN Series instruction manual

Citronic Z44R user manual

Citronic

Citronic Z44R user manual

manuals.online logo
manuals.online logoBrands
  • About & Mission
  • Contact us
  • Privacy Policy
  • Terms and Conditions

Copyright 2025 Manuals.Online. All Rights Reserved.