manuals.online logo
Brands
  1. Home
  2. •
  3. Brands
  4. •
  5. Kyocera
  6. •
  7. All In One Printer
  8. •
  9. Kyocera 3554ci Manual

Kyocera 3554ci Manual

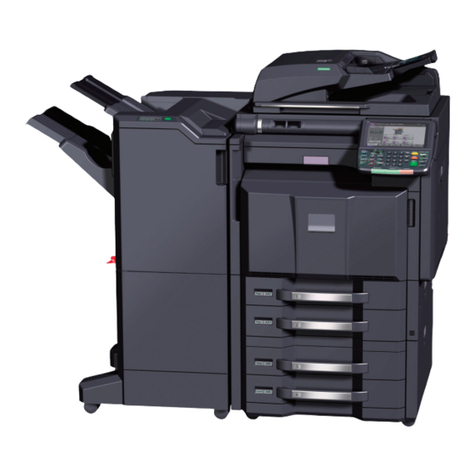
TASKalfa 3554ci/6054ci/7004i Device Setup Procedure
2021-06-04 V1.7
Kyocera Document Solutions Inc.
Masaki Sone
[Introduction]
This document describes an overview of device setup installation.
Please refer to the Service Manual for detailed instructions.
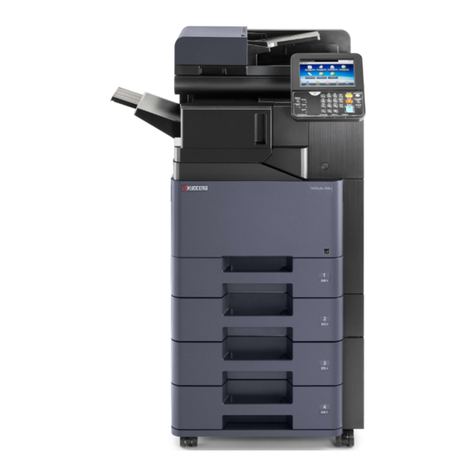
The device is divided into three boxes.
・Main Body : TASKalfa 3554ci
・Document Processor : DP-7140
・Option Cassette : PF-7150
The Additional device is also divided into three boxes for each.
・Main Body : TASKalfa 6054ci
・Document Processor : DP-7160
・Option Cassette : PF-7150
・Main Body : TASKalfa 7004i
・Document Processor : DP-7150
・Option Cassette : PF-7150
You don't need to reuse the wooden frame, but please keep the cardboard box
because you need it if you send it again. (However, you don’t need to return this device
to us.)
[Setup Procedure 3554ci]
STEP1
First of all, connect the Main Body and the Option Cassette. The Option Cassette has
rollers, so it will be easier to move if you connect it first.
Please open the Option Cassette cardboard. This is the base. (It's a medium size
cardboard.)
For information about opening, refer to 2-40 (page 92) in the Service Manual.
Please open the Main Body cardboard. (Largest size cardboard.)
For information about opening, refer to 2-4 (page 56) in the Service Manual.
After opening each one, connect the option cassette under the main body.
Refer to 9-55 (page 1786) in the Service Manual for installation instructions.
Basically, it is possible to connect by just putting the main body on the option cassette.
However, be careful not to break the connector when putting the main body on the
option cassette.
According to the service manual, it is a procedure to screw after connecting, but it is
not necessary.
STEP2
Next, connect the Document Processor on the Main Body.
Please open the Document Processor cardboard. (It's a minimum size cardboard.)
For information about opening, refer to 2-44 (page 96) in the Service Manual.
After opening one, connect the document processor on the main body.
Refer to 9-169 (page 1900) in the Service Manual for installation instructions.
Basically, it is possible to connect by putting it on the main body and insert the
connecter.
Two back covers must be opened to insert the connector.
STEP3
When the above steps are completed, the physical connection is finished.
[Note:] This device is for 100V, so be sure to connect it to 100V (or 120V) power supply.
If connect it to 200V by mistake and press the main switch, there is high risk of device
broken.
Plug in the power supply and press the main switch to start it up.
*If shows any error screen on the operation panel, the connection may be incorrect.
Please turn the power off and check the connection again.
Please check the Document Processor and Option Cassette are running by following
operation:
[Document Processor]
Place the document on the Document Processor and start a single copy. If the
document is scanned from the Document Processor, it is working properly.
[Option Cassette]
Set only the Option Cassette with A4 Paper.
Place the document on the Document Processor and start a single copy. If the paper
is fed from the Option Cassette, it is working properly.
*If it doesn't work, please turn the power off and check the connection again.
This completes the setup as a device.
There is a limit to the amount of Toner, so please refrain from large printing/coping as
much as possible.
[Setup Procedure 6054ci]
STEP1
First of all, connect the Main Body and the Option Cassette. The Option Cassette has
rollers, so it will be easier to move if you connect it first.
Please open the Option Cassette cardboard. This is the base. (It's a medium size
cardboard.)
For information about opening, refer to 2-2 (page 103) in the Service Manual.
Please open the Main Body cardboard. (Largest size cardboard.)
For information about opening, refer to 2-4 (page 63) in the Service Manual.
After opening each one, connect the option cassette under the main body.
Refer to 9-89 (page 2169) in the Service Manual for installation instructions.
Basically, it is possible to connect by just putting the main body on the option cassette.
However, be careful not to break the connector when putting the main body on the
option cassette.
According to the service manual, it is a procedure to screw after connecting, but it is
not necessary.
STEP2
Next, connect the Document Processor on the Main Body.
Please open the Document Processor cardboard. (It's a minimum size cardboard.)
For information about opening, refer to 2-5 (page 106) in the Service Manual.
After opening one, connect the document processor on the main body.
Refer to 9-168 (page 2248) in the Service Manual for installation instructions.
Basically, it is possible to connect by putting it on the main body and insert the
connecter.
Two back covers must be opened to insert the connector.
STEP3
When the above steps are completed, the physical connection is finished.
[Note:] This device is for 100V, so be sure to connect it to 100V (or 120V) power supply.
If connect it to 200V by mistake and press the main switch, there is high risk of device
broken.
Plug in the power supply and press the main switch to start it up.
*If shows any error screen on the operation panel, the connection may be incorrect.
Please turn the power off and check the connection again.
Please check the Document Processor and Option Cassette are running by following
operation:
[Document Processor]
Place the document on the Document Processor and start a single copy. If the
document is scanned from the Document Processor, it is working properly.
[Option Cassette]
Set only the Option Cassette with A4 Paper.
Place the document on the Document Processor and start a single copy. If the paper
is fed from the Option Cassette, it is working properly.
*If it doesn't work, please turn the power off and check the connection again.
This completes the setup as a device.
There is a limit to the amount of Toner, so please refrain from large printing/coping as
much as possible.
[Setup Procedure 7004i]
STEP1
First of all, connect the Main Body and the Option Cassette. The Option Cassette has
rollers, so it will be easier to move if you connect it first.
Please open the Option Cassette cardboard. This is the base. (It's a medium size
cardboard.)
For information about opening, refer to 2-2 (page 101) in the Service Manual.
Please open the Main Body cardboard. (Largest size cardboard.)
For information about opening, refer to 2-3 (page 61) in the Service Manual.
After opening each one, connect the option cassette under the main body.
Refer to 9-56 (page 2356) in the Service Manual for installation instructions.
Basically, it is possible to connect by just putting the main body on the option cassette.
However, be careful not to break the connector when putting the main body on the
option cassette.
According to the service manual, it is a procedure to screw after connecting, but it is
not necessary.
STEP2
Next, connect the Document Processor on the Main Body.
Please open the Document Processor cardboard. (It's a minimum size cardboard.)
For information about opening, refer to 2-4 (page 123) in the Service Manual.
After opening one, connect the document processor on the main body.
Refer to 9-135 (page 2435) in the Service Manual for installation instructions.
Basically, it is possible to connect by putting it on the main body and insert the
connecter.
Two back covers must be opened to insert the connector.
STEP3
When the above steps are completed, the physical connection is finished.
[Note:] This device is for 100V, so be sure to connect it to 100V (or 120V) power supply.
If connect it to 200V by mistake and press the main switch, there is high risk of device
broken.
Plug in the power supply and press the main switch to start it up.
*If shows any error screen on the operation panel, the connection may be incorrect.
Please turn the power off and check the connection again.
Please check the Document Processor and Option Cassette are running by following
operation:
[Document Processor]
Place the document on the Document Processor and start a single copy. If the
document is scanned from the Document Processor, it is working properly.
[Option Cassette]
Set only the Option Cassette with A4 Paper.
Place the document on the Document Processor and start a single copy. If the paper
is fed from the Option Cassette, it is working properly.
*If it doesn't work, please turn the power off and check the connection again.
This completes the setup as a device.
There is a limit to the amount of Toner, so please refrain from large printing/coping as
much as possible.
[for the Security Test]
Make sure the hard disc is installed or not before starting the test by viewing [Device
Information] on the home screen of the device operation panel. If the hard disc is
installed, “Large Capacity Storage: HDD320GB” is displayed. If not, “Large Capacity
Storage:Not Installed” is displayed.
One fax option is missing. Remove it from the device already tested and install it on
the new device. Only need to reseat the fax board, but refer to the Installation Guide
in the Service Manual.
(The device already has a hard disc drive and fax option installed. That is, it is a “with
HDD model”. Also, the current version of firmware is not latest. We will give you the
firmware after the developer tests are complete, so please update when you start the
test.)
If change “the SSD model”, you just need to remove the hard disc drive. To remove
the hard disc drive, open the back cover and disconnect the hard disc drive connector
cable. There is no need to physically remove the hard disc drive.
The settings remain at almost default values.
Please refer the Operation Guide for how to set up each function.
First, configure only the TCP/IP settings for your network on operation panel and
connect to the Command Center RX from your PC's web browser by IP address (e.g.
https://192.168.0.1). This will make the rest of the setup easier.
*Instead of setting up a network with enhanced security, it is recommended that
you first connect at the default level and make sure it works.
In addition, since the storage encryption function is inactive, the encryption function
must be activated from the “system menu > option setting” of the operation panel.
However, once activated, it cannot be deactivated again.
Please contact us if you have any questions. We will update this document in
consideration of the future.
[Other setup information]
・Command Center RX default password
From this product, the default password to access from Command Center RX (Web
browser) has been changed.
ID: “Admin”
Pass: Serial Number of each device
You can confirm the serial number to open the Configuration page of CommandCenter
RX or Device Information screen of Operation Panel.
If you change the password to different value and then execute the initialization
function, it will return to this default value.
・Install printer driver
You can install the Printer Driver from ProductLib files.
Please perform the following installation steps:
1. Copy the “ProductLib” folers to your PC any directly.
2. Launch [Devices and Printers] from [Control Panel].
3. Click [Add a printer].
4. Click [The printer that I want isn’t listed].
5. Select [Add a local printer or network printer with manual settings] and click [Next].
6. Select [Create a new port:].
7. Select [Standard TCP/IP Port] and click [Next].
8. Add printer IP address to [Hostname or IP address] and click [Next].
9. Click [Have Disk...] .
10.Click [Browse...].
11.Select <OEMSETUP.INF> from <…¥ProductLib¥KXDriver¥64bit> and click [OK]. *
If your PC is 32bit, select the “32bit” folder.
12.Select model name and click [Next].
13.Confirm model name and click [Next] and KX Driver installation will be started.
14.Click [Finish] after KX Driver installation.
In the above installation only, the printer driver is connected with the RAW port. In
the security test environment, it have to use IPPS, so the following steps are required.
At first, you need to install the certificate of MFP to your PC.
1. Open the CCRX.
2. Click the Certification error button on URL box of Web browser.
3. Click the Display the certificate and click the install of certificate.
4. Click the Brows button and select the Trusted root CA.
Next, you need to set the Printer setting.
5. Open [Devices and Printers] from Control Panel on Windows
6. Click [Add a printer].
7. Click [The printer that I want isn’t listed].
8. Select [Select a shared printer by name] and enter the text box as following:
https://[host name]:443/printers
9. Click [Next].
If the certificate is not imported correctly, an error message is displayed here.
Please try again to install the certificate
10. Select [Kyocera] and TASKalfa ****
If the installation is successful, when open the printer icon → right-click → Properties
of the printer, the properties screen will be displayed. If fails, an error screen appears.
・Install TWAIN driver
You can install the Printer Driver from ProductLib files.
Please perform the following installation steps:
1. Copy the “ProductLib” folers to your PC any directly.
2. Execute <…¥ProductLib¥TWAIN¥setup.exe>.
3. You can then follow the instructions and proceed with the installation.
・Change the Destination Setting
To enable the Data Security Kit 10, the destination setting must be changed to US.
Change the destination setting from Maintenance mode.
Enter Maintenance mode by the following step.
1. In [Home] screen, enter “10871087” using the Numeric Keypad.
The device does not respond while you press the Numeric Keypad. If all the
number match, the maintenance mode screen is displayed.
Change the destination setting.
2. Enter “252” using the numeric key of Maintenance mode and press [Start].
3. The Destination list is displayed.
The “02 Europe Metric” should be checked.
4. Select the “Inch” and press [Start].
Initializes according to the destination. Wait a few seconds.
5. When [Stop] is pressed, "Power SW Off/On" is displayed, so turn the power switch
off then on.
The destination setting has been changed to US.
* If you want to return to the normal mode from Maintenance mode, enter "001" and press [Start].
However, since it changed the paper size to the “inch” setting, you need to return to
the “Metric” setting by following the steps below.
6. [Home] > [Paper Settings]
Change all cassette settings to Metric.
7. [System menu] > [Device Settings] > [Original/Scan Settings] > [Auto Detect
Original Size] > [System of Units]
Change Metric settings.
The time zone is also changed to US, so please return it.
8. [System menu] > [Device Settings] > [Data/Time] > [Time Zone]
Select “+01:00 Stockholm”.
・Activate Data Security Kit 10 option for HCD-PP
For HCD-PP, you must activate Data Security Kit 10, the IPsec security enhancement
option.
Please perform the following activation steps:
*See also Chapter 5, “Application”, in the product's Operation Guide.
1. [System menu] > [Add/Delete Application] > [Optional Function List] of Optional
Function.
2. The optional function screen is displayed. Select “Data Security Kit 10” and press
[Activate].
3. The license key screen is displayed. Enter the following license key and press
[Official].
TASKalfa 3554ci : 1310-7825-4801-9031-9939
TASKalfa 6054ci : 0738-1335-0037-7277-9222
TASKalfa 7004i : 1069-1544-7708-2848-6869
4. Turn the power switch on again following to the indication in the panel screen.
5. Confirm that Data Security Kit 10 is enabled by the [Device Information] >
[Option/Application].
“Data Security Kit 10: Installed” in the Software area.
[Firmware Update]
Perform the Firmware update as following steps:
1. Unzip the downloaded ZIP file and copy all the files and folders directly under the
USB device.
2. Change the security level setting value to "High" from the operation panel of MFP
device.
[System menu] > [Security Settings] > [Security level]
To change security level settings, you must log-in as DeviceAdmin. (Account:
3500)
*When "Very High", the following update steps does not work.
3. Turn OFF the MFP device.
4. Insert the USB device with the copied firmware into the USB port on the front right
side of the MFP device.
5. Turn ON the MFP device.
6. When the MFP boots, it automatically moves to Firmware Update mode.
Unlike the normal startup screen, the firmware update screen appears.
If the normal startup screen appears, device has not moved to update mode.
Please start again from step 1.
7. If the firmware update screen shows OK, the firmware update is complete.
8. Turn OFF the MFP device, and remove the USB device.
9. Turn ON the MFP device again and check the Firmware version on the Device
Information screen(Software version) of the operation panel.
If any error occurs, please contact us.
[Engine Firmware Update]
If the machine is old device, the following steps are required to update the engine
firmware:
*Please be careful not to make a mistake as there are many firmware files.
1. Open the [Right Cover] of the device.
If open the right cover, the engine (motor) will not drive. It needs to be opened
to stop driving the engine, so please make sure to open it.
2. Update the following special firmware.
*When you unzip the ZIP file, a folder is created, but please copy all files such as ‘.bin’ to the
root directory of the USB device.
3554ci: 2XD_1000.XR2.047
6054ci: 2XC_1000.XR2.054
7004i: 2XF_1000.XR2.054
3. Turn OFF and ON the device.
4. After confirming that "The cover is opend." is displayed on the operation panel,
then turn off the device.
5. Update the official engine firmware.
*When you unzip the ZIP file, a folder is created, but please copy all files such as bin to the root
directory of the USB device.
3554ci: 2XD_1000.002.002
6054ci: 2XC_1000.001.089
7004i: 2XF_1000.001.089
6. The next turn-on may cause another error, but please update the system firmware
accordingly.
3554ci: 2XD_S000.002.266
6054ci: 2XC_S000.002.333
7004i: 2XF_S000.002.333
7. Close the [Right Cover] of the device and turn on.
[How to change SSD model]
To change to the SSD model, you must first disable “encryption/overwrite function”.
To disable this function, perform the following steps:.
1. Update the “special firmware”*1 for changing.
2. After Update, turn the power off/on and boot the device.
3. Save the “special signature file”*2 to the USB device and insert it into the device.
4. After a while, the LED on the device starts blinking.
5. When the LED turns on, the disable process is complete.
6. Turn the power off/on and boot the device.
7. Please check that the encryption/overwrite function has been disabled by
checking that the Hard Disk icon in the upper right corner of the screen has
disappeared or on the Security screen of Device Information.
8. Return to the official firmware. Please update.
Next, to change to the SSD model.
9. Turn the power off and unplug the power cable.
10. Open the back cover and disconnect the two hard disc drive connector cables.
*There is no need to physically remove the hard disc drive.
11. Plug-in the power cable and turn the power on.
12. Please check that the hard drive is disabled on the Device Information screen of
the control panel.
13. Refer to the user-guide to re-enable the encryption/overwrite function.
*1 Special firmware will be sent separately.
*2 Need the serial number information of USB device to create “special signature file”.
---
End of document

This manual suits for next models

2

Other Kyocera All In One Printer manuals
Kyocera TASKalfa 2551ci User manual

Kyocera

Kyocera TASKalfa 2551ci User manual

Kyocera TASKalfa 7550ci User manual

Kyocera

Kyocera TASKalfa 7550ci User manual

Kyocera Triumph-Adler 302ci User manual

Kyocera

Kyocera Triumph-Adler 302ci User manual

Kyocera FS FS-1020D User manual

Kyocera

Kyocera FS FS-1020D User manual

Kyocera KM-1530 User manual

Kyocera

Kyocera KM-1530 User manual

Kyocera TASKalfa 356ci User manual

Kyocera

Kyocera TASKalfa 356ci User manual

Kyocera FS-2020D User manual

Kyocera

Kyocera FS-2020D User manual

Kyocera ECOSYS M6530cdn User manual

Kyocera

Kyocera ECOSYS M6530cdn User manual

Kyocera KM-6030 User manual

Kyocera

Kyocera KM-6030 User manual

Kyocera TASKalfa 3010i User manual

Kyocera

Kyocera TASKalfa 3010i User manual

Kyocera ECOSYS M6035cidn User manual

Kyocera

Kyocera ECOSYS M6035cidn User manual

Kyocera KM-C3130 User manual

Kyocera

Kyocera KM-C3130 User manual

Kyocera FS-2100DN User manual

Kyocera

Kyocera FS-2100DN User manual

Kyocera TASKalfa 6500i User manual

Kyocera

Kyocera TASKalfa 6500i User manual

Kyocera FS-9120DN User manual

Kyocera

Kyocera FS-9120DN User manual

Kyocera FS-1024MFP User manual

Kyocera

Kyocera FS-1024MFP User manual

Kyocera ecosys M2640idw User manual

Kyocera

Kyocera ecosys M2640idw User manual

Kyocera Ecosys M812cidn User manual

Kyocera

Kyocera Ecosys M812cidn User manual

Kyocera FS-1118MFP User manual

Kyocera

Kyocera FS-1118MFP User manual

Kyocera TASKalfa 181 User manual

Kyocera

Kyocera TASKalfa 181 User manual
Kyocera PointSource Ai 4040 manual&nbsp;

Kyocera

Kyocera PointSource Ai 4040 manual&nbsp;

Kyocera TASKalfa 6500i User manual

Kyocera

Kyocera TASKalfa 6500i User manual

Kyocera 255b User manual

Kyocera

Kyocera 255b User manual

Kyocera TASKalfa 820 User manual

Kyocera

Kyocera TASKalfa 820 User manual

Popular All In One Printer manuals by other brands

Sharp MX-1810U Service manual

Sharp

Sharp MX-1810U Service manual

Ricoh Aficio GX3000S Specification sheet

Ricoh

Ricoh Aficio GX3000S Specification sheet

Xerox VersaLink B415 user guide

Xerox

Xerox VersaLink B415 user guide

Oce CS175 Phase 3 User's guide controller

Oce

Oce CS175 Phase 3 User's guide controller

Epson STYLUS OFFICE BX610FW Series Specifications

Epson

Epson STYLUS OFFICE BX610FW Series Specifications

Konica Minolta PagePro 1380 MF Service manual

Konica Minolta

Konica Minolta PagePro 1380 MF Service manual

THORLABS CM401 user guide

THORLABS

THORLABS CM401 user guide

Xerox WorkCentre 7525 Secure installation and operation

Xerox

Xerox WorkCentre 7525 Secure installation and operation

Olivetti d-Copia 45 Operation guide

Olivetti

Olivetti d-Copia 45 Operation guide

Lanier 5613 brochure

Lanier

Lanier 5613 brochure

Xerox WorkCentre 5016 specification

Xerox

Xerox WorkCentre 5016 specification

Brother MFC-J6520DW Basic user's guide

Brother

Brother MFC-J6520DW Basic user's guide

Canon Color imageRUNNER LBP5975 Brochure & specs

Canon

Canon Color imageRUNNER LBP5975 Brochure & specs

Brother Business Smart MFC-J4510dw Advanced user's guide

Brother

Brother Business Smart MFC-J4510dw Advanced user's guide

Triumph Adler DCC 6526L user manual

Triumph Adler

Triumph Adler DCC 6526L user manual

Epson CX7800 - Stylus Color Inkjet Basic guide

Epson

Epson CX7800 - Stylus Color Inkjet Basic guide

Brother MFC-J4335DW Online user's guide

Brother

Brother MFC-J4335DW Online user's guide

Brother MFC-J4310DW manual

Brother

Brother MFC-J4310DW manual

manuals.online logo
manuals.online logoBrands
  • About & Mission
  • Contact us
  • Privacy Policy
  • Terms and Conditions

Copyright 2025 Manuals.Online. All Rights Reserved.