manuals.online logo
Brands
  1. Home
  2. •
  3. Brands
  4. •
  5. KYORITSU
  6. •
  7. Measuring Instrument
  8. •
  9. KYORITSU KEW2040 User manual

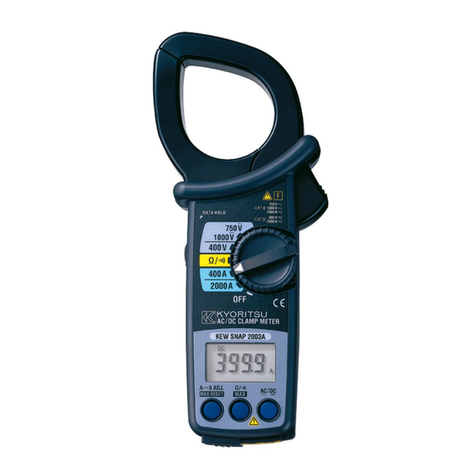
KYORITSU KEW2040 User manual

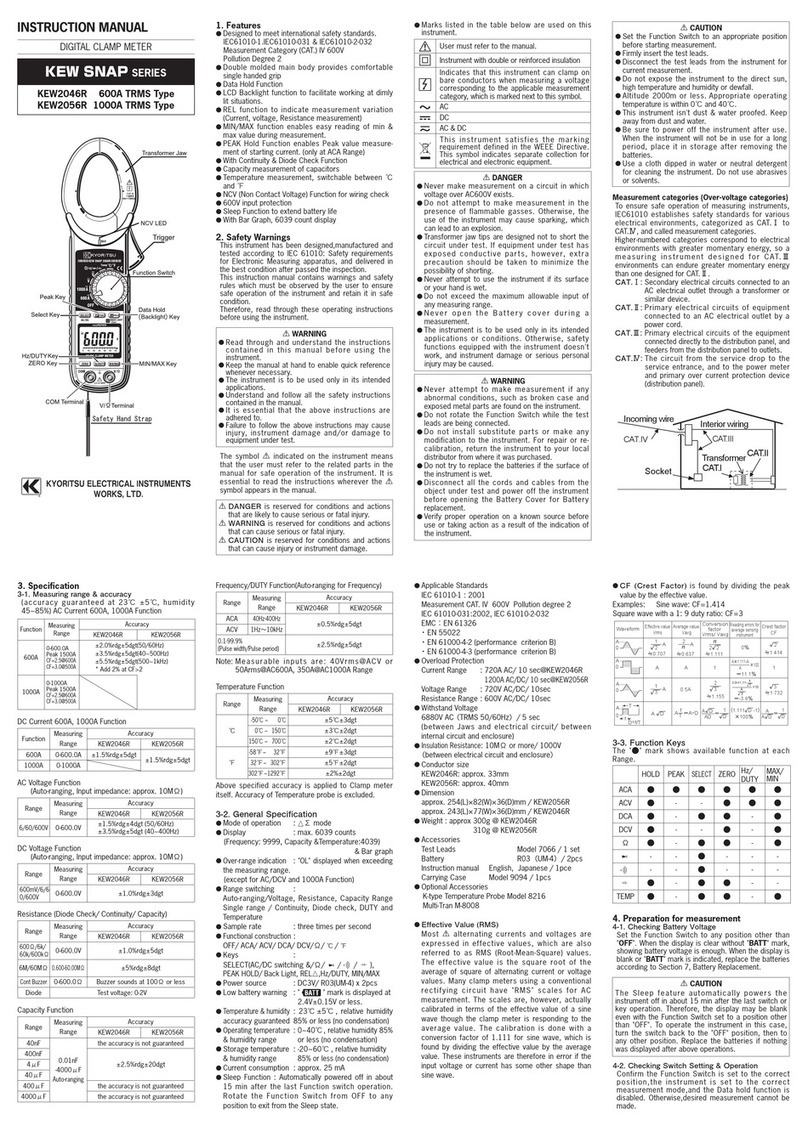
INSTRUCTION MANUAL
DIGITAL CLAMP METER
KEW SNAP
 
SERIES
KEW2040
 
600A AC Only Type
KEW2055
 
1000A AC/DC Type
1.Features
●
Designedtomeetinternationalsafetystandards.
 
IEC61010-1.IEC61010-031:2002&IEC61010-2-032
 
MeasurementCategory(CAT.)IV600V
 
PollutionDegree2
●
Double molded main body provides comfortable

singlehandedgrip
 
●
DataHoldFunction
●
LCD Backlight function to facilitate working at
dimlylitsituations.(KEW2055only)
●
RELfunctiontoindicatemeasurementvariation.
 
(Current,voltage,Resistancemeasurement)
●
MIN/MAX function enables easy reading of min &
maxvalueduringmeasurement.
●
WithContinuity&DiodeCheckFunction
●
NCV
(
Non Contact Voltage
)
Function for wiring
check.
●
600Vinputprotection.
●
Sleepfunctiontoextendbatterylife.
●
WithBarGraph,6039counts
2. Safety Warnings
This instrument has been designed, manufactured and
testedaccordingtoIEC61010:Safetyrequirementsfor
ElectronicMeasuringapparatus,anddeliveredin
the best condition after passed the inspection. This
instructionmanualcontainswarningsandsafety
rules which must be observed by the user to ensure
safeoperation of the instrumentand retain it insafe
condition.
Therefore, read through these operating instructions
beforeusingtheinstrument.
 
WARNING
●
Read through and understand the instructions
containedinthismanualbeforeusingthe
instrument.
●
Keepthemanualathandtoenablequick
referencewhenevernecessary.
●
Theinstrumentistobeusedonlyinitsintended
applications.
●
Understandandfollow allthesafety
instructionscontainedinthemanual.
●
It is essential that the above instructions are
adheredto.
●
Failure to follow the above instructions may
causeinjury,instrumentdamageand/ordamage
toequipmentundertest.
Thesymbol indicatedontheinstrumentmeansthat
theusermustrefertotherelatedpartsinthemanual
forsafeoperationoftheinstrument.It is essential to
read the instructions wherever the  symbol appears
inthemanual.
 
DANGER is reserved for conditions and actions
that are likely to cause serious or fatal injury.
 
WARNING is reserved for conditions and actions
that can cause serious or fatal injury.
 
CAUTION is reserved for conditions and actions
that can cause injury or instrument damage.
●
Marks listed in the table below are used on this
instrument.
Usermustrefertothemanual.
Instrumentwithdoubleorreinforcedinsulation
Indicates that this instrument can clamp on
bare conductors when measuring a voltage
corresponding to the applicable measurement
category,whichismarkednexttothissymbol.
AC
 DC
AC&DC
 
DANGER
●
Nevermakemeasurementonacircuitinwhich
voltageoverAC600Vexists.
●
Do not attempt to make measurement in the
presence of flammable gasses. Otherwise, the
useoftheinstrumentmaycausesparking,
whichcanleadtoanexplosion.
●
Transformerjawtips aredesignednottoshort
the circuit under test. If equipment under test
has exposed conductive parts, however, extra
precaution should be taken to minimize the
possibilityofshorting.
●
Never attempttousetheinstrumentifits
surfaceoryourhandiswet.
●
Donotexceedthemaximumallowableinputof
anymeasuringrange.
●
NeveropentheBatterycoverduringa
measurement.
●

Theinstrumentistobeusedonlyinitsintended
applications or conditions. Otherwise, safety
functions equipped with the instrument doesn

t
work,andinstrumentdamageorseriouspersonal
injurymaybecaused.
 
WARNING
●
Never attempt to make measurement if any
abnormalconditions,suchasbrokencase
andexposedmetalpartsarefoundonthe
instrument.
 
●
Do not rotate the Function Switch while the
testleadsarebeingconnected.
●
Do not install substitute parts or make any
modification to the instrument. For repair or
re-calibration, return the instrument to your
localdistributorfromwhereitwaspurchased.
●
Donottrytoreplacethebatteriesifthe
surfaceoftheinstrumentiswet.
●
Disconnect all the cords and cables from the
objectundertestandpowerofftheinstrument
before opening the Battery Cover for Battery
replacement.
●
Verifyproperoperationonaknownsource
before use or taking action as a result of the
indicationoftheinstrument.
●
Use appropriate personal protective equipment
suchasinsulatinggloves,Insulatingboots,and
safetyglasses.

 
CAUTION
●
SettheFunctionSwitchtoanappropriate
positionbeforestartingmeasurement.
 
●
Firmlyinsertthetestleads.
 
●
Disconnect the test leads from the instrument
forcurrentmeasurement.
 
●
Donotexposetheinstrumenttothedirectsun,
hightemperatureandhumidityordewfall.
 
●
Altitude 2000m or less. Appropriate operating
temperatureiswithin0
℃
and40
℃
.
●
Thisinstrumentisn

tdust&waterproofed.Keep
awayfromdustandwater.
●
Be sure to power off the instrument after use.
When the instrument will not be in use for a
longperiod, place it in storage after removing
thebatteries.
●
Usea cloth dipped in water or neutral
detergent for cleaning the instrument. Do not
useabrasivesorsolvents.
Measurement Category
To ensure safe operation of measuring instruments,
IEC 61010 establishes safety standards for various
electrical environments, categorized as O to CAT IV,
and called measurement categories. Higher-numbered
categories correspond to electrical environments with
greatermomentary energy, soameasuringinstrument
designedforCATIII environmentscanendure greater
momentaryenergythanonedesignedforCATII.
O
:Circuits which are not directly connected
tothemainspowersupply.
CAT II
:Electrical circuits of equipment connected
toanACelectricaloutletbyapowercord.
CAT III
:Primary electrical circuits of the
equipment connected directly to the
distribution panel, and feeders from the
distributionpaneltooutlets.
CAT IV
:The circuit from the service drop to the
service entrance, and to the power meter
andprimaryover-currentprotectiondevice
(distributionpanel).
3. Specification
3-1. Measuring range & accuracy
(accuracyguaranteedat23
℃±
5
℃
.humidity45
〜
85%)
ACCurrent600A,1000AFunction
Function Measuring
Range
Accuracy
KEW2040 KEW2055
600A 0-600.0A
±
1.5%rdg
±
5dgt
(50/60Hz)
±
3.5%rdg
±
8dgt
(40-400Hz)
±
1.5%rdg
±
5dgt
(50/60Hz)
±
3.5%rdg
±
8dgt
(40-400Hz)
1000A 0-1000A
N/A
DCCurrent600A,1000AFunction
Function Measuring
Range
Accuracy
KEW2040 KEW2055
600A
0-600.0A
N/A
±
1.5%rdg
±
5dgt
1000A
0-1000A
N/A
ACVoltageFunction

(
Auto-ranging,Inputimpedance:approx.10M
Ω)
Range Measuring
Range
Accuracy
KEW2040 KEW2055
6/60/600V 1-600.0V
±
1.3%rdg
±
4dgt(50/60Hz)
±
3.0%rdg
±
5dgt(40
〜
400Hz)
DCVoltageFunction

(
Auto-ranging,Inputimpedance:approx.10M
Ω)
Range Measuring
Range
Accuracy
KEW2040 KEW2055
600mV/6/
60/600V 0-600.0V
±
1.0%rdg
±
3dgt
Resistance
(
Continuity/DiodeCheck
)
Function
Range Measuring
Range
Accuracy
KEW2040 KEW2055
600
Ω
/6k/
60k/600k
Ω
6M
Ω
0-6M
Ω
±
1.0%rdg
±
5dgt
60M
Ω
6.00M-
60.00M
Ω
±
5%rdg
±
8dgt
ContBuzzer 0-600.0
Ω
Thresholdvalue:60
Ω±
30
Ω

Diode
Testvoltage:0-2V
Frequency/DUTYFunction
(
Auto-rangingfor
Frequency
)
Range Measuring
Range
Accuracy
KEW2040 KEW2055
ACA 40Hz
−
400Hz
±
0.5%rdg
±
5dgt
ACV 1Hz
〜
10kHz
0.1-99.9%
(Pulsewidth/Pulseperiod)
±
2.5%rdg
±
5dgt
Note:Measurableinputsare:40Vrms@ACVor
60Arms@AC600A,350A@AC1000ARange
3-2. General Specification
●
Modeofoperation
 
:
Δ
∑mode
●
Display 
 
:max.6039counts

     
(Frequency:9999)&Bargraph
●

Over-range indication : "OL" displayed when exceeding
t h e  m e a s u r i n g  r a n g e .  ( e x c e p t  f o r  A C / D C V  a n d  1 0 0 0 A 
Function)
●
Rangeswitching :
 
Auto-ranging/Voltage,ResistanceRange
 
Singlerange/Continuity,Diodecheckand
DUTY
●
Samplerate
  
:threetimespersecond
●
Functionalconstruction:
 
OFF/ACA/ACV/DCV/
Ω
KEW2040
 
OFF/ACA/DCA/ACV/DCV/
Ω
KEW2055
●
Keys  :
 
SELECT(AC/DCswitching&/
Ω
/ / ),REL
Δ
,
 
Hz/DUTY,MIN/MAX,HOLD/BackLight(KEW2055)
●
Powersource :DC3V/R03(UM-4)x2pcs
●
Lowbatterywarning
:
" "markisdisplayedat

   
2.4V
±
0.15Vorless.
●

Temperature & humidity : 23
℃±
5
℃
, relative humidity

accuracyguaranteed85%orless(nocondensation)
●
Operatingtemperature:0
〜
40
℃
,relativehumidity
 
&humidityrange85%orless(nocondensation)
●
Storagetemperature :-20
〜
60
℃
,relativehumidity

 
&humidityrange85%orless(nocondensation)
●
Currentconsumption:approx.12mA
●
SleepFunction:Automaticallypoweredoffinabout
 
15minafterthelastFunctionswitchoperation.
 
Press any key or rotate the Function Switch from
OFFtoanypositiontoexitfromtheSleepstate.
●
Locationforuse
Outdooruse,Altitudeupto2000m
●
ApplicableStandards
 
IEC61010-1,61010-2-033
 
MeasurementCAT.IV600VPollutiondegree2
 
IEC61010-031,IEC61010-2-032
 
EMC
:
EN61326-1
 ・
EN55022
 ・
EN61000-4-2(performancecriterionB)
 ・
EN61000-4-3(performancecriterionB)
●
RoHS
:
EN50581
●
OverloadProtection
 
CurrentRange :720AAC/10sec@KEW2040

 
1200AAC/DC/10sec@KEW2055
 
VoltageRange :720VAC/DC/10sec
 
ResistanceRange :600VAC/DC/10sec
●
WithstandVoltage
 
6720VAC
(
TRMS50/60Hz
)
/5sec
 
(betweenJawsandelectricalcircuit/betweeninternal

 
circuitandenclosure)
●
InsulationResistance:10M
Ω
ormore/1000V
 (
betweenelectricalcircuitandenclosure
)
●
Conductorsize
 
KEW2040:approx.33mm
 
KEW2055:approx.40mm
●
Dimension
 
approx.254(L)
×
82(W)
×
36(D)mm/KEW2055
 
approx.243(L)
×
77(W)
×
36(D)mm/KEW2040
●
Weight:approx.:300g@KEW2040
 
:310g@KEW2055
●
Accessories
 
 
TestLeads Model7066A/1set
 
BatteryR03
(
UM-4
)
/2pcs
 
InstructionmanualEnglish,Japanese/1pce
 
CarriyngCaseModel9094/1pcs
3-3. Function Keys
The"
●
"markshowsavailablefunctionateachRange.
DCCurrentMeasurement(KEW2055only)
HOLD SELECT ZERO Hz/
DUTY MAX/
MIN
ACA
●●●●●
ACV
●
-
●●●
DCA
●●●
-
●
DCV
●
-
●
-
●
Ω●●●
-
●
-
●
---
-
●
---
4. Preparation for measurement
4-1. Checking Battery Voltage
Set the Function Switch to any position other than
"
OFF
".Whenthedisplay isclearwithout "
BATT
"mark,
showing, battery voltage is enough. When the display
is blank or
 
"
BATT
"  mark is indicated, replace the
batteriesaccordingtoSection7,BatteryReplacement.
 
CAUTION
TheSleepfeatureautomaticallypowersthe
instrument off in about 15 min after the last
switch or key operation. Therefore, the display
may be blank even with the Function Switch set
to a position other than  "
OFF
". To operate the
instrument in this case, turn the switch back to
the  "
OFF
"  position, then to any other position,
orpressanykey.Replacethebatteriesifnothing
wasdisplayedafteraboveoperations.
4-2. Checking Switch Setting & Operation
Confirm the Function Switch is set to the correct
position,theinstrumentissettothecorrect
measurementmode,
and the Data hold function is disabled. Otherwise,
desiredmeasurementcannotbemade.
5. Measurement
5-1. AC Current Measurement
 
DANGER
●
Never make measurement on a circuit in which
voltage over AC600V exists to avoid getting
electricalshock.
●
Transformer jaw tips are designed not to short
the circuit under test. If equipment under test
has exposed conductive parts, however, extra
precautionshouldbetakentominimizethe
possibilityofshorting.
●
Donotmake measurement with the Battery
Coverremoved.
●
Disconnectthetestleadsfromtheinstrumentfor
currentmeasurement.
(1)SettheFunctionSwitchto"
600A
" or "
1000A
"
position.(onKEW2040,only"600A"isavailable)
AChasbeenselectedbydefault;presstheSELECT
key, when DC has been selected, to change it to
AC.ACmarkisdisplayedattheupperleftonthe
display.(KEW2055only)
(2)Pressthetriggertoopenthetransformerjawsand
clampthemontotheoneconductorundertest,then
take the reading on the display. Pressing the "
Hz/
DUTY
" Key switches the indication in following
sequence.
AC Current
⇨
Hz
⇨
DUTY
Hz/DUTY
 Function requires 60A or more at AC600A
Rangeand350AormoreatAC1000Arange.
 
CAUTION
●
MaxconductorsizeforKEW2040isapproxdia.
33mm and for KEW2055 is approx dia. 40mm.
During current measurement, keep the trans
former jaws fully closed. Other wise, accurate
measurementscannotbetaken.
●
Keepyourfingersandhandsbehindthebarrier
duringmeasurement.
5-2. DC Current Measurement (KEW2055 only)
 
DANGER
●
Nevermakemeasurementonacircuitinwhich
voltage over DC600V exists to avoid getting
electricalshock.
●
Do not make measurement with the Battery
Coverremoved.
(1)SettheFunctionSwitchto"
600A
" or "
1000A
"
position. AC has been selected by default; press
the SELECT  key, when AC has been selected, to
changeittoDC.
DCmarkisdisplayedattheupperleftonthe
Barrier
O: Device which is
not directly
connected to the
mains power supply
Barrier
:
It isapartprovidingprotectionagainst
electricalshockand ensuring the minimum
requiredairandcreepagedistances.
5-4. DC Voltage Measurement
 
DANGER
●
Nevermakemeasurementonacircuitinwhich
voltage over DC600V exists to avoid getting
electricalshock.
●
Do not make measurement with the Battery
Coverremoved.
●

Keep your fingers behind the barrier on the
instrumentduringmeasurement.
(1)SettheFunctionSwitchto"
DCV
"position.
(2)ConnecttheredtestleadtoV/
Ω
terminalandthe
blacktestleadtoCOMterminal.
(3)Connectthe red and black test leads to the
positive (+)and negative (-) sides of the circuit
under test respectively. Take the reading on the
display. If the connection is reversed, the display
indicatesthe"-"mark.
5-5. Resistance/ Cont/ Diode Measurement
 
DANGER
●
Neverusetheinstrumentonanenergizedcircuit.
●
Do not make measurement with the Battery
Coverremoved.
Resistance
(1)Set the Function Switch to  "
Ω/ Cont/ Diode
" 
position.
(2)ConnecttheredtestleadtoV/
Ω
terminalandthe
black test lead to COM terminal. Confirm "OL" is
indicatedonthedisplay,andthenshort-circuitthe
tipsoftestleadstomaketheindicationzero.
(3)Connect the test leads to the both ends of the
resistorundertest.
(4)Takethereadingonthedisplay.
     
 
CAUTION
●

Evenifshortthetestleadtips,indicatedvalue
may not be zero. But this is because of the
resistanceoftestleadsandnotafailure.
●
Whentestleadsareopen,"OL"isindicatedon
thedisplay.
●
Keepyourfingersandhandsbehindthebarrier
duringmeasurement.
Continuity
(1)Set the Function Switch to  "
Ω/ Cont/ Diode
" 
position. "
Ω
"  has been selected by default; press
theSELECTkeytochangeitto"
Continuity
".
Resistance ⇨ Cont ⇨ Diode
(2)ConnecttheredtestleadtoV/
Ω
terminalandthe
black test lead to COM terminal. Confirm "
OL
" is
indicated on the display and short-circuit the tips
of test leads. Indication should become zero and
buzzersounds.
(3)Connect the test leads to the both ends of the
conductor under test. The buzzer sounds, if the
resistanceundertestis100
Ω
orless.
Diode
(1)SettheFunctionSwitchto"
Ω/ Cont/ Diode
"
position. "
Ω
" has been selected by default; press
theSELECTkeytochangeitto"
Diode
"
Resistance ⇨ Cont ⇨ Diode
(2)ConnecttheredtestleadtoV/
Ω
terminalandthe
blacktestleadtoCOMterminal.
(3)ConnecttheredandblacktestleadstotheAnode
and Cathode of the diode under test respectively.
Takethereading on the display. If the connection
isreversed,thedisplayindicates"
OL
".
 
CAUTION
●
Someof diodescannotbetested.Indication on
thedisplaywillbe"OL".
 

(Zenerdiode,LEDand
soon)
6. Other functions
6-1. Sleep Function
(1)This is a function to prevent the instrument from
beingleftpoweredoninordertoconservebattery
life.
Thisfunctioncausestheinstrumenttoenter
Sleepmodeabout15minutesafterthelast
key operation. To exit the Sleep mode, turn the
Functionswitchto"
OFF
",thentoanyotherposition,
orpressanyKey.
(2)SleepFunctionisdisabledwhen;MIN/MAX
Function is selected. Continuous measurement is
made with the Sleep Function being disabled. To
activate Sleep Function again, disable the MIN/
MAXFunction.
 
CAUTION
●
The instrument consumes small amount of
batterypowerintheSleepmode. Set the
FunctionSwitchtotheOFFpositionafteruse.
6-2. HOLD Key
(1)DataHoldFunction
This is a function to freeze the measured value
onthedisplay.Pressthe"HOLD" key to freeze the
reading.
The reading will be held regardless of subsequent
variationininput."
H
"isindicatedontheupperleft
cornerofthedisplaywhiletheinstrumentisinthe
DataHoldmode.ToexitDataHoldmode,pressthe
"HOLD"keyagain.
    
 
CAUTION
●
Held readings are released when Sleep
Functionisactivatedwhiletheinstrumentisin
theDataHoldmode.
(2)BacklightON/OFF(KEW2055only)
PressingtheHOLDkey2secormorelightsupthe
Backlight. Pressing the HOLD key 2 sec or more
againturnsofftheBacklight.
6-3. NCV Function
Red LED on the upper area on the Panel lights up
at all functions except for OFF when electric field
exceeding 100V is detected by the sensor installed in
theJaws.
Itindicatesapresenceof
voltageinanelectricalcircuit
or equipment without touching
them.
NCVSensorcandetect
electrical field only from the
directionindicatedintheright
figure.
Putthefixedelement(left
side) closer to the conductor
undertest.
Detectionagainstin-wall
outletisimpossible.
 
DANGER
●

The LED may not light up due to installation
condition of electrical circuit or equipment.
Never touch the circuit under test to avoid
possibledangereveniftheLEDforNCV
doesn

tlightup.
●

CheckthefunctionalityofLEDonawell-known
power supply prior to measurement. When the
LEDdoesn

tlightup,donotmakemeasurement.
●
NCVindicationisaffectedbyexternalvoltage,
howtoholdorplacetheinstrument.
6-4. MIN/MAX Function
 
CAUTION
●
SELECT, ZERO, Hz/DUTY keys are disabled
whileMIN/MAXFunctionisbeingactivated.
(1)
AC/DC Current Range
(AC600AonlyonKEW2040)
PressingtheMIN/MAXKey at 600A&1000A
Function enables min or max value measurement.
PresstheMIN/MAXKeytoselectMAXorMIN.The
maxorminvaluewithinmeasuringrange isbeing
held until this function is disabled. "MIN" or "MAX"
is indicated on the display while this function is
being activated. To disable this function, press
down the MIN/MAX Key at least 2 sec or change
functions.
(2)
AC/DC Voltage Range

 
CAUTION
●
Pressing the MIN/MAX Key without applying
voltagedisablestheAuto-rangingfunctionand
fixes the Range to 6V. Connect the test leads
tothecircuitundertestandpresstheMIN/MAX
Key after an appropriate range is selected by
Auto-rangingfunction.
Pressing the MIN/MAX Key enables min or max value
measurement. Press the MIN/MAX Key to select MAX
orMIN.Themaxorminvaluewithinmeasuringrange
is being held until this function is disabled. "MIN" or
"MAX"isindicatedonthedisplaywhilethisfunctionis
beingactivated.
Todisablethisfunction,pressdowntheMIN/MAXKey
atleast2secorchangefunctions.
6-5. ZERO Function
 
CAUTION
●

MIN/MAX,PEAK keys are disabled while ZERO
Functionisbeingactivated.
ZeroAdjustment FunctionatCurrentRange "
Δ
"mark
istobeindicatedattheupperrightonthedisplaywhile
ZEROfunctionisbeingoperated.Indicationofrelative
value at Current, Voltage, Resistance: Pressing the
ZERO Key indicates REL (relative value) Press the
ZERO Key to save the initial value at the start of
measurementasareferencevalue.Thenthedifference
betweenthelatermeasured values and the reference
valueisindicatedonthedisplay.
TheAuto-rangingfunction is disabled, while this
functionisbeingactivated, andtheRange isfixedto
theRangeselectedatthestartofmeasurement.
Relativevalueisindicatedwithinfollowingranges.
(
Measuringrange
)
=(Full-scalevalueatthefixedRange)‒(Initialvalue)
Todisablethisfunction,pressdowntheMIN/MAXKey
atleast2secorchangefunctions.
6-6. Over-flow indication
When the input exceeds the measuring range at each
FunctionotherthanVoltageand1000ARange,"OL"or
"-OL"isindicatedonthedisplay.
7. Battery Replacement
 
WARNING
●

MIN/MAX,PEAKkeysare disabledwhileZERO
Functionisbeingactivated.
 
CAUTION
●

Donotmixoldandnewbatteries.
●

Installbatteriesincorrectpolarityasindicated
intheBatteryCompartment.
ReplacethebatterieswhenaLow Battery
Voltage warning "BATT" mark is indicated on the
display. Note that when the battery is completely
exhausted,thedisplayblankswithout"
BATT
"mark
shown.
(1)SettheFunctionSwitchto"OFF"position.
(2)Unscrew and remove the Battery Compartment
Coveronthebottomoftheinstrument.
(3)Replace the batteries observing correct polarity.
UsenewR03(AAA)orLR03/1.5Vbatteries.
(4)Install the Battery Compartment and tighten the
screws.
display.
(2)Withthetransformerjawsclosedandwithout
clampingthemontotheconductor,pressthe
"
ZERO
" key to zero adjust the display. (mark is
displayedattheupperrightonthedisplay.)
(3)Pressthetriggertoopenthetransformerjawsand
clampthemontotheoneconductorundertest,the
conductorshouldbeatthecenterofthejaws,then
takethereadingonthedisplay.
(4)Set theFunctionSwitchto an appropriateposition
accordingtocurrentundertest.
(5)Pressing the  "
ZERO
"  key again releases  "
ZERO
" 
function. (mark at the upper right on the display
disappears.)
 
CAUTION
●
When the current flows from the upside (the
displayside)totheundersideoftheinstrument,
thepolarityofthereadingispositiveandvice
versa.
●
Keepyourfingersandhandsbehindthebarrier
duringmeasurement.
5-3. AC Voltage Measurement
 
DANGER
●
Nevermakemeasurementonacircuitinwhich
voltage over AC600V exists to avoid getting
electricalshock.
●
Do not make measurement with the Battery
Coverremoved.
●
Keep your fingers behind the barrier on the
instrumentduringmeasurement.
(1)SettheFunctionSwitchto"
ACV
"position.
(2)ConnecttheredtestleadtoV/
Ω
terminalandthe
blacktestleadtoCOMterminal.
(3)Connect the test leads to the circuit under test.
Takethereadingonthedisplay.Pressingthe
"
Hz/DUTY
"keywhilereadingisindicatedon
the display switches the indication in following
sequence.
 
AC Voltage ⇨ Hz ⇨ DUTY
 
CAUTION
●
Hz/DUTYFunctionrequiresAC40Vorhigher.
●
To measure a frequency, measure the voltage
ontheelectricalcircuitinadvance.
●
Then press the Hz/DUTY key to enter into
frequencymeasurement.
●
Readingsof frequency mayfluctuate orbe
influencedundernoisyenvironment.
Anode
Cathode
92-1801C8-16
8. Maintenance
●
Cleaning
Use a cloth dipped in water or neutral detergent for
cleaningtheinstrument.
Donotuseabrasivesorsolvents.Otherwise,instrument
getdamaged,deformedordiscolored.

This manual suits for next models

1

Other KYORITSU Measuring Instrument manuals

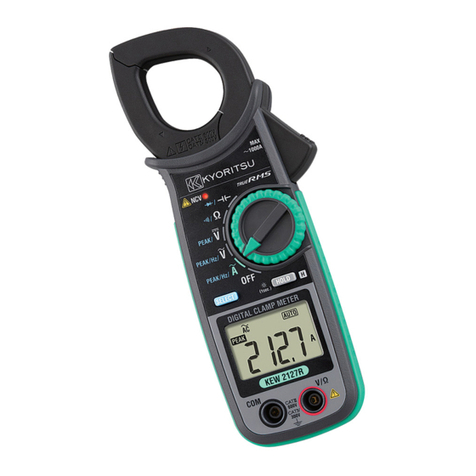
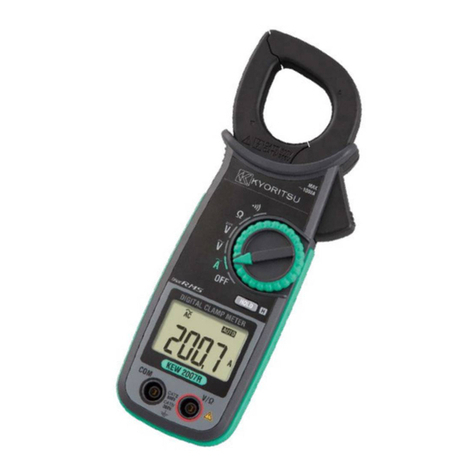
KYORITSU KEW2127R User manual

KYORITSU

KYORITSU KEW2127R User manual

KYORITSU KEW 6300 Assembly instructions

KYORITSU

KYORITSU KEW 6300 Assembly instructions

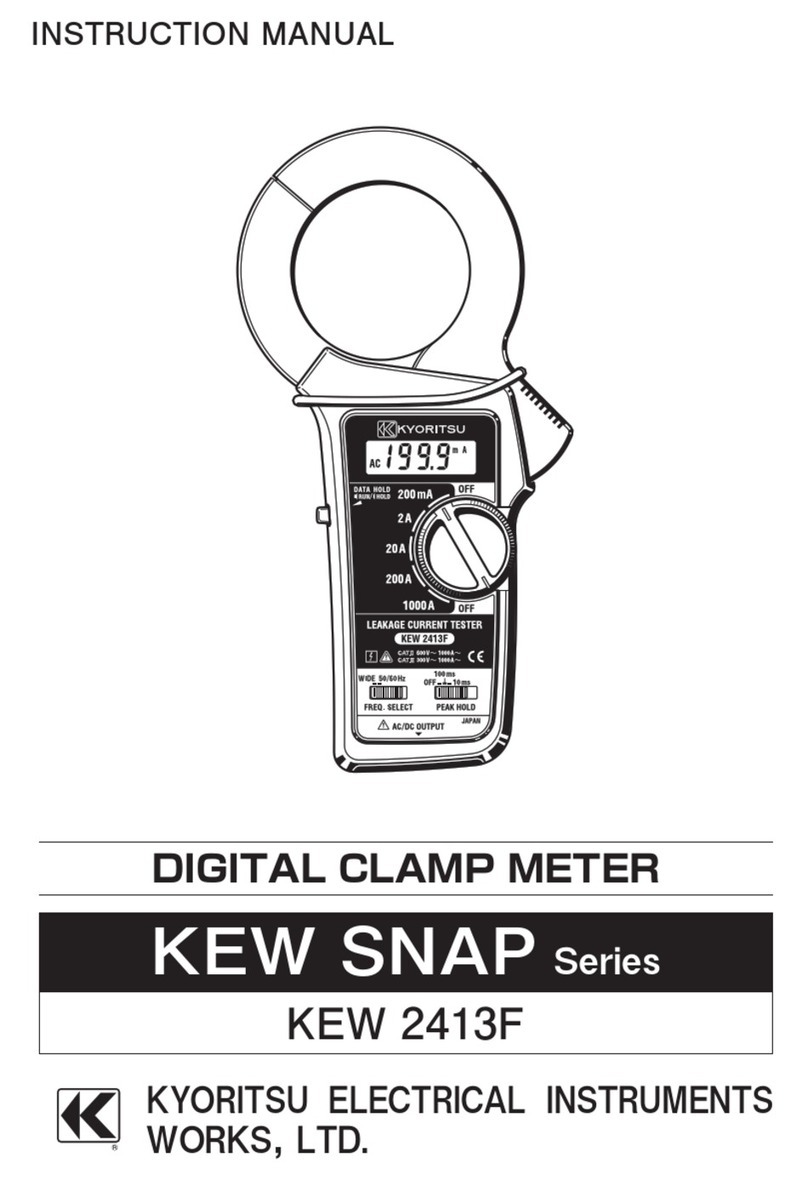
KYORITSU KEW SNAP Series User manual

KYORITSU

KYORITSU KEW SNAP Series User manual

KYORITSU KEW 6305 User manual

KYORITSU

KYORITSU KEW 6305 User manual

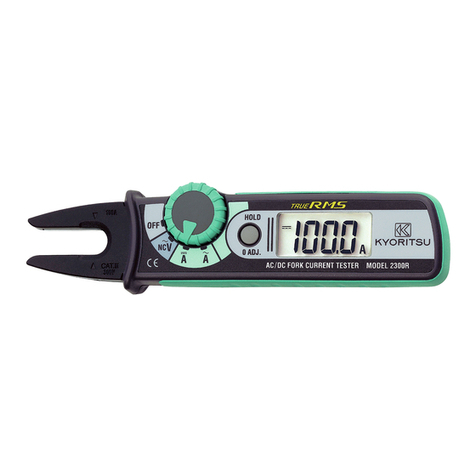
KYORITSU KEW FORK 2300R User manual

KYORITSU

KYORITSU KEW FORK 2300R User manual

KYORITSU KEW 2007R User manual

KYORITSU

KYORITSU KEW 2007R User manual

KYORITSU KEW 6310 Installation guide

KYORITSU

KYORITSU KEW 6310 Installation guide

KYORITSU 8115 User manual

KYORITSU

KYORITSU 8115 User manual

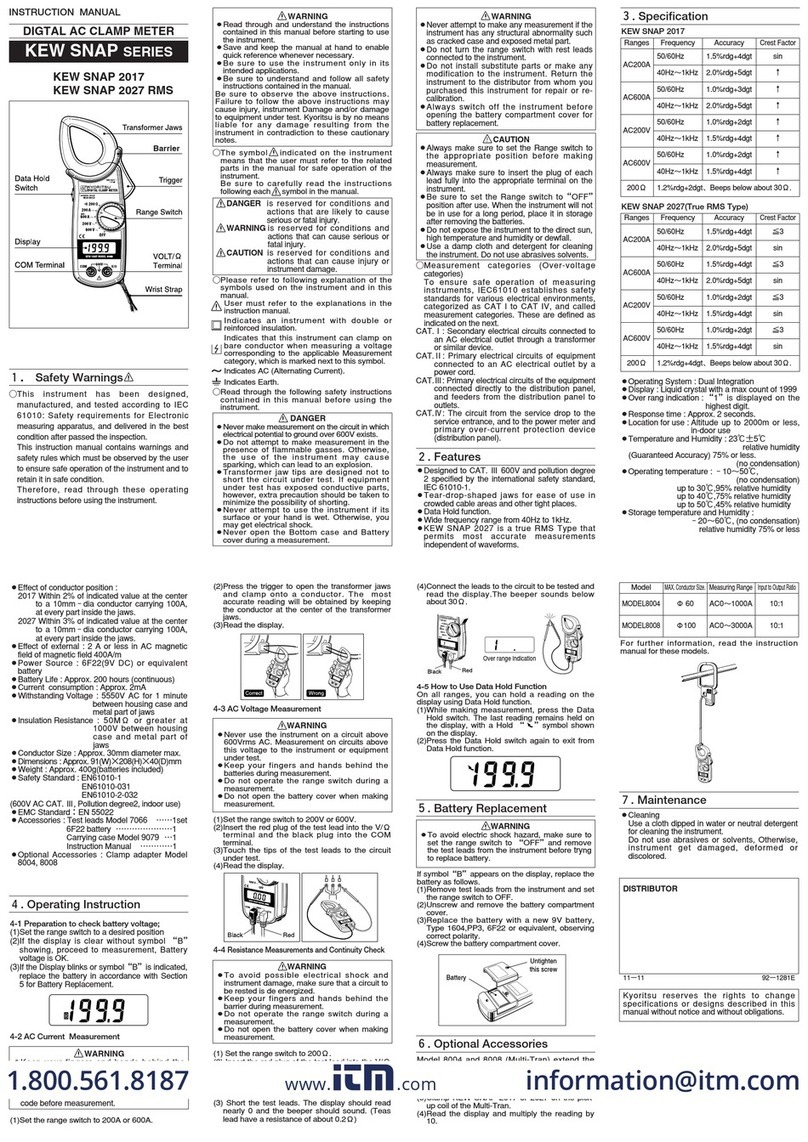
KYORITSU KEW SNAP Series User manual

KYORITSU

KYORITSU KEW SNAP Series User manual

KYORITSU KEW 6305 Installation guide

KYORITSU

KYORITSU KEW 6305 Installation guide

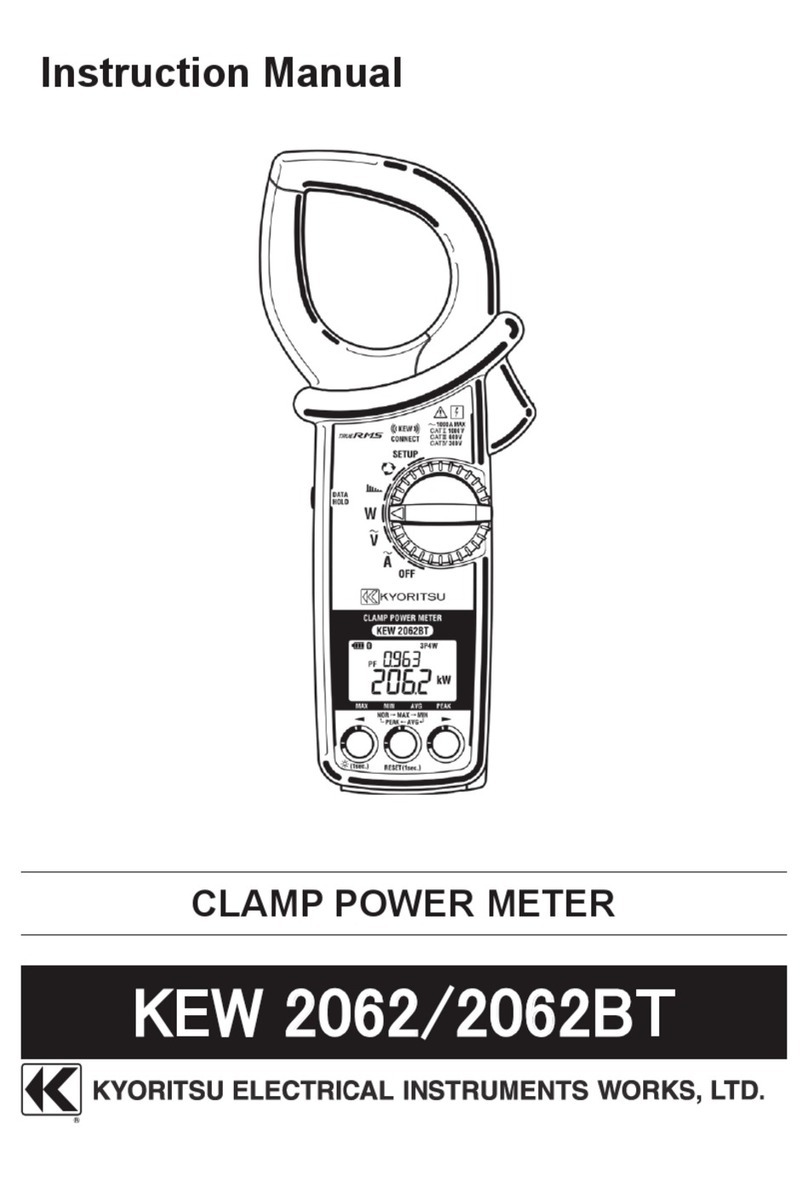
KYORITSU KEW 2062 User manual

KYORITSU

KYORITSU KEW 2062 User manual

KYORITSU KEW SNAP 2413R User manual

KYORITSU

KYORITSU KEW SNAP 2413R User manual

KYORITSU KEW Smart User manual

KYORITSU

KYORITSU KEW Smart User manual

KYORITSU 2062 User manual

KYORITSU

KYORITSU 2062 User manual

KYORITSU 6300 User manual

KYORITSU

KYORITSU 6300 User manual

KYORITSU KEW2046R User manual

KYORITSU

KYORITSU KEW2046R User manual

KYORITSU 6300 Installation guide

KYORITSU

KYORITSU 6300 Installation guide

KYORITSU KEW SNAP 2009R User manual

KYORITSU

KYORITSU KEW SNAP 2009R User manual

KYORITSU KEW2200R User manual

KYORITSU

KYORITSU KEW2200R User manual

KYORITSU KEW 6305 User manual

KYORITSU

KYORITSU KEW 6305 User manual

KYORITSU KEW 2413R User manual

KYORITSU

KYORITSU KEW 2413R User manual

KYORITSU KEW 2510 User manual

KYORITSU

KYORITSU KEW 2510 User manual

KYORITSU 3131A User manual

KYORITSU

KYORITSU 3131A User manual

KYORITSU KEW3551 User manual

KYORITSU

KYORITSU KEW3551 User manual

Popular Measuring Instrument manuals by other brands

pyroscience FireStingO2 user manual

pyroscience

pyroscience FireStingO2 user manual

National Instruments NI 5911 user manual

National Instruments

National Instruments NI 5911 user manual

ENERGY SUPPORT CORPORATION LP-30H instruction manual

ENERGY SUPPORT CORPORATION

ENERGY SUPPORT CORPORATION LP-30H instruction manual

R&S ZPH Getting started

R&S

R&S ZPH Getting started

ADWA AD1000 user manual

ADWA

ADWA AD1000 user manual

Silverline 482913 quick guide

Silverline

Silverline 482913 quick guide

ABB 2410 instruction manual

ABB

ABB 2410 instruction manual

Livorsi Vantage View NMEA 2000 VVMHN2K Installation and operation manual

Livorsi

Livorsi Vantage View NMEA 2000 VVMHN2K Installation and operation manual

BRONKHORST EL-FLOW Select Series instruction manual

BRONKHORST

BRONKHORST EL-FLOW Select Series instruction manual

Hanna Instruments HI 96729C instruction manual

Hanna Instruments

Hanna Instruments HI 96729C instruction manual

Extech Instruments SDL310 user guide

Extech Instruments

Extech Instruments SDL310 user guide

Gossen MetraWatt METRACLIP EARTH quick start guide

Gossen MetraWatt

Gossen MetraWatt METRACLIP EARTH quick start guide

OHAUS TD52 instruction manual

OHAUS

OHAUS TD52 instruction manual

TECLOCK SSH-R1400 user manual

TECLOCK

TECLOCK SSH-R1400 user manual

HT Italia HT950N user manual

HT Italia

HT Italia HT950N user manual

EaseTech ACCURON 7200 Series Installation & operating manual

EaseTech

EaseTech ACCURON 7200 Series Installation & operating manual

Mahr Millimar C 1200 M/T operating instructions

Mahr

Mahr Millimar C 1200 M/T operating instructions

Setra Systems SRIM1 operating instructions

Setra Systems

Setra Systems SRIM1 operating instructions

manuals.online logo
manuals.online logoBrands
  • About & Mission
  • Contact us
  • Privacy Policy
  • Terms and Conditions

Copyright 2025 Manuals.Online. All Rights Reserved.