manuals.online logo
Brands
  1. Home
  2. •
  3. Brands
  4. •
  5. Kyosho
  6. •
  7. Motorized Toy Car
  8. •
  9. Kyosho V-oneS II User manual

Kyosho V-oneS II User manual

This manual suits for next models

1

Other Kyosho Motorized Toy Car manuals

Kyosho MINI-Z Racer AWD MA-10 Type User manual

Kyosho

Kyosho MINI-Z Racer AWD MA-10 Type User manual

Kyosho MINI-Z Racer AWD MA-010 Type User manual

Kyosho

Kyosho MINI-Z Racer AWD MA-010 Type User manual

Kyosho Mini-Z Racer MR-015 RML Type User manual

Kyosho

Kyosho Mini-Z Racer MR-015 RML Type User manual

Kyosho EVOLVA 2005 WC Team Edition User manual

Kyosho

Kyosho EVOLVA 2005 WC Team Edition User manual

Kyosho MINI-Z Racer MR-03W MM Type User manual

Kyosho

Kyosho MINI-Z Racer MR-03W MM Type User manual

Kyosho INFERNO MP-7.5 Yuichi KANAI EDITION User manual

Kyosho

Kyosho INFERNO MP-7.5 Yuichi KANAI EDITION User manual

Kyosho Mini-Z Racer MR-03N HM Type User manual

Kyosho

Kyosho Mini-Z Racer MR-03N HM Type User manual

Kyosho V-OneS III Evo User manual

Kyosho

Kyosho V-OneS III Evo User manual

Kyosho INFERNO MP-7.5 Yuichi KANAI EDITION 2 User manual

Kyosho

Kyosho INFERNO MP-7.5 Yuichi KANAI EDITION 2 User manual

Kyosho Pure Ten GP FAZER 4WD User manual

Kyosho

Kyosho Pure Ten GP FAZER 4WD User manual

Kyosho Mini-Z Racer MR-02 MM Type User manual

Kyosho

Kyosho Mini-Z Racer MR-02 MM Type User manual

Kyosho INFERNO MP7.5 Sports 3 readyset User manual

Kyosho

Kyosho INFERNO MP7.5 Sports 3 readyset User manual

Kyosho Wildcat Circuit 10 User manual

Kyosho

Kyosho Wildcat Circuit 10 User manual

Kyosho MINI-Z Racer AWD MA-010 Type User manual

Kyosho

Kyosho MINI-Z Racer AWD MA-010 Type User manual

Kyosho INFERNO MP7.5 Sports 3 readyset User manual

Kyosho

Kyosho INFERNO MP7.5 Sports 3 readyset User manual

Kyosho MINI-Z Racer MR-02 LM Type User manual

Kyosho

Kyosho MINI-Z Racer MR-02 LM Type User manual

Kyosho Inferno GT2 ReadySet User manual

Kyosho

Kyosho Inferno GT2 ReadySet User manual

Kyosho MINI-Z Racer MR-03N RM Type User manual

Kyosho

Kyosho MINI-Z Racer MR-03N RM Type User manual

Kyosho Mini-Z Racer MR-03N HM Type User manual

Kyosho

Kyosho Mini-Z Racer MR-03N HM Type User manual

Kyosho Mini-Z Racer MR-03N RM Type User manual

Kyosho

Kyosho Mini-Z Racer MR-03N RM Type User manual

Kyosho MINI-Z Racer AWD MA-010 Type User manual

Kyosho

Kyosho MINI-Z Racer AWD MA-010 Type User manual

Kyosho DBX User manual

Kyosho

Kyosho DBX User manual

Kyosho EP JETSTREAM888 VE User manual

Kyosho

Kyosho EP JETSTREAM888 VE User manual

Kyosho MINI-Z Racer MR-015 RM Type User manual

Kyosho

Kyosho MINI-Z Racer MR-015 RM Type User manual

Popular Motorized Toy Car manuals by other brands

Reely Dune Fighter 3S operating instructions

Reely

Reely Dune Fighter 3S operating instructions

REVELL 1970 Chevelle SS 454 manual

REVELL

REVELL 1970 Chevelle SS 454 manual

Team Losi Micro Rally Car Operation guide

Team Losi

Team Losi Micro Rally Car Operation guide

Jamara Mercedes-AMG GLE 63 Instruction

Jamara

Jamara Mercedes-AMG GLE 63 Instruction

Eduard Humber Scout Car Mk.I exterior quick start guide

Eduard

Eduard Humber Scout Car Mk.I exterior quick start guide

Jamara VW T1 Bus Instruction

Jamara

Jamara VW T1 Bus Instruction

REVELL 68 CHEVY CHEVELLE SS 396 manual

REVELL

REVELL 68 CHEVY CHEVELLE SS 396 manual

Schumacher Pro Cat instruction manual

Schumacher

Schumacher Pro Cat instruction manual

Tamiya TT-01 TYPE E instruction manual

Tamiya

Tamiya TT-01 TYPE E instruction manual

Eduard Krupp Protze 6x4 1/48 quick start guide

Eduard

Eduard Krupp Protze 6x4 1/48 quick start guide

New Bright 61072UEP quick start guide

New Bright

New Bright 61072UEP quick start guide

Team Durango DEX410v5 manual

Team Durango

Team Durango DEX410v5 manual

Jamara Mercedes Actros Muldenkipper 2,4 GHz Instruction

Jamara

Jamara Mercedes Actros Muldenkipper 2,4 GHz Instruction

PLAYMOBIL 9536 manual

PLAYMOBIL

PLAYMOBIL 9536 manual

Atomic BZ3 instruction manual

Atomic

Atomic BZ3 instruction manual

Jamara McLaren Senna 2,4GHz instructions

Jamara

Jamara McLaren Senna 2,4GHz instructions

Aiyaplay 370-290V00 user manual

Aiyaplay

Aiyaplay 370-290V00 user manual

ZEROTRIBE Zetricks ZT1144 instruction manual

ZEROTRIBE

ZEROTRIBE Zetricks ZT1144 instruction manual

manuals.online logo
manuals.online logoBrands
  • About & Mission
  • Contact us
  • Privacy Policy
  • Terms and Conditions

Copyright 2025 Manuals.Online. All Rights Reserved.

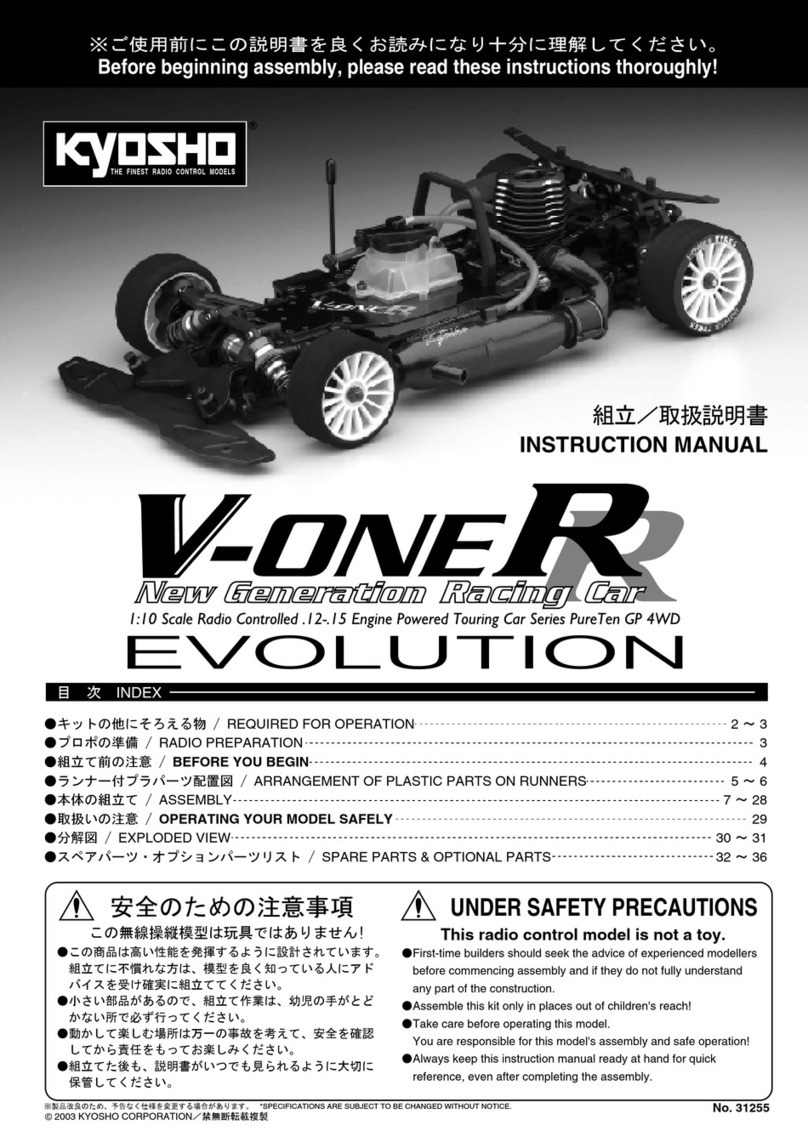
© 2003 KYOSHO CORPORATION/禁無断転載複製
THE FINEST RADIO CONTROL MODELS
R
※製品改良のため、予告なく仕様を変更する場合があります。 Specifications are subject to be changed without prior notice!
Technische nderungen sind ohne vorherige AnkŸndigungen mšglich! Les sp cifications peuvent changer sans pr avis! No. 31122
●キットの他にそろえる物 / Required for operation / Das notwendige Zubehšr / Mat riel n cessaire
●プロポの準備 / Radio preparation / Die RC-Anlage / Pr paration de la radio
●組立て前の注意 / Before you begin / Bevor Sie beginnen / Avant de commencer
●本体の組立て / Assembly / Das Bauen / Assemblage
●取扱いの注意 / Operating your model safely / Zu Ihrer Sicherheit / Consignes de s curit
●分解図 / Exploded View
●パーツリスト / Spare parts & Optional parts
2 ~ 3
3
4
5 ~ 28
29 ~ 35
36 ~ 37
38 ~ 41
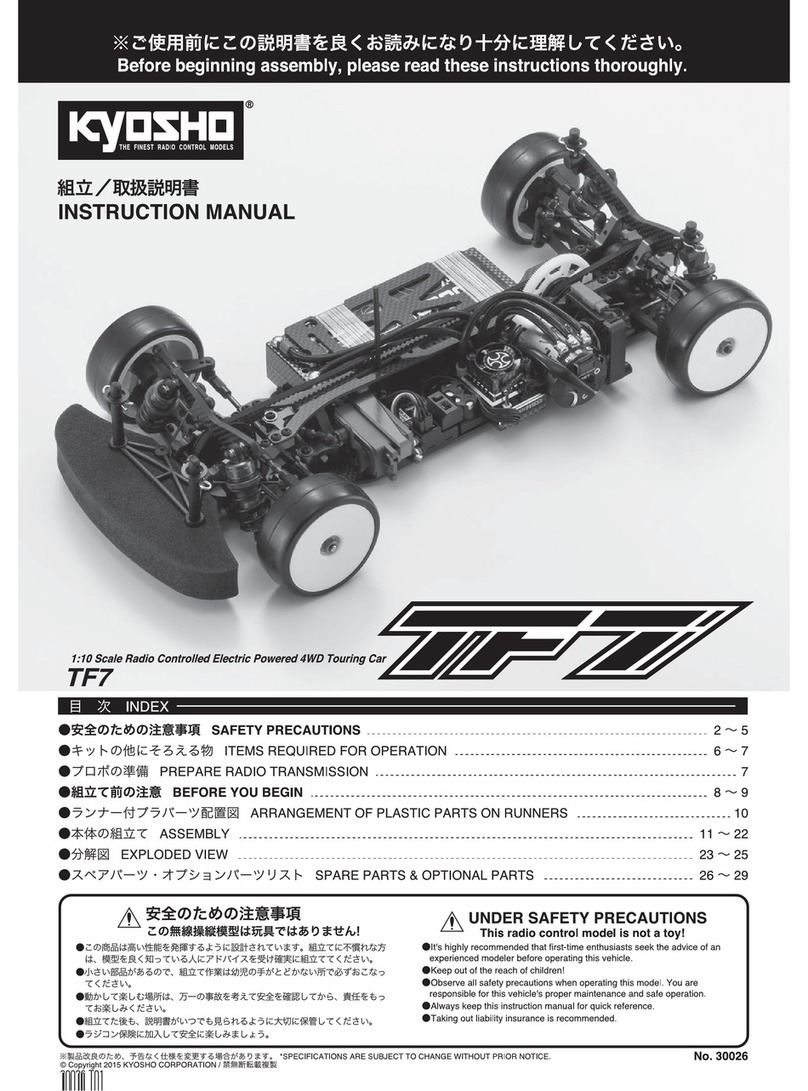
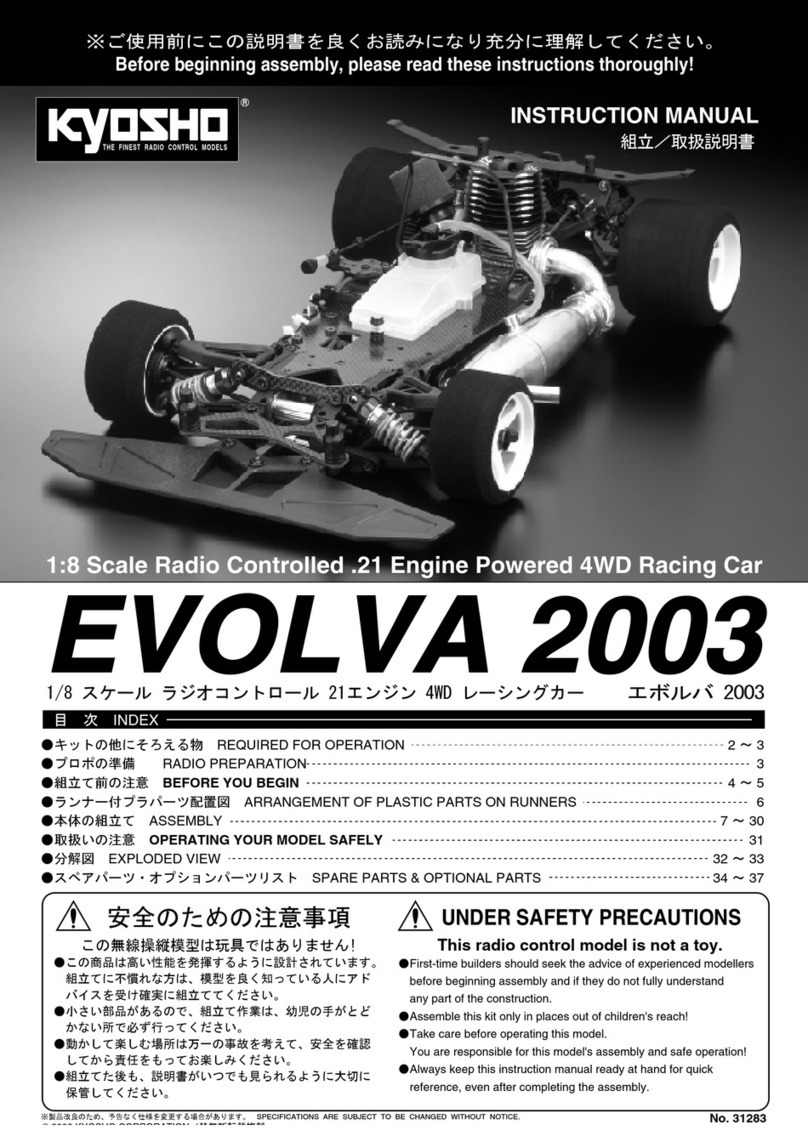
RADIO CONTROLLED .12-.15 ENGINE POWERED TOURING CAR SERIES
PureTen GP V-ONE S II 4WD
INSTRUCTION MANUAL
組立/取扱説明書
安全のための注意事項
この無線操縦模型は玩具ではありません!
●この商品は高い性能を発揮するように設計されています。組立てに不慣れな方
は、模型を良く知っている人にアドバイスを受け確実に組立ててください。
●小さい部品があるので、組立て作業は幼児の手がとどかない所で必ずおこなっ
てください。
●動かして楽しむ場所は、万一の事故を考えて安全を確認してから、責任をもっ
てお楽しみください。
●組立てた後も、説明書がいつでも見られるように大切に保管してください。
UNDER SAFETY PRECAUTIONS
This radio control model is not a toy!
●First-time builders should seek the advice of experienced modellers before
beginning assembly and if they do not fully understand any part of the
construction.
●Assemble this kit only in places out of childrenÕs reach!
●Take enough safety precautions prior to operating this model. You are responsible
for this modelÕs assembly and safe operation!
●Always keep this instruction manual ready at hand for quick reference, even after
completing the assembly.
ACHTUNG!
Dieses Modell ist kein Spielzeug!
●AnfŠnger sollten mšglichst Rat bei Modellbaukundigen einholen, um das Modell richtig
zusammenzubauen und gefahrlos bedienen zu kšnnen.
●Bauen Sie dieses Modell nur au§er Reichweite von Kindern zusammen!
●Treffen Sie genŸgend Sicherheitsvorkehrungen, bevor Sie Ihr Modell bedienen! Sie
alleine tragen die Verantwortung fŸr Ihr Modell und dessen gefahrlose Bedienung!
●Bitte bewahren Sie diese Dokumentation zur spŠteren Verwendung auf.
ATTENTION!
Ce mod le nÕest pas un jouet!
●Si vous tes d butant dans le mod le r duit, prenez conseils aupr s de mod listes con-firm
s afin dÕutiliser votre mod le dans des conditions optimales.
●Assemblez ce kit en dehors de la port e de jeunes enfants!
●Prenez des pr cautions lors de lÕutilisation. Vous seul tes responsable des volutions
de votre mod le. La soci t KYOSHO ou son distributeur ne peuvent en aucun cas tre
tenus responsables des accidents pouvant survenir lors de lÕutilisation de ce mod le!
●Gardez cette notice ˆ port e de main afin de vous y r f rer rapidement.
※ご使用前にこの説明書を良くお読みになり十分に理解してください。
Before beginning assembly, please read these instructions thoroughly!
Bitte lesen Sie die Anweisungen vor Gebrauch genau durch!
Veuillez attentivement lire les instructions avant lÕemploi!
ESSO Ultraflo Supra
(和英独仏)
エッソウルトラフロー スープラ
ラジオコントロール 12‑15 エンジン ツーリングカー シリーズ
ピュアテン GP V‑ONE S II 4WD
1
BEC仕様2チャンネル2サーボ無線操縦機(プロポ)
Minimum 2 channel radio with 2 servos.
Eine 2-Kanal BEC Fernlenkanlage mit 2 Servos.
Radio type B.E.C. 2 voies avec 2 servos
●プロポの取扱いは、プロポに付属の説明書を参考にしてください。
●For more information on the radio, refer to its instruction manual.
●Für mehr Einzelheiten über die RC-Anlage, lesen Sie bitte die
Gebrauchsanweisung der RC-Anlage durch.
●Lisez la notice de la radio pour plus d’informations.
■スティックタイプ
 Stick-type
 Knüppelsteuerung
 A manches
■ハンドルタイプ
 Wheel-type
 
Drehknopfsteuerung
 A volant
■電池ボックス
 Battery Box
 Batteriehalter
 
Boîtier à piles
•
プロポセットに付いているときは必要ありません。
• If a battery box not included with your radio system, one
must be purchased separately.
• Wenn der Batteriehalter schon mit der RC-Anlage geliefert
wird, brau-chen Sie keinen gesondert kaufen.
• S’il est déjà fourni avec l’ensemble radio, il est inutile
d’acheter un boîtier à piles séparé.
燃料と始動用具
Required for engine starting:
Zum Starten von Verbrennungsmotoren benötigtes Zubehör:
Pour faire démarrer le moteur thermique:
19~20mm
38~41mm
使用できるサーボサイズ
Suitable size servos
Passende Servos
Servos compatibles
2
■筆
PAINT BRUSH
3塗料(ボディ塗装用)
Paints (for painting the body shell)
Farben (zur Lackierung der Karosserie)
Peintures (pour peindre la carrosserie)
ポリカカラー
(筆ぬり塗料)
POLYCA COLOR
(Brush paints)
(Pinselfarben)
(Peintures à pinceau)
No.2230
マスキングカバーシート
MASKING SHEET
マスキングテープとビニール
シートが一体になった広範囲
マスク用テープです。
No.1947
For safe masking jobs, use this plastic masking
sheet featuring one self-adhesive edge.
京商スプレーカラー
KYOSHO SPRAY COLOR
No.76301 ~ 76711
警告
地上用(自動車用)のプロポ(2チャンネル2サーボ仕様)セットを
必ず使用してください。(地上用以外使用禁止)
CAUTION: Only use a radio suitable for surface use!
WICHTIG: Benutzen Sie ausschließlich eine 2-Kanal RC-Anlage mit
2 Servos für den Autobereich!
IMPORTANT: N’utilisez qu’une radio 2 voies avec 2 servos pour voitures!
注意
スプレーカラーを使用する場合、缶の説明を良く読んでください。
CAUTION: Before using Kyosho Spray Colours, always read the
instructions thoroughly!
WICHTIG: Lesen Sie bitte zuerst die Gebrauchsanleitung der Spray-
farben sorgfältig durch!
IMPORTANT: Avant l’utilisation des Kyosho Spray Colors, lisez atten-
tivement les explications!
注意
AAAA AAAA AAAA
■単3乾電池
AA-size Batteries
AA Trockenbatterien
Piles type AA
ガソリンや灯油は使用禁止。
WARNING: Never use petrol or kerosene!
VORSICHT: Verwenden Sie niemals handelsübliches
Benzin und Diesel!
ATTENTION: N’utilisez jamais ni de l’essence ni du gasoil!
S
P
R
A
Y
C
O
L
O
R
R
K
Y
O
S
H
O
F
U
E
L
P
R
O
F
F
P
A
I
N
T
S
P
R
A
Y
C
O
L
O
R
R
K
Y
O
S
H
O
F
U
E
L
P
R
O
F
F
P
A
I
N
T
2
●リバーススイッチを使用する場合は、プロポに付属の説
明書を参考に設定してください。
●In case of using reverse switch, refer to instruction
manual included in the radio set.
●Beachten Sie die Bedienungsanleitung des Herstellers
des Fernsteuersystems
●Pour utiliser les inverseurs de servos, se référer à la
notice de la radio.
FUEL
No.73201
Super Starter Pack
スーパースターターパック
■プラグヒーター/充電器
Plug Heater / AC Charger
■グロー燃料
Glow Fuel
■プラグレンチ
Plug Wrench
●エンジン始動に必要な用具セット
キットの他にそろえる物 / REQUIRED FOR OPERATION / DAS NOTWENDIGE ZUBEHÖR / MATÉRIEL NÉCESSAIRE
4組立てに必要な工具
Tools required
Die notwendigen Werkzeuge
Les outils utilisés
キットに入っている工具
TOOLS INCLUDED
GELIEFERTE WERKZEUGE
OUTILS FOURNIS
■カッターナイフ
Sharp Hobby Knife
Scharfes Bastelmesser
Cutter
■六角レンチ
(1.5mm, 2mm, 2.5mm, 5mm)
 Hex Wrench
(1.5mm, 2mm, 2.5mm, 5mm)
 Sechskantschlüssel
(1.5mm, 2mm, 2.5mm, 5mm)
 Clé allen (1.5mm, 2mm, 2.5mm, 5mm)
■+ドライバー(大、中、小)
Phillips Screwdriver (L, M, S)
Kreuzschlitzschraubendreher
Tournevis cruciforme
■ラジオペンチ
Needle Nose Pliers
Flachzange
Pinces plates ■キリ
Awl
Spitzahle
Poinçon
■ニッパー
Wire Cutters
Seitenschneider
Pince coupante
■十字レンチ
 Cross Wrench
 Kreuzschlüssel
 Clé en croix
GREASE
■グリス
 Grease
 Fett
 Graisse
使用する工具の取扱いには、十分注意してください。
CAUTION: Handle tools carefully!
WICHTIG: Gehen Sie vorsichtig mit Werkzeugen um!
IMPORTANT: Maniez les outils avec prudence!
注意
3
POWER ON
POWER
ST.D/R
DIGITAL PROPORTIONAL RADIO CONTROL SYSTEMPERFEXKT-3
ST.TRIMTH.TRIM
ModelNo.KT-3
プロポの準備 / RADIO PREPARATION / DIE RC-ANLAGE / PRÉPARATION DE LA RADIO
●プロポを下の順番にしたがってセットします。
Set up the radio as explained below.
Bereiten Sie die RC-Anlage wie unten beschrieben vor.
Préparez votre radiocommande comme ci-dessous.
▲受信機
Receiver
Empfänger
Récepteur
▲スイッチ
Switch
Schalter
Interrupteur
▲サーボ
Servo
5
4
3
8ON
OFF
10
▲電池ボックス
Battery Box
Batteriehalter
Boîtier à piles
1
2
3
4
5
6
7
8
9
10
11
12
●始める時
●終わる時
送信機に単3乾電池をセットする。
送信機のアンテナをのばす。
電池ボックスに単3乾電池をセット
する。
電池ボックスのコネクターをつなぐ。
受信機のアンテナをのばす。
トリムを中央にセットする。
送信機のスイッチを入れる。
受信機のスイッチを入れる。
ハンドル/トリガーを動かしてサーボ
が動いているか確認。
受信機のスイッチを切る。
送信機のスイッチを切る。
送信機のアンテナを縮める。
1
2
3
4
5
6
7
8
9
10
11
12
●START
●FINISH
Insert AA-size batteries into the
Transmitter.
Extend the Transmitter antenna.
Insert the AA-size dry batteries into
the battery box.
Plug in the battery box.
Unwind the Receiver antenna.
Center the Transmitter trims.
Switch "ON" the Transmitter.
Switch "ON" the Receiver.
Make sure the servos move accord-
ing to your transmitter inputs.
Switch "OFF" the Receiver.
Switch "OFF" the Transmitter.
Retract the Transmitter antenna.
1
2
3
4
5
6
7
8
9
10
11
12
●ANFANG
●ENDE
Setzen Sie die AA Batterien in den
Sender ein.
Ziehen Sie die Senderantenne aus.
Setzen Sie die AA Batterien in den
Batteriehalter ein.
Schließen Sie den Batteriehalter an.
Entspulen Sie die Empfängerantenne.
Stellen Sie die Trimmer neutral.
Schalten Sie den Sender an.
Schalten Sie den Empfänger an.
Überprüfen Sie, ob die Servos sich Ihr-
er Richtung entsprechend verhalten.
Schalten Sie den Empfänger aus.
Schalten Sie den Sender aus.
Ziehen Sie die Senderantenne ein.
1
2
3
4
5
6
7
8
9
10
11
12
●DEBUT
●FIN
Installez les piles type AA dans
l’émetteur.
Déployez l’antenne de l’émetteur.
Installez les piles type AA dans le
boîtier à piles.
Ensuite, branchez le boîtier à piles.
Déployez l’antenne du récepteur.
Mettez les trims au neutre.
Mettez l’émetteur sur “ON”.
Mettez le récepteur sur “ON”.
Vérifiez si les servos bougent selon
vos maneuvres sur l’émetteur.
Mettez le récepteur sur “OFF”.
Mettez l’émetteur sur “OFF”.
Rentrez l’antenne de l’émetteur.
1
2
12
送信機
Transmitter
Sender
Émetteur
▲
6
9
1
2
12
6
ON
OFF
11
7
9
ON
OFF
11
7
ナイフエッジリーマー
KNIFE EDGE REAMER
REIBAHLE
ALESOIR SPECIAL
No.695101
下穴加工が不要で、直接1 ~ 15mmの穴あけができる工具です。
No need to pre-drill! Drills neat 1 ~ 15mm holes directly!
Unerläßlich, nützlich! Diese Ahle bohrt Ihnen 1 ~ 15mm
Löcher, einfach und sauber!
Un must! Permet de faire des trous de 1 ~ 15mm sans
effort! Idéal pour les carrosseries.
ラウンドカッター&サンダー
CURVED SCISSORS & SANDER
LEXANSCHERE
CISEAUX A LEXAN
No.1829
ボディのカット、仕上げ用。
曲線部分も楽に作業ができます。
For trimming body shells. Makes cutting curved lines easy!
Schneidet ohne Probleme auch Kurven. Für Karosserien
aus Lexan.
Coupe le long de lignes courbées. Pour les carrosseries.
KYOSHO スペシャルグルー
KYOSHO Special Glue No.96154
瞬間接着剤
Instant Glue
Sekundenkleber
Colle cyanoacrylate
KYOSHO
Special Glue
組立て前の注意 / BEFORE YOU BEGIN / BEVOR SIE BEGINNEN / AVANT DE COMMENCER
1
組立ての前に下記のことに注意してください。
●この説明書を良く読み、構造を理解する。
●キットの内容を確かめる。
※万一不良、不足がありましたら、お買い求めの販売店か、当社「ユーザー
相談室」までご連絡ください。
●小さな部品の形やサイズを間違えないようにする。図を参考にして
確認しながら組立てる。
●TPビス締めるときは・・・
締めこみが固くても部品が固定されるまで締めてください。
ただし、部品が変形するまで締めるとビスがきかなくなります。
Lesen Sie folgendes vor dem Zusammenbau aufmerksam durch:
●Lesen Sie zuerst die Bauanleitung ganz durch und verstehen Sie
den Aufbau Ihres Modelles.
●Überprüfen Sie den Verpackungsinhalt.
Sollten Teile fehlen, wenden Sie sich direkt an Ihren Fachhändler oder an
den Kyosho-Vertreiber in Ihrem Land.
●
Verwechseln Sie Schrauben sowie kleine Bauteile nicht! Vergleichen Sie
sie vor dem Einbau mit den Darstel-lungen in Originalgröße in den Baustufen.
●Beachten Sie beim Festziehen einer Treibschraube folgendes:
Schrauben Sie solange, bis das anzubringende Teil sicher und fest sitzt.
Achten Sie jedoch darauf, daß Sie den Gewindegang im Material nicht überdrehen!
Before assembling, please read the following carefully:
●First, read this instruction manual and understand the model’s con--
struction.
●Check the contents of this kit.
Should parts be missing, immediately contact the retail shop or your nearest
Kyosho distributor.
●Do not take the wrong screw or small part. Compare it to the true-to-
scale dia-gram in each assembly step, then install it.
●When tightening a self-tapping (TP) screw:
Even if feeling hard, tighten a TP screw until the part will be securely
attached. However, do not overtighten it as the plastic thread inside the part
may strip!
Avant l’assemblage, veuillez lire les points suivants attentivement:
●Lisez d’abord complètement cette notice; ainsi vous aurez un aperçu
du déroulement et pourrez mieux vous orienter.
●Vérifiez ensuite le contenu du kit.
Si jamais il y a des pièces manquantes, adressez-vous directement à votre
magazin spécialisé ou au distributeur Kyosho dans votre pays.
●Ne confondez pas les vis et les petites pièces! Vérifiez-les à l’aide
des illus-trations dans chaque plage de montage, puis assemblez les.
●Lorsque vous serrez une vis autotaraudeuse:
Serrez jusqu’à ce que la pièce à monter soit bien installée. Pourtant, veillez
à ne pas trop la serrer puisque vous risquez d’abîmer le filet dans la pièce.
説明書の見かた
How to read the instruction manual:
So funktioniert die Bauanleitung:
Comment lire les instruction:
2
No.4, No.5, No.6
メタル
Metal Bushing
Metallager
Palier métal
4
キングピン
King Pin
Achsschenkelbolzen
Vis de fusée
4
6
4
5
5
7
5
フロントサスペンション
Front Suspension
Vordere Aufhängung
Suspension avant
1
〔説明例 Example Exemple Beispiel〕
A: この項目で組立てるおおよその場所。
B: 小物部品の名前、原寸図、使用数。
C: キット内の部品は、ビス類を除いてキー
No.が付けられています。スペアパーツを
購入する時はキーNo.を参照して下さい。
D: 説明書内では多くのマークが使用されて
います。マークに注意して組立てを進め
てください。マークの説明は、各ページ
の下にあります。
A: Numéro de la plage de montage et le nom de
la pièce à assembler.
B: Numéro de référence de la pièce, nom, illu--
stration en grandeur réelle et quantité
utilisée.
C: Toutes les pièces, exceptées les vis, sont
iden-tifiées par un numéro de référence. Pour
l’achat de pièces de rechange, trouvez ce
numéro dans la liste pour pièces de rechange
à la fin de cette notice. Toute à la gauche de
cette même liste, vous trouverez ainsi le
numéro de commande correspondant.
D: Cette notice utilise des icônes dans les
plages de montage. Référez-vous au bas de
A: Die Nummer der Baustufe sowie das zu bau--
ende Teil werden angegeben.
B: Teilenummer, Teilename, Darstellung in
Origi-nalgröße und Anzahl.
C: Die Teilenummer stellt den Bezug zu unserer
Bestellnummer her. Am Ende der Bauanlei--
tung finden Sie eine Ersatzteilliste, die zu der
Teilenummer die entsprechende Bestellnum--
mer liefert.
D: Diese Bauanleitung verwendet verschiedene
Piktogramme, deren Bedeutungen unten auf
jeder Seite erklärt werden.
A: Indicates the number of the assembly step
and the part that will be assembled.
B: Key Number, Part Name, True-to-scale
Diagram, Quantity Used.
C: All parts except screws are identified by key
numbers. For purchasing spare parts, find
the key number of the part needed in the
spare parts list and refer to the left column to
look up the corresponding order number.
D: This instruction manual uses several
symbols. Please note them during the entire
assembly at the bottom of each page.
A
C
CD
D
B
5 x 10mm
Correct
Richtig
Bon
Wrong
Falsch
Mauvais
4
5
No.2
No.3
No.4
/ ARRANGEMENT OF PLASTIC PARTS ON RUNNERS
Die Kunststoffteile an den Spritzlingen / Nomenclature des grappes de pièces plastique
64
65
23 24
63
83
39 28
30
30
84
Shaded Parts are not used.
Schattiert dargestellte Teile werden nicht benötigt.
Les pièces grisées ne sont pas utilisées.
31
33
34 32
35
21
20
19
18
22
22
99
101
97
100
98
94
92
92
91
93
95
101
81
82
82
部分の部品は、使用しません。
ランナー付プラパーツ配置図
6
No.5
No.6 No.9
Shaded Parts are not used.
Schattiert dargestellte Teile werden nicht benötigt.
Les pièces grisées ne sont pas utilisées.
/ ARRANGEMENT OF PLASTIC PARTS ON RUNNERS
Die Kunststoffteile an den Spritzlingen / Nomenclature des grappes de pièces plastique
62
62
62 61
61
60
160
60
36
43
42
41
58
56
166
163
161
162
165
167
164
55
36
3838 39 39
62
G-1 G-1 G-6
G-6
G-4
G-4
G-4 G-4
G-5G-5
G-10
G-3G-2
G-8
G-7 G-7
G-8
G-3 G-2
部分の部品は、使用しません。
ランナー付プラパーツ配置図
7
For Front
Vorne
Avant
For Rear
Hinten
Arrière
x1x1
4
2 x 8mm
TP Screw
LK Treibschr
Vis TP 2x8mm
For Front
Vorne
Avant
2x8mm
2x8mm
< >
< >
< >
For Front
Vorne
Avant
< >
< >
< >
For Rear
Hinten
Arrière
Note the direction.
Einbaurichtung beachten.
Notez le sens.
43
4
3
No.1
Part bags used.
Verwendeter Teilebeutel.
Sachet utilisé.
x1
Assemble as many times as specified.
Sooft wie angegeben zusammenbauen.
Assemblez aussi souvent qu’indiqué.
8
4
Differential Shaft
Welle Differential
Axe Différentiel
11
O-ring P5
O-Ring P5
Joint thorique P5
4
13
2 x 11mm
Pin
Stift
Axe 2x11mm
12
2
4 x 27mm
Shaft
Welle
Axe 4x27mm
4
10
5 x 12mm
Shim
Unterlegscheibe
Rondelle de callage
4
9 4 x 10mm
Shim
Unterlegscheibe
Rondelle de callage
8
2.6 x 8mm
TP F/H Screw
SK Treibschraube
Vis TP F/H 2.6x8mm
For Front (Optional parts)
(No.SIL50000 Silicon Oil #50000)
Alternativ kann das Silikonöl Best.-Nr. SIL50000
(50.000 cps) verwendet werden
Pour l'avant utiliser de l'huile silicone de grade #50000
(Réf. SIL50000 - non-inclus)
For Rear (Optional parts)
(No.SIL5000 Silicon Oil #5000)
Für hinten (Tuningteile)
(Best.-Nr. SIL-5000 Silikonöl 5000 cps)
Pour l'arrière. (Pièces options)
(Huile Silicone #5000 - Réf. HM-H5000)
8
1
11
10
13
6
7
12
9
96
5
2
11
10
13
7
14
8
2.6x8mm
2.6x8mm
2.6x8mm
8
10
1
13
11
Apply grease.
Fetten.
Graissez.
4
Must be purchased separately!
Das Teil ist nicht im Bausatz enthalten!
Doit être acheté séparément!
Oil
Öl
Huile
1Différentiel
Diferencial
Differential
No.1
2Différentiel
Diferencial
Differential
フロント用 リヤ用
TPビス
< >リヤ用
< >フロント用
使用する袋詰。
フロント用
向きに注意。
1セット組立てる(例)。
デフジョイント
Oリング P5
ピン
シャフト
シム
シム
TPサラビス
フロント用 (別売オプション)
(No.SIL50000 シリコンオイル#50000)
リヤ用 (別売オプション)
(No.SIL5000 シリコンオイル#5000)
グリスを塗る。 別購入品。
オイル
デフギヤ
デフギヤ
No.2, No.10
No.2, No.8,
No.10
2
17
5.8mm
Ball
Kugel
Rotule
4
16
5.8mm
Ball End
Kugelpfanne
Chape
2
15
3 x 45mm
Adjustable Rod
Gewindestange
Biellette règlable
2
3 x 15mm
F/H Screw
SK Schraube
Vis F/H 3x15mm
2
Tapered Plastic Washer
Scheibe, konisch
Rondelle plastique incurvée
30
4
3 x 12mm
TP F/H Screw
SK Treibschraube
Vis TP F/H 3x12mm
2
26
12 x 18mm
Ball Bearing
Kugellager
Roulements à billes
2
4 x 8mm
Set Screw
Gewindestift
Vis BTR 4x8mm
2
3mm
Nylon Nut
Kunststoffmutter
Ecrou nylon
24
26
26 23
25
4x8mm
4x8mm
3x12mm
3x12mm
27
16
16
17
15
x2
Gear Differential (For Front)
Gear Differential (Vorne)
Différentiel (Avant)
Steering
Lenk
Direction
3mm
3x15mm
30
30
18
x2
approx. 3mm
ca. 3mm
environ 3mm
approx. 32mm environ 32mm
ca. 32mm
8
Belt (big)
Zahnriemon, groß
Courroie (grande)
19
Serrated Cap (F)
Servo Adapter (F)
Bague crantée (F)
FUTABA
KO
JR
SANWA
20
Serrated Cap (KJS)
Servo Adapter (KJS)
Bague crantée (KJS)
21
Serrated Cap (H)
Servo Adapter (H)
Bague crantée (H)
HITEC
3Steering
Lenkung
Direction
4Getriebekasten, vorn
Cellule avant
Front Bulkhead
Part bags used.
Verwendeter Teilebeutel.
Sachet utilisé.
Assemble as many times as specified.
Sooft wie angegeben zusammenbauen.
Assemblez aussi souvent qu’indiqué.
True-to-scale diagram.
Maßstabsgetreue Darstellung.
Illustration à l’échelle.
ボール
ボールエンド
アジャスタブルロッド
サラビス
テーパープラワッシャー
TPサラビス
ベアリング
セットビス
2セット組立てる(例)。原寸図。
約32mm
ナイロンナット
約3mm
デフギヤ(フロント用) ステアリング
使用する袋詰。
ベルト(大)
セレーションキャップ(F)
セレーションキャップ(H)
セレーションキャップ(KJS)
ステアリング
フロントバルクヘッド
No.2, No.6,
No.8, No.10
9
4
45
9mm
Pillow Ball
Kugelschraube
Rotule 9mm
4
49
146
5.8mm
Pillow Ball (silver)
Kugelschraube (silber)
Rotule (argent) 5.8mm
4
46
9mm
Pillow Ball Nut
Kugelschraube
Ecrou de rotule
2
4 x 8mm
Set Screw
Gewindestift
Vis BTR 4x8mm
2
3 x 15mm
TP Screw
LK Treibschr
Vis TP 3x15mm
2
44
Wheel Shaft
Welle Felge
Axe Roue
2
48
6 x 12mm
Ball Bearing
Kugellager
Roulements à billes
2
47
10 x 15mm
Ball Bearing
Kugellager
Roulements à billes
Part bags used.
Verwendeter Teilebeutel.
Sachet utilisé.
Ensure smooth, non-binding movement when assembling.
Das Teil muß sich leicht bewegen lassen.
La pièce doit pouvoir pivoter autour de la vis.
Assemble left and right sides the same way.
Bauen Sie eine linke und eine rechte Seite.
Assemblez le côté gauche comme le côté droit.
approx. 2mm
ca. 2mm
environ 2mm
< >
< >
< >
For Right
Rechts
Drolte
< >
< >
< >
For Left
Links
Gauche
Hex Wrench (2.5mm)
Sechskantschlüssel (2.5mm)
Clé Hexagonale (2.5mm)
approx. 1mm
ca. 1mm
environ 1mm
approx. 1mm
ca. 1mm
environ 1mm
33 32
49
29
47
44
31
33
49
48
13
36
46
45
45
46
146
28
3x15mm
4x8mm
4mm
45
46
Hex Wrench (5mm)
Sechskantschlüssel (5mm)
Clé Hexagonale (5mm)
2
13
2 x 11mm
Pin
Stift
Axe 2x11mm
45
1mm
Temporarily tighten.
Vorläufig festziehen.
Vissez temporairement.
2
4mm
Flanged Nylon Nut
Stoppmutter
Ecrou Nylstop épaulé
5Vordere Aufhängung Querlenker
Suspension Triangle avant
Front Suspension Arm
ピロボール
ピロボール(銀)
ピロボールナット
セットビス
TPビス
ホイルシャフト
ベアリング
ベアリング
使用する袋詰。 可動するように組立てる。 左右同じように組立てる。
約2mm
右側用
左側用
< >
< >
六角レンチ(
2.5mm
)
六角レンチ(
5mm
)
約1mm
約1mm
ピン
仮止め。
フランジ付ナイロンナット
フロントサスアーム
No.2,
No.8,
No.10
10
50
50
51
51
52
53 53
54
34
35
3x3mm
E2.5
E2.5
3x3mm
2
51
3 x 47mm
Welle Axe 3x47mm
Shaft
2
50
3 x 74mm
Welle Axe 3x74mm
Shaft
2
53
Halbwelle Cardan
Swing Shaft
2
E2.5
E-ring
E-Ring E2.5
Clips 2.5mm
2
3 x 3mm
Gewindestift Vis BTR 3x3mm
Set Screw
54
O-ring P3
O-Ring P3
Joint thorique P3
2
No.5, No.10
6
3x10mm
3x10mm
3x10mm
3x10mm
3mm
59
55
60
56
3
3 x 10mm
F/H Screw
SK Schraube
Vis F/H 3x10mm
3x10mm
60
3mm
Kunststoffmutter Ecrou nylon
Nylon Nut
3 x 10mm
LK Treibschr Vis TP 3x10mm
TP Screw
3
For Right
Rechts
Drolte
For Left
Links
Gauche
6Vordere Aufhängung Querlenker
Suspension Triangle avant
Front Suspension Arm
7Stoßstange
Pare-choc
Bumper
Part bags used.
Verwendeter Teilebeutel.
Sachet utilisé.
Apply grease.
Fetten.
Graissez.
Assemble left and right sides the same way.
Bauen Sie eine linke und eine rechte Seite.
Assemblez le côté gauche comme le côté droit.
使用する袋詰。 左右同じように組立てる。
シャフト
シャフト
スイングシャフト
セットビスEリング
Oリング P3
左側用
右側用
TPビス
サラビス
グリスを塗る。
ナイロンナット
バンパー
フロントサスアーム