LabelTac LT4 User manual

LabelTac®4 Reference Guide


Contents
Unboxing
What’s in the box
Your printer
Setup & Install
Before you continue...
Connecting LabelTac®
Installing LabelTac®drivers
Installing templates & symbols
Using LabelTac®
Loading print ribbon
Loading tape supply
How to make labels
LED & button functions
Ribbon tension
Troubleshooting
When using die-cut labels...
Cleaning your printer
Warranty & Support
3
4
6
7
10
11
12
14
16
19
20
21
23
24
25
Contents 1

LabelTac®Printers are professional thermal transfer
printing systems, designed for creating custom labels and
signs, in-house, for a variety of applications including:
Pipe Marking, Safety, Arc Flash, OSHA, Racks/Warehouses,
Tool Identification, Lean & 5S, Kaizen, Kanban, Hazmat,
ANSI/ASME & more.
We’re here to help!
Please give us a call or email if you need any help with
installing or operating your LabelTac®Printer:
phone 1-877-356-6584
web labeltac.com
email [email protected]
2

What’s in the box
Unboxing What’s in the box 3
Included
•LabelTac®4 Printer
•USB Cable
•Power Cable
•2 Cleaning Swabs
* Print ribbon ships pre-installed for convenience
•Install CD
•Reference Guide & Lit
•1 Black Print Ribbon*

Unboxing Your Printer4
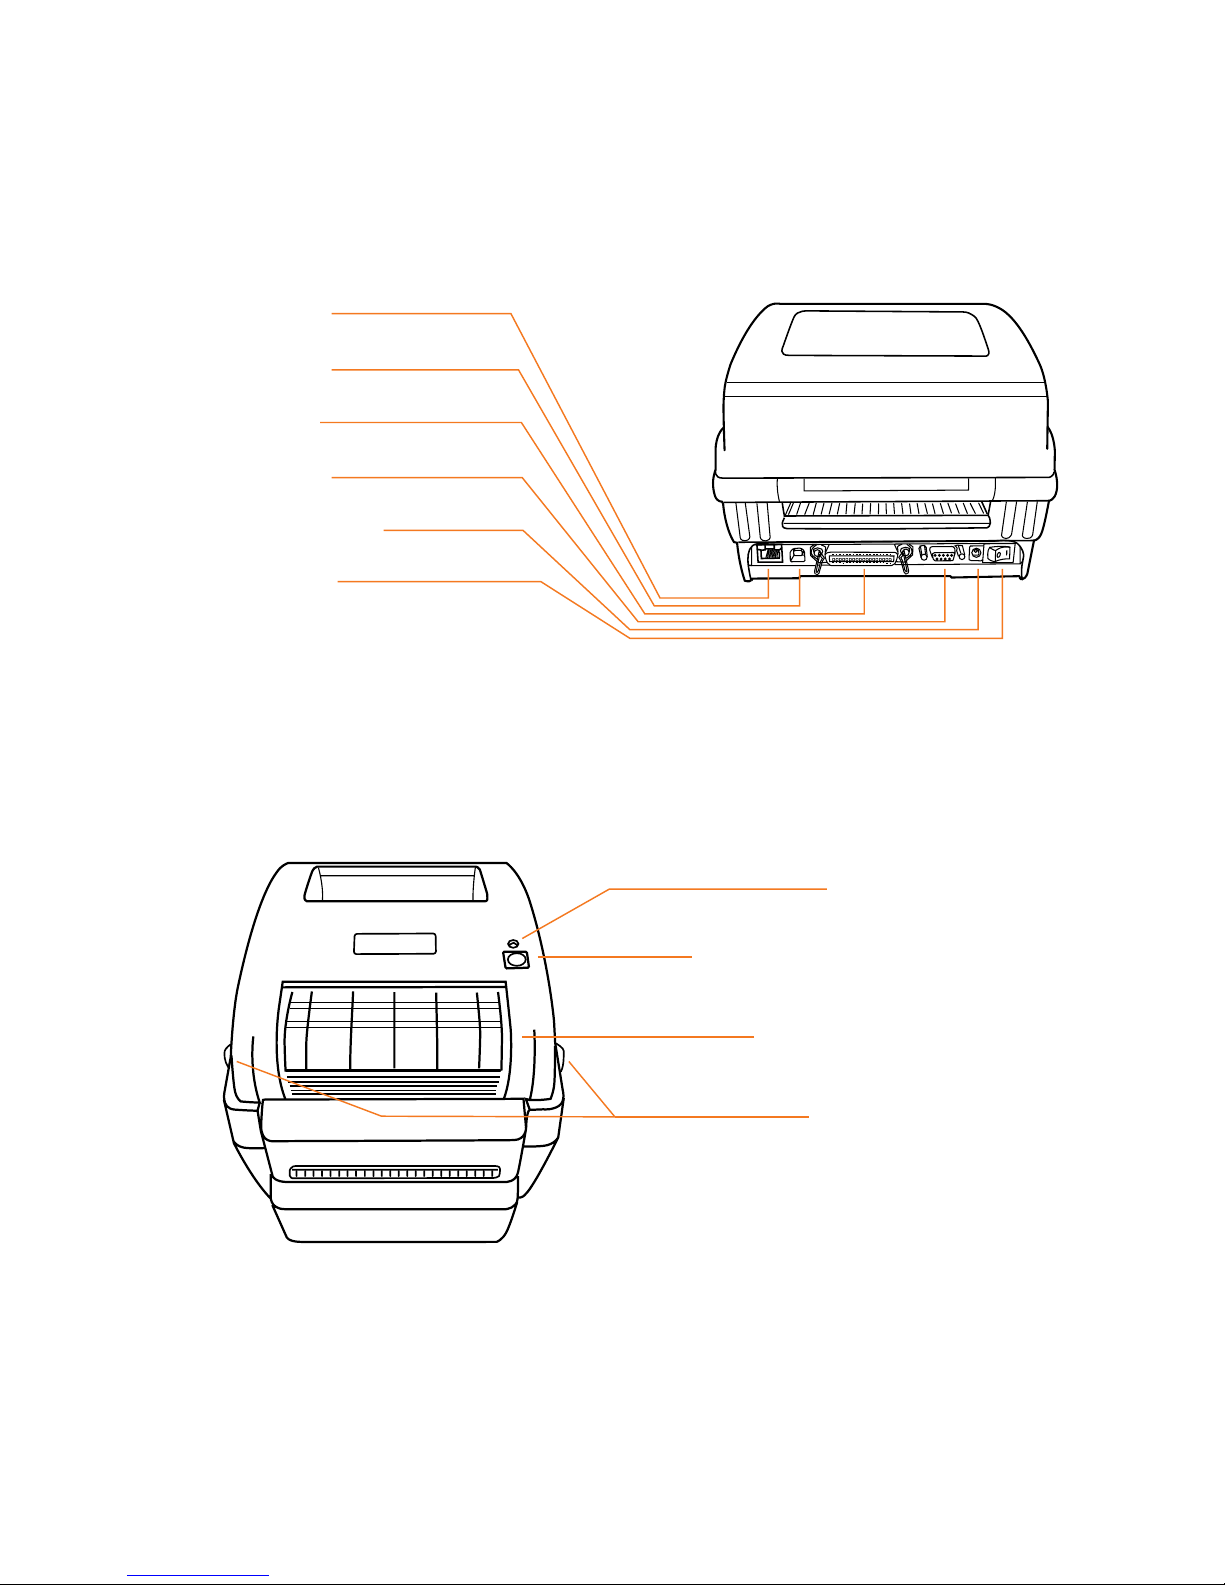
Your Printer
Ribbon Rewind Hub
Ribbon Supply Hub
Cover Support Release
Media Holder
Platen Roller
Cutter
Alignment Guide
Adjustment Wheel
Print Head
Alignment Guides
Black Mark Sensor
Mouth
Media Holder
Lock Switch
Ribbon Rewind Gear
Unboxing Your Printer 5
Your Printer (cont’d)
LED Indicator
Multi-Function Action Button
Ribbon Access Cover
Cover Releases
Ethernet Port
USB 2.0 Port
Parallel Port
RS-232C Port
Power Jack Socket
Power Switch

Setup & Install Before you continue...6
BEFORE INSTALLING DRIVERS...
Please connect your LabelTac®Printer to both
your computer and to power, and make sure
the printer is turned on.
See pages 7-9 for connection instructions.
IMPORTANT
Let us install LabelTac®for you, for free!
We offer a quick 5-minute remote installation- Go ahead, let us do the work while
you grab a cup of coffee! Call us at 1-877-356-6584. Mon-Fri, 6am-3:30pm (PST)
. . .
Before you continue...

Setup & Install Connecting LabelTac®7
Connecting LabelTac®
Step 1: Connect to PC
Connect one end of the USB cable to an available USB 2.0
port on the back of your computer.
Connect the other end of the cable to the USB port on your
LabelTac®4 printer.
1
2
USB 2.0
8
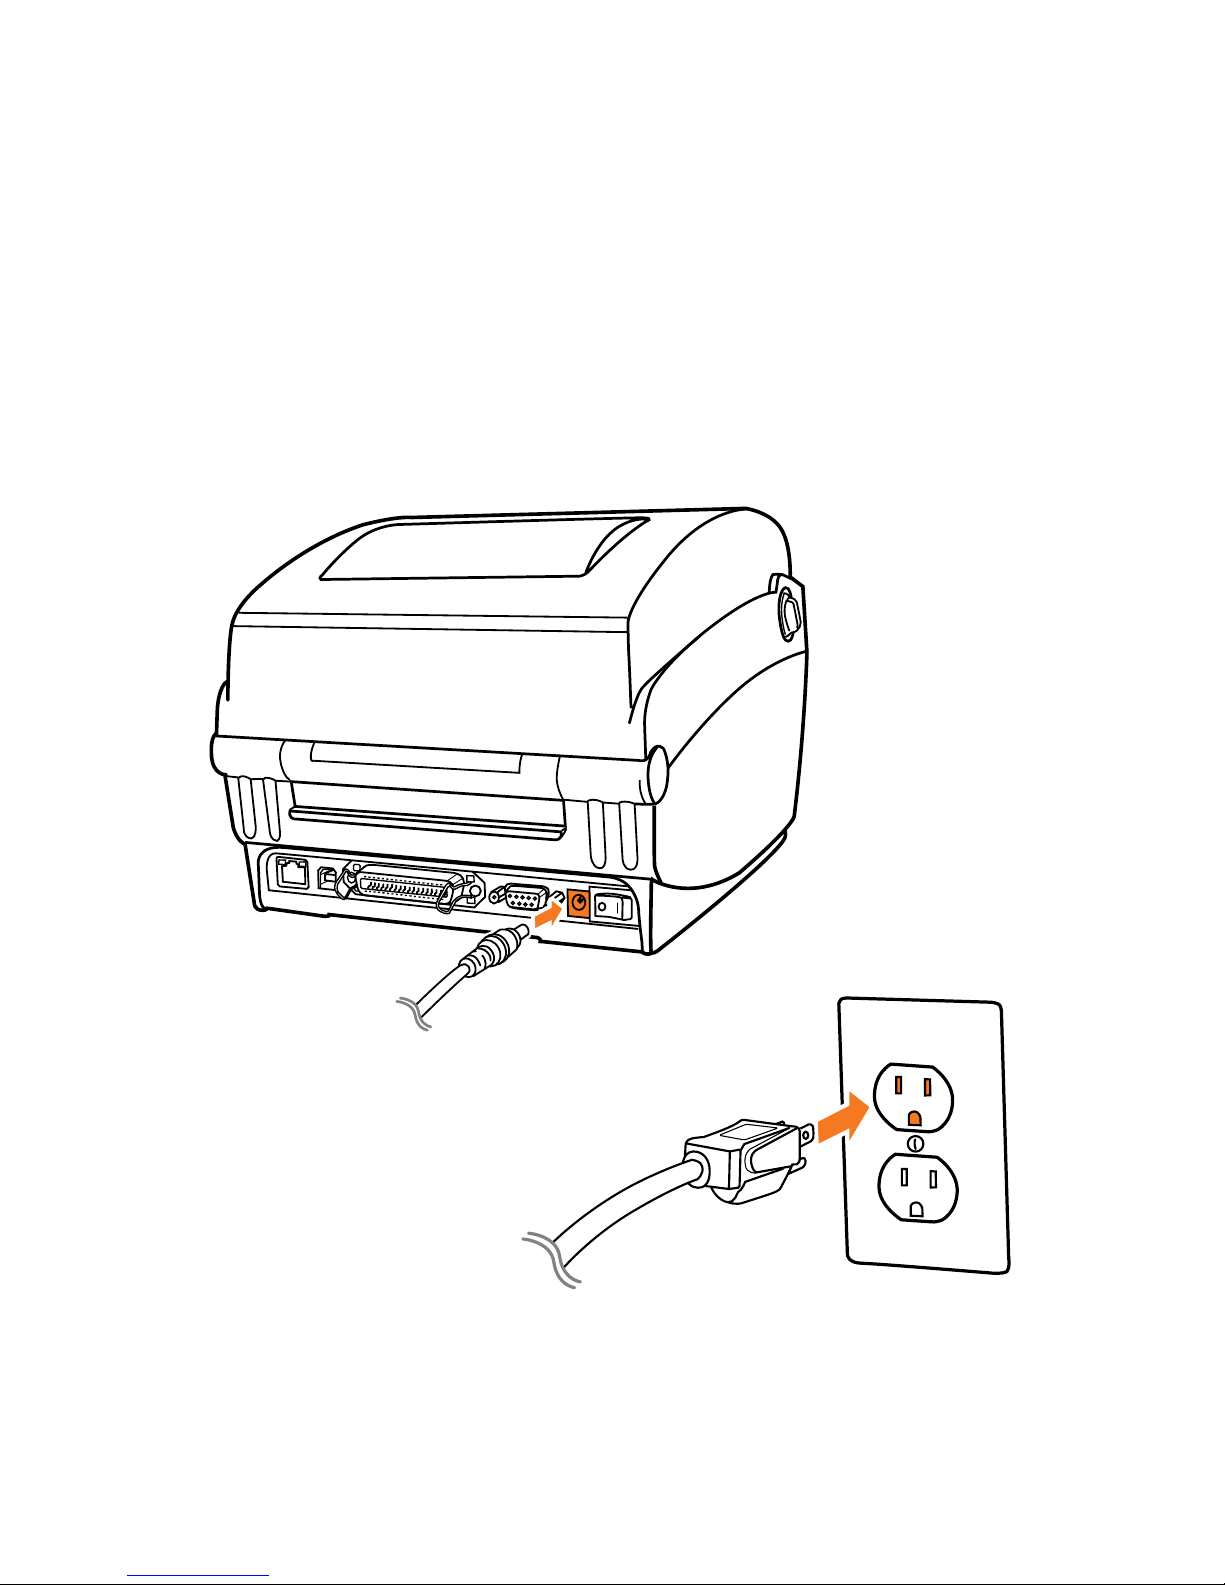
Connecting LabelTac®
Step 2: Connect to Power
Connect one end of the power cord to the power port on the
back of the LabelTac®.
Connect the other end of the cable to a power outlet.
1
2
Setup & Install Connecting LabelTac®
Table of contents
Other LabelTac Printer manuals


