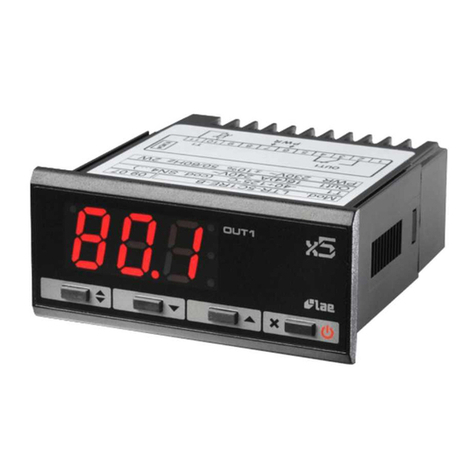
LAE electronic TMR15 User manual

OPERATING MODES
The TMR15 features two main operating modes: Normal and Manual; when the unit is powered, its software loads the operating
mode active before the TMR15 was switched off.
NORMAL MODE
In the STOP state, the output is off and the display shows the programmed cycle time. Pressing the button or making the
remote start contact causes the output to be switched on and the display shows the countdown time. During the countdown, by
pressing the buttons or , the total cycle time is displayed. By pressing it’s possible to quit the program and switch
over to the STOP state at any time. In case of a power failure, the timer always resumes the STOP state.
MANUAL MODE
Pressing the button for 3 seconds activates the manual mode, with the buttons and you choose the permanent state
of the output (On/Off). This operating mode and the associated state are stored and maintained even in case of power failure. To
exit and revert to normal mode, press for 3 seconds.
CYCLE TIME SETTINGS
From the STOP state it’s possible to program the time by pressing or till you obtain the desired value. Autoscaling in
minutes/seconds and hours/minutes takes place automatically, the respective two dots on the display show the scale active, in
other words: 9 minutes and 59 seconds and 9 hours and 99 minutes. Exit from the programming is automatic after 5 seconds of
not using the keypad or immediate by pressing .
SETUP
The setup is accessed by pressing and keeping the buttons + pressed for 5 seconds. The available parameters appear
in the table here below. Press button to pass from one parameter to the next, viceversa press the button to go back. To
display the value of a parameter press , to modify it press + or simultaneously. Exit from the setup is either by
pressing or automatic after 20 seconds of not using the keypad.
Par Adjustment Description
ALR YES/NO Buzzer enabling
LOC YES/NO Keypad lock
ADR 1...255 Peripheral address
AUXILIARY FUNCTIONS
MANUAL MODE
The keypad lock avoids undesired, potentially dangerous operations, which might be attempted when the controller is operating
in a public place. From the Setup it’s possible to assign YES or NO to the parameter Loc. With LOC=YES all keypad commands
are inhibited, countdown START therefore takes place through remote command only. To resume normal keypad operation, just
re-program LOC=NO.
BUZZER
The TMR15 can be tted with a buzzer to warn that the cycle has come to an end, this function is active with ALR=YES.
BUZZER
The TMR15 can have an optional serial port for connection to a PC or programmer. In the rst case it is important to assign to the
parameter ADR a different value for each linked unit (peripheral address); with automatic programming, ADR should remain on 1.
WIRING DIAGRAM
TMR15E-A
OUT1
START
16(4)A
456
230V~
121011
WARRANTY
LAE electronic SPA guarantees its products against defects due to faulty materials or workmanship for one (1) year from the
date of manufacture shown on the container. The Company shall only replace products which are shown to be defective to the
satisfaction of its own technical services. The Company shall not be under any liability and gives no warranty in the event of defects
due to exceptional conditions of use, misuse or tampering.
LAE electronic does not accept units back unless LAE electronic has previously given its allowance or request.
INSTALLATION
The TMR15, size 77x35x77 mm (WxHxD), is inserted into the panel through a hole measuring 71x29 mm and is xed by means ■
of the suitable clips, by pressing gently. If tted, check that the rubber gasket adheres to the panel perfectly, in order to prevent
debris and moisture inltration to the back of the instrument.
The instrument should work with room temperatures between -10°.. +50°C and relative humidity between 15%...80% inclusive.■
Supply voltage, switched powers and connection set-up should scrupulously comply with the indications given on the container. To
reduce the effects of electromagnetic disturbance, keep the sensor and signal cables well separate from the power wires.
Start/Stop button
Fig.1 - Front panel
Decrease button
Increase button
Manual mode button.
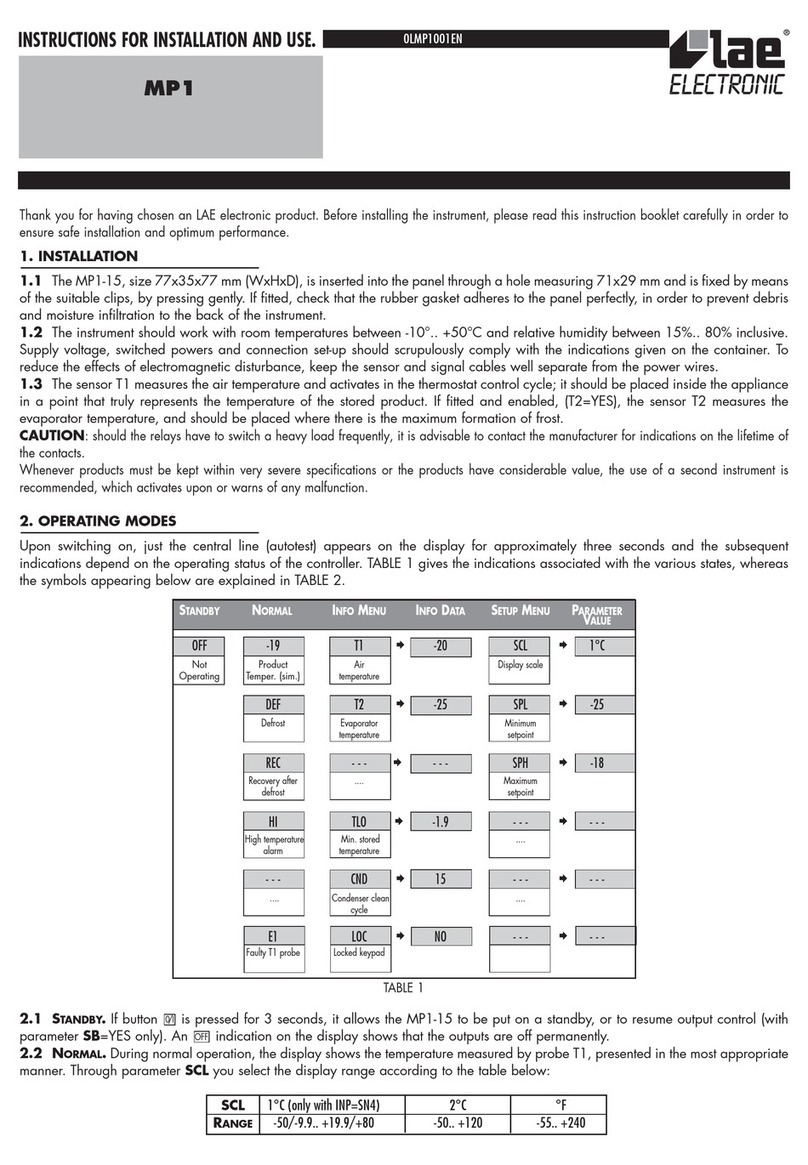
Thank you for having chosen an LAE electronic product. Before installing the instrument, please read this instruction booklet
carefully in order to ensure safe installation and optimum performance.
DESCRIPTION INDICATIONS
TMR15 INSTRUCTION FOR USE
MODI OPERATIVI
Il TMR15 ha due modi principali di funzionamento: Normale e Manuale; all’accensione si predispone nel modo attivo al momento
dello spegnimento.
MODO NORMALE
Nello stato STOP l’uscita è spenta ed il display visualizza il tempo programmato, premendo il tasto o chiudendo il contatto
dello start remoto, l’uscita viene attivata ed il display visualizza il tempo rimanente. Durante il conteggio all’indietro, premendo i
tasti o , viene visualizzato il tempo totale del ciclo. E’ possibile abbandonare il programma in qualsiasi momento
premendo In caso di interruzione di alimentazione, il timer si ripropone sempre nello stato di STOP.
MODO MANUALE
Premendo il tasto per 3 secondi si attiva il modo manuale, con i tasti e si sceglie lo stato permanente dell’uscita
(On/Off). Questo modo operativo e lo stato associato sono memorizzati e mantenuti anche in caso d’interruzione d’alimentazione.
Per uscire e ritornare al modo normale premere per 3 secondi .
IMPOSTAZIONE PROGRAMMA
Dallo stato STOP è possibile programmare il tempo premendo o no ad ottenere il valore desiderato. Il cambio scala
minuti/secondi e ore/minuti avviene in modo automatico, i rispettivi due punti sul display indicano la scala attiva, ovvero: 9minuti e
59 secondi e 9 ore e 99 minuti. L’uscita dalla programmazione è automatica dopo 5 secondi di non operatività della tastiera oppure
premendo .
SETUP
Alla programmazione dei parametri si accede premendo in successione e mantenendo premuti contemporaneamente per 5
secondi i tasti + I parametri disponibili appaiono nella tabella di seguito riportata. L’avanzamento da un parametro al
successivo si ha premendo il tasto lo spostamento in senso inverso con il tasto . Per visualizzare il valore correlato al
parametro premere , per modicarlo premere contemporaneamente + o . L’uscita dal setup si ha o premendo
o automaticamente dopo 20 secondi di non operatività della tastiera.
Par Regolazione Descrizione
ALR YES/NO Abilitazione del segnalatore acustico
LOC YES/NO Blocco tastiera
ADR 1...255 Indirizzo periferica
FUNZIONI AUSILIARIE
BLOCCO DELLA TASTIERA
Il blocco dei tasti impedisce operazioni indesiderate, potenzialmente dannose, che possono avvenire qualora il regolatore operi
in ambiente pubblico. Dal setup è possibile assegnare al parametro LOC il valore YES o NO. Con LOC=YES tutti i comandi da
tastiera sono inibiti, lo START avviene pertanto solo tramite comando remoto. Per ripristinare la normale funzionalità, è sufciente
riprogrammare LOC=NO.
BUZZER
Il TMR15 può essere equipaggiato di segnalatore acustico per indicare la conclusione del ciclo, questa funzione è attiva con
ALR=YES.
PORTA SERIALE
Il TMR15 può avere una porta seriale opzionale per il collegamento con un PC o un programmatore. Nel primo caso è
importante assegnare al parametro ADR un valore diverso per ogni unità collegata in rete (indirizzo di periferica); nel caso della
programmazione automatica, ADR deve rimanere a 1.
SCHEMA DI COLLEGAMENTO
TMR15E-A
OUT1
START
16(4)A
456
230V~
121011
GARANZIA
LAE electronic S.p.A. garantisce i suoi prodotti contro vizi di fabbricazione e difetti dei materiali per un (1) anno dalla data di
costruzione riportata sul contenitore. La stessa sarà tenuta alla sola riparazione o sostituzione dei prodotti la cui difettosità sia
ad essa imputabile e venga accertata dai propri servizi tecnici. In caso di difetti dovuti a condizioni eccezionali di impiego, uso
scorretto e/o manomissione, ogni garanzia viene a decadere.
Tutte le spese di trasporto per la restituzione del prodotto al fabbricante, previa sua autorizzazione e per l’eventuale ritorno
all’acquirente sono a carico di quest’ultimo.
Modo manuale
Timer attivato
Uscita attiva
Scala ore-minuti
Scala minuti-secondi
Tasto Start/Stop
Fig.1 - Pannello frontale
Tasto decremento
Tasto incremento
Tasto modo manuale
Vi ringraziamo per la preferenza accordataci scegliendo un prodotto LAE electronic. Prima di procedere all’installazione dello
strumento, leggete attentamente il presente foglio d’istruzioni: solo così potrete ottenere massime prestazioni e sicurezza.
DESCRIZIONE INDICAZIONI
TMR15 ISTRUZIONI D’USO
INSTALLAZIONE
Il TMR15 ha dimensioni 77x35x77 mm (LxHxP), va inserito nel pannello attraverso un foro di 71x29 mm e ssato mediante le ■
apposite staffette, esercitando una corretta pressione. Qualora presente, la guarnizione di gomma dev’essere interposta fra la
cornice dello strumento ed il pannello, vericandone la perfetta adesione per evitare inltrazioni verso la parte posteriore dello
strumento.
Lo strumento deve operare con temperatura ambiente compresa fra -10°.. +50°C e 15%.. 80% di umidità relativa. Tensione di■
alimentazione, potenze commutate e disposizione dei collegamenti devono rispettare rigorosamente le indicazioni riportate sul
contenitore. Per ridurre gli effetti delle perturbazioni elettromagnetiche, distanziare i cavi di segnale dai conduttori di potenza.
Manual mode
Timer started
Output active
Hours-minutes scale
Minutes-seconds scale
TECHNICAL DATA
Power supply
230Vac±10%, 50/60Hz, 3W
Relay output
16(4)A 240V~
Operating conditions
-10 … +50°C
CE (Reference Norms)
EN60730-1; EN60730-2-9;
EN55022 (Class B);
EN50082-1
Front protection
IP55
DATI TECNICI
Alimentazione
230Vac±10%, 50/60Hz, 3W
Uscita relè
16(4)A 240V~
Condizioni operative
-10 … +50°C
CE (Norme di Riferimento)
EN60730-1; EN60730-2-9;
EN55022 (Classe B);
EN50082-1
Protezione frontale
IP55
VIA PADOVA, 25
31046 ODERZO /TV /ITALY
TEL. +39 - 0422 815320
FAX +39 - 0422 814073
www.lae-electronic.com
E-mail: [email protected]
TMR15
INSTRUCTIONS FOR USE
ISTRUZIONI D’USO
MODE D’EMPLOI
BEDIENUNGSANLEITUNG
0LTMR001-09
EN
IT
TMR15
INSTRUCTIONS FOR USE
ISTRUZIONI D’USO
BEDIENUNGSANLEITUNG
MODE D’EMPLOI
FR
DE

MODES DE FONCTIONNEMENT
Le TMR15 a deux modes principaux de fonctionnement: Normal et Manuel; lorsque l’appareil est mis sous tension, l’appareil se
remet sur le mode de fonctionnement actif lors de sa coupure.
MODE NORMAL
Dans l’état STOP la sortie est éteinte et l’afcheur montre le temps programmé. En pressant la touche ou en fermant le
contact du démarrage déporté, la sortie est activée et l’afcheur montre le temps restant. Pendant le compte à rebours, en gardant
les touches ou , pressée, le temps total du cycle est afché. Il est possible d’abandonner le programme dans n’importe
quel moment en appuyant sur la touche . Lors d’un manque de courant, le temporisateur se remet toujours sur l’état de
STOP.
MODE MANUEL
En appuyant sur la touche pendant 3 secondes on l’active le mode manuel, par les touches et vous choisissez l’état
permanent de la sortie (On/Off). Ce mode de fonctionnement et l’état associé sont mémorisés et gardés même en cas de manque
d’alimentation. Pour sortir et retourner au mode normal presser la touche pour 3 secondes.
SÉLECTION D’UN PROGRAMME
De l’état STOP il est possible de programmer le temps en appuyant sur ou jusqu’à ce que l’on obtient la valeur désirée.
L’échange d’échelle minutes/secondes et heures/minutes se passe d’une manière automatique, les deux points respectifs sur
l’afcheur indiquent l’échelle active, c’est-à-dire: 9minutes et 59 secondes et 9 heures et 99 minutes. La sortie de la programmation
est automatique 5 secondes après la dernière opération sur le clavier ou en pressant .
SETUP
On accède à la programmation des paramètres en appuyant successivement sur les touches + et en les gardant
appuyées ensemble pendant 5 secondes. Les paramètres disponibles apparaissent sur la table ci-après. On passe d’un paramètre
au paramètre suivant avec la touche , et au précédent avec la touche . Pour afcher la valeur corrélée au paramètre
presser , pour la modier presser + ou au même temps. La sortie du setup est automatique 20 secondes après
la dernière opération sur le clavier ou en pressant .
Par Réglage Déscription
ALR YES/NO Validation du roneur
LOC YES/NO Blocage clavier
ADR 1...255 Adresse périphérique
FONCTIONS ACCESSOIRES
BLOCAGE DU CLAVIER
Le blocage des touches empêche que des opérations non désirées, qui pourraient être dangereuses, soient effectuées dans
le cas où le régulateur serait installé en milieu public. Du setup, on peut affecter au paramètre LOC la valeur YES ou NO. Avec
LOC=YES, toutes les commandes par clavier sont inhibées; le START du comptage ne se fait donc que par la commande dépor-
tée. Pour rétablir un fonctionnement normal, il suft de reprogrammer LOC=NO.
RONFLEUR
Le TMR15 peut être équipé d’un roneur pour indiquer la conclusion du cycle. Cette fonction est active avec ALR=YES.
PORT SÉRIE
Il TMR15 peut avoir un port série optionnel pour le raccordement à un PC ou programmateur. Dans le premier cas il est important
d’affecter au paramètre Adr une valeur différente pour chaque unité raccordée en réseau (adresse de périphérique); dans le cas
de la programmation automatique, ADR doit rester à 1.
SCHEMA DE RACCORDEMENT
TMR15E-A
OUT1
START
16(4)A
456
230V~
121011
GARANTIE
LAE electronic SpA garantit ses produits contre les vices de fabrication et les défauts des matériaux pour une période d’un (1) an
à partir de la date de fabrication indiquée sur l’emballage. Cette dernière ne sera tenue qu’au remplacement des produits dont la
défectuosité pourra lui être imputée et sera constatée par ses propres services techniques. La garantie ne s’appliquera pas en cas
de conditions exceptionnelles d’utilisation, de mauvais usage et/ou de modication du produit. Tout retour de produits devra être
autorisé ou demandé par LAE electronic SpA avant de l’expédition
Mode Manuel
Minuterie active
Sortie active
Echelle heures-minutes
Echelle minutes-secondes
Touche Start / Stop
Fig.1 — Panneau avant
Touche diminution
Touche augmentation
Touche mode manuel
Nous vous remercions d’avoir choisi un produit LAE electronic. Pour que votre instrument soit le plus sûr et le plus performant
possible, il est indispensable d’en lire attentivement le mode d’emploi.
DESCRIPTION INDICATIONS
TMR15 MODE D’EMPLOI
INSTALLATION
Introduire le TMR15 dans un trou de 71x29 m. Fixer l’instrument au panneau, à l’aide des étriers prévus à cet effet, en exerçant■
une pression appropriée. S’il existe un joint en caoutchouc, celui-ci doit être interposé entre le cadre de l’instrument et le panneau
en s’assurant qu’il adhère bien pour éviter les inltrations à l’arrière de l’instrument.
Les conditions de fonctionnement de l’instrument sont: -10°.. +50°C et 15%.. 80% d’humidité relative. Effectuer les raccordements■
électriques en suivant les indications sur le schéma de raccordement ci-après. Pour réduire les effets des perturbations
électromagnétiques, éloigner des conducteurs de puissance les câbles de signal.
DONNEES TECHNIQUES
Alimentation
230Vac±10%, 50/60Hz, 3W
Sortie relais
16(4)A 240V~
Conditions de fonctionnement
-10 … +50°C
CE (Normes de référence)
EN60730-1; EN60730-2-9;
EN55022 (Class B);
EN50082-1
Protection façade
IP55
BETRIEBSMODI
TMR15 arbeitet mit zwei Betriebmodi: normal und manuell. Beim Einschalten startet er im Modus, in dem er ausgeschaltet wurde.
NORMALBETRIEB
Im STOPP-Zustand ist der Ausgang ausgeschaltet; das Display zeigt die programmierte Zeit an; durch Drücken der Taste
oder Schließen des Remote-Start-Kontaktes wird der Ausgang aktiviert und das Display visualisiert die verbleibende Zeit.
Während des Count-downs wird durch Drücken der Tasten oder die Gesamtzeit des Zyklus angezeigt. Das Programm
kann jederzeit über die Taste verlassen werden. Im Fall der Unterbrechung der Spannungsversorgung wird der Timer in den
STOPP-Zustand versetzt.
MANUELLER BETRIEB
Durch Drücken der Taste für 3 Sekunden wird der manuelle Betrieb aktiviert; mit den Tasten und wird der
permanente Ausgangszustand gewählt (Ein/Aus). Dieser Betriebsmodus und der assoziierte Zustand werden gespeichert und
auch bei Unterbrechung der Spannungsversorgung beibehalten. Zum Verlassen und zur Rückkehr zum Normalbetrieb für 3
Sekunden drücken.
PROGRAMMIERUNG
Im STOPP-Zustand kann durch Drücken von oder bis zum Erreichen des gewünschten Wertes die Zeit programmiert
werden. Der Wechsel von Minuten/Sekunden zu Stunden/Minuten erfolgt automatisch; die beiden Pünkte auf dem Display zeigen
die aktive Zeitskala an: 9 Minuten und 59 Sekunden und 9 Stunden und 99 Minuten. Das Verlassen der Programmierung erfolgt
automatisch nach 5 Sekunden Untätigkeit der Tastatur oder durch Drücken von .
SETUP
Zur Parameterprogrammierung gelangt man, indem man nacheinander und dann gleichzeitig für 5 Sekunden die Tasten +
drückt und gedrückt hält. Die verfügbaren Parameter sind in der nachstehenden Tabelle angeführt. Der Sprung von einem
Parameter zum nächsten erfolgt über die Taste , zum vorhergehenden mit der Taste . Zur Anzeige des Parameterwertes
die Taste drücken, zu dessen Änderung gleichzeitig + oder . Das Verlassen des Setup erfolgt durch Drücken
von oder automatisch nach 20 Sekunden Untätigkeit der Tastatur.
Par Einstellung Beschreibung
ALR YES/NO Aktivierung des Summers
LOC YES/NO Tastensperre
ADR 1...255 Adresse des Peripheriegerätes
ZUSATZFUNKTIONEN
TASTENSPERRE
Die Tastensperre verhindert unerwünschte und potenziell schädliche Handlungen, sollte der Regler beispielsweise der Öffentli-
chkeit zugänglich sein. In der Setup-Ebene kann dem Parameter Loc der Wert YES oder NO zugewiesen werden. Bei LOC=YES
sind alle Tastenbefehle gesperrt; der START erfolgt also nur über einen Remote-Befehl. Zur Deaktivierung der Sperre genügt es,
die Einstellung LOC=NO zu tätigen.
SUMMER
TMR15 kann mit einem Summer für die akustische Meldung des Zyklusabschlusses ausgerüstet werden; die Funktion wird mit
ALR=YES aktiviert.
SERIELLER ANSCHLUSS
TMR15 kann mit einem zusätzlichen seriellen Anschluss für die Verbindung mit einem PC oder einem Programmiergerät
ausgestattet werden. Im ersten Fall ist dem Parameter Adr für jedes Netzwerk-Gerät ein eindeutiger Wert zuzuweisen (Adresse
des Peripheriegerätes); bei der automatischen Programmierung muss Adr auf 1 eingestellt bleiben.
SCHALTPLAN
TMR15E-A
OUT1
START
16(4)A
456
230V~
121011
GARANTIE
LAE electronic S.p.A. garantiert die eigenen Produkte gegen Material- und Fabrikationsfehler für ein (1) Jahr ab dem auf dem
Gehäuse angebrachten Herstellungsdatum. Die Garantie bezieht sich nur auf die Reparatur oder den Austausch von Produkten,
deren Mängel nachweislich und vom Technischen Service festgestellt auf Fabrikationsfehlern beruhen. Schäden, die durch eine
unsachgemäße Behandlung der Produkte, falsche Handhabung oder Manomission verursacht werden, sind von der Garantie
ausgeschlossen.
Alle Transportkosten für die Rückerstattung des Produktes nach Ermächtigung an den Hersteller und die Rückgabe an den Käufer
sind zu Lasten des Käufers
Manueller Betrieb
Timer aktiviert
Ausgang eingeschaltet
Skala Stunden/Minuten
Skala Minuten/Sekunden
Taste Start/Stopp
Abb. 1 — Bedienteil
Taste Down
Taste Up
Taste Manueller Betrieb
Wir danken Ihnen, dass Sie sich für ein Produkt der Firma LAE electronic entschieden haben. Lesen Sie vor der Installation des
Gerätes bitte aufmerksam die vorliegende Bedienungsanleitung durch: nur so können wir Ihnen höchste Leistungen und Sicher-
heit garantieren
BESCHREIBUNG ANGABEN
TMR15 BEDIENUNGSANLEITUNG
INSTALLATION
Das Gerät TMR15 der Abmessungen 77x35x77 mm (LxHxT) wird an der Tafel in einer 71x29 mm-Bohrung mittels beiliegenden■
Bügeln mit leichtem Druck befestigt. Falls vorhanden ist die Gummidichtung zwischen Geräterahmen und Tafel einzusetzen.
Achtung auf die korrekte Positionierung, um das geräterückseitige Eindringen von Flüssigkeiten zu vermeiden.
Das Gerät arbeitet mit einer Umgebungstemperatur von -10° bis +50°C und einer relativen Feuchte von 15% bis 80%. Die■
Versorgungsspannung, die Schaltleistungen und das Layout der Anschlüsse müssen denAngaben auf dem Gehäuse entsprechen. Zur
Vermeidung von elektromagnetischen Störungen müssen die Signalkabel getrennt von den Starkstromleitern angebracht werden.
TECHNISCHE DATEN
Spannungsversorgung
230Vac±10%, 50/60Hz, 3W
Relaisausgang
16(4)A 240V~
Betriebsbedingungen
-10 … +50°C
CE (Bezugsnormen)
EN60730-1; EN60730-2-9;
EN55022 (Klasse B);
EN50082-1
Frontschutzart
IP55
VIA PADOVA, 25
31046 ODERZO /TV /ITALY
TEL. +39 - 0422 815320
FAX +39 - 0422 814073
www.lae-electronic.com
E-mail: [email protected]
Other LAE electronic Temperature Controllers manuals
Popular Temperature Controllers manuals by other brands

Johnson Controls
Johnson Controls A419 Series installation instructions

Panasonic
Panasonic CZ-64ESMC3 operating instructions

Roger
Roger HRT82TS installation guide

La Crosse Technology
La Crosse Technology CA80987 Quick setup guide

DELTA DORE
DELTA DORE TYBOX 117 Important product information

Zamel
Zamel exta RTM-03 user manual

Unical
Unical Ufly P Installation and Servicing Manual

Smart temp
Smart temp SMT-200 rev3 owner's manual

UE
UE 100 Series Installation and maintenance instructions

S+S Regeltechnik
S+S Regeltechnik HYGRASGARD AFTF Series Operating Instructions, Mounting & Installation

BriskHeat
BriskHeat X2 Benchtop instruction manual

AEC
AEC TDH-6 Series Operation and installation manual