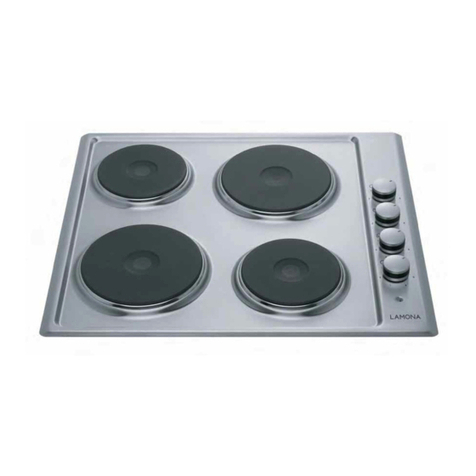
Lamona LAM1701 Troubleshooting guide

User & Installation Guide
LAM1701
LAM1702
Ceramic
Side Control Hob

02_
LAMONA Appliances
Dear Customer,
Congratulations on your choice of hob which has been designed to give you excellent service.
The user manual will help you use your product quickly and safely.
Please read this user manual before installing and using the hob.
Always follow the safety instructions.
Keep this user manual within easy reach for future reference.
Please read any other documents supplied with the product.
Explanation of symbols
Throughout this user manual the following symbols are used:
This product’s packaging material is recyclable. Help recycle it and protect the
environment by dropping it off in the municipal receptacles provided for this purpose.
Your product also contains a great amount of recyclable material. It is marked with this
label to indicate the used appliances that should not be mixed with other waste. This
way, the appliance recycling organised by your manufacturer will be done under the
best possible conditions, in compliance with European Directive 2002/96/EC on Waste
Electrical and Electronic Equipment. Contact your town hall or your retailer for the used
appliance collection points closest to your home. We thank you doing your part to protect
the environment.
Important information or useful tips about usage.
Warning for possible hazards to health and property.
Warning possibility of electric shock.

_ 03
User manual LAM1701 / LAM1702
This appliance canbe used by childrenaged from 8 years
and above and persons with reduced physical, sensory or
mental capabilitiesor lack of experience and knowledge if
they have been given supervision or instruction concerning
use of the appliance in a safe way and understand the
hazards involved.
Children shall not play with the appliance. Cleaning and
user maintenance shall not be made by children without
supervision.
The appliance and its accessible parts become hot during
use. Care should be taken to avoid touching heating
elements. Children less than 8 years of age shall be kept
away unless continuously supervised.
Do not use steam cleaners to clean the appliance as this
may cause an electric shock.
Only use the connection cable specified in the “Technical
specifications”.
If the power connection cable for the product is damaged,
it must be replaced by the manufacturer, its service agent
or similary qualified persons in order to avoid a hazard.
The appliance mustbe installed so thatit can be
completely disconnected from the network. The separation
must be provided either by a mains plug, or a switch built
into the fixed electrical installation, according to
construction regulations.

04_
LAMONA Appliances
Unattended cooking on a hob with fat or oil can be
dangerous and may result in fire. NEVER try to extinguish
a fire with water, but switch off the appliance and then
cover flame e.g. with a lid or a fire blanket.
Danger of fire: Do not store items on the cooking surfaces.
The appliance is not intended to be operated by means of
an external timer or separate remote-control system.
Glass surface models: If the surface is cracked, switch off
the appliance to avoid the possibility of electric shock.
Induction models: Metallic objects such as knives, forks,
spoons and lids should not be placed on the hob surface
since they can get hot.
With top lid models: Do not close the top cover before the
hotplates or burners cool down. Wipe the top cover dry
before opening it in order to avoid water leakage to the
rear and inner sections of the oven.

_ 05
User manual LAM1701 / LAM1702
Index
Index
01 - Before Using the hob 04
02 - Safety 04
General 04
Fire safety advice 05
,IDSDQFDWFKHVÀUH
Deep fat frying 05
If you have an Electrical Fire 05
03 - Using your hob 06
Controls 06
Hot hob Indicator lights 06
Heat Settings 06
Hob Layout 07
04 - Cleaning and Maintenance 08
Ceramic hob glass 08
05 - Installation 08
General Information 08
Positioning 08
Protecting the hob cut out 08
Clearances and dimensions
requirements 09
Connect to the electricity supply 10
Technical Data 11
06 - Your guarantee 12

06_
LAMONA Appliances
Before Using the hob
Make sure that you have removed all packaging, wrappings, stickers and from the hob surface.
It is recommended that you clean and wash the hob surface before using for the time.
Apply a thin coat of ceramic hob cleaner to the hob to help maintain and protect it.
01 - Before using the hob
This appliance is for domestic cooking
purposes only. It must not be used for other
purposes, for example room heating.
General
Accessible parts may become hot during use.
To avoid burns, children less than 8 years of age
should be kept away unless continuously
supervised.
This appliance can be used by children aged 8
years and above, persons with reduced physical,
sensory or mental capabilities or lack of experience
and knowledge if they have been given supervision
or instruction concerning use of the appliance in
a safe way and understand the hazards involved.
Children must not play with the appliance. Cleaning
and user maintenance must not be made by
children without supervision.
Servicing should be carried out only by
authorised personnel.
Do not spray aerosols in the vicinity of this
appliance while it is in operation.
Do not store or use liquids or items in
the vicinity of this appliance.
Do not modify this appliance.
Always ensure that pan bases are dry and
before using them on the hob.
Always position pans over the centre of the
heat zone, and turn the handles to a safe
position so they cannot be knocked over or
grabbed by children.
Always use pans which are no smaller than
100mm (4”), or no larger than 250mm (10”).
Always match the size of pan to the heat zone
– do not use large pans on small zones or vice
versa.
Always lift pans onto and off the hob, rather
than sliding them across the surface to avoid
marks and scratches.
Never use double pans, rim-based pans, old or
misshapen pans, or any pan that is not stable
on a surface.
Never leave cooking fat, or oil, unattended.
Never use commercial simmering aids, or heat
diffusers, as they create excessive heat and
can damage the surface of the hob.
Never use the hob for any other purpose than
cooking food.
Never leave plastic utensils close to, or on top
of the hob -they could melt!
Never leave any cook zone on without a pan
covering it. This causes potential a hazard.
02 - Safety

_ 07
User manual LAM1701 / LAM1702
Never use the hob surface as a chopping
board or food preparation area, as this may
lead to it becoming damaged.
Never put metal cooking utensils, cutlery,
knives or other metal objects on the hob. They
could become hot if they are near a cooking
area which is in use.
Never leave aluminium foil on the hob top,
LWUHÁHFWVKHDWEDFNLQWRWKHHOHPHQWZKLFK
leads to damage.
Never heat up a sealed tin of food on the hob,
as it may explode.
Never leave pans overhanging the edge of the
hob.
Fire safety advice
0RVWNLWFKHQÀUHVRFFXUZKHQSHRSOHDUHGLVWUDFWHG
or leave things unattended, so remember:
If you’re called away from the hob - by the phone or
someone at the door, either take pans off the heat,
or switch off your hob.
Don’t let yourself be distracted while cooking.
,I\RXGRKDYHDÀUHLQWKHNLWFKHQGRQ·WWDNHDQ\
risks - get everyone out of your home and call the
Fire Service
,IDSDQFDWFKHVÀUH
Do not move it as it’s likely to be extremely hot.
Turn off the heat if it’s safe to do so, but never
lean over a pan to reach the controls.
8VHÀUHEODQNHWRUDGDPSWHDWRZHOWRFRYHU
the pan.
,I\RXKDYHSXWWKHÀUHRXWOHDYHWKHSDQWR
cool completely.
Deep-fat frying presents more
dangers in your kitchen
1HYHUÀOODFKLSSDQRURWKHUGHHSIDWIU\HU
more than one-third full of oil.
'RQRWXVHDÀUHH[WLQJXLVKHURQDSDQRI
burning oil - the force of the extinguisher can
VSUHDGWKHÀUHDQGFUHDWHDÀUHEDOO
,I\RXKDYHDQHOHFWULFDOÀUHLQWKH
NLWFKHQ
Pull the plug out, or switch off the power at the
IXVHER[WKLVPD\EHHQRXJKWRVWRSWKHÀUH
immediately
6PRWKHUWKHÀUHZLWKDÀUHEODQNHWRUXVHD
dry powder or carbon dioxide extinguisher
Remember: never use water on an electrical or
FRRNLQJRLOÀUH
Safety

08_
LAMONA Appliances
Do not use the ceramic hob if the glass surface
is cracked, as electrical parts are directly beneath.
Switch off the appliance at the supply to prevent
electric shock and contact your supplier.
The hob surface remains hot after use.
DO NOT TOUCH.
The appliance is not intended to be operated
by means of an external timer or separate control
system.
Controls
Rotate in either direction to switch on and select the
heat level. Each zone has 6 heat settings as
described in the heat settings table.
When any one of the heating zones is on, the red
indicator light on the control panel lights up.
To switch a heating zone off turn the corresponding
knob to ‘0’ (zero)
Hot Hob Indicator Lights
Indicator lights show which zone is operating and/
or hot. Whenever the temperature of the zone’s
surface drops below 64 degrees ºc, the indicator
lights will turn off.
Heat settings
Heat Settings
1 2 - 3 4 - 5 - 6
Warming Simmering Frying
Boiling
03 - Using the hob - Side Control Ceramic Hob
Using the hob

_ 09
User manual LAM1701 / LAM1702
Hob layout
a.
b.
c.
d.
e.
f.
i.
j.
g.
h.
Using the hob
a. Rear Left Zone (140mm 1200w)
Suitable for 6” or 15cm diameter saucepan
b. Rear Right Zone (180mm 1700w)
Suitable for 7” or 18cm diameter saucepan
c. Front Left Zone (180mm 1700w)
Suitable for 7” or 18cm diameter saucepan
d. Front Right Zone (140mm 1200w)
Suitable for 6” or 15cm diameter saucepan
e. Power on Indicator
f. Rear right Control Knob
g. Rear left Control Knob
h. Front left Control Knob
i. Front right control Knob
j. Hot Hob Warning Indicators.

10_
LAMONA Appliances
04 - Cleaning & maintenance
Ceramic glass hobs
7KHFHUDPLFKREtRSFDQEHFOHDQHGXVLQJD
FOHDQGDPSFORWKRUNLWFKHQSDSHU'RQRW
XVHDXVHGGLVKFORWKRUVSRQJHDVWKe\FDQ
leaveaRIGetHUJHQWRQtheVXUIacewhich
FDQOHDGtRGLVFRORXUDWLRQ3OHDVHHQVXUHWKDW
WKHHOHPHQWVDUHFRROHGIXOO\tRavRLGVtHDP
EXUQV
YRXFDQXVHDVSHFLDOLVWFHUDPLFFOHDQHUtR
UHVtRUHWKHVXUIDFHEXWXVHVSDULQJO\tRavRLG
FRDWLQJWKHKREtRStRRWKLFNOyTRRPXFK
FUHDPFOHDQHUZLOOOHDGtRGLVFRORXUDWLRQ8VH
DGUyFOHDQFORWKtRSROLVKWKHVXUIace.
FRUVWXEERUQPDUNVDVSHFLDOLVWKREVFUDSHU
FDQEHXVHG
'RQRWXVHVtHDPFOHDQHUVRUKLJKSUHVVXUH
FOHDQLQJHqXLSPHQW
RHJXODUFOHDQLQJZLOOSUevHQWDn\VDOWVRU
PLQHUDOVIURPDFFXPXODWLQJRQyRXUKREDQG
GLVFRORXULQJWKHJODVV
:LSHDn\VSLOODJHDVVRRQDVSRVVLEOH
&OHDQWKHKREtRSDVUHJXODUO\DVSRVVLEOHWKLV
ZLOOSUevHQWDn\EXLOGXSRIJUHDVHZKLFKPa\
EHahazaUG
FRRGVZLWKKLJKVXJDUFRQtHQWtRIIHHIUXLW
MXLFHMDPeWFWKDWERLORvHUZKLOHFRRNLQJRU
spattHUHGVXJDUVWDLQVPXVWEHLPPHGLDtHO\
UHPRvHGXVLQJDVFUDSHUevHQLIKRt.
'RQRWXVHDEUDVLvHSURGXFWVEOHDFKKRE
FOHDQHUVSUa\RUSDQVFRXUHUs.
&OHDQLQJDQGPDLQtenance
06 - Installation
General information
,QVWDOODWLRQVKRXOGRQO\EHFDUULHGRXWEya
LQVWDOOHURUHQJLQHHU.
3OHDVH1Rte:
$OWKRXJKeveU\FDUHKDVEHHQWDNHQtRHQVXUH
WKLVDSSOLDQFHKDVQREXUUVRUVKDUSHGJHVWH
UHFRPPHQGWKDWyRXwHDUSURtectivHJORvHVZKHQ
LQVWDOOLQJDQGPRYLQJWKLVDSSOLDQFH7KLVZLOO
SUevHQWLQMXUy.
TheKREVKRXOGnRtEH DERveawDVKLQJ
PDFKLQHDIULGJHRUDIUHH]HUWDOOVXUIDFHVDERvH
WKHwRUNVXUIDFHDQGLQWKHLPPHGLDtHYLFLQLW\RI
WKHFRRNLQJKREPXVWEHKHDWUHVLVWDQW
/DPLQDtHGVXUIDFHVDQGWKHDGKHVLvHXVHGIRU
WKHPPXVWEHheatUHVLVWDQWinRUGHUtRavRLG
an\GDPDJH
,QVWDOODWLRQVVKRXOGEHFDUULHGRXWLQOLQHZLWKWKH
1DWLRQDORHJXODWLRQVDSSOLFDEOHZLWKWKLVSURGXFW
type.
Positioning
7KHKRELVGHVLJQHGtREHEXLOWLQtRDwRUNtRSDV
GeWDLOHGLQWKHLPDJH
$SSDWXUHZLGWKPP[GHSWKPP
Protecting the Hob cut-out
7KHW\SHVRIFKLSERDUGXVHGIRUwRUNVXUIDFHVVwHOO
UHODWLvHO\qXLFNO\LQFRQWDFWZLWKKXPLGLWy
$SSO\DVSHFLDOvDUQLVKRUDGKHVLvHtRWKHFXWHGJH
tRSURtHFWLWIURPPRLVWXUHLQJUHVV

_ 11
User manual LAM1701 / LAM1702
Installation
Clearances and dimensions requirements
560mm
50mm Min
55mm min
400mm min
490mm
Minimum distance
between carcasses must
be equal to width of hob
*
Minimum height to extractor
as recommend in extractor
instruction manual
*
50mm min between hob and rear wall
(>60mm to cut out aperture)
No shelf or overhang of combustible material should be closer than 650mm directly above the hob.
There must be a minimum clearance of 50mm between the rear edge of the hob and the rear wall. This
clearance must be maintained up to 650mm above the worktop (unless otherwise stated in your extractor
manual).
Apply the self adhesive seal to the underside edges of the hob glass. For best results, the seal should be
adhered along each side in turn, as close to the edge as possible, and trimmed at each corner, taking care
to ensure a neat join.

12_
LAMONA Appliances
Typical Installation positions
Seal
Underside of hob
Place the hob in the aperture, checking the hob
glass is covering the worktop along all four sides.
Set the front edge of the appliance parallel with the
front of the worktop.
Secure the hob to the worktop by means of the
brackets provided, taking the thickness of the
worktop into account. Depending on your appliance
it will be supplied and installed using one of the
following installation methods.
Method 1
The brackets screw directly into the base of the hob
in the positions shown
40mm Hob
Worktop
Screw
50mm Hob
Worktop
30mm Hob
Worktop
Screw
Installation above an oven
If the appliance is installed with an oven
underneath, please leave atleast 25mm of
ventilation, umless otherwise stated in your oven
installation guidelines.
Worktop
25mm
oven or partition
Hob
Connect to the electricity Supply
This appliance must be earthed.
The hob must be installed by a competent
electrician, using a suitable double pole control unit,
with 3mm minimum contact separation at all poles.
Connection should be made with a suitable cable.
Ensure that you route all mains electrical
cables well away from any adjacent heat source,
such as the base of the hob or oven / grill surface.
Strip the wires & connect to the terminal
block as appropriate:-
Installation

_ 13
User manual LAM1701 / LAM1702
Installation
Technical Data
Outer Dimentions
Width 580mm
Depth 510mm
Height 71mm
Cutout Dimentions
Width 560mm
Depth 490mm
Cook Zones
Hob Wattage-Front Left Ø180-1700w
Hob Wattage-Rear Left Ø140-1200w
Hob Wattage-Front Right Ø140-1200w
Hob Wattage-Rear Right Ø180-1700w
Total Electric Power 5800w
Supply Voltage 230V~50Hz
Fuse Protection 23 A min
Cable Type HORR-F5 4.0mm ², 3 core or equivalent
This appliance conforms to European Directive 2009/125/EC regarding Eco design
requirements for energy-related products

14_
LAMONA Appliances
07 - Your guarantee
Product Guarantee Details (UK only)
<RXUDSSOLDQFHKDVWKHEHQHÀWRIDFRPSUHKHQVLYHPDQXIDFWXUHU·VJXDUDQWHHZKLFKFRYHUVWKHFRVWRI
breakdown repairs. (Details of which are shown on your Proof of Purchase Document).
Any claim during the period of the guarantee (MUST BE ACCOMPANIED BY THE PROOF OF PURCHASE)
The product must be correctly installed and operated in accordance with the manufacturer’s
instructions and used for normal domestic purposes.
This guarantee does not cover accidental damage, misuse or alternations which are likely to affect the
product.
The guarantee is invalid if the product is tampered with, or repaired by any unauthorised person.
(The guarantee in no way affects your statutory or legal rights)
What to do if you need to report a problem-
Please ensure you have ready:
7KHSURGXFW·VPRGHOVHULDOQXPEHUV
Howdens Proof of Purchase document
Your full contact details
Call the Service Line on 0845 00 60 006
Your guarantee

_ 15
User manual LAM1701 / LAM1702
Model LAM1701/2
Type of hob Ceramic
Noof cookingzones 4
HeaƟngtechnology Ceramic
ႇ
FL - 180mm
RL - 140mm
FR - 140mm
RR - 180mm
EC
electric cooking
FL - 206.93Wh/kg
RL - 211.46Wh/kg
FR - 211.46Wh/kg
RR - 206.93Wh/kg
EC
electrichob
209.19Wh/kg
CommissionRegulaƟon(EU)No 66/2014
Product InformaƟon

16_
LAMONA Appliances
Notes

_ 17
User manual LAM1701 / LAM1702
Notes

w
If supplied, please stick your self adhesive product rating plate
here, or make a note of the product serial number below in the
box below for future reference.
Serial Number : ...........................................................................................
Issue 5 28/04/2015
This manual suits for next models
1
Table of contents
Other Lamona Hob manuals

Lamona
Lamona LAM1215 User manual

Lamona
Lamona LAM1742 Troubleshooting guide

Lamona
Lamona LAM1009 Guide

Lamona
Lamona LAM1802 Guide

Lamona
Lamona LAM1112 Guide

Lamona
Lamona LAM1746 Guide

Lamona
Lamona LAM9501 User manual

Lamona
Lamona LAM1803 User manual

Lamona
Lamona LAM1625 Troubleshooting guide

Lamona
Lamona LAM1763 Troubleshooting guide

Lamona
Lamona LAM1851 User manual

Lamona
Lamona LAM1706 Guide

Lamona
Lamona LAM9550 User manual

Lamona
Lamona LAM1761 Troubleshooting guide

Lamona
Lamona LAM9500 Guide

Lamona
Lamona LAM1850 Guide

Lamona
Lamona LAM1741 Troubleshooting guide

Lamona
Lamona LAM1750 User manual

Lamona
Lamona LAM1749 Guide

Lamona
Lamona LAM1550 User manual