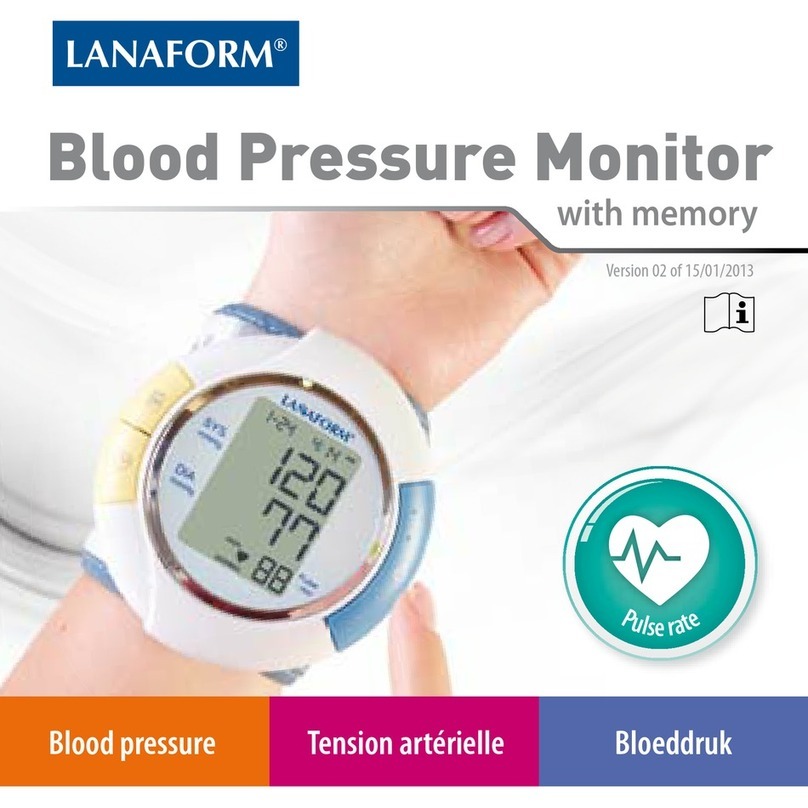
Lanaform WBPM-110 User manual


ENGLISH
Presentation
Thank you for choosing the WBPM-110 from Lanaform.
Pleasereadall the instructionsbeforeusing
your product, particularly these basic safe-
ty instructions.
The photographs and other images of the product
in this manual and on the packaging are as accu-
rate as possible, but do not claim to be a perfect
reproduction of the product.
Contents
01 Important information
02 Contents and display indicators
03 Intended use
04 Contraindication
05 Package contents
06 Product description.
07 Specications
08 Notice
09 Setup and operating procedures
10 Maintenance
11 Explanation of symbols on unit
12 Limited warranty
13 Service center
14 Electromagnetic compatibility information
15 Advice regarding the disposal of waste
01. Important information
Normal Blood Pressure Fluctuation
All physical activity, excitement, stress, eating,
drinking, smoking, body posture and many other
activities or factors (including taking a blood pres-
sure measurement) will inuence blood pressure
value. Because of this, it is mostly unusual to ob-
tain identical multiple blood pressure readings.
Blood pressure uctuates continually, day and
night. The highest value usually appears in the
daytime and lowest one usually at midnight. Typi-
cally, the value begins to increase at around 3:00AM,
and reaches to highest level in the daytime while
most people are awake and active.
Considering the above information, it is recom-
mended that you measure your blood pressure at
approximately the same time each day.
Too frequent measurements may cause injury due
to blood ow interference, please always relax a
minimum moment of 1 to 1.5 minutes between meas-
urements to allow the blood circulation in your arm
to recover. It is rare that you obtain identical blood
pressure readings each time.
02. Contents and display indicators
1
2
3
4
6
7
8
5
1313
1111
1010
1212
99
202010LA090207002 · 27/08/20 · 3

4· 202104LA090207003 · 09/02/21
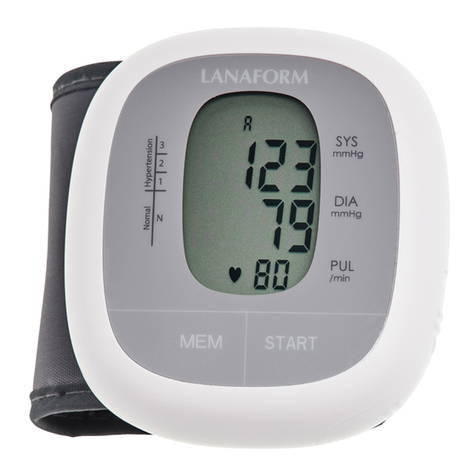
01 Day and time display
02 Systolic
03 Diastolic
04 Pulse rate
05 Irregular heartbeat symbol
06 Low battery indicator
07 The pressure in cu is instable,
or much remnant air in cu
08 Blood pressure level classication indicator
09 Blood pressure level classication indicator
10 MEM button
11 START button
12 LCD
13 Cu
03. Intended Use
FullyAutomaticElectronicSphygmomanometeris
for use by medical professionals or at home and is a
non-invasiveblood pressuremeasurement system
intended tomeasurethediastolicandsystolicblood
pressures and pulse rate of an adult individual by
using a non-invasive technique in which an inat-
able cu is wrapped around the wrist.
04. Contraindication
It is inappropriate for people with serious
arrhythmia to use this Electronic Sphygmo-
manometer.
05. Package contents
01 Manual
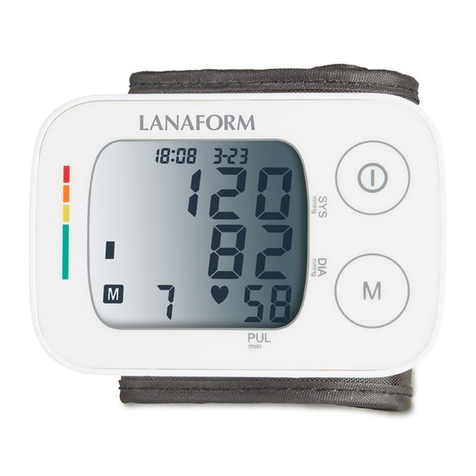
02 Wrist blood pressure monitor
03 Battery 2×AAA
06. Product Description
Based on Oscillometric methodology and silicon in-
tegrated pressure sensor, blood pressure and pulse
ratecanbe measuredautomaticallyandnon-inva-
sively. The LCD display will show blood pressure and
pulse rate. The most recent 2×60 measurements can
be stored in the memory with date and time stamp.
The Electronic Sphygmomanometer corresponds to
the below standards: IEC 60601-1Edition 3.1 2012-08/
EN 60601-1:2006/A1:2013(Medical electricalequip-
ment — Part 1: General requirements for basic safety
and essential performance), IEC60601-1-2:2014/
EN60601-1-2:2015 (Medical electrical equipment
— Part 1-2: General requirements for basic safety
and essential performance - Collateral standard:
Electromagneticcompatibility -Requirementsand
tests), IEC80601-2-30:2009+AMD1:2013/EN 80601
2-30:2010/A1:2015(Medicalelectrical equipment –
Part 2-30: Particular requirements for the basic
safety and essential performance of automated
non-invasive sphygmomanometers)EN 1060-1:
1995 + A2: 2009 (Non-invasive sphygmomanom-
eters - Part 1: General requirements), EN 1060-3:
1997 + A2: 2009 (Non-invasive sphygmomanom-
eters - Part 3: Supplementary requirements for
electro mechanical blood pressure measuring
systems);ISO81060-2:2013(Non-Invasive Sphy-
gmomanometers - Part 2: Clinical Validation Of
Automated Measurement Type).
07. Specications
01 Product name: WBPM-110
02 Model: LA090207
03
Classication: Internally powered, Type BF
applied part, IP22, No AP or APG, Continu-
ous operation
04
Machine size: Approx. 83mm × 74mm ×26mm
(3 9/32” ×2 29/32” ×1 1/32”)
05 Cu circumference: 14cm-19.5cm
(5 1/2”-7 11/16”)
06
Weight: Approx. 71g (2 1/2oz.) (exclude bat-
teries and cu)
07 Measuring method: Oscillometric method, au-
tomatic ination and measurement
08
Memory volume: 2×60 times with time and
date stamp

202104LA090207003 · 09/02/21 · 5
09 Power source: batteries: 2×1.5V SIZE AAA
10 Measurement range:
a Cu pressure: 0-300mmHg
b Systolic: 60-260mmHg
c Diastolic: 40-199mmHg
d Pulse rate: 40-180 beats/minute
11 Accuracy:
a Pressure: ±3mmHg
b Pulse rate: ±5%
12
Environmental temperature for operation:
10°C~40°C (50°F~104°F)
13
Environmental humidity for operation: ≤85%RH
14
Environmental temperature for storage and
transport: -20°C~50°C (-4°F~122°F)
15 Environmental humidity for storage andtrans-
port: ≤85%RH
16 Environmental pressure: 80kPa-105kPa
17 Battery life: Approx. 200 times.
18
All components belonging to the pressure meas-
uring system, including accessories: Pump,Valve,
LCD, Cu, Sensor
These specications are sub-
ject to change without notice.
08. Notice
01
Read all of the information in the operation
guide and any other literature in the box be-
fore operating the unit.
02 Stay still, calm and rest for 5 minutes before
blood pressure measurement.
03
The cu should be placed at the same lev
-
el as your heart.
04 During measurement, neither speak nor move
your body and arm.
05
Measuringon left wristforeach measurement.
06 Please always relax at least 1 or 1.5 minutes
between measurements to allow the blood
circulation in your arm to recover. Prolonged
over-ination (cu pressure exceed 300 mmHg
or maintained above 15 mmHg for longer than
3 minutes) of the bladder may cause ecchy-
moma of your arm.
07 Consult your physician if you have any doubt
about below cases:
a The application of the cu over a wound or
inammation diseases;
b
The application of the cu on any limb where
intravascular access or therapy, or an arter-
io-venous (A-V) shunt, is present;
c
The application of the cu on the arm on the
side of a mastectomy;
d
Simultaneously used with other monitor-
ing medical equipments on the same limb;
e
Need to check the blood circulation of the user.
08
This Electronic Sphygmomanometer is de-
signed for adults and should never be used on
infants or young children. Consult your physi-
cian or other health care professionals before
use on older children.
09
Do not use this unit in a moving vehicle; this may
result in erroneous measurement.
10
Blood pressure measurements determined by
this monitor are equivalent to those obtained
by a trained observer using the cu/stethoscope
auscultationmethod,withinthelimits prescribed
by the American National Standard Institute,
Electronic or automated sphygmomanometers.
11
Information regarding potential electromag-
netic or other interference between the blood
pressure monitor and other devices together
with advice regarding avoidance of such in-
terference please see part ELECTROMAGNETIC
COMPATIBILITY INFORMATION. It is suggested
that the blood pressure monitor be kept 30 cm
away from other wireless devices, such as WLAN
unit, cell phone, microwave oven, etc. It can’t be
used near active HF SURGICAL EQUIPMENT and

6· 202104LA090207003 · 09/02/21
the RF shielded room of an ME SYSTEM for mag-
neticresonance imaging, where the intensity of
EM DISTURBANCES is high.
12
If Irregular Heartbeat (IHB) brought by com-
mon arrhythmias is detected in the procedure
of blood pressure measurement, a sig-
nal will be displayed. Under this condition,
the Electronic Sphygmomanometers can
keep function, but the results may not be ac-
curate, it’s suggested that you consult with
your physician for accurate assessment.
There are 2 conditions under which the signal of
IHB will be displayed:
a
The coecient of variation (CV) of pulse
period >25%.
b
The dierence of adjacent pulse period≥0.14s,
and the number of such pulse takes more than
53 percentage of the total number of pulse.
13 Please do not use the cu other than supplied
by the manufacturer, otherwise it may bring
biocompatible hazard and might result in meas-
urement error.
14 The monitor might not meet its performance
specications or cause safety hazard if stored
or used outside the specied temperature and
humidity ranges in specications.
15 Please do not share the cu with other infec-
tive person to avoid cross-infection.
16
This equipment has been tested and found to
comply with the limits for a Class B digital de-
vice, pursuant to part 15 of the FCC Rules. These
limits aredesignedtoprovide reasonable protec-
tionagainstharmfulinterference inaresidential
installation. This equipment generates, uses
and can radiate radio frequency energy and, if
not installed and used in accordance with the
instructions, may cause harmful interference
to radio communications. However, there is no
guarantee that interference will not occur in a
particular installation. If this equipment does
cause harmfulinterference toradioor television
reception, which can be determined by turning
the equipment o and on, the user is encouraged
to try to correct the interference by one or more
of the following measures:
a Reorient or relocate the receiving antenna.
b Increase the separation between the equip-
ment and receiver.
c
Connect the equipment into an outlet on a
circuit dierent from that to which the re-
ceiver is connected.
d Consult the dealer or an experienced radio/
TV technician for help.
17 Measurementsare notpossibleinpatients with
a high frequency of arrhythmias.
18 The device is not intended for use on neonates,
children or pregnant women. (Clinical testing
has not been conducted on neonates, children
or pregnant women.)
19
Motion, trembling, shivering may aect the
measurement reading.
20 The device would not apply to the patients with
poorperipheralcirculation,noticeablylowblood
pressure, or low body temperature (there will be
low blood ow to the measurement position).
21
The device would not apply to the patients who use
an articial heart and lung (there will be no pulse)
22
Consult your physician before using the device for
any of the following conditions: common arrhyth-
mias such as atrial or ventricular premature beats
or atrial brillation, arterial sclerosis, poor per-
fusion,diabetes, pre-eclampsia,renaldiseases.
23 The patient can be an intended operator.
24
This device complies with part 15 of the FCC
Rules. Operation is subject to the following two
conditions: (1) This device may not cause harm-
ful interference, and (2) this device must accept
anyinterference received, includinginterference
that may cause undesired operation.

202104LA090207003 · 09/02/21 · 7
25
Attention that changes or modication not ex-
pressly approved by the party responsible for
compliance could void the user’s authority to
operate the equipment.
26
Swallowing batteries and/or battery uid can
be extremely dangerous. Keep the batteries
and the unit out of the reach of children and
disabled persons.
27
Ifyouareallergictoplastic/rubber,pleasedon’t
use this device.
09. Setup And Operating Procedures
01 Battery Loading
a
Open battery cover at the back of the monitor.
b Load two AAA size batteries. Please pay at-
tention to polarity.
c Close the battery cover.
When LCD shows battery symbol , re-
place all batteries with new ones.
Rechargeable batteries are not suit-
able for this monitor.
Remove the batteries if the monitor will not
be used for a month or more to avoid rel-
evant damage of battery leakage.
Avoid the battery uid to get in your eyes. If it
should get in your eyes, immediately rinse with plen-
ty of clean water and contact a physician.
The monitor, the batteries and the cu, must
be disposed of according to local regulations
at the end of their usage.
02 Clock And Date Adjustment
a Once you install the battery or turn o the
monitor, it will enter Clock Mode, and LCD will
display time and date. See picture 2.
b
While the monitor is in Clock Mode, press
the START and MEM button simulta-
neously for two seconds, then release the
buttons, the monitor will be in Clock and
Date Adjustment Mode.
c
In Clock and Date Adjustment Mode, the time
format will blink at rst. See picture2-1.
While time format is blinking, press the
button MEM to change the time format.
The default time format is 24h.
d
Pressthebutton START repeatedly,theyear
(range is 2018~2099), month, day, hour and
minute will blink in turn. See picture2- 2&2-3
& 2-4 & 2-5 & 2-6. While the number is blink-
ing, press the button MEM toincrease the
number, keep on pressing the button MEM ,
the number will increase faster.
e
During adjusting clock and date, the monitor
will go back to Clock Mode automatically when
no button will be pressed within 60 seconds.
f
You can turn off the monitor by press-
ing START button when the minute is
blinking, then the time and date is conrmed.

8· 202104LA090207003 · 09/02/21
Note
01 The clock format could be set by user.
02
Table 2-1 instructs the conversion relations
between 24hour format and 12hour format.
Table 2-1
24 HOUR
FORMAT
12 HOUR
FORMAT
24 HOUR
FORMAT
12 HOUR
FORMAT
0:00 12:00 AM 12:00 12:00 PM
1:00 1:00 AM 13:00 1:00PM
2:00 2:00 AM 14:00 2:00 PM
3:00 3:00 AM 15:00 3:00 PM
4:00 4:00 AM 16:00 4:00 PM
5:00 5:00 AM 17:00 5:00 PM
6:00 6:00 AM 18:00 6:00 PM
7:00 7:00 AM 19:00 7:00 PM
8:00
8:00 AM
20:00
8:00 PM
9:00
9:00 AM
21:00
9:00 PM
10:00
10:00 AM
22:00
10:00 PM
11:00
11:00 AM
23:00
11:00 PM
03 Connecting The Cu To The Monitor
The cu is attached to the monitor when it is pack-
aged. Should the cu become unattached, align the
two plugs and four brackets of the cu with the
plug sockets and bracket sockets of the monitor
and press the cu to the monitor until the plugs
and brackets are securely attached.
04 Applying The Cu
a
Place the cu around a bare wrist 1-2cm above
the wrist joint on the palm side of the wrist.
b
While seated, place the arm with the cued
wrist in front of your body on a desk or table
with the palm up. If the cu is correctly placed,
you can read the LCD display.
c
The cu must be neither too tight nor too loose.
Note
d
Please refer to the cu circumference range
in “SPECIFICATIONS” to make sure that the
appropriate cu is used.
e Measuring on left arm each time.
f
Do not move your arm, body, or the moni-
tor and do not move the rubber tube during
measurement.
g
Stay quiet, calm for 5 minutes before blood
pressure measurement.
h Please keep the cu clean. Clean the cu
by wet soft cloth and mild detergent if the
cu becomes dirty. Do not remove the cu
from the monitor. Clean the cu after the
usage of every 200 times is recommended.

202104LA090207003 · 09/02/21 · 9
Do not place the cu around your arm if the
arm has any inammation, acute diseases,
infections skin wounds.
05 Body Posture During Measurement
Sitting Comfortably Measurement
a
Be seated with your feet at on the oor,
and don’t cross your legs.
b Place palm upside in front of you on a at
surface such as a desk or table, with your
elbow resting on a chair or table
c The middle of the cu should be at the lev-
el of the right atrium of the heart.
06 Taking Your Blood Pressure Reading
a
After applying the cu and your body is in a com-
fortable position, press the START button.
All display characters are shown for self-test.
You can check the LCD display according to the
picture.Pleasecontact the service centerifseg
-
ment is missing. See picture 6-1.
b
Then the current memory bank is blink. See
picture 6-2. Press MEM buttontochange
over to other bank. Conrm your selection by
pressing START button. The current bank
can also be conrmed automatically after 5
seconds with no operation.
c If the monitor has stored results, the LCD
will momentarily display the most recent one.
See picture 6-3. If no result has been stored,
zero will appear on LCD. See picture 6-4.
d Then the monitor starts to seek zero pres-
sure. See picture 6-5.
e
Then the monitor inates the cu until su-
cient pressure has built up for a measurement.
Then the monitor slowly releases air from
the cu and carries out the measurement.
Finally the blood pressure and pulse rate
will be calculated and displayed on the LCD
screen. The blood pressure classication
indicator and Irregular heartbeat symbol
(if any) will blink on the screen. See pic-
ture 6-6. The result will be automatically
stored in the monitor.
f
After measurement, the monitor will turn o
automaticallyafter 1minute ofno operation.
Alternatively, you can press the START but-
ton to turn o the monitor manually.
g
During measurement, you can press
the START button to turn o the mon-
itor manually.
Please consult a health care professional for in-
terpretation of pressure measurements.

10 · 202104LA090207003 · 09/02/21
07 Displaying Stored Results
a
In Clock Mode, press MEM button, the
monitor will display sign of current group.
The amount of results in current user mem-
ory zone will be displayed. See picture 7-1.
Press START button to switch group,
press MEM to conrm current group. The
current bank can also be conrmed auto-
matically after 5 seconds with no operation.
b
Then LCD will display the average value of all
results in the current bank. See picture 7-2. If
no result stored in the current user memory
zone, LCD will display “0” for blood pressure
and pulse rate. See picture 7-3.
c
Press MEM button, the LCD will display the
average value of the last three results in the
current user memory zone. See picture 7-4. If
no result stored in the current user memory
zone, LCD will display “0” for blood pressure
and pulse rate. See picture 7-5.
d
Press MEM but ton again, the memory num-
ber in the current user memory zone will be
displayed. See picture 7-6. If the monitor has
no result stored in the current user memory
zone, the LCD will display “0”. See picture 7-7.
e
Then the most recent result will be displayed
with date and time stamp. See picture 7-8. Ir-
regular heartbeat symbol (if any) and blood
pressure classication indicator will blink
at the same time. Press MEM button re-
peatedly to review the results measured
previously. If the monitor has no result stored
in the current user memor y zone, the LCD will
display “0” for blood pressure and pulse rate.
See picture 7-9.
f
When displaying the stored results, the moni-
tor will turn o automatically after 1 minutes
of no operation. You can also press the but-
ton START to turn o the monitor manually.
08 Deleting Measurements From The Memory
When any result is displaying (exclude average value
displaying), keeping on pressing button MEM for
three seconds, all results in the current bank will be
deleted. See picture 8. Press the button START ,
the monitor will be turned o.
09 Assessing High Blood Pressure For Adults
The following guidelines for assessing high blood
pressure (without regard to age or gender) have
been established by the World Health Organiza-
tion (WHO). Please note that other factors (e.g.
diabetes, obesity, smoking, etc.) need to be tak-
en into consideration. Consult with your physician
for accurate assessment, and never change your
treatment by yourself.

202104LA090207003 · 09/02/21 · 11
Classication of blood
pressure for adults
RANGE OF
BLOOD PRES-
SURE VALUES
SYSTOLIC
(IN MMHG)
DIASTOLIC
(IN MMHG)
VALUE
DISPLAYED
Level 3: acute
hypertension ≥180 ≥110 3
Level 2: intermediate
hypertension 160-179 100-109 2
Level 1: mild
hypertension 140-159 90-99 1
Normal high
130-139
85-89
N
Normal
120-129
80-84
N
Optimum
<120
<80
N
10 Technical Alarm Description
The monitor will show ‘HI’ or ‘Lo’ as technical alarm
on LCD with no delay if the determined blood pres-
sure (systolic or diastolic) is outside the rated range
specied in part SPECIFICACIONS. In this case, you
should consult a physician or check if your opera-
tion violated the instructions.
The technical alarm condition (outside the rat-
ed range) is preset in the factory and cannot be
adjusted or inactivated. This alarm condition is
assigned as low priority according to IEC 60601-1-8.
The technical alarm is non-latching and need no
reset. The signal displayed on LCD will disappear
automatically after about 8 seconds.
Troubleshooting (1)
PROBLEM POSSIBLE CAUSE SOLUTION
LCD Display shows abnormal result
The cu position
was not correct or
i twas not prop-
erly tightened
Apply the cu cor-
rectly and try again.
Body posture
was not correct
during testing
Review the “BODY
POSTURE DURING
MEASUREMENT”
sections of the
instructions
and re-test
Speaking, arm or
body movement,
angry, excited
or nervous dur-
ing testing
Re-test when
calm and without
speaking or mov-
ing during the test
Irregular heart-
beat (arrythmia)
It is inappropri-
ate for people with
serious arrthyth-
mia touse this
Electronic Sphy-
gmomanometer
Troubleshooting (2-1)
PROBLEM POSSIBLE CAUSE SOLUTION
LCD shows
low battery
symbol
Low Battery Change the
batteries
LCD
shows “ER 0”
Pressure sys-
tem is unstable
before meas-
urement
Don’t move
and try again
LCD
shows “ER 1”
Fail to detect
systolic pressure
LCD
shows “ER 2”
Fail to detect di-
astolic pressure

12 · 202104LA090207003 · 09/02/21
PROBLEM POSSIBLE CAUSE SOLUTION
LCD
shows “ER 3”
Pneumatic sys-
tem blocked
during ination
Connect the cu
correctly and
try again. If the
monitor is still
abnormal, please
contact the lo-
cal distributor
or the factory
LCD
shows “ER 4”
Pneumatic sys-
tem leakage
during ination
Troubleshooting (2-2)
PROBLEM POSSIBLE CAUSE SOLUTION
LCD
shows “ER 5”
Cu pressure
above 300mmHg
Measure again
after ve min-
utes. If the
monitor is still
abnormal, please
contact the lo-
cal distributor
or the factory
LCD
shows “ER 6”
More than 160
seconds with
cu pressure
above 15 mmHg
LCD
shows “ER 7”
Inner Mem-
ory error
LCD
shows “ER 8”
Device parame-
terchecking error
LCD
shows “ER A”
Pressure sensor
parameter error
No repsonse
when you
press button or
load battery
Incorrect oper-
ation or strong
electromagnet-
ic interference
Take out bat-
teries for ve
minutes, and
then reinstall
all batteries
10. Maintenance
01
Do not drop this monitor or subject it to
strong impact.
02
Avoidhightemperatureandsolarization. Do
not immerse the monitor in water as this will
result in damage to the monitor.
03 If this monitor is stored near freezing, allow it
to acclimate to room temperature before use.
04 The monitor requires 6hours to warm from
the minimum storage temperature between
uses until the monitor is ready for its INTEND-
ED USE when the ambient temperature is 20°C.
05 The monitor requires 6hours to cool from the
maximum storage temperature between uses
until the the monitor is ready for its INTEND-
ED USE when the ambient temperature is 20°C.
06 Do not attempt to disassemble this monitor.
07 If you do not use the monitor for a long time,
please remove the batteries.
08 It is recommended the performance should be
checked every 2 years or after repair. Please
contact the service center.
09
Clean the monitor with a dry, soft cloth or a soft
clothsqueezedwellaftermoistened withwater,
diluteddisinfectant alcohol,or diluteddetergent.
10
No component can be maintained by user in the
monitor. The circuit diagrams, component part
lists, descriptions,calibrationinstructions, or
other information which will assist the user’s
appropriately qualied technical personnel to
repairthose parts of equipment whichare des-
ignated repairably can be supplied.
11
The monitor can maintain the safety and perfor-
mance characteristics for a minimum of 10,000
measurements or three years, and the cu in-
tegrity is maintained after 1,000 open–close
cycles of the closure.
12
It is recommended the cu should be disinfect-
ed 2 times every week if needed (For example, in
hospital or in clinique). Wipe the inner side (the
side contacts skin) of the cu by a soft cloth
squeezed after moistened with Ethyl alcohol
(75-90%), then dry the cu by airing.
13
Not servicing/maintenance while the mon-
itor is in use.

202104LA090207003 · 09/02/21 · 13
11. Explanation of Symbols On Unit
The following symbols appear in these instruc-
tions for use:
SYMBOL DESCRIPTION
Warning
Warning instruction indicating a
risk of injury or damage to health.
Safety note indicating possible
damage to the unit/accessory.
Note on important information.
Symbol for ”THE OPERATION GUIDE MUST
BE READ” (The sign background colour:
blue. The sign graphical symbol: white).
Symbol for “SERIAL NUMBER”
Symbol for “TYPE BF APPLIED PARTS”
(The cu is type BF applied part)
Symbol for “ENVIRONMENT PROTEC-
TION – Waste electrical products should
not be disposed of with household
waste. Please recycle where facilities
exist. Check with your local authori-
ty or retailer for recycling advice”.
Symbol for “COMPILES WITH
MDD93/42/EEC REQUIREMENTS”
Manufacturer
Symbol for “EUROPEAN REPRESENTATION”
Level of protection against
water penetration.
Date of manufacture.
12. Limited warranty
LANAFORM guarantees this product against any
material or manufacturing defect for a period of
two years from the date of purchase, except in the
circumstances described below.
The LANAFORM guarantee does not cover damage
caused as a result of normal wear to this product.
Inaddition,theguarantee coveringthis LANAFORM
product does not cover damage caused by abusive
or inappropriate or incorrect use, accidents, the use
ofunauthorizedaccessories, changesmadeto the
product or any other circumstance, of whatever sort,
that is outside LANAFORM’s control.
LANAFORM may not be held liable for any type
of circumstantial, indirect or specic damage.
All implicit guarantees relating to the suitability
of the product are limited to a period of two years
from the initial date of purchase as long as a copy
of the proof of purchase can be supplied.
On receipt, LANAFORM will repair or replace your
appliance at its discretion and will return it to you.
The guarantee is only valid through LANAFORM’s
Service Centre. Any attempt to maintain this product
by a person other than LANAFORM’s Service Centre
will render this guarantee void.
13. Service Center
Andon Health Co., Ltd.
No. 3 Jinping Street, YaAn Road,
Nankai District, Tianjin 300190, China
Tel: +86 22 87611660
iHealthLabs Europe SAS
36 Rue de Ponthieu, 75008, Paris, France
Tel: +33 1 42661559
Lanaform SA
Rue de la Légende 55, 4141
Louveigné, Belgium
Tel: +32 4 3609291

14 · 202104LA090207003 · 09/02/21
14. Electromagnetic
Compatibility Information
Table 1 – Emission
PHENOMENON COMPLIANCE ELECTROMAGNET-
IC ENVIRONMENT
RF emissions CISPR 11 Group
1 Class B
Home Healthcare
environment
Harmon-
ic distortion
IEC 61000-3-
2 Compliance
Home Healthcare
environment
Voltage uc-
tuations and
icker
IEC 61000-3-
3 Compliance
Home Healthcare
environment
Table 2 – Enclosure Port
PHENOMENON BASIC EMC
STANDARD
IMMUNITY
TEST LEVELS
Home Healthcare
environment
Electrostat-
ic Discharge
IEC 61000-
4-2
± 8kV contact
± 2kV, ±4kV, ±8kV,
±15 kV air
Radiated RF
EM led
IEC 61000-
4-3
10V/m
80MHz-2.7GHz
80% AM at 1kHz
Proximity leds
from RF wireless
communicati-
ons equipment
IEC 61000-
4-3
Refer to table 3
Rated power
frequency mag-
netic elds
IEC 61000-
4-8
30A/m
50Hz or 60Hz
Table 3 – Proximity
leds from RF wireless
communications equipment
TEST FREQUEN-
CY (MHZ)
BAND
(MHZ)
IMMUNITY
TEST LEVELS
Professional
Healthcare faci-
lity environment
385 380-390 Pulse modula-
tion 18Hz, 27V/m
450 430-470 FM, ±5kHz de-
viation, 1kHz
sine, 28V/m
710 704-787 Pulse modula-
tion 217Hz, 9V/m
745
780
810 800-960 Pulse modulati-
on 18Hz, 28V/m
870
930
1720
1700-1990
Pulse modulati-
on 217Hz, 28V/m
1845
1970
2450
2400-2570
Pulse modulati-
on 217Hz, 28V/m
5240 5100-5800 Pulse modulati-
on 217Hz, 9V/m
5500
5785
15 Advice regarding
the disposal of waste
All the packaging is composed of materials that
pose no hazard for the environment and which can
be disposed of at your local sorting centre to be
used as secondary raw materials. The cardboard
may be disposed of in a paper recycling bin. The
packaging lm must be taken to your local sort-
ing and recycling centre.

202104LA090207003 · 09/02/21 · 15
When you have nished using the device, please
dispose of it in an environmentally friendly way
and in accordance with the law.
Prior to disposal, please remove the battery and
dispose of it at a collection point so that it can
be recycled.
Under no circumstances should spent batteries be
disposed of with household waste.
FRANÇAIS
Présentation
Merci d’avoir choisi le WBPM-110 de Lanaform.
Veuillezlire toutesles instructions avantd’uti
-
liser votreproduit,en particulier les consignes
de sécurité de base.
Les photographies etautresreprésentations du
produit dans le présent manuel et sur l’emballage se
veulent les plus dèles possibles mais peuvent ne
pasassurerune similitudeparfaite avecleproduit.
Contenu
01 Informations importantes
02 Contenu et indicateurs de l’achage
03 Usage prévu
04 Contre-indications
05 Contenu de l’emballage
06 Description du produit.
07 Caractéristiques techniques .
08 Notice
09 Procédures de préparation et d’utilisation
10 Maintenance
11 Explication des symboles sur l’appareil
12 Garantie limitée
13 Service après-vente
14
Informations sur la compatibilité
électromagnétique
15 Conseils relatifs à l’élimination des déchets
01. Informations importantes
Variations normales de
la pression sanguine
La valeur de la pression sanguine peut être inuen-
cée par divers facteurs: toute activité physique,
excitation, stress, alimentation, boisson, taba-
gisme, posture, et de nombreux autres facteurs
ou activités (y compris la mesure elle-même). Il
est donc inhabituel d’obtenir des résultats iden-
tiques de plusieurs mesures de la pression sanguine.
La pression sanguine varieenpermanence, jouret
nuit. En général, la pression sanguine est la plus
élevée en journée, et la plus basse vers minuit. Typi-
quement, la valeur commence à augmenter vers 3h
du matin et atteint son niveau le plus élevé en jour-
née, quand la plupart des gens sont éveillés et actifs.
Compte tenu de ces informations, il est recom-
mandé de mesurer la pression sanguine environ
à la même heure chaque jour.
Des mesures trop fréquentes peuvent provoquer
des lésions induites par le blocage de la circula-
tion sanguine ; il faut toujours attendre au moins 1
à 1,5 minute entre des mesures an de permettre
le rétablissement de la circulation sanguine. Il est
rare d’obtenir chaque fois des résultats identiques
des mesures de la pression sanguine.

16 · 202104LA090207003 · 09/02/21
02. Contenu et indicateurs
de l’achage
1
2
3
4
6
7
8
5
13
11
10
12
9
01 Achage du jour et de l’heure
02 Systolique
03 Diastolique
04 Fréquence cardiaque
05 Symbole de fréquence cardiaque irrégulière
06 Indicateur de pile faible
07
La pression dans le brassard est instable
ou beaucoup d’air résiduel dans le brassard
08 Indicateur de classication de niveau de pres-
sion sanguine
09 Indicateur de classication de niveau de pres-
sion sanguine
10 Bouton MEM
11 Bouton START
12 LCD
13 Brassard
03. Usage prévu
Ce sphygmomanomètre électronique totalement
automatique est destiné à une utilisation par des
professionnels de santé ou au domicile ; c’est un
système non invasif de mesure de la pression san-
guine, systolique et diastolique, et de la fréquence
cardiaque chez l’adulte, avec un brassard gonable
passé autour du poignet.
04. Contre-indications
Ce sphygmomanomètre électronique ne
convient pas aux personnes atteintes d’aryth-
mie sévère.
05. Contenu de l’emballage
01 Manuel d’utilisation
02 Tensiomètre poignet
03 Batterie 2×AAA
06. Description du produit
Sur base d’une méthode oscillométrique et d’un
capteur de pression intégré en silicium, la pres-
sion sanguine et la fréquence cardiaque peuvent
être mesurées de manière automatique et non in-
vasive. L’écran LCD achera la pression sanguine
et la fréquence cardiaque. Les 2 × 60 mesures les
plus fréquentes peuvent être conservées dans la
mémoire avec indication de la date et de l’heure.
Le sphygmomanomètre électronique répond aux
normes suivantes: IEC60601-1Edition3.12012-08/
EN 60601-1:2006/A1:2013 (Appareils électromé-
dicaux — Partie 1 : Exigences générales pour la
sécuritédebase etlesperformances essentielles),
IEC60601-1:2014/EN 60601-1-2:2007 (Appareils
électromédicaux — Partie 1-2: Exigences géné-
rales pour la sécurité de base et les performances
essentielles - Norme collatérale: Compatibilité
électromagnétique–Exigencesetessais),IEC80601-
2-30:2009+AMD1:2013/EN 806012-30:2010/A1:2015

202104LA090207003 · 09/02/21 · 17
(Appareils électromédicaux –Partie 2-30: Exigences
particulières pour la sécurité de base et les per-
formances essentielles des sphygmomanomètres
non invasifs automatiques) EN 1060-1: 1995 + A2:
2009 (Sphygmomanomètres non invasifs - Par-
tie 1: Exigences générales), EN 1060-3: 1997 + A2:
2009 (Sphygmomanomètres non invasifs - Partie
3: Exigences supplémentaires pour les systèmes
électromécaniques de mesure de la pression san-
guine) ; ISO81060-2:2013(Sphygmomanomètres non
invasifs - Partie 2 : Validation clinique pour type à
mesurage automatique).
07. Caractéristiques techniques
01 Nom du produit : WBPM-110
02 Modèle : LA090207
03
Classication : Alimentation interne, partie
appliquée de type BF, IP22, non AP ou APG, fonc-
tionnement continu
04 Dimensions de l’appareil :
Env. 83mm×74mm ×26mm
(3 9/32” ×2 29/32” ×1 1/32”)
05 Circonférence du brassard:
14cm-19,5cm (5 1/2”-7 11/16”)
06 Poids: Env. 71g (2 1/2oz.)
(sans les piles et le brassard)
07
Méthodedemesure :Méthodeoscillométrique,
gonage et mesure automatiques
08
Volume de mémoire : 2×60 mesures avec
heure et date
09 Alimentation: piles : 2×1,5V TYPE AAA
10 Plage de mesure :
a Pression du brassard : 0-300 mm Hg
b Systolique : 60-260 mm Hg
c Diastolique : 40-199 mm Hg
d Fréquence cardiaque: 40-180/minute
11 Exactitude:
a Pression : ±3 mm Hg
b Fréquence cardiaque : ±5%
12 Température de fonctionnement
10°C~40°C(50°F~104°F)
13 Humidité de fonctionnement ≤85% HR
14 Température de stockage et de transport:
-20°C~50°C(-4°F~122°F)
15
Humidité de stockage et de transport : ≤85% HR
16 Pression de l’environnement: 80-105 kPa
17
Durée de fonctionnement sur piles : Environ
200 mesures.
18
Composants du système de mesure de pression,
avec accessoires : pompe, soupape, écran LCD,
brassard, capteur
Ces spécications sont susceptibles d’être mo-
diées sans préavis.
08. Notice
01 Avant d’utiliser l’appareil, lire toutes les infor-
mations du guide d’utilisation et tous les autres
documents joints.
02
Veuillez rester tranquille, calme et au re-
pos pendant 5 minutes avant la mesure de la
pression sanguine.
03
Le brassard doit être placé au même niveau
que le cœur.
04 Pendant la mesure, vous ne devez ni parler ni
bouger le corps ou le bras.
05 Utiliser le bras gauche pour chaque mesure.
06
Veuillez toujours vous relaxer pendant au moins
1 à 1,5 minute entre des mesures an de per-
mettre le rétablissement de la circulation dans
le bras. Un surgonage prolongé (pression du
brassard supérieure à 300 mmHg, ou supé-
rieure à 15 mmHg pendant plus 3 minutes) du
brassard peut provoquer un hématome du bras.
07
Consultezvotremédecinsivous avezun doute
dans les cas ci-dessous :
a
Application du brassard sur une plaie ou
des zones inammatoires ;

18 · 202104LA090207003 · 09/02/21
b
L’application dubrassard surunmembre uti-
lisé pour un accès vasculaire, un traitement
ou une stule artério-veineuse ;
c Application du brassard sur le bras du côté
d’une mastectomie ;
d
Utilisation simultanée d’autres disposi-
tifs médicaux de monitorage sur le même
membre;
e Nécessité de surveiller la circulation san-
guine de l’utilisateur.
08 Ce tensiomètre électronique est conçu pour
l’adulte et ne doit jamais être utilisé chez le
nourrisson ou le jeune enfant. Consultez un mé-
decin ou un autre professionnel de santé avant
de l’utiliser chez un enfant plus âgé.
09
Ne pas utiliser cet appareil à l’intérieur d’un
véhicule en déplacement ; cela pourrait don-
ner un résultat erroné.
10
Les mesures de la pression sanguine déter-
minées par ce moniteur sont équivalentes à
celles obtenues par un professionnel de santé
formé qui utilise la méthode du brassard avec
l’auscultation au stéthoscope, dans les limites
dénies par l’American National Standard Insti-
tute pour les sphygmomanomètres électroniques
ou automatiques.
11 Des informations sur le risque d’interférence
électromagnétique ou autre entre le moniteur
depressionsanguineetd’autres appareils, ainsi
que des recommandations sur les moyens d’évi-
ter ces interférences, sont présentées dans la
section INFORMATIONS SUR LA COMPATIBILITÉ
ÉLECTROMAGNÉTIQUE. Il est suggéré de garder
le moniteur de pression sanguine à une distance
de 30 cm d’autres dispositifs sans l, comme
les appareils R-LAN, les téléphones portables,
les fours à micro-ondes, etc. Il ne peut pas être
utilisé à proximité d’ÉQUIPEMENT CHIRURGICAL
HF actif et de la salle blindée RF d’un SYSTÈME
ME pour l’imagerie par résonance magnétique,
oùl’intensitédes perturbationsélectromagné-
tiques est élevée.
12
Si l’appareil détecte une fréquence cardiaque ir-
régulière, produite par une arythmie commune,
pendant la mesure de la pression sanguine, il
ache le symbole . Dans ce cas, le sphy-
gmomanomètre électronique peut continuer à
fonctionner, mais les résultats peuvent être
erronés ; vous devez alors consulter votre mé-
decin pour une évaluation exacte.
Deux conditions peuvent entraîner l’achage
de symbole de FCI :
a Coecient de variation (CV) de la période
des battements cardiaques >25%.
b Diérence de période des battements car-
diaques consécutifs ≥0,14 s pour plus de 53%
de l’ensemble des battements.
13
Ne pas utiliser un brassard autre que celui fourni
par le fabricant ; le non-respect de cette directive
peut entraîner un risque de biocompatibilité et
donner des résultats erronés.
14
Si le moniteur est stocké ou utilisé en dehors
des plages de température et d’humidité indi-
quées dans les spécications, il est possible qu’il
nerépondeplusaux caractéristiques de perfor-
mance ou qu’il entraîne un risque de sécurité.
15
Ne pas partager le brassard avec des
personnes infectées an d’éviter toute conta-
mination croisée.
16 Cet appareil a été testé conforme aux limites
des dispositifs numériques de classe B, se-
lon la partie 15 de la réglementation de la FCC.
Ces limites sont destinées à garantir une pro-
tection raisonnable contre les interférences
dangereuses en milieu résidentiel. Cet appa-
reil génère, utilise ou peut diuser une énergie
de radiofréquence ; il peut provoquer une inter-
férence indésirable avec des communications
radio s’il n’est pas installé conformément aux

202104LA090207003 · 09/02/21 · 19
instructions. Il n’est cependant pas possible de
garantir une absence d’interférence dans une ins-
tallation particulière. Si cet appareil provoque
des interférences gênantes avec desrécepteurs
radio ou de télévision (ce qu’on peut vérier en
éteignant eten rallumant l’appareil),l’utilisateur
peut tenter de corriger l’interférence en appli-
quant une ou plusieurs des mesures suivantes :
a
Réorientez ou repositionnez l’antenne
réceptrice.
b
Augmentez la distance entre l’appareil
et le récepteur.
c
Raccordez l’appareil à une prise de cou-
rant d’un circuit diérent de celui auquel
est connecté le récepteur.
d
Consultezledistributeuroudemandezl’as-
sistance d’untechnicien radio/TV expérimenté.
17 Il est impossible d’eectuer des mesures sur
des patients présentant une fréquence éle-
vée d’arythmie.
18
L’appareil n’est pas destiné à être utilisé sur
desnouveaux-nés,des enfantsou desfemmes
enceintes. (Aucun essai clinique n’a été réali-
sé sur des nouveaux-nés, des enfants ou des
femmes enceintes.)
19
La lecture de la mesure peut être perturbée par
un mouvement, un tremblement ou un frisson.
20
Le dispositif ne doit pas être utilisé sur des
patients présentant une mauvaise circulation
périphérique, une pression sanguine visible-
ment faible ou une température corporelle
basse (le ux sanguin jusqu’à la position de
mesure sera alors faible).
21
Le dispositif ne doit pas être utilisé sur des
patients disposant d’un cœur ou d’un poumon
articiel (il n’y aura alors pas de battements
cardiaques)
22
Consultezvotremédecinavantd’utiliserle dis-
positif dans l’un des cas suivants: fréquence
cardiaque irrégulière comme battements au-
riculaires ou ventriculaires prématurés ou
brillation auriculaire, artériosclérose, irrigation
sanguine insusante, diabète, pré-éclampsie,
maladies rénales.
23 Le patient peut être un utilisateur prévu.
24
Ce dispositif est conforme à la partie 15 de
la réglementation FCC. Le fonctionnement
est soumis aux deux conditions suivantes:
(1) Ce dispositif ne doit pas provoquer d’in-
terférences nuisibles, et (2) ce dispositif doit
supporter toute interférence reçue, y compris
des interférences susceptibles d’entraîner un
fonctionnement indésiré.
25
Attention : tous changements ou toutes modi-
cations n’ayant pasétéformellement approuvés
par l’autorité responsable de la conformité
peuvent annuler l’autorisation de l’utilisateur
d’utiliser l’équipement.
26
L’ingestion de piles et/ou de liquide de pile peut
être extrêmement dangereuse. Conserver les
piles et l’appareil hors de la portée des enfants
et des personnes handicapées.
27
Si vous êtes allergique au plastique / caoutchouc,
veuillez ne pas utiliser cet appareil.
09. Procédures de préparation
et d’utilisation
01 Installation des piles
a Ouvrir le couvercle du logement des piles
à l’arrière du moniteur.
b
Installez deux piles de type AAA. Respec-
ter la polarité des piles.
c
Refermer le couvercle du logement des piles.
Quand l’écran LCD ache le symbole de pile ,
remplacer toutes les piles par de nouvelles.
Les piles rechargeables ne
conviennent pas à ce moniteur.

20 · 202104LA090207003 · 09/02/21
Si le moniteur ne va pas être utilisé pendant
un mois ou plus, retirer les piles an d’éviter
tout dommage à cause d’une fuite des piles.
Éviter tout contact du liquide des piles avec les
yeux. En cas de contact avec les yeux, rincer im-
médiatement les yeux avec un grand volume d’eau
propre et consulter un médecin.
À la n de leur durée de vie, le moniteur, les
piles et le brassard doivent être éliminés en
respectant la réglementation locale.
02 Réglage de la date et de l’horloge
a
Lorsque vous insérez les piles ou étei-
gnez l’écran, le dispositif passe en mode
horloge et l’écran LCD ache l’heure et la
date. Voir gure2.
b Lorsque le moniteur est en mode horloge,
appuyez simultanément sur les bou-
tons START , et MEM pendant deux
secondes. Relâchez ensuite les boutons.
Le moniteur est alors en mode de réglage
de la date et de l’horloge.
c
En mode de réglage de la date et de l’horloge,
leformatd’heureclignoteen premierlieu.Voir
la gure2-1. Pendant que le format d’heure
clignote,appuyez surle bouton MEM pour
modier le format d’heure. Le format d’heure
par défaut est 24h.
d
Appuyez sur le bouton START àplusieurs
reprises, l’année(plage 2018~2099),le mois,
lejour,l’heureet lesminutes clignotentcha-
cun successivement. Voir les gures 2- 2&2-3
& 2-4 & 2-5 & 2-6. Pendant que le nombre
clignote,appuyez surle bouton MEM pour
augmenter la valeur ; en maintenant l’appui
sur le bouton MEM , la valeur augmente
plus rapidement.
e
Pendant le réglage de l’horloge et de la
date,le moniteurrepasseautomatiquement
en mode Horloge quand aucun bouton n’est
activé pendant 60 secondes.
f
Vous pouvez éteindre le moniteur en appuyant
sur le bouton START quand la minute cli-
gnote ; l’heure et la date sont alors conrmées.
Note
01
Le format de l’horloge peut être conguré
par l’utilisateur.
02 Le Tableau 2-1 montre les équivalences entre
les formats 24heures et 12heures.
Tableau 2-1
FORMAT 24
HEURES
FORMAT 12
HEURES
FORMAT 24
HEURES
FORMAT 12
HEURES
0:00 12:00 AM 12:00 12:00 PM
1:00 1:00 AM 13:00 1:00PM
2:00 2:00 AM 14:00 2:00 PM
3:00 3:00 AM 15:00 3:00 PM
4:00 4:00 AM 16:00 4:00 PM
Other manuals for WBPM-110
1
This manual suits for next models
1
Table of contents
Languages:
Other Lanaform Blood Pressure Monitor manuals