9
!
WARNING THE DISPENSER MUST BE CLEANED AND SANITIZED AFTER INSTALLATION IS COMPLETE AND
AFTERWARDS AS REQUIRED BY STATE AND LOCAL AUTHORITIES, OR EVERY SIX MONTHS, MINIMUM.
ADVERTENCIA EL DISTRIBUIDOR DEBE LIMPIARSE Y DESINFECTARSE DESPUÉS DE LA INSTALACIÓN ES
COMPLETO Y DESPUÉS COMO LO REQUIERAN LAS AUTORIDADES ESTATALES Y LOCALES, O CADA SEIS
MESES, COMO MÍNIMO.
AVERTISSEMENT LE DISTRIBUTEUR DOIT ÊTRE NETTOYÉ ET DÉSINFECTÉ APRÈS L’INSTALLATION EST
COMPLÈTE ET ENSUITE COMME EXIGÉ PAR LES AUTORITÉS NATIONALES ET LOCALES, OU TOUS LES SIX
MOIS, AU MINIMUM.
2.2 ADJUSTMENT PROCEDURE
A. Hold ratio cup under the syrup separator (see Figure 1). Hold small chamber marked “4.50 to 1”
under the syrup spout.
B. Actuate the valve until approximately ve ounces (148 ml) of water lls the main chamber.
1. Set the ratio cup on a level surface, and note whether the syrup level is above or below the
water level.
2. If the syrup and water are at the same level, the ratio is properly adjusted. If the syrup and
water are not at the same level, continue with the valve adjustment procedure below.
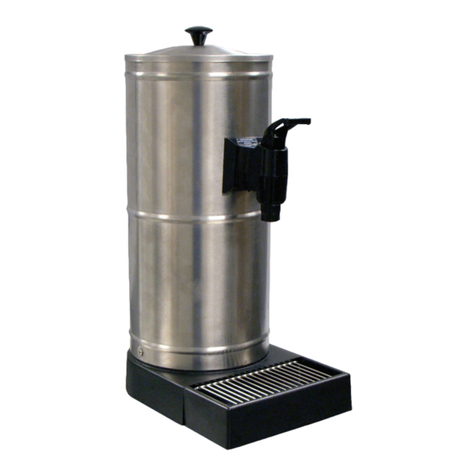
C. Remove the lid from the dispenser by unscrewing the knob.
D. Locate the two ow control adjustment screws on the front of the valve (see Figure 2). The
water side ow control adjustment screw is on the left. The syrup side ow control adjustment
screw is on the right.
NOTE: The water side ow control is factory preset to dispense 2 1/2 uid ounces per second (74
ml/sec) and should require no adjustment.
E. Increase or decrease the syrup ow to cause the two liquid levels to become even in the ratio
cup. To increase syrup ow, turn the adjustment screw in (clockwise); to decrease ow, turn the
screw out (counterclockwise).
F. Rinse out the ratio cup with water.
G. Repeat steps E and F until syrup and water levels are even.
H. Remove the syrup separator, replace the diffuser and nozzle, and reinstall the lid on the
dispenser.
3. CLEANING AND MAINTENANCE
3.1 CLEANING INFORMATION
A. Clean external surfaces with mild soap and warm water. Rinse with clean water.
B. Remove four wingnuts and mounting screws securing tea dispenser to counter. Clean under
unit as required.
C. Do NOT use strong bleaches or detergents. They tend to discolor and corrode various
materials.
D. Do NOT use steel wool, scouring pads, or abrasives on the dispenser.
E. Do NOT use hot water exceeding a temperature of 140oF (60oC). This may damage certain
materials.
F. Continuous maintenance is a basic requirement for proper operation and sanitation of this unit.
G. Daily routine cleaning should be performed. This should consist of washing the cup rest and
drip pan in cleaning solution. Then rinse with tap water. Wipe all splash areas clean, using a
damp cloth soaked in cleaning solution.
H. Reinstall tea dispenser to counter location. Secure with four mounting screws and wingnuts
removed in Step A above.
3.2 REQUIRED CLEANING EQUIPMENT
A. Prepare a cleaning solution consisting of two ounces of CHECK-MARK DDS-164 (NCH Corp./
Kernite) per gallon of tap water (200 ppm Quaternaries) at 75°F (24°C). An equivalent
cleaning solution may be used if prepared in accordance with the manufacturer’s instructions.
Approximately 3 1/2 gallons should be prepared.
B. Prepare a sanitizing solution consisting of one ounce of CHECK-MARK DDS-185 (NCH Corp./
Kernite) per four gallons of tap water (200 ppm quaternaries) at 75°F (24°C). An equivalent
sanitizing solution may be used if prepared in accordance with the manufacturer’s instructions.
Approximately 3 1/2 gallons should be prepared.
