Langer & Laumann QKS6 User manual

1 / 26
User Manual
for
QKS6 L&L door operator
conversion

2 / 26
document history
No.
ver.
Date
worker
1
1.0
12.08.13
Rau
2
1.1
07.04.15
RAU
3
1.2
26.11.15
JE
4
1.3
01.08.16
CSA
5
1.4
30.12.19
CSA
Fordern Sie die Umbauanleitung auf Deutsch an,
indem Sie den QR Code einscannen.
Langer & Laumann Ing.-Büro GmbH
Wilmsberger Weg 8
48565 Steinfurt
Germany
Phone: +49 (2552) 92 7 91 0
Email info@LuL-Ing.de
Web: www.lul-ing.de
© 2019 Langer & Laumann Ingenieurbüro GmbH All rights reserved
These operating instructions and the product described therein are copyright protected for Langer & Lau-
mann Ingenieurbüro GmbH or its suppliers, with all rights reserved. In accordance with this copyright
these operating instructions may not be copied either in part or in their entirety without the written authori-
sation of Langer & Laumann Ingenieurbüro GmbH unless within the framework of normal use of the
product or to create backup copies. This exceptional provision does not extend to include copies, which
are created for third parties and sold to or in any other way conveyed to same. Nevertheless, the entire,
acquired material (including all backup copies) can be sold to, handed over to or made available on a loan
basis to such parties. In accordance with the provisions of the law, the production of a translation similarly
falls under the definition of copying.
Langer & Laumann Ingenieurbüro GmbH does not accept any warranty or guarantee for the content
of these operating instructions, and similarly declines any legal guarantee in respect of marketabil-
ity or suitability for a specific purpose. Langer & Laumann Ingenieurbüro GmbH is not liable for er-
rors in these operating instructions or for consequential or direct damage in conjunction with the delivery,
performance or use of these operating instructions. Langer & Laumann Ingenieurbüro GmbH reserves
the right to occasionally revise these operating instructions and change their content without prior notifica-
tion.
file: 1.31.20191_Umbauanleitung_Schindler_QKS6_auf_TSG_V1.4_en.docx
date of print: 30/12/2019 14:22:00

3 / 26
table of contents
1Basic Instructions ________________________________________________________________ 4
1.1 Status of the Installation Instructions _______________________________________________ 4
1.2 Copyright_____________________________________________________________________ 4
1.3 Instructions in the Installation Manual_______________________________________________ 4
1.4 Informal Measures by the Fitter ___________________________________________________ 4
1.5 Requirements of Installation Personnel _____________________________________________ 4
1.6 Description of Symbols __________________________________________________________ 5
2General ________________________________________________________________________ 6
2.1 Summary Sketch_______________________________________________________________ 6
2.2 Variant of QKS6 _______________________________________________________________ 8
2.3 Scope of Delivery ______________________________________________________________ 9
2.4 Description of Product Functions __________________________________________________ 9
3Assembly Instructions for Mechanical Part____________________________________________ 10
3.1 Fundamental Info _____________________________________________________________ 10
3.2 Safety Equipment _____________________________________________________________ 11
3.3 Car door lock_________________________________________________________________ 11
3.4 Assembly door frame on the car roof ______________________________________________ 12
4Assembly Instructions for Electrical Part _____________________________________________ 24
5Maintenance ___________________________________________________________________ 25
5.1 Maintenance Sinus Drive _______________________________________________________ 25
6Waste disposal _________________________________________________________________ 25
7Contact _______________________________________________________________________ 26

4 / 26
1 Basic Instructions
1.1 Status of the Installation Instructions
Product installation instructions are enclosed by the manufacturer or supplier in order to provide the cus-
tomer or fitter with the essential knowledge necessary for correct and safe installation. These brief installa-
tion instructions are intended to clarify basic mechanical installation steps and to illustrate the principal dif-
ferences between the door operator versions for telescopic 2 panel, central 2 panel and central 4 panel.
Electrical connection, commissioning and adjustment of the door control unit are expressly not components
of these instructions.
1.2 Copyright
We reserve all rights pertaining to these technical documents. It is prohibited to reproduce them, make
them available to third parties or to use them in any other unauthorised manner without our prior agree-
ment. Changes require our express prior and written agreement.
1.3 Instructions in the Installation Manual
All instructions in the installation manual absolutely must be adhered to.
1.4 Informal Measures by the Fitter
The fitter installing the system is him/herself responsible for participating in training. He/she must immedi-
ately inform the manufacturer/supplier of missing or damaged delivered parts.
1.5 Requirements of Installation Personnel
Persons responsible for installation and maintenance should be familiar with the generally applicable safe-
ty and work-hygiene regulations. They should be familiar with Langer & Laumann products. Installation
tools are to be properly functional and measuring instruments must be subject to continuous checks.

5 / 26
1.6 Description of Symbols
WARNING:
This sign is to indicate a possible impeding danger of serious physical damage or death.
CAUTION:
This sign is to indicate a possible impending danger of light physical damage. This sign is
also to warn you of material damage.
NOTE:
You will be informed of various possible applications and will receive further useful sugges-
tions.

6 / 26
2 General
2.1 Summary Sketch
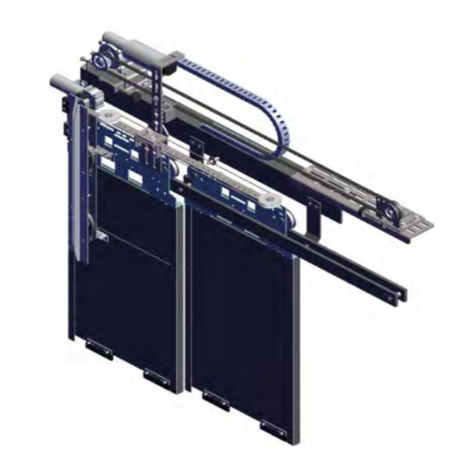
Abb. 1: QKS6 L&L door operator telescoping right
Abb. 2: QKS6 L&L door operator centre

7 / 26
Abb. 3: QKS6 L&L door operator centre telescoping

8 / 26
2.2 Variant of QKS6
Following the variants of QKS6:
Table 1: variants
Door width
(configuration)
2 panel telescoping
left
2 panel telescoping
right 2 panel
telescoping
centre
4 panel
telescoping
centre
0700 X X X -
0800 X X X -
0900 X X X -
1000 X X X -
1100 X X X -
1200 X X X X
1300 X X X X
1400 X X X X
1500 - - - X
1600 - - - X
1700 - - - X
1800 - - - X
1900 - - - X
2000 - - - X
2100 - - - X
2200 - - - X
(X) = existing, (-) = not existing

9 / 26
2.3 Scope of Delivery
Pos.
article number
quantity
1
(depend on door ope-
rator)
QKS6 L&L door operator
(completely assembled incl. cogs, belt, drive, buffer)
1
2
Sinus Drive for shaft door actuator
1 / 2
3
accessories
4
bolts, washers)
5
TSG electronic in closed housing
1
6
1.31.20191
Manual QKS6 conversion to L&L
1
8
1.20.91000
Manual TSG
1
CAUTION:
Shafts and their bearings as well as the encoder must not be damaged by pumping!
2.4 Description of Product Functions
All the door drives operate according to the same function principle. The doors are activated by a DC mo-
tor using toothed belts and two or more pusher dogs.
The DC motor drives a toothed belt, which runs over double toothed belt pulleys. The pusher dogs are fas-
tened to the toothed belts by means of a catch. The car doors are firmly interconnected with the pusher
dogs. The height of the toothed belts can be adjusted by adjusting the double toothed belt pulleys (eccen-
tric).

10 / 26
3 Assembly Instructions for Mechanical Part
3.1 Fundamental Info
In principle, the door frame is pre-commissioned for all types of doors and are pre-assembled as much as
possible at the factory.
However, there are a few items that still have to be assembled on the cabin doors and adapted on site.
Likewise, adjustments are required on the pulleys, the limit switches as well as the door pusher dogs.
The existing shaft door actuator for shaft opening remains intact in principle, but requires an additional ac-
tuator.
As all the assembly steps for the 2 panel telescopic, 2 panel central and 4 piece central door models are all
similar in principle, the following description deals with all three door types at the same time. Wherever
there are distinct differences, these will be explained explicitly.
WARNING:
For safety reasons all nuts and bolts, which are already tightened upon delivery, must be
re-tightened on-site.

11 / 26
3.2 Safety Equipment
CAUTION:
All the safety regulations listed in EN81 must still be observed after modifying the new door
machine.
In the case of a telescopic lift door, it should be noted that the door panel has a door interlock.
Extract from EN81-1:
Ch. 8.10 Lift-compartment sliding doors with several mechanically linked door panels
8.10.1 In the case of lift-compartment sliding doors with several directly mechanically interlinked door pan-
els, it is permissible,
a) to attach the installation as per 8.9.2
1. either only on one door panel (the fastest one in the case of telescopic doors)
2. or on the door drive, as long as there is a form-fitting link between the drive element and the door
panels,,
and
b) in the event of locking only one door panel and in accordance with the conditions as per 11.2.1 c, if
this one interlock prevents the opening of the other door panels due to their intermeshing with each
other in the closed position.
When attaching and commissioning the TSG in/on a lift cabin, it must be ensured that the maximum per-
mitted total weight of the lift cabin is not exceeded under maximum rated load.
In the event of an emergency stop or shut-down of the lift, it must be ensured that the TSG door-control
unit does not cause any unintentional, dangerous or uncontrolled door movements.
CAUTION:
The simulated limit switch for “Door open”, “Door closed” and “Door blocked” on the control-
ler for the door and locking bar drive must not be used as safety equipment with any safety
relevance.
3.3 Car door lock
WARNING:
The Schindler QKS6/9 car door lock is not compatible with the Langer & Laumann
modernization packages and is not supported!

12 / 26
3.4 Assembly door frame on the car roof
NOTE:
The sequence of the assembly specified here shows only a recommendation. There is not
a requirement on completeness.
3.4.1 Before disassembly the old door operator
Before the disassembly of the old door operator must be taken up the following mass.
1. Height of track of car roof (car internal height)
upper edge of track to car roof.
2. Track:
- closing edge extremely needed measure consider (pay attention to lines and other obstacles of
shaft wall by passage),
- opening edge extremely needed measure consider (pay attention to lines and other obstacles of
shaft wall by passage),
3. depth of installation of the track (back of track to car),
NOTE:
The new track has the same length and mass as the old one.
3.4.2 Disassembly the old door operator
The old door drive must be dismantled completely. The clamping plates at the old door drive must be un-
screwed, since they are again used.
3.4.3 Door operator on car
Put the new door operator on car (provisional attachment by fighter mounting plate e.g. by fastening
clamps).
The height, lateral position and the depth of the door operator depends on the track. The mass, which were
taken up before the disassembly of the old door operator, are to be kept with the new track.
NOTE:
Build door operator horizontally and in the plumb!
For security an inspection drive should be accomplished, in order to recognize possible ob-
stacles and to correct the position of the door operator. It makes certain that also the su-
pernatant double toothed belt disks do not affect the shaft wall or obstacles at the shaft wall

13 / 26
3.4.4 Adaptation on car
Fastening the door frame occurs as with the old QKS 6 design, depending on the cab (PK9), either on the
top on the cab roof, or on the right or left side on the exterior wall of the cab. With both types of fasteners,
the mountings have been pre-assembled on the frame; their respective spacing can be moved horizontally
and is infinitely variable.
Abb. 4: View from side QKS6 L&L
NOTE:
It is not necessary to use both brackets (upper and lateral) for fixing the door operator. Un-
der normal circumstances it is enough to use one of them.

14 / 26
3.4.5 Hang up the panel
The fast panel hang up with the help of the door roller (supports).
3.4.6 Safety contact
Control the safety contact at door operator and fix the actuator for safety contact on door roller.
Abb. 5: safety contact by QKS6 L&L telescoping right
Abb. 6: safety contact by QKS6 L&L centre / centre telescoping

15 / 26
3.4.7 Limit stop / buffer
The TSG has to use in every floor the same limit stop. Therefore, on the door operator QKS6 L&L there
are two limit stop with puffer. The fasten coupler serves as a stop and stops the panel in open and close di-
rection. Control the limit stop / buffer in closed and opened position.
3.4.8 Slow panel
The slow panel hang up with the help of the door roller (supports).
3.4.9 Emergency coupler
In case of a break of the toothed belt, please install the attached coupler on the panels.
Abb. 7: Emergency coupler on TL
Abb. 8: Emergency coupler on TR

16 / 26
3.4.10 Mounting shaft door actuator
The old shaft door actuator is replaced with a new electric shaft door actuator.
-Dismantle the old shaft door actuator.
-Dismantle old lever.
-Clean and fit to handle the new shaft door actuator.
-Drill holes for the safety contact bridge.
-Install the new shaft door actuator at the panel.
-Connect contact safety circuit.
-Connect Sinus drive with the TSG electronic.
NOTE:
The levers are taken from the original shaft door actuator!
Abb. 9: new electrical shaft door actuator

17 / 26
NOTE:
Before mounting the shaft door actuator must be 2 holes in the door be drilled. A match-
ing template is included.
Abb. 10: Processing door (drilling pattern)

18 / 26
Abb. 11: Lever installed in new shaft door actuator
Abb. 12: old shaft door actuator mounted
Abb. 13: Removed from the old lever shear
Abb. 14: Delivery condition shaft door actuator
Abb. 15: safety contacts on the new shaft door actuator

19 / 26
3.4.10.1 User setting - h parameters
Table 2: h parameters
Parameter
Function
Min.
value
Default
value
Max.
value
Factor
Unit
hA
Activation
Additional dri-
ve
Only for use with optional add on
boards (valid from version TSG
V4).
00: Opportunity to move to the
intermediate position and Ready
For Operation (usable with add
on board 4E/4A relais or 4E/4A
electronic)
01: interlock or skate drive
(e.g. QKS6, usable with add on
board additional drive)
02: retiring cam magnet (e.g.
KONE ADC, usable with add on
board additional drive)
03: interlock with emergency
power supply (e.g. Koch, usable
with add on board additional
drive)
04: enabling mode (usable with
add on board 4E/4A electronic)
05: external sensor, two channel
(usable with add on board 4E/4A
electronic)
06: interlock drive for shaft
hinged doors (usable with add
on board additional drive)
00
00
18
hb
Closing time
of the skate
Only with additional board that
can be optionally fitted and
hA=01, hA=03 or hA=06.
Caution:
If the value of h7 = 00, then the
value of hb is for opening and
closing time of the skate.
00
50
80
[1/100
seconds]
hC
Time delay
between
opening of the
drive and
opening of the
door
Only with additional board that
can be optionally fitted and
hA=01, hA=03 or hA=06.
01
50
99
[1/100
seconds]
h7
Opening time
of the skate
Only with additional board that
can be optionally fitted and
hA=01 or hA=03
Caution:
If the value of h7 = 00, then the
value of hb is for opening and
closing time of the skate.
00
00
80
[1/100
seconds]

20 / 26
3.4.10.2 Short description
The TSG extension board for drive is able to activate and move at least two additional drives. It is connected
with the control section of the TSG main board for this purpose. Parameters can be adjusted in the TSG
main board for activating the function (hA), changing the opening and closing time of the drive (h7, hb) and
setting the time delay between the opening of the drive and the opening of the door (hC).
3.4.10.3 Activation of the function
To be able to use the TSG drive expansion board function, activation must be set to 01 with parameter hA.
NOTE:
For additional information on parameter settings, see the TSG door control device manual.
3.4.10.4 Opening and closing time of Sinus Drive
The opening and closing time of the Sinus Drive can be adjusted with parameter h7 and hb.
Values can be changed in increments of 0.01 seconds. A time of 0.5 seconds can be applied as the default
value for both the in and out travel of the drive. However, this value must be monitored and adjusted to spe-
cific local conditions as appropriate.
CAUTION:
The values must not be set larger than the time actually required to move the drive in or out.
Otherwise the drive could fail!
NOTE:
When a value is changed and confirmed, it is permanently stored. This means that the modi-
fied value is still available even after a power failure.
Table of contents
Other Langer & Laumann Door Opening System manuals
Popular Door Opening System manuals by other brands

Micom
Micom SW800 Operation & installation manual

Norton
Norton PR7570 Series installation instructions

Record
Record DFA 127 Basic Quick Set Up

Roto
Roto E-Tec DoorDrive Installation, maintenance and operation instructions

Saxco
Saxco RG-AT40S-I/O manual

Glynn Johnson
Glynn Johnson 100 installation instructions

CAME
CAME F1000 installation manual

Versus-Omega
Versus-Omega PENTA CITY 300 user manual

Lamp
Lamp FD35EV instruction manual

Remote Solutions
Remote Solutions SAFE-T-RACK SR-U Operation manual

GEZE
GEZE Slimdrive EMD Replacement instructions

CornellCookson
CornellCookson FS-150EP Series Installation instructions and operation manual