X-431
SC
Quick
Start
Guide
(EN)
LAUNCH
~
回
OBD
1116
PIN connector
Communication
i
ndi
c
ato
「
P
o
w
e
「
i
nd
ic
ato
「
Mic
「
O
USB
DO
「
I
Install
the
diagn
ostic
connector
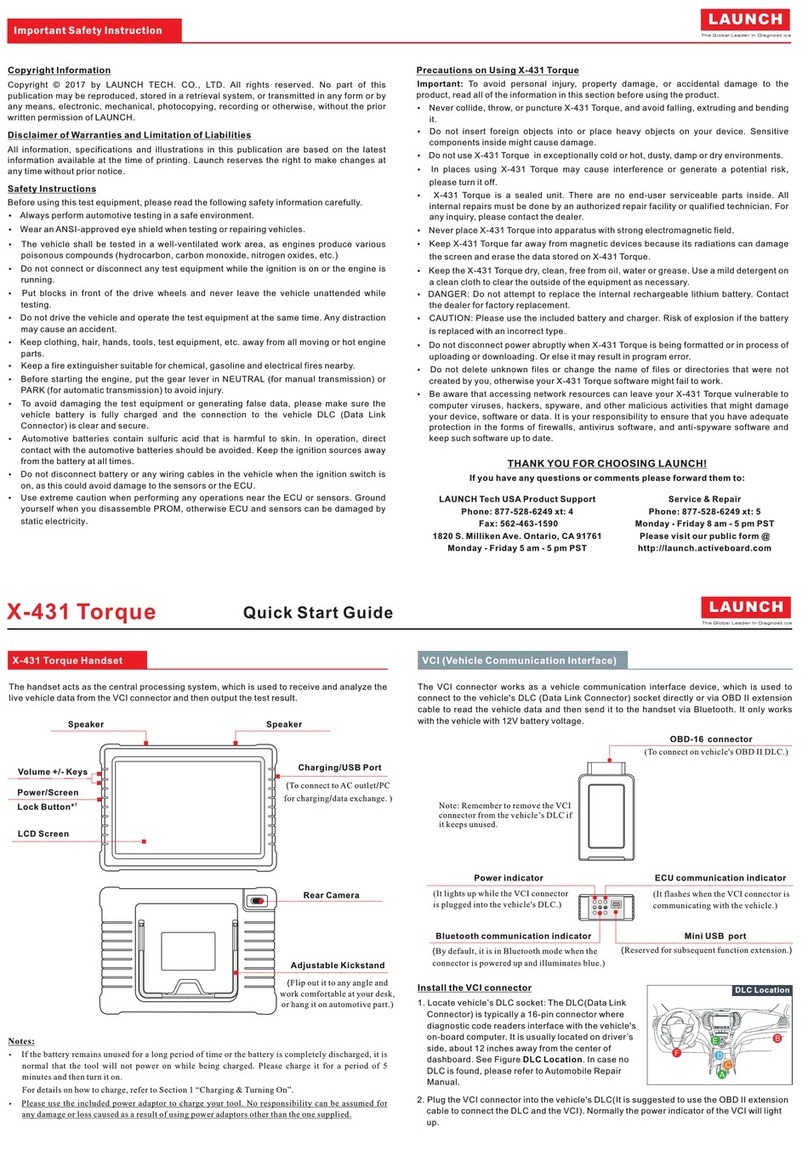
1. Locate vehicle’s DLC socket: It provides
standa
「
d
16 pins and is
ge
nera
川 y
located
on
driver
’S side, about 12 inches away from the
cente
「
o
fda
shbo
a
「
d
See
Figu
「
e
DLC
Locat
ion. If D
LC
is not equipped
unde
「
dash
boa
「
d
,
a lab
el
indicating its position will
be given.
In
case no
DL
C
is
found,
p
l
ease
「
efer
to Automobile
R
e
pa
i
「
Manual
;
2. Plug the
conn
e
cto
「
in
t
o
the vehicle’s DLC(lt
is
suggested to use the OBD
II
extension
cable to connect the D
LC
and the connector).
F o
「
vehicles
wi
th
non-16PIN DLC,
please choose the desired connector. Normally the
powe
「
indicato
r
of
diagnostic
connector will light up.
1.
lnse
「
t
the included USB cable into the
cha
「
ger
.
Pl
ug
th
e
ada
p
to
「
i
nto
AC
outlet.
2. Connect the
othe
「
e
nd
of
USB cable to
your
tool.
3. Once the battery is
fu
lly charged,
disconnect
the power
adaptor
f
「
om
the
AC
outlet.
4’
P
「
e
s
s
the [POWER] button
on
the tool, the system starts initializi
ng
and then enters
th
e desktop.
4’
1.
Tap
[Settings]
on
the desktop and th
en
[Wi-Fi] to configure Wi-Fi setting.
2. Select the desired Wi-Fi connection
f 「
om
th
e list.
(
Pa
ss
wo
「
d
may be required
fo
「
secured
netwo
「
ks)
.
When “Connected”appears,
ta
p
画
to
retu
rn
to the desktop.
4’
lli1
堕冒雪白,~胃~霄’
.
川
|
旦
E
Aa·
叫
一
。町
oh
He
r
山
MUN
Xω
,
m
n
阳
mw
创旧叩刊
ILHUT
-
MU
’
2.
Tap
on
"New Registration”in
Figu
「
e
A, input the information (i tems
with*
must be filled) and then tap
on
“Register
".
Refer to Figure B.
3. Input the Product S/N and Activation Code (can be obtained from the
passwo
「
d
envelope)
, and then tap on "Activate”Refer to Fi
gu
re
C.
*
The
Product
S
斤
4
and
A
川川
n
Code
: I
Pr
in
the
Pas
s 飞
.
vord
*
*
*
5
1
6
9
圄嚣’
*
4’ (
To
be
cont
i
nued
...)
