manuals.online logo
Brands
  1. Home
  2. •
  3. Brands
  4. •
  5. LAUNCH TECH
  6. •
  7. Other
  8. •
  9. LAUNCH TECH X-431 Torque User manual

LAUNCH TECH X-431 Torque User manual

Important Safety Instruction
Copyright Information
Copyright © 2017 by LAUNCH TECH. CO., LTD. All rights reserved. No part of this
publication may be reproduced, stored in a retrieval system, or transmitted in any form or by
any means, electronic, mechanical, photocopying, recording or otherwise, without the prior
written permission of LAUNCH.
Disclaimer of Warranties and Limitation of Liabilities
All information, specifications and illustrations in this publication are based on the latest
information available at the time of printing. Launch reserves the right to make changes at
any time without prior notice.
Safety Instructions
Before using this test equipment, please read the following safety information carefully.
Always perform automotive testing in a safe environment.
Wear an ANSI-approved eye shield when testing or repairing vehicles.
The vehicle shall be tested in a well-ventilated work area, as engines produce various
poisonous compounds (hydrocarbon, carbon monoxide, nitrogen oxides, etc.)
Do not connect or disconnect any test equipment while the ignition is on or the engine is
running.
Put blocks in front of the drive wheels and never leave the vehicle unattended while
testing.
Do not drive the vehicle and operate the test equipment at the same time. Any distraction
may cause an accident.
Keep clothing, hair, hands, tools, test equipment, etc. away from all moving or hot engine
parts.
 Keep a fire extinguisher suitable for chemical, gasoline and electrical fires nearby.
Before starting the engine, put the gear lever in NEUTRAL (for manual transmission) or
PARK (for automatic transmission) to avoid injury.
To avoid damaging the test equipment or generating false data, please make sure the
vehicle battery is fully charged and the connection to the vehicle DLC (Data Link
Connector) is clear and secure.
Automotive batteries contain sulfuric acid that is harmful to skin. In operation, direct
contact with the automotive batteries should be avoided. Keep the ignition sources away
from the battery at all times.
Do not disconnect battery or any wiring cables in the vehicle when the ignition switch is
on, as this could avoid damage to the sensors or the ECU.
 Use extreme caution when performing any operations near the ECU or sensors. Ground
yourself when you disassemble PROM, otherwise ECU and sensors can be damaged by
static electricity.
Precautions on Using X-431 Torque
Important: To avoid personal injury, property damage, or accidental damage to the
product, read all of the information in this section before using the product.
Never collide, throw, or puncture X-431 Torque, and avoid falling, extruding and bending
it.
 Do not insert foreign objects into or place heavy objects on your device. Sensitive
components inside might cause damage.
Do not use X-431 Torque in exceptionally cold or hot, dusty, damp or dry environments.
In places using X-431 Torque may cause interference or generate a potential risk,
please turn it off.
 X-431 Torque is a sealed unit. There are no end-user serviceable parts inside. All
internal repairs must be done by an authorized repair facility or qualified technician. For
any inquiry, please contact the dealer.
Never place X-431 Torque into apparatus with strong electromagnetic field.
Keep X-431 Torque far away from magnetic devices because its radiations can damage
the screen and erase the data stored on X-431 Torque.
Keep the X-431 Torque dry, clean, free from oil, water or grease. Use a mild detergent on
a clean cloth to clear the outside of the equipment as necessary.
 DANGER: Do not attempt to replace the internal rechargeable lithium battery. Contact
the dealer for factory replacement.
CAUTION: Please use the included battery and charger. Risk of explosion if the battery
is replaced with an incorrect type.
Do not disconnect power abruptly when X-431 Torque is being formatted or in process of
uploading or downloading. Or else it may result in program error.
Do not delete unknown files or change the name of files or directories that were not
created by you, otherwise your X-431 Torque software might fail to work.
Be aware that accessing network resources can leave your X-431 Torque vulnerable to
computer viruses, hackers, spyware, and other malicious activities that might damage
your device, software or data. It is your responsibility to ensure that you have adequate
protection in the forms of firewalls, antivirus software, and anti-spyware software and
keep such software up to date.
LAUNCH
DLC Location
Note: Remember to remove the VCI
connector from the vehicle’s DLC if
it keeps unused.
Power indicator
Speaker Speaker
Rear Camera
Adjustable Kickstand
Charging/USB Port
Volume +/- Keys
LCD Screen
Power/Screen
1
Lock Button*
(It lights up while the VCI connector
is plugged into the vehicle's DLC.)
(By default, it is in Bluetooth mode when the
connector is powered up and illuminates blue.)
(
)
Flip out it to any angle and
work comfortable at your desk,
or hang it on automotive part.
( /
/)
To connect to AC outlet PC
for charging data exchange.
(To connect on vehicle's OBD II DLC.)
OBD-16 connector
ECU communication indicator
(It flashes when the VCI connector is
communicating with the vehicle.)
Mini USB port
(Reserved for subsequent function extension.)
Bluetooth communication indicator
Install the VCI connector
1. Locate vehicle’s DLC socket:
It is usually located on driver’s
side, about 12 inches away from the center of
dashboard. See Figure DLC Location. In case no
DLC is found, please refer to Automobile Repair
Manual.
The DLC(Data Link
Connector) is typically a 16-pin connector where
diagnostic code readers interface with the vehicle's
on-board computer.
X-431 Torque Handset VCI (Vehicle Communication Interface)
The handset acts as the central processing system, which is used to receive and analyze the
live vehicle data from the VCI connector and then output the test result.
The VCI connector works as a vehicle communication interface device, which is used to
connect to the vehicle's DLC (Data Link Connector) socket directly or via OBD II extension
cable to read the vehicle data and then send it to the handset via Bluetooth. It only works
with the vehicle with 12V battery voltage.
Not es:
If the battery remains unused for a long period of time or the battery is completely discharged, it is
normal that the tool will not power on while being charged. Please charge it for a period of 5
minutes and then turn it on.
For details on how to charge, refer to Section 1 “Charging & Turning On”.
Please use the included power adaptor to charge your tool. No responsibility can be assumed for
any damage or loss caused as a result of using power adaptors other than the one supplied.
2. Plug the VCI connector into the vehicle's DLC(It is suggested to use the OBD II extension
cable to connect the DLC and the VCI). Normally the power indicator of the VCI will light
up.
Quick Start Guide
X-431 Torque LAUNCH
THANK YOU FOR CHOOSING LAUNCH!
If you have any questions or comments please forward them to:
LAUNCH Tech USA Product Support
Phone: 877-528-624 xt: 4
Fax: 562-463-1590
1820 S. Milliken Ave. Ontario, CA 91761
Monday - Friday 5 am - 5 pm PST
9
Service & Repair
Phone: 877-528-624 xt: 5
Monday - Friday 8 am - 5 pm PST
Please visit our public form @
http://launch.activeboard.com
9
Quick Start Guide
Quick Start Guide
X-431 Torque
X-431 Torque
LAUNCH
LAUNCH
5. Vehicle Connection
B Via Battery Clamps Cable
VCI Connector OBD I Adaptor
Battery Clamps CableTo Vehicle's Battery
1. OBD II Vehicle Connection
A Directly plug the VCI into vehicle’s DLC
B Using OBD II extension cable
2. Non-OBD II Vehicle Connection
A Via Cigarette Lighter Cable
VCI Connector OBD I Adaptor
To Vehicle’s DLC Non-16pin Connector
Cigarette Lighter CableTo Cigarette Lighter Receptacle
VCI Connector OBD II Extension Cable To Vehicle’s DLC
If the power supply on vehicle diagnostic socket is insufficient or the power pin is damaged,
you can get power in the following ways:
To Vehicle’s DLC Non-16pin Connector
The method used to connect the diagnostic connector to a vehicle's DLC depends on the
vehicle's configuration as follows:
 A vehicle equipped with an OBD II management system supplies both communication and
12V power through a standardized DLC.
 A vehicle not equipped with an OBD II management system supplies communication
through a DLC connection, and in some cases supplies 12V power through the cigarette
lighter receptacle or a connection to the vehicle battery.
Tap “Diagnose”
Select vehicle
Select test system
Select test function
Select diagnostic
software version
Tap “New
Customer” to
register
Is the VCI
activated ?
No
Tap “Update” to
update software*1
Yes
…… (Refer to
Section 3)
Register & Activate
OK
Not es:
1.
you are suggested to check for
updates on a frequent basis and keep
synchronized with the latest available
software.
2. If you choose “AutoDetect” to
diagnose a vehicle, this flowchart
shall not apply.
To enjoy more service and functions,
Preparation
Before diagnosing, please make
sure the following:
s Switch the ignition on.
s Vehicle battery voltage range
should be 9-14Volts.
s Throttle should be in a closed
position.
6. Start Diagnostics
For more detailed operations, please refer to the User Manual.
X-431 Torque support two kinds of diagnosis approaches: Smart Diagnosis and Manual
Diagnosis.
Smart Diagnosis(AutoDetect):
Through simple Bluetooth communication between the X-431 Torque handset and VCI
connector, you can easily get the VIN (Vehicle Identification Number) information of the
currently identified vehicle. Once the VIN is successfully identified, the system will retrieve
it from the remote server and then guide you to vehicle information page without the
necessity of step-by-step manual menu selection.
Manual Diagnosis:
In this mode, you have to diagnose a vehicle by performing the menu-driven command
manually.
For new users, please follow the operation chart shown on the left to get familiar with and
start using this tool.
1. Charging & Turning On
2. Changing Language
4. Register & Update
3. Wi-Fi Setup
4. Register & Update(Cont.)
1. Plug one end of the included power adaptor into the USB port of the handset, and then
other end into the AC outlet.
2. Once the battery is fully charged, disconnect the power adaptor from the AC outlet.
handset3. Press the [POWER] button on the , the system starts initializing and then enters
the home screen.
X-431 Torque supports multiple languages. To change the language of the tool, please do the
following:
1. On the home screen, tap on Settings -> Language & Input -> Languages.
2. Tap on “Add a language”, and then choose the desired language from the list.
3. Tap and hold the desired language and drag it to the top of the screen and then release it,
the system will change into the target language.
X-431 Torque
X-431 Torque
X-431 Torque
has a built-in Wi-Fi module that can be used to get online. Once you're online,
you can register your tool, update the diagnostic software & APK, surf the Internet, get apps
and send email on your network.
->1. On the home screen, select Settings Wi-Fi.
2. Select the Wi-Fi switch to ON, will start searching for available wireless
networks.
3. Select a wireless network:
If the chosen network is open will connect automatically.
If the selected network is encrypted a network password will need to be entered.
Register/Logi n
Has this un it b een registe red?
New Custo me r Existin g Cu stomer
1. Launch App: On the home screen, tap the application icon
to launch it, a dialog box similar to the following will pop up
on the screen.
A. If you are a new user, tap on “New Customer” in Fig. A to
start your sign-up. Refer to Steps 2-4.
B. If you have registered to be a member, tap on “Existing
Customer” and then tap on “Login” to login the system
directly.
2. Create an App Account: Tap on “New Registration” in Figure A, input the information
(items with * must be filled) and then tap on “Register”. Refer to Figure B.
3. Activate VCI Connector: Input the Product S/N and Activation Code (can be obtained
from the password envelope), and then tap on “Activate”. Refer to Figure C.
4. Finish Registration: To download the diagnostic software, tap on “Yes” to navigate to the
download page. Tap on “No” to download and install it later.
On the download page, tap on “Update” to start downloading until it is complete.
Select Countr y
*
Email
*
Confirm Passw ord
*
Password
*
Username
*
CAPTCHA CAPTC HA
Register
2 3
1
Create a n Acc ount
Activa te V CI
Finish R eg istration
Register
B
Create a n Acc ount
Activa te V CI
Finish R eg istration
Register
1 3
2
Serial Number
Activation Code
Where is my activation code?
>> Skip
Activate
C
A
Register
123
Yes
No
Congratulat ions! You h ave registered succe ssfully. Do you downlo ad vehicl e
soft ware now?
Create a n Acc ount
Activa te V CI
Finish R eg istration
D

Other manuals for X-431 Torque

1

Other LAUNCH TECH Other manuals

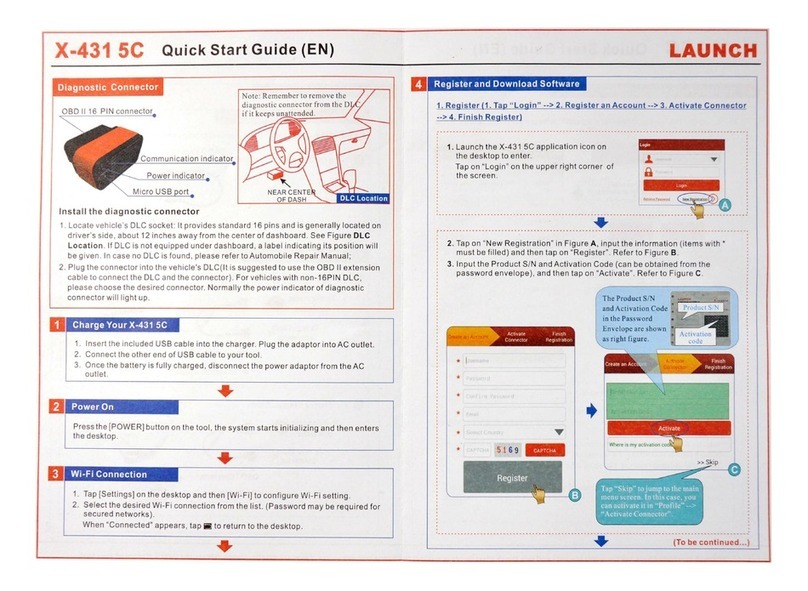
LAUNCH TECH X-431 5C User manual

LAUNCH TECH

LAUNCH TECH X-431 5C User manual

LAUNCH TECH X-431 PRO V4.0 User manual

LAUNCH TECH

LAUNCH TECH X-431 PRO V4.0 User manual

LAUNCH TECH X-431 PRO V4.0 User manual

LAUNCH TECH

LAUNCH TECH X-431 PRO V4.0 User manual

LAUNCH TECH X-431 Torque User manual

LAUNCH TECH

LAUNCH TECH X-431 Torque User manual

LAUNCH TECH CRP12X Premium Series User manual

LAUNCH TECH

LAUNCH TECH CRP12X Premium Series User manual

LAUNCH TECH X-431 V+ User manual

LAUNCH TECH

LAUNCH TECH X-431 V+ User manual

LAUNCH TECH Pilot TPMS User manual

LAUNCH TECH

LAUNCH TECH Pilot TPMS User manual

Popular Other manuals by other brands

Masterlock FHW40300EURHRO Instructions for use

Masterlock

Masterlock FHW40300EURHRO Instructions for use

Aero-motive 11207 installation instructions

Aero-motive

Aero-motive 11207 installation instructions

Aqua Medic Mistral 50 ECO Operation manual

Aqua Medic

Aqua Medic Mistral 50 ECO Operation manual

Icom UX-120 instruction manual

Icom

Icom UX-120 instruction manual

Alfalaval Toftejorg MultiJet 65 instruction manual

Alfalaval

Alfalaval Toftejorg MultiJet 65 instruction manual

Crestron Electronics EDU-601 quick start

Crestron Electronics

Crestron Electronics EDU-601 quick start

Cold Jet Aero V Operator's manual

Cold Jet

Cold Jet Aero V Operator's manual

TSindustrie Saelen GS/COUGAR PTO Technical manual

TSindustrie

TSindustrie Saelen GS/COUGAR PTO Technical manual

XPower A-2 owner's manual

XPower

XPower A-2 owner's manual

Intempco CX402-T215 manual

Intempco

Intempco CX402-T215 manual

CoolGear USBG-410B user manual

CoolGear

CoolGear USBG-410B user manual

Sel SEL-387A manual

Sel

Sel SEL-387A manual

Aqua Medic EcoDrift  Series Operation manual

Aqua Medic

Aqua Medic EcoDrift Series Operation manual

BOSSCO eBand JS-10 Training guide

BOSSCO

BOSSCO eBand JS-10 Training guide

digi-tech IPS33B manual

digi-tech

digi-tech IPS33B manual

Aqua One AquaReef 525 manual

Aqua One

Aqua One AquaReef 525 manual

Alarmcom ADC-V720 installation guide

Alarmcom

Alarmcom ADC-V720 installation guide

Remax RT-V03 Product instruction manual

Remax

Remax RT-V03 Product instruction manual

manuals.online logo
manuals.online logoBrands
  • About & Mission
  • Contact us
  • Privacy Policy
  • Terms and Conditions

Copyright 2025 Manuals.Online. All Rights Reserved.