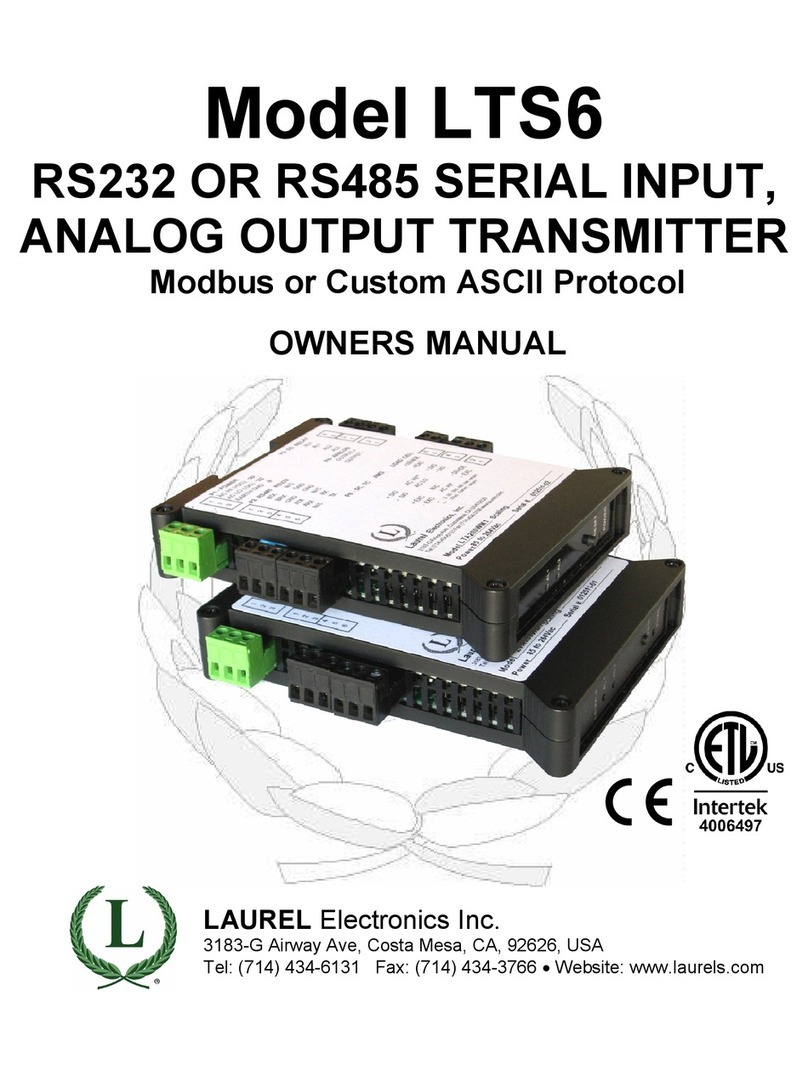
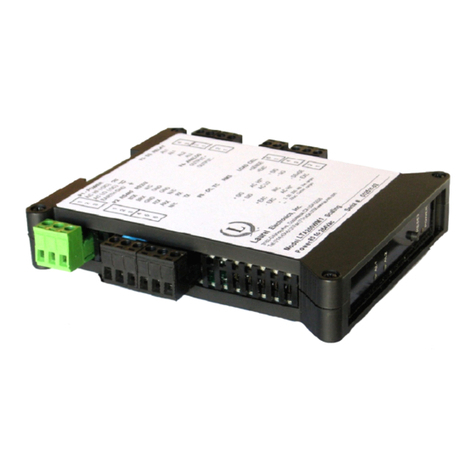
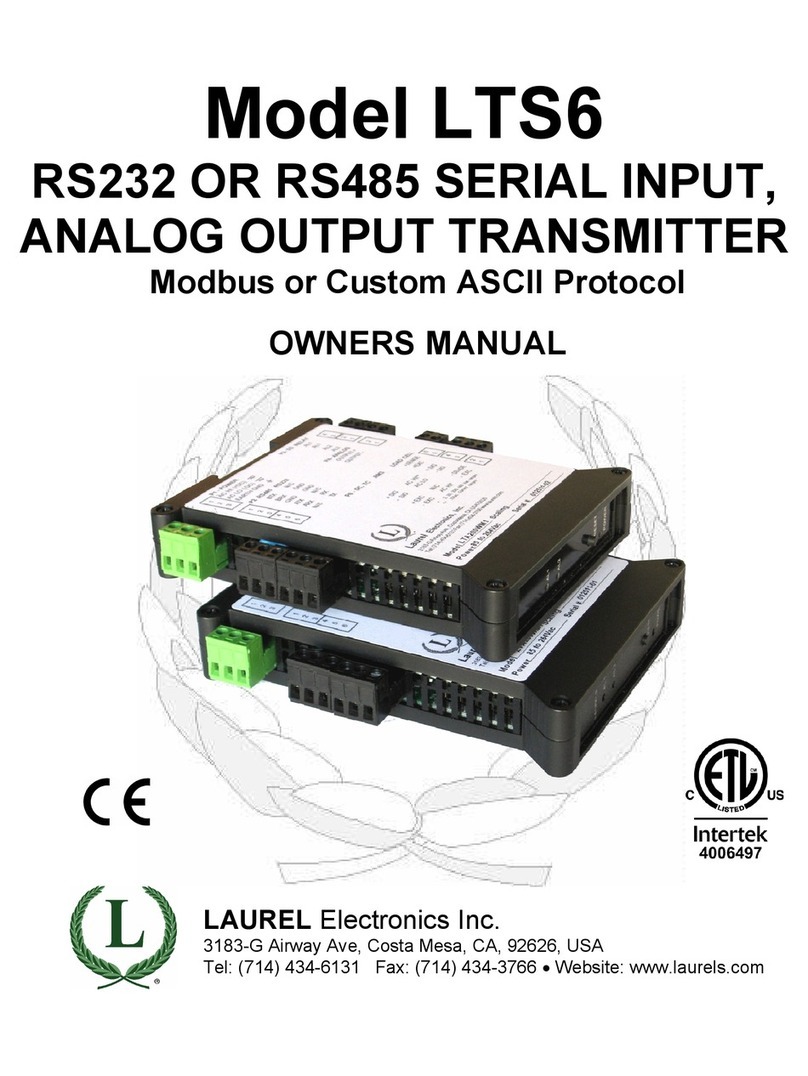
LAUREL LT Series User manual

LT SERIES
TRANSMITTERS
PULSE INPUTS
4-20 MA OUTPUT & RS232
/
RS485 I/O
USER MANUAL
LAUREL Electronics Inc.
3183-G Airway Ave, Costa Mesa, CA, 92626, USA
el: (714) 434-6131 Fax: (714) 434-3766 Website: www.laurels.com

- 2 -
1. ORDERING GUIDE
Configure a model number in this format: LT60VF1, CBL04
Transmitter Type
LT ... Pulse input transmitter with 4-20 mA, 0-20
mA, 0-10V or -10V to 10V isolated analog
output, isolated RS232 or RS485 serial
data output (Modbus or Custom ASCII
protocol), two isolated solid state relays,
and isolated transducer excitation output.
Default jumpered for 10V excitation.
LTE
.
.Pulse input transmitter with 4-20 mA, 0-20
mA or 0-10V isolated analog output, iso-
lated Ethernet serial data output (Modbus
or Custom ASCII protocol), two isolated
solid state relays, and isolated transducer
excitation output. Default jumpered for 10V
excitation.
Main Board
6 ............................... Standard pulse or AC input
8 ............................... Extended pulse of AC input
Please see notes for “Extended.”
Power
0 ....................................................... 85-264 Vac
1 .................................... 12-32 Vac or 10-48 Vdc
2 ..........................................Power over Ethernet
(LTE only)
nput Type
FR .................. .. Dual Channel Pulse or AC Input
Standard main board
Frequency (2 channels), rate (2 channels), total
(2 channels), period, stopwatch, time interval.
Extended main board
Above plus rate and total simultaneously, linear-
ized inputs using up to 180 points, arithmetic
functions applied to channels A & B (A B, A-B,
A*B, A/B, A/B-1), phase angle, duty cycle, up/
down counting, batch control.
VF1
............................. .. 4-20 mA Process Input
VF2 ............................... .. 0-1 mA Process Input
VF3 ................................. .. 0-10V Process Input
VF4 ............................................ .. Custom Input
Standard main board
Rate or total from analog process signals.
Selectable square root extraction for use with
differential pressure flow meters.
Extended main board
Above plus rate and total simultaneously (analog
totalizer), custom curve linearization using up to
180 points, batch control, and time based on
rate.
QD .................................................. .. Quadrature
Standard main board
Position or length from encoders. Accepts diffe-
rential or single-ended inputs: 1x, 2x or 4x, plus
zero index.
Extended main board
Above plus bidirectional rate (rate and position
or length are not simultaneous).
ACCESSOR ES
CBL04 ...... RS232 cable, 3-pin connector on
transmitter end, DB9 connector on
computer end.
CBL02 ...... USB to DB9 adapter cable.

- 3 -
2. TABLE OF CONTENTS
1. ORDERING GUIDE ............................................................................................................ 2
2. TABLE OF CONTENTS ....................................................................................................... 3
3. PRODUCT OVERVIEW ....................................................................................................... 4
4. RECEIVING & UNPACKING YOUR TRANSMITTER ........................................................... 5
5. SAFETY CONSIDERATIONS .............................................................................................. 5
6. TRANSMITTER FIELD WIRING ......................................................................................... 6
7. PROGRAMMING YOUR TRANSMITTER ............................................................................ 8
8. OPENING YOUR TRANSMITTER CASE ............................................................................. 15
9. DUAL CHANNEL PULSE OR AC INPUT SIGNAL CONDITIONER BOARD ........................... 16
9.1 Rate & Frequency Modes ....................................................................................... 18
9.2 Period Modes ......................................................................................................... 22
9.3 Total Modes ........................................................................................................... 23
9.4 Timing Modes ........................................................................................................ 27
9.5 Phase Angle ........................................................................................................... 30
9.6 Power Factor .......................................................................................................... 31
9.7 Duty Cycle .............................................................................................................. 32
10. V-TO-F CONVERTER SIGNAL CONDITIONER BOARD ...................................................... 33
11. QUADRATURE SIGNAL CONDITIONER BOARD ................................................................ 35
12. MAIN BOARD JUMPER SETTINGS ................................................................................... 38
13. DUAL RELAY OPERATION ............................................................................................... 39
14. INPUT SIGNAL FILTERING ................................................................................................ 41
15. TRANSMITTER CALIBRATION .......................................................................................... 42
16. CUSTOM CURVE LINEARIZATION .................................................................................... 43
17. MODBUS PROTOCOL TRANSMITTER COMMUNICATIONS .............................................. 44
18. CUSTOM ASCII PROTOCOL TRANSMITTER COMMUNICATIONS .................................... 49
19. SPECIFICATIONS, LT SERIES PULSE INPUT TRANSMITTERS ......................................... 54
18. WARRANTY ...................................................................................................................... 56

- 4 -
3. PRODUCT OVERVIEW
This manual covers LT Series D N rail transmitters
with isolated analog and RS232/RS485 outputs,
dual relays, and a pulse input signal conditioner.
A separate manual covers LTE Series
DIN rail
transmitters
with isolated 4-20 mA output and Ethernet I/O, dual relays, and a pulse input signal
conditioner.
LT Series transmitters duplicate the signal conditioning and signal processing features of their
1/8 DIN panel-mounted counter / timer counterparts for exceptional accuracy at high read rate. A
wide range of counter / timer functions are accommodated by three signal conditioners:
• Dual-channel pulse input signal conditioner (for frequency, rate, total, arithmetic combina-
tions of two channels, stopwatch, timer, phase angle, duty cycle).
• Voltage-to-frequency signal conditioner (for rate or total from 4-20 mA, 0-1 mA or 0-10V
process signals).
• Quadrature signal conditioner (for position or rate from quadrature encoder signals).
• A 4-20 mA, 0-20 mA, 0-10V, or -10V to +10V isolated analog output is standard.
This output
is generated by an
ultra-linear 16-bit digital-to-analog converter which tracks an internal
linearized digital reading.
solated serial communications are standard. The transmitter serial port is default jumpered for
RS232 or full-duplex RS485 (same jumper settings). Half-duplex RS485 is also selectable either
via internal or external jumpers. Three serial protocols are software selectable: Modbus RTU,
Modbus ASCII and Custom ASCII. Modbus allows devices by different manufacturers to be
addressed on the same data line. The simpler Custom ASCII protocol is recommended when there
are no devices by other manufacturers on the data line.
An isolated transducer excitation output is standard. Three output levels are jumper selectable:
5V at 100 mA, 10V at 120 mA, or 24V at 50 mA. The factory default setting is 10V.
solated dual solid state relays are standard. These are rated 120 mA at 140 Vac or 180 Vdc.
solation to 250V rms is provided for power, signal input, analog output, relay outputs, and com-
munications. Isolation adds safety and avoids possible ground loops. The transducer excitation
output is isolated to ±50V from signal ground.
nternal jumpers are used to select the signal range, analog output type, communication type, and
excitation level. The transmitter configuration is specified by the model number on the transmitter
label. A user can reconfigure the transmitter by opening the case and moving jumpers.
Transmitter scaling is via serial connection to a PC using MS Windows based Instrument Setup
Software, which can be downloaded at no charge. The required transmitter-to-PC interface cable
is available for purchase.

- 5 -
4. RECEIVING & UNPAC ING YOUR TRANSMITTER
Your transmitter was carefully tested and inspected prior to shipment. Should the transmitter be
damaged in shipment, notify the freight carrier immediately. In the event the transmitter is not
configured as ordered or is inoperable, return it to the place of purchase for repair or replacement.
Please include a detailed description of the problem.
5. SAFETY CONSIDERATIONS
Warning: Use of this transmitter in a manner other than specified may impair the protection
of the device and subject the user to a hazard. Visually inspect the unit for signs of damage. If the
unit is damaged, do not attempt to operate.
Cautions:
• This unit may be powered from 85-264 Vac or with the worldwide voltage power supply
option, or from 12-32 Vac or 10-48 Vdc with the low voltage power supply option. Verify that
the proper power option is installed for the power to be used.
• The 85-264 Vac power connector (P1 Pins 1-3) is colored Green to differentiate it from other
input and output connectors. The 12-32 Vac or 10-48 Vdc power connector is colored Black.
This transmitter has no power switch. It will be in operation as soon as power is applied.
• To avoid dangers of electrocution and/or short circuit, do not attempt to open the case while
the unit is under power.
• To prevent an electrical or fire hazard, do not expose the transmitter to excessive moisture.
Do not operate the transmitter in the presence of flammable gases or fumes, as such an
environment constitutes an explosion hazard.
Symbols applicable to this product:
Caution (refer to accompanying documents)
Earth (ground) terminal.
Caution, risk of electric shock.
Both direct and alternating current.
Equipment protected throughout by double
insulation or reinforced insulation.
ETL Mark. Indicates that the product
conforms to UL Std. 61010-1 and is
certified to CAN/USA Std. C22.2 No.
61010-1
CE Mark. Indicates that product meets
EU safety, health and environmental
requirements.
Operating environment:
Transmitter Class II (double insulated) equipment designed for use in Pollution degree 2.

- 6 -
6. TRANSMITTER FIELD WIRING

- 7 -
P6 - SIGNAL INPUT DETAIL
Excitation return 1
+ Excitation 2
- Signal input 3
+ Signal input 4
2-Wire Process Transmitter
+
-
Excitation return 1
+ Excitation 2
- Signal input 3
+ Signal input 4
DC & Externally Powered Process
-DC
+DC
Excitation return 1
+ Excitation 2
+B Signal Input 3
Signal Ground 4
+A Signal Input 5
Signal Ground 6 Sensor 1
Power to sensor
+
-
DUAL CHANNEL PULSE SIGNAL INPUT..
PROCESS / TOTALIZER SIGNAL INPUT
Excitation return 1
+ Excitation 2
+B Signal Input 3
Signal Ground 4
+A Signal Input 5
Signal Ground 6 Sensor 1
Sensor 2
Power to sensor
+
+
-
-
Single Powered Sensor Input
Two Powered Sensor Inputs
Excitation return 1
+ Excitation 2
+B Signal Input 3
Signal Ground 4
+A Signal Input 5
Signal Ground 6
Active and Passive Inputs
A Input 1
A Input 2
B Input 3
B Input 4
Z Input (+Excitation) 5
Z Input (Exc. return) 6
QUADRATURE SIGNAL INPUTS
Differential or Complementary Inputs
A Channel In
B Channel In
Zero Index In or
Excitation Output
A Input 1
+Excitation 2
B Input 3
Excitation return 4
Z Input 5
Signal Ground 6
Single Ended Inputs
A Channel In
B Channel In
Zero Index In
+ Power Output
- Power Output
Sensor common
P4 - ANALOG OUTPUT DETAIL
Driving a Load with 4-20 mA
Analog return 1
4-20 mA output 2
500 Ohms max
Driving a Load with 0-10V
Analog GND 1
0-10V output 25 kOhms min
MOUNTING FOR COOLING
AL 1
AL 2
RESET
POWER
AL 1
AL 2
RESET
POWER
AL 1
AL 2
RESET
POWER
AL 1
AL 2
RESET
POWER
AL 1
AL 2
RESET
POWER
Mount transmitters with ventilation holes at
top and bottom. Leave minimum of 6 mm (1/4")
between transmitters, or force air with a fan.
Inputs can be proximity switches, contact closures,
digital logic, magnetic pickups, or AC inputs to 250V .
Warning: Dual-channel signal grounds 4 & 6 are
connected internally.

- 8 -
7. PROGRAMMING YOUR TRANSMITTER
Our transmitters are easily programmed using a PC and nstrument Setup ( S) Software, which
provides a graphical user interface. The software allows uploading, editing, downloading and
saving of setup data, execution of commands under computer control, listing, plotting and
graphing of data, and computer prompted calibration.
US NG S SOFTWARE
Schematic of RS232 cable CBL04
with rear view of DB9 connector to
PC.
Use a 3-wire RS232 cable (P/N CBL04) to connect your transmitter to the COM port of your PC.
Download the file ISx_x_x.exe from our website and double-click on the file name. Click on
“Install Instrument Setup Software” and follow the prompts. To launch IS software, press on
Start => Programs => IS2 => Instrument Setup or on the desktop shortcut that you may have
created. Following a brief splash screen, the Communications Setup screen below will appear.
In the Communications Setup screen,
In the Communications Setup screen,In the Communications Setup screen,
In the Communications Setup screen, select the “Custom ASCII” as the protocol, as this is the
factory default setting. Select “Transmitter LT” as the Device Type and RS232 the Communi-
cations Type. This will take you to the Establish Communications screen.

- 9 -
In the Establish Communications screen,
In the Establish Communications screen,In the Establish Communications screen,
In the Establish Communications screen, select your Com Port and 9600 as the Baud Rate. You
will be able to change your protocol and baud rate later under the Communication setup tab.
Click on Establish, and the two fields at the bottom of the screen should turn green. Click on the
Main Menu button.
From the Main Menu,
From the Main Menu, From the Main Menu,
From the Main Menu, click on Counter => Get Setup to retrieve (or get) the existing setup data
from your counter transmitter. Click on View => Setup to bring up screens which allow you to
easily edit the setup file using pull-down menus and other selection tools. You can download
(or put) your edited file into the transmitter by clicking on Counter => Put Setup. You can save
your setup file to disk by clicking on File => Save Setup and retrieve a previously saved file from
disk by click on File => Open.
The best way to learn IS software
The best way to learn IS softwareThe best way to learn IS software
The best way to learn IS software is to experiment with it.
For context
For contextFor context
For context-
--
-sensitive help
sensitive helpsensitive help
sensitive help for any data entry field under any tab, select that field and press the
F1 key
F1 keyF1 key
F1 key.

- 10 -
To get to the
To get to the To get to the
To get to the Input Display tab
Input Display tabInput Display tab
Input Display tab,
, ,
, click on Counter => Get Setup to retrieve the current setup
information from your counter transmitter, then on View => Setup, which will take you to the
Input Display tab. Use this screen to set up Signal Input, Display, and Control Inputs. Click on
Read to display the current reading. The background color of this field will change from red to
green.
Clicking on the Control Inputs field
Clicking on the Control Inputs fieldClicking on the Control Inputs field
Clicking on the Control Inputs field opens a pull-down menu which allows selection of the roles
of Control Input 1, Control Input 2, and simultaneous Control Inputs 1 and 2. For example, with
a Dual Pulse Input signal conditioner and the highlighted selection, grounding Control Input 1
causes a Function Reset, which resets Peak, Valley and latched alarms; grounding Control Input
2 places the transmitter on Hold, and causes the Peak reading to be transmitted, and grounding
both Control Inputs 1 and 2 causes a Meter Reset, causes a power-on reset of the transmitter.
Note that the roles of the Control Inputs vary with the type of signal conditioner. Only the
applicable roles will be displayed.
Press the F1 key
Press the F1 keyPress the F1 key
Press the F1 key for context-sensitive help with any item.

- 11 -
Click on the Scaling tab
Click on the Scaling tabClick on the Scaling tab
Click on the Scaling tab to scale your transmitter. You will normally be given the choice of two
scaling methods: 1) direct entry of Scale and Offset, and 2) the Coordinates of 2 Points me-
thod, where (Low In, Low Read) and (High In, High Read) data points are entered numerically.
Click on the Filter tab
Click on the Filter tabClick on the Filter tab
Click on the Filter tab to set to set up filtering for your readings. Press the F1 key
F1 keyF1 key
F1 key for context-
sensitive help with any item.

- 12 -
Click on the Relay Alarms tab
Click on the Relay Alarms tabClick on the Relay Alarms tab
Click on the Relay Alarms tab to set up your transmitter’s two solid state relays, which are
standard. Press the
F1 key
F1 keyF1 key
F1 key for context-sensitive help with any item.
Click on the Communication tab
Click on the Communication tabClick on the Communication tab
Click on the Communication tab to view the communication parameters that you used to
establish default communications with your transmitter. You can reselect Baud Rate, Device
Address, Serial Protocol, and Full/Half Duplex, even though you may have selected different
values to establish initial communications with your PC. Press the
F1 key
F1 keyF1 key
F1 key for context-sensitive
help with any item.

- 13 -
Click on the Analog Out tab
Click on the Analog Out tabClick on the Analog Out tab
Click on the Analog Out tab to scale your analog output, which is standard. Under Range, select
0-20 mA Current, 0-10V Voltage, or 4-20 mA. Enter your “Lo Range Reading” and “Hi Range
Reading” to create the two endpoints of your analog output range. For example, for the 4-20
mA range, “Lo Range Reading” corresponds to 4 mA and “Hi Range Reading” corresponds to
20 mA.
ADD T ONAL FEATURES
• The Commands pull-down menu allows you to execute certain functions by using your
computer mouse. This menu will be grayed out unless a
Get Setup
has been executed.
• The Readings pull-down menu provides three formats to display input data on your PC
monitor. Use the
Pause
and
Continue
buttons to control the timing of data collection, then
press
Print
for a hardcopy on your PC printer.
- List presents the latest internal readings in a 20-row by 10-column table. Press
Pause
at any
time to freeze the display. Press
Print
for a hardcopy.
- Plot generates a plot of internal readings vs. time in seconds. It effectively turns the
transmitter-PC combination into a printing digital oscilloscope.
- Graph generates a histogram, where the horizontal axis is the internal reading, and the
vertical axis is the number of occurrences of readings. The display continually resizes itself
as the number of readings increases.
• The Jumpers pull-down menu graphically shows jumper positions for the selected signal
conditioner boards and the main board, duplicating information in this manual.

- 14 -
Plot
PlotPlot
Plot
Graph
GraphGraph
Graph

- 15 -
8. OPENING YOUR TRANSMITTER CASE
WHEN TO CHANGE JUMPERS
Your transmitter case does not need to be opened if jumpers have already been set by your
distributor. Otherwise you will need to open the case and either set jumpers or verify that the
factory default jumpers positions will meet your needs. Jumpers are used for the following:
1) On the dual channel pulse input signal conditioner board to set trigger levels, frequency
response, bias resistance, and contact debounce. See Section 9.
2) On the V-to-F signal conditioner board to set the analog input signal type (0-10V, 0-1 mA
or 4-20 mA). See Section 10.
3) On the quadrature signal conditioner board to set the quadrature input type, input termi-
nation, phase for up-counting, count-by options, and zero index polarity. See Section 11.
4) On the main board to set the serial communication signal (RS232 or RS485), termination
resistor for long cable runs, analog output signal (current or voltage), and sensor excita-
tion output (5V, 10V or 24V). Default factory settings are RS232, no termination resistor,
and 10V excitation output. Section 12.
HOW TO OPEN & CLOSE THE CASE
The two clamshell halves of the case are held together with a bolt and a nut at each of the four
corners. Use a Phillips screwdriver to remove the four bolts. The nut will then drop off, and the
clamshell halves will separate. When closing the case, make sure that the ventilation grills are
properly aligned.
Caution: The nuts at each corner are not captive and are black. Take precautions so
that the nuts do not get lost.

- 16 -
9. DUAL CHANNEL PULSE SIGNAL CONDITIONER BOARD
The same signal conditioner board is used for the frequency, rate, period, timing, phase angle,
or duty cycle functions. The board needs to be configured via jumpers for the input signal type
and level. It is recognized by Instrument Setup software, which will bring up the applicable
menu items for the Input Option “Dual Sig Cond.” The board does not require calibration, since
the quartz crystal oscillator used for frequency and timing applications is located on the
transmitter main board.
Jumper Settings for Expected Signal Levels
The jumper settings for Channel A (A2 & A3) and Channel B (B2 & B3) need to be set for the
expected signal voltage. This voltage must be outside of the high and low thresholds per the
following table, or the transmitter will not operate properly. The larger the difference between
the high and low thresholds, the more immune the transmitter is to input signal noise.
A3
B3
A2
B2
nput must be
A3
B3
A2
B2
nput must be
A3
B3
A2
B2
nput must be
below
above
below
above
below
above
-
-
-
a
b
-
-12 mV
-150 mV
-1.15V
12 mV
150 mV
1.15V
a
a
a
a
b
-
30 mV
350 mV
1.25V
60 mV
600 mV
2.1V
b
b
b
a
b
-
-60 mV
-600 mV
-2.1V
-30 mV
-350 mV
-1.25V
Jumper Settings for Frequency Response, Bias Resistor, Debounce Time
Pull-up or pull-down resistors are used with open collector devices and dry contact closures
to provide input signal bias. hey should not be connected for other inputs. Debounce
circuitry keeps the transmitter from counting extra pulses due to contact bounce.

- 17 -
Function Block Jumper
Setting
Frequency Response
A0 & B0
-
b
a
1 MHz max
30 kHz max
250 Hz max
Bias Resistor
A1 & B1
a
b
10 kOhm pull-up to 5V
10 kOhm pull-down to -5V
Contact Debounce
A4 & B4
b
a, c
c
None
3 msec
50 msec
Common Jumper Settings
nput Type Vmax A0 & B0 A1 & B1 A2 & B2 A3 & B3 A4 & B4
Logic levels 250V - - - a b
NPN open collector NA b a - a b
PNP open collector NA b b - b b
Contact closures NA a or b a - a a, c
Line frequency 250V b - - - a, c
Turbine flow meter 250V b - a - b

- 18 -
9.1 RATE & FREQUENCY MODES
Frequency in Hz is determined by timing an integral number of pulses over a user-specified
Gate Time from 0 to 199.99 sec and taking the inverse of average period. The typical internal
display update rate is Gate Time 1 period 30 ms. Selecting a longer Gate Time produces a
more stable reading as more cycles are averaged, but slows down the update rate. At very low
frequencies, the update rate is controlled by the period. A Time Out from 0 to 199.99 sec is also
selectable. This is the time the transmitter waits for a signal to start or end a conversion. If the
signal is not received before the Time Out ends, the transmitter reads zero. The longer the Time
Out, the lower the minimum frequency that can be processed.
Rate in engineering units can be obtained by applying a scale factor to frequency, or by using
the Coordinates of 2 Points method, where two inputs in Hz and the corresponding desired two
internal readings are entered directly.
• Rate A, B determines rate independently for Channel A (Item #1) and Channel B (Item #2).
Either item can be selected for the analog output.
• Rate A Only determines rate only for Channel A. Channel B is not used.
• Rate A, A Total (Extended main board) determines Rate for Channel A (Item #1) and Total
for Channel A (Item #2) since last reset. Total can count down from an offset by entering a
negative scale factor.
• Rates A+B, A-B, AxB, A-B, A/B, A/B-1 (Extended main board) can output arithmetic combi-
nations of Rates A and B (Item #1), Rate A (Item #2), or Rate B (Item #3). With rates A and
B scaled to produce a ratio close to 1 and an offset of -1, the special combination A/B-1,
called “Draw,” can output percentage changes, such as elongation of material as it passes
between rollers.
Applicable to all rate & frequency application examples:
Connect your transmitter to a PC running Instrument Setup (IS) Software. Establish commu-
nications. To open a setup file for editing, click on “Get Setup” under the Counter tab to retrieve
the latest setup file from your transmitter, or click on “Open Setup” under the File tab to retrieve
a previously saved setup file from disk.
Relay Alarms and Analog Out respond to the counts that are transmitted digitally. While a
decimal point can be specified and will be transmitted digitally, it does not affect counts (except
for power factor). For example, the same 58134 count frequency can be transmitted as 58134
Hz or 58.134 kHz
Following editing, click on the Main Menu button. Under the Counter tab, click on “Put Setup”
to download your setup file into your transmitter. Under the File tab, click on “Save Setup As”
to save your setup to disk if desired.

- 19 -
Example 1: Transmit frequency in Hz with 1 Hz resolution
Application: Transmit digital frequency readings f from 1 Hz to 999999 Hz with no decimal
point, update rate of 4/sec, and adaptive moving average filter for 0.4 sec. Set analog output to
0V at 0 Hz and 10V at 25 kHz.
Solution:
• Under Input Display tab and Signal Input, set Mode to “A Rate”, Function to “A only”, Gate
Time to 0.25 sec, and Time Out to 2 sec. Under Display, set Type to “Norml 999999”.
• Under Scaling tab, set decimal point to 111111. If “Scale, Offset” is selected as scaling
method, set Scale to 1.00000, Multiplier to 1, and Offset to 000000. If Coordinates is
selected as scaling method, enter 0 for Lo In and 0 for High Read. Also enter 100000 for
High In and 100000 for High Read. To minimize rounding errors, do not enter small values
for High In and High Read.
• Under Filter tab, set Time Constant to 0.4 sec.
• Under Analog Out tab, set Range to “0-10V Voltage”, Lo Range Reading to 000000, and Hi
Range Reading to 025000.

- 20 -
Example 2: Transmit rate as 0-100.00 for a 10 kHz to 11 kHz input
Application: Transmit 0.00 to 100.00 (with two decimal places) for a 10 kHz to 11 kHz
frequency input. Set analog output to 4-20 mA for this range.
Solution:
• Under Input Display tab and Signal Input, set Mode to Rate, Function to “A only”, Gate
Time to 0.1 sec, Time Out to 2 sec, and Display Type to “Norml 999999”. Native units will
be Hz.
• Under Scaling tab, set Decimal Point to two places. If “Scale, Offset” is selected as scaling
method, set Scale to 1.00000 and Multiplier to 10. Product of Scale and Multiplier will
ensure that 1000 Hz are displayed as 10,000 counts (decimal point has no effect on
counts). Also enter an Offset of -100,000 counts (previously selected decimal point will be
displayed, but has no effect on counts). If Coordinates is selected as scaling method (by far
the easiest scaling method for this example), simply enter endpoints as shown.
• Under the Analog Out tab, set Range to “4-20mA Current”, Lo Range Reading to 0000.00,
and Hi Range Reading to 0100.00.
This manual suits for next models
9
Table of contents
Other LAUREL Transmitter manuals
Popular Transmitter manuals by other brands

WIKA
WIKA E-10 operating instructions

Becker
Becker Centronic SunWindControl SWC241-II Assembly and operating instructions

Midland
Midland ALAN 507 SpeakEasy user manual

Williams Sound
Williams Sound PPA T45NET user manual

VOSTEK ELECTRONICS
VOSTEK ELECTRONICS LX 3000/MIL user manual

Kramer
Kramer TP-410 user manual